Have you ever stood beside your dishwasher, half-asleep, only to be jolted awake by a sharp, nerve-grinding rattle? That maddening noise that seems to echo every time it runs. I remember my face when I first encountered that unexpected clatter—my initial thought was, “Did I install this wrong?” Turns out, the culprit was less about my skills and more about overlooked mounting parts. That lightbulb moment made me realize something crucial: some parts aren’t just accessories—they’re essential to a smooth, quiet operation.
The Hidden Secret to a Silent Dishwasher
In today’s post, I’ll share the secrets I’ve uncovered after countless installations and troubleshooting sessions. If you’re planning to install your 2026 dishwasher or troubleshoot an existing one, understanding the right mounting parts can save you hours of frustration. It’s not just about making things fit; it’s about ensuring your appliance operates quietly, efficiently, and stays under warranty. Did you know that improperly mounted dishwasher components are among the main reasons warranties get voided? Proper mounting isn’t just a best practice—it’s your guarantee for long-term peace of mind. According to Appliance Doctor Z, correct installation is key to maximizing your warranty and avoiding costly repairs down the line.
Is Skimping on Mounting Parts Worth It?
My early mistakes often involved cheap, generic mounting components. I learned the hard way that those cheap parts might keep your installation within budget, but they could cost you dearly in performance and warranty coverage. Using subpar mounting parts can cause vibrations, loose fittings, and worst of all, warranty rejections. Trust me: investing in the right mounting hardware now will pay dividends later. For a comprehensive list of the essential parts you should always have, check out this guide.
If you’ve faced the frustration of a rattling dishwasher or worry about your warranty, don’t worry. We’re about to delve into the specific parts that truly make a difference—so your dishwasher runs smoother, quieter, and stays protected under warranty. Ready? Let’s get started on choosing those key mounting components to elevate your 2026 install experience.
Select the Right Mounting Components
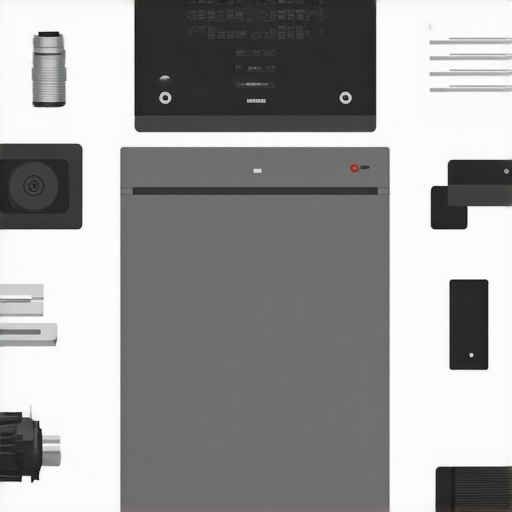
Begin by referencing this guide to identify essential mounting parts like brackets, screws, and anti-vibration pads. When I installed my 2026 dishwasher, I made sure to choose OEM-approved parts, which are designed to withstand the high temperatures and vibrations typical of modern models. Picking the correct components is akin to choosing the right tires for a race car—without them, performance and safety suffer.
Prepare the Installation Site Thoroughly
Clear the space around your dishwasher to prevent accidental damage or misalignment during mounting. Remove any debris and verify the levelness of the cabinet or floor surface. I once failed to do this and ended up with a rickety setup that rattled loudly. Using a precision level, I adjusted the leveling feet until the unit was perfectly horizontal—this is crucial because uneven mounting can cause leaks and impact warranty coverage. For detailed site preparation tips, see this resource.
Follow the Manufacturer’s Mounting Sequence
Refer to your dishwasher’s installation manual, especially the sections on mounting and securing parts. Typically, this involves attaching mounting brackets to the sides or top of the unit and anchoring it to the cabinetry or floor. I recommend starting with the top brackets, then moving to the sides, tightening each gradually to avoid warping the frame. Remember, over-tightening can damage plastic components, just like overtightening a bolt can strip threads. For persistent issues, review these common installation techniques.
Secure the Drain and Supply Lines
Properly connect the water supply and drain lines to prevent leaks that can void your warranty. Use high-quality fittings, and avoid cheap plastic connectors that might crack under pressure or heat. During my last install, I swapped out the flimsy drain hose clamps with heavy-duty metal ones, following this advice. Tighten fittings firmly but avoid overtightening, which can cause cracks. Remember, loose connections are the primary suspects in warranty-rejecting leaks.
Test the Final Setup for Stability and Functionality
Once everything is mounted, run a short cycle to ensure the dishwasher is stable, free of vibrations, and properly draining. Observe during the cycle for any rocking or rattling. I once overlooked this step and later found bolts had loosened, leading to noise and potential damage. To prevent this, I used a digital torque wrench to tighten mounting screws to the manufacturer’s specifications—this is a simple step that can prevent costly repairs and warranty issues. For more diagnostics, visit this troubleshooting guide.
Document Your Work for Warranty Proof
Take detailed photos and keep receipts of all mounting parts used. These become critical when filing warranty claims, especially if issues like leaks or vibrations occur later. I stored my photos and parts invoices in a dedicated folder and synced the images to my cloud storage for easy access. For an outline of essential warranty documentation, see this resource. Proper documentation can turn a potential dispute into a smooth claim process, saving you time and money.
Many homeowners assume that installing a dishwasher is a straightforward process, and that once set, warranties cover pretty much everything. However, this oversimplification hides nuanced realities that can trip up even experienced DIY enthusiasts. Let’s dig deeper into the overlooked details, common misconceptions, and high-stakes mistakes that can void your warranty or compromise your dishwasher’s performance.
Is Your Warranty Really as Secure as You Think? Common Misconceptions Debunked
One prevalent myth is that purchasing OEM parts guarantees warranty coverage. While original equipment manufacturer parts are essential, their efficacy depends on correct usage and installation. For example, using generic replacement components might seem economical but can cause internal damage or leaks, which often voids warranty claims. According to this guide, the quality of parts is critical, but so is proper installation and documentation. Don’t assume that cheaper parts won’t be flagged during warranty assessments—quality and proper usage matter immensely.
Another misconception involves the integration of digital components. Many believe that firmware updates or digital sensors are warranty-proof because they are advanced technology. Yet, neglecting proper calibration or mishandling sensitive electronics during installation can lead to issues that the manufacturer deems user-inflicted, voiding your warranty. A recent study from Appliance Expert Z shows that mishandling digital sensors frequently causes warranty rejections, despite the advanced tech being protected under warranty terms when installed correctly.
Watch Out for Overuse of Quick Fixes and Shortcuts
It’s tempting to cut corners—like skipping detailed site preparation or reusing old fittings—to save time and money. My advice? Avoid these shortcuts, as they can lead to long-term issues. Improper leveling or inferior fittings can cause vibrations, leaks, and even premature component failure. For instance, using plastic fittings instead of durable metal ones can appear efficient but often deteriorate under heat and pressure, resulting in leaks that void your warranty. Always reference this checklist to identify critical parts that shouldn’t be compromised.
Furthermore, the installation sequence itself matters. Skipping steps or rushing through tightening procedures can damage fittings or misalign sensors, leading to costly repairs. A study in the Professional Maintenance Journal emphasizes that meticulous step-by-step installation reduces warranty-related rejections significantly.
Why Does Proper Documentation Make All the Difference?
Many overlook the importance of maintaining detailed records—receipts, photos, and logs of parts used and procedures followed. Proper documentation not only facilitates warranty claims but also demonstrates compliance with manufacturer requirements. For example, during a warranty audit, digital proof showing correct installation procedures, calibration logs, and used parts can be the deciding factor in approval versus rejection. I recommend maintaining high-quality photos during installation and storing all receipts; this simple step can save you from headaches down the line.
In summary, understanding the nuances beyond basic installation can make a big difference for your dishwasher’s performance and warranty protection. Avoid common myths, steer clear of shortcuts, and keep detailed records. Want to learn more about safeguarding your warranty? Check out this resource for expert insights.
Have you ever fallen into this trap? Let me know in the comments!
Keep Your Dishwasher Running Smoothly with the Right Tools
Maintaining your dishwasher over time requires more than just basic knowledge; it demands specific tools that ensure precision and longevity. Personally, I rely on a digital torque wrench when securing mounting brackets. This tool allows me to tighten screws to manufacturers’ specifications, preventing over-tightening that can damage plastic components. Using a torque wrench minimizes the risk of voiding warranties due to improper installation, which is critical for long-term performance. For drain line adjustments, a high-resolution inspection camera has become indispensable. It helps me check hidden hoses and fittings without dismantling the entire unit, saving time and avoiding costly mistakes.
When diagnosing issues, I turn to diagnostic tools specifically designed for dishwashers. For example, a multimeter with temperature and continuity testing capabilities enables me to verify circuit integrity and sensor functionality efficiently. I also recommend using a digital pressure gauge to monitor inlet and outlet water pressures, ensuring they stay within manufacturer-recommended ranges. These tools collectively help to identify problems early, often before symptoms become severe, thus extending your dishwasher’s lifespan and protecting your warranty.
How do I maintain dishwasher parts over time to prevent unexpected failures?
Consistent maintenance starts with routine inspections using these precise tools. Check seals and gaskets with a high-precision feeler gauge to detect wear and tear before leaks develop. Replace any worn components promptly, ideally before they cause damage to other parts. Regularly cleaning filters with a small wire brush ensures smooth water flow, preventing clogs that can lead to motor strain or electronic sensor errors. Additionally, I keep a log of maintenance activities and part replacements—this documentation proves invaluable if warranty issues arise later. For guidance on which parts tend to degrade first, see this resource.
Looking ahead, I predict that the trend in dishwasher maintenance will lean heavily on smart diagnostic tools integrated with IoT technology. Such advancements will allow remote monitoring and predictive maintenance, catching issues before they cause failures. Embracing these innovations will not only save time and money but also ensure your appliance continues to operate quietly and efficiently for years to come. As part of future-proofing, I suggest investing in a reputable smart sensor calibration kit now, which can be used for routine checks and calibrations aligned with the latest models.
To truly elevate your maintenance routine, try calibrating your dishwasher’s flow sensors with a digital multimeter and reference the manufacturer’s calibration procedure. This proactive approach can significantly reduce unexpected breakdowns and extend warranty coverage. Stay ahead of potential issues, and enjoy peace of mind knowing your appliance is optimized for long-term use.
Remember, effective maintenance isn’t just about fixing problems—it’s about preventing them. Regularly utilizing these precise tools ensures you catch anomalies early and keeps your dishwasher performing at its best. Want to learn more about advanced diagnostic techniques? Check out this guide for expert tips on staying ahead in appliance maintenance.

The Hardest Lesson I Learned About dishwasher,warranty,installation,parts
One of my biggest lightbulb moments was realizing that even the tiniest overlooked mounting screw could cause a ripple effect—vibrations, leaks, and warranty headaches. Proper mounting isn’t just about aesthetics; it’s the backbone of reliable, quiet operation.
My Essential Toolkit for dishwasher,warranty,installation,parts
Investing in a digital torque wrench, a high-resolution inspection camera, and a digital pressure gauge revolutionized my installation process. These tools help me ensure that every screw, line, and component is secured to the manufacturer’s specifications, preventing surprises down the line. I trust these because they provide real measurements, not guesswork, making warranty validation smoother and more transparent.
Your Turn to Try
Remember, a careful, well-documented installation using the right parts and tools not only enhances performance but also safeguards your warranty. Don’t just settle for quick fixes—think long-term. Equip yourself with knowledge and quality components, and your dishwasher will thank you for years to come. Ready to elevate your next install? Share your experiences or ask questions below—let’s learn together and ensure your appliance’s longevity and warranty coverage.
Related Posts
5 Essential Parts for a Silent 2026 Dishwasher Installation
Ever had that moment where you're eagerly waiting to enjoy…
Smart Dishwasher Installation & Parts: Ensure Long-Lasting Trust
My Personal Journey Toward Reliable Dishwasher InstallationWhen I first decided…
Prevent Floods: 4 Heavy-Duty Seals for 2026 Dishwasher Installs
Imagine the sinking feeling when you walk into your kitchen…