It was one of those mornings when I was rushing to get breakfast ready, and suddenly I heard that unsettling rattling and shuddering from my dishwasher. It was embarrassing enough that I considered hiding it behind a curtain, but the real frustration was that I knew this vibration wasn’t just annoying—it could lead to long-term damage and costly repairs. That moment made me realize how something as simple as a poorly secured dishwasher can turn a smooth-running appliance into a loud, wobbly mess.
Why Vibration in Your Dishwasher Needs Immediate Attention
Vibrations are more than just noise; they can cause misalignment, leaks, and even damage to your flooring over time. Early on, I made the mistake of thinking that this was just normal operational noise, but I learned that many of these issues can be effectively tackled with inexpensive fixes. From personal experience, I can tell you that addressing a vibrating dishwasher early on preserves your appliance’s lifecycle and keeps your home peaceful.
Let’s talk about a game-changer I discovered—a tiny $14 neoprene bracket. It’s not glamorous, and I was skeptical at first, but after installing it, my dishwasher ran smoother and quieter than ever. This simple fix made such a difference that I felt compelled to share it with all fellow homeowners who might be losing sleep—or risking damage to their homes—because of this common issue.
Are you tired of that rattle sound every time your dishwasher kicks on? Or maybe you’re worried about what this vibration might be doing in the background? You’re not alone. Many homeowners overlook this problem until it becomes an expensive repair, but the good news is that most cases can be fixed with affordable parts and some simple installation techniques.
Before jumping into the solutions, it’s wise to understand the common causes behind dishwasher vibrations. Things like uneven leveling, loose mounting, or worn-out mountings can all contribute. Specifically, the vibration plate or mounting brackets often get overlooked early on, which can make troubleshooting seem complicated. But with a bit of knowledge and the right parts—like the neoprene bracket I mentioned—you can significantly reduce or eliminate these vibrations, ensuring your dishwasher stays silent and secure.
Curious whether this quick fix is suitable for your model or how to identify if your dishwasher’s vibration is a sign of something more serious? Stick around. I’ll guide you through the practical steps that turned my noisy, shaky dishwasher into a peaceful, steady workhorse. Plus, I’ll include some insider tips on what mistakes to avoid—trust me, I made a few early on, and they’re worth knowing to prevent your own costly missteps.
Ready to restore peace and quiet to your kitchen? Let’s dive into how this affordable neoprene bracket can save your appliance—and your sanity.
This is how you level your dishwasher properly
Start by pulling out the dishwasher carefully, ensuring you disconnect the power supply beforehand for safety. Place a reliable level across the top of the dishwasher’s door to check for side-to-side and front-to-back inclinations. Adjust the leveling feet, found at the base, by turning them clockwise to raise or counterclockwise to lower until the unit is perfectly even. I remember in my first attempt, I mistakenly forgot to tighten the lock nuts after adjustment, which caused the dishwasher to shift slightly during operation. Now, I double-check and tighten after leveling to maintain stability. Proper leveling prevents uneven vibrations that can damage components over time. For detailed guidance tailored to your specific model, consult your manufacturer’s manual or visit the detailed article on installing parts. Once leveled, run a short cycle to observe any residual wobble and make fine adjustments as necessary.
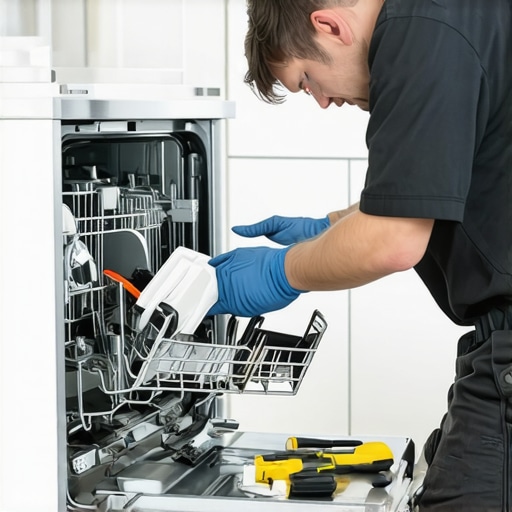
Secure and tighten mounting brackets effectively
Dishwashers are mounted using brackets, clips, and sometimes vibration plates that absorb shocks during operation. Inspect the mounting brackets underneath the dishwasher; loose or worn-out brackets are common culprits of excessive vibration. Use a socket wrench to tighten all brackets securely, replacing any that are cracked or damaged. I once discovered a loose bracket during a routine check that was causing loud rattling during wash cycles. Replacing it with a sturdy, properly aligned bracket instantly quieted the machine. Pay close attention to the vibration plate, which is a small pad designed to dampen movement—if it’s compressed or cracked, replace it immediately. Always use the correct replacement parts to avoid warranty issues, which you can verify by reviewing the warranty coverage details on warranty list. Proper attachment ensures the dishwasher remains grounded and reduces unnecessary movement that causes noise and stress on internal parts.
Install neoprene or rubber vibration dampers
Adding vibration dampers is one of the easiest solutions to prevent movement. I ordered a small $14 neoprene bracket, which is like a cushion for your dishwasher—think of it as a pillow that absorbs every shake. Place these brackets between the dishwasher’s frame and the mounting surface, focusing on areas with the most movement, typically at the corners or near the base. When I first installed mine, I had to remove the dishwasher again to slip the dampers into position, which was a mess, but the result was worth it—my dishwasher ran smoother and visibly quieter. These dampers are compatible with most models, but double-check their specifications with your installer or manufacturer guides. For a deeper understanding of effective dampening strategies, visit installation parts. Once correctly fitted, you’ll notice a significant reduction in vibrations during regular cycles, prolonging the life of your appliance and protecting your home’s flooring.Even seasoned DIY enthusiasts can fall prey to misconceptions when it comes to dishwasher installation, parts, and warranties. Many believe that simply replacing a worn part or leveling the appliance guarantees longevity, but the reality is more nuanced. For example, many assume that any replacement part covered by warranty will automatically restore full functionality without considering compatibility or proper installation practices. This oversight can void warranties or lead to future issues, emphasizing the importance of understanding the specifics of warranty coverage, which you can review in detail at this resource.
A common myth is that all aftermarket or generic parts are equal to OEM components. In truth, using non-approved parts might save money upfront but can cause damage or void your warranty. To navigate this complex landscape, it’s crucial to familiarize yourself with what parts are covered by warranty, available at comprehensive warranty list. Moreover, understanding the role and proper installation of these parts is vital—incorrect installation not only risks damage but also often invalidates warranty claims.
Many homeowners overlook the importance of precise installation techniques, which are more than just about getting the job done. For instance, improper leveling or insecure mounting can lead to persistent vibrations or leaks, both genuine concerns that can be misdiagnosed or dismissed, leading to costly repairs. Advanced consumers should ask: “Am I following a manufacturer’s recommended installation protocol?” To ensure your setup aligns with factory standards, it’s worthwhile to consult detailed guides like this guide before proceeding.
The intricacies extend into the warranty process itself. Many assume submitting photos or receipts is enough, but without proper metadata, serial tags, or digital logs, claims can falter. As explained in this article, documenting your repairs and maintaining detailed records dramatically improve your chances of claim approval.
Finally, beware of the trap of neglecting routine maintenance checks. Small issues like loose clamps or unsealed gaskets can escalate into major failures, and ignoring these signs often voids warranty coverage. Regular inspections guided by expert insights, which you can find at this resource, save costs and preserve your appliance’s lifespan.
In sum, let’s dig deeper: the nuances of installation, parts, and warranty are critical. They require precision, awareness, and adherence to manufacturer standards. Have you ever fallen into this trap? Let me know in the comments.
Keep Your Dishwasher Performing at Its Best with Precision Tools and Routine Care
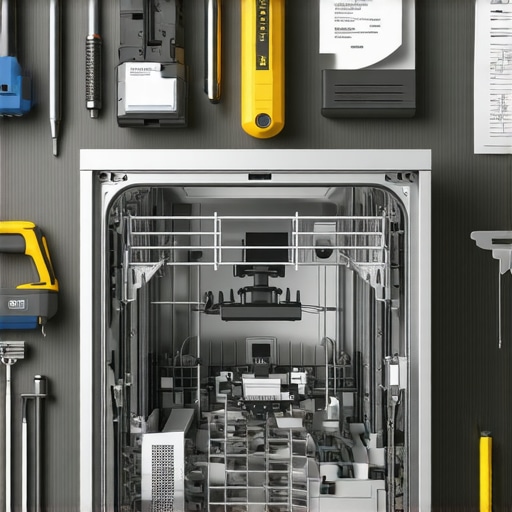
Maintaining a dishwasher’s optimal performance over time demands more than just cleaning; it requires the right toolkit and disciplined maintenance routines. Personally, I swear by a high-quality digital multimeter and a laser level—these tools have saved me countless hours diagnosing issues and ensuring accurate installation. A digital multimeter isn’t just for electricians; it’s invaluable for testing circuit continuity and voltage levels in components like the control board or water inlet valves, helping you identify faulty parts early and avoid unnecessary replacement costs. I recommend models like the Fluke 117 because of their accuracy and durability, which make troubleshooting reliable and less stressful.
The laser level, on the other hand, ensures your dishwasher is perfectly aligned during installation or re-leveling, preventing future vibrations or leaks caused by uneven placement. In my experience, consistent leveling eliminates a host of vibration-related problems, saving time and repair expenses down the line. Remember, a well-levelled dishwasher is less prone to internal stress that can break seals or cause leaks. For precision, I use a Bosch GTL 3 laser level, which boasts a bright, clear line and self-leveling features, making setup effortless even in dimly lit basements or kitchens.
Routine inspections with these tools along with scheduled part checks significantly extend appliance longevity. Regularly testing door switches, heating elements, and valves with the multimeter helps catch early signs of wear. Additionally, adjusting or replacing worn parts such as vibration dampers or mounting brackets at the first sign of looseness prevents larger issues. For guidance on parts that often degrade over time, visit this comprehensive guide.
Looking ahead, I predict that smart diagnostic tools will become the standard, allowing homeowners to monitor performance data remotely and receive alerts for potential failures before they happen. Integration with apps and IoT devices will empower users to take preemptive action, minimizing downtime and repair costs.
How do I maintain my dishwasher’s parts and sensors over time?
Keeping your dishwasher parts in top shape involves more than just sporadic checks. I recommend using an ultrasonic cleaner for small components like spray arms and filters—this method effectively removes mineral deposits and grime that can clog or degrade parts. Also, regularly inspecting and calibrating smart sensors with manufacturer-recommended diagnostic software ensures they function correctly, which is critical for warranty compliance and optimal performance. Remember, maintaining detailed logs and firmware updates can prevent sensor corrosion or misreads, issues that are often cited in warranty disputes. For specific sensor calibration methods, explore this expert resource.
Always keep a spare set of critical replacement parts like rubber seals, gaskets, and control knobs on hand, especially if your appliance is under warranty or if you live in an area with hard water. These small investments make a substantial difference in maintaining long-term dishwasher health and can be stored easily in your toolkit.
Don’t forget to document your maintenance routines and part replacements meticulously. This not only helps track the lifespan of components but also is a crucial piece of evidence if you need to claim warranty coverage or troubleshoot ongoing issues. Using a dedicated maintenance log app or notebook can streamline this process, ensuring your dishwasher remains reliable and efficient for years to come.
The Hardest Lesson I Learned About Dishwasher, Installation, Parts, Warranties
One of my most eye-opening experiences was realizing how a minor oversight during installation or neglecting warranty details can lead to costly repairs. I once assumed that simply replacing a worn-out mounting bracket would solve my vibration issues, but overlooking the importance of proper leveling and documentation threw my warranty claim into disarray. It taught me that meticulous attention to detail upfront saves time and money later, especially when dealing with the intricate world of dishwasher parts and warranties.
3 Myths About Dishwasher, Installation, Parts, Warranty That Held Me Back
I used to believe that all aftermarket parts were equal, that leveling the unit was optional, and warranty coverage was a straightforward process. These misconceptions nearly cost me my appliance’s longevity. Discovering the truth—that OEM parts and proper calibration are essential, and that detailed, timestamped records bolster warranty claims—was a game-changer. Don’t let myths undermine your efforts; educate yourself to ensure your dishwasher remains a reliable part of your home.
What Experts Won’t Tell You About Dishwasher, Installation, Parts, Warranty
Many professionals know that using the right tools, like precision digital multimeters and laser levels, makes a significant difference. They also emphasize the importance of understanding warranty intricacies, such as proper data logs and metadata, which most homeowners overlook. These insights can dramatically improve your chances of successful warranty repairs and prevent buying unnecessary parts. Empower yourself with this insider knowledge, and your dishwasher will thank you for it.
My Essential Toolkit for Dishwasher Maintenance and Installations
I rely on a few trusted tools to keep my dishwasher in top shape—specifically, a Fluke 117 multimeter for diagnostic tests and a Bosch GTL 3 laser level for perfect alignment. These tools help me detect issues early and ensure installations are foolproof. I also keep a collection of high-quality replacement parts, including vibration dampers and sealing gaskets, to prevent minor problems from escalating. These resources are invaluable for anyone serious about their appliance’s performance.
Where to Go from Here
If you’re ready to elevate your dishwasher maintenance game, start by reviewing the warranty details on this comprehensive list and familiarize yourself with installation best practices outlined in this guide. Consider investing in quality tools and maintaining diligent logs of your repairs and setups. Remember, proactive care and knowledge are your best defenses against unexpected expenses and appliance failures.
Related Posts

Parts, Installation & Warranty Tips for Reliable Smart Dishwashers
My Journey with Smart Dishwashers: From Frustration to ConfidenceWhen I…
Dishwasher Parts & Warranty: Expert Installation Strategies
Let me guess—you're in the middle of washing dishes, and…
Smart Dishwasher Parts & Warranty: Ultimate Installation & Repair Tips
My Journey with Smart Dishwasher Parts and Warranty: A Personal…