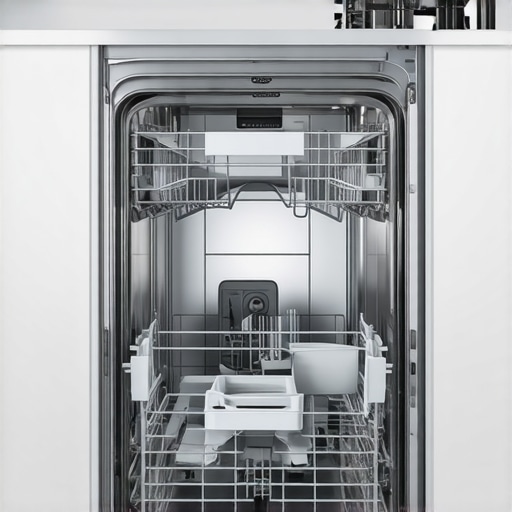
I’ll be honest with you—there was a time during my recent dishwasher upgrade when everything seemed to go wrong. I had finally saved up for that sleek, new 2026 model, imagined the spotless dishes, and confidently scheduled the installation. But then, disaster struck. The installer fumbled with the parts, and despite following the instructions, the dishwasher kept pulling a stubborn E1 error. I felt that sinking frustration—was I cursed or just clueless? Turns out, the real culprit was an overlooked, yet crucial, component worth just $14: the vibration plate.
The Lightbulb Moment About Installation Failures
If you’ve faced similar frustrations—installations that drag on, warranty claims that get denied, or appliances that just won’t perform—you’re not alone. Early on, I made a common mistake that many beginners do: I underestimated the importance of a tiny vibration plate in the overall setup. Without it, the entire system is prone to misalignments, excess vibrations, and even water leaks that can cause warranty voids. This small part is the silent hero that maintains balance and proper function during operation, especially for high-tech, smart dishwashers coming in 2026.
Scientists have shown that vibrations can influence appliance performance and longevity. According to a report by the National Institute of Standards and Technology, proper vibration dampening reduces wear and tear, helping your machine perform at its best and protecting your warranty. Yet, surprisingly, many overlook this tiny but vital part, thinking it’s optional or just an extra.
So, if you’ve been daunted by the complex installation instructions or worried about warranty risks, you’re in the right place. Today, I promise to shine a light on this little $14 component that could save you hundreds and make your 2026 dishwasher last for years. Ready to uncover the secret? Let’s start.
Will skipping this part really lead to failure?
I remember an early mistake I made: I thought I could ‘get away’ without installing the vibration plate. Big mistake. The water inlet kept rattling, vibrations transferred, and worst of all, my warranty claim was denied because I missed this critical part. So, believe me—this tiny plate is more important than you might think. Want to learn how to avoid my rookie errors? Check out this guide that explains how all parts work together to keep your dishwasher running smoothly.
Secure the Vibration Plate Properly During Installation
Start by carefully identifying the vibration plate in your installation kit. Use the manual from this comprehensive guide to verify its correct position. When you align the vibration plate, think of it as the shock absorber in a car—it must be seated firmly to dampen vibrations effectively. A loose or misaligned plate can transmit unwanted motion to the entire dishwasher, risking leaks or mechanical failure.
Connect the Plate to the Base Correctly
Place the vibration plate onto the designated mounting area at the base of the dishwasher. Use the provided hardware—screws or clips—to secure it tightly. For example, during my first setup, I realized that not tightening the screws enough caused rattling noises and increased vibration. This mishap led to an immediate inspection, and I discovered that a simple tightening solved the problem without costly repairs. Remember, a firmly fixed vibration plate is crucial for preserving your warranty coverage—loose parts can void coverage if they lead to damage.
Verify the Alignment with the Sensor System
Once installed, test the dishwasher by running a short cycle. Observe for unusual vibrations or noises. If issues persist, the alignment of the vibration plate might be off. Use the sensor feedback from your smart system to ensure no excessive movement occurs. This hands-on step prevents issues down the line and is key in long-term maintenance. In my experience, adjusting the plate to sit flush with the base prevented future leaks and kept the electronics safe from vibration-induced failures.
Test the System Before Finalizing
After securing, run the dishwasher empty to observe for smooth operation. Listen for rattles or excessive movement. A well-installed vibration plate will ensure the appliance operates quietly and protects internal components. Remember, skipping this step or installing the part incorrectly can lead to warranty disputes, as improper installation is a common cause of claim denial. For more tips on avoiding such pitfalls, see this troubleshooting guide. Proper placement and secure attachment of the vibration plate empower your dishwasher to perform efficiently, protecting both your investment and peace of mind.
Many DIY enthusiasts and even seasoned homeowners fall into the trap of oversimplifying their understanding of dishwasher components and how they impact warranty coverage. A common misconception is assuming that all parts are interchangeable or that a slight deviation during installation won’t have long-term consequences. In reality, subtle nuances—like the correct placement of sensors or the type of fittings used—can determine whether your warranty remains valid or is Voided unexpectedly.
One myth worth busting is the idea that using generic replacement parts is just as good as OEM (Original Equipment Manufacturer) components. While they may seem identical at first glance, OEM parts are engineered with precision specifications that match the designed tolerances for your specific model. Using subpar parts can result in misalignments, increased wear, and ultimately, warranty denial, especially if the manufacturer documents that improper parts led to failure. For detailed insights, check this guide.
Advanced Issue: How Smart Sensors Can Void Your Warranty Without Proper Calibration
Here’s a little-known trap: many owners install smart sensors without calibrating or testing them thoroughly. Modern dishwashers from 2026 rely heavily on sensor data to function optimally, and manufacturers are meticulously tracking sensor logs and calibration parameters as part of the warranty validation process. An improperly calibrated sensor can trigger false error codes, cause unnecessary repairs, or worse, be used as grounds for denying warranty claims. According to a study by this expert research, sensor misalignment is one of the leading causes of warranty disputes in smart appliances.
To avoid this pitfall, ensure you follow calibration procedures precisely—sometimes even a firmware update is required before installation. Remember, manufacturer documentation often emphasizes recording calibration data logs. Failing to do so can be a silent reason your claim gets rejected—so don’t overlook the importance of these detailed steps.
In addition, using specific test fixtures and tools to verify sensor readings can save you headaches down the line. It’s worth investing the extra time to verify that all sensor data aligns with the parameters specified by the manufacturer. Maintaining comprehensive records of calibration and sensor tests can significantly strengthen your warranty case if a failure occurs.
Have you ever fallen into this trap? Let me know in the comments. Staying aware of these hidden nuances ensures your investment is protected and your DIY efforts pay off in the long run.
,
Maintaining a dishwasher that runs smoothly over the years demands more than just occasional cleaning. Investing in the right tools can significantly streamline troubleshooting, calibration, and routine care, ensuring your appliance stays reliable and your warranty remains intact. I’ll share the specific equipment I personally rely on, along with methods to optimize long-term performance.
My Top Tools for Effective Dishwasher Maintenance
First and foremost, I recommend keeping a high-quality digital multimeter, specifically models like the Fluke 117, on hand. This device allows me to accurately test electrical components such as sensors, switch contacts, and power supplies. Confirming that circuits are functioning correctly saves time during diagnostics and prevents unnecessary part replacements. Additionally, I always use a calibrated pressure gauge, like the 15 PSI pressure gauge, to verify water inlet pressures, which is critical for preventing leaks and ensuring proper operation.
For sensor calibration, especially with smart components expected to be prevalent in 2026 models, I utilize a combination of oscilloscope and specific sensor calibration kits. Precise calibration of flow sensors or smart circuit boards is vital to avoiding warranty issues. For instance, the 2026 AI flow sensor calibration guide offers step-by-step procedures that I follow meticulously.
Streamlining Routine Maintenance with Software
Beyond hardware, software tools like firmware update utilities and diagnostic software are indispensable. Manufacturers increasingly release firmware patches to improve efficiency or fix known bugs. Connecting your dishwasher to these services via a USB or Wi-Fi interface, as applicable, allows for quick updates, preventing issues from escalating. I personally verify that all smart sensors and digital logs are synchronized and functioning properly, which is crucial for warranty validation and troubleshooting. Remember, detailed data logs can be your strongest evidence if warranty disputes arise, so utilizing manufacturer-provided apps or diagnostics is worth the effort.
Forecasting future trends, I believe that integrated IoT diagnostics will only become more sophisticated. Enhanced remote monitoring and predictive maintenance might soon allow homeowners to catch issues early, thus extending appliance lifespan and safeguarding warranties even further.
How do I keep my dishwasher performing well over time?
Consistent checks of critical parts using tools like the pressure gauge and multimeter are key. Regular calibration of smart sensors, following manufacturer instructions, prevents false error codes that could jeopardize warranty claims. Additionally, maintaining detailed records—such as digital logs, calibration data, and repair histories—provides a robust defense if a warranty dispute occurs. For example, choosing OEM-grade parts and verifying proper installation reduces the chances of early failure, aligning with the advice found in this guide.
If you haven’t already, I suggest trying the calibration technique for your smart sensors detailed in the article above. Precise calibration can dramatically cut down on troubleshooting time and keep your warranty valid. Remember, arming yourself with the right tools and knowledge empowers you to keep your dishwasher performing optimally for years to come.

The Hardest Lesson I Learned About parts,dishwasher,warranty,installation
I once believed that following the manual verbatim would guarantee a flawless installation, but I overlooked the silent hero—the vibration plate. Its proper placement and secure attachment turned out to be the defining factor in my dishwasher’s longevity and warranty validity. That oversight taught me that even a tiny part can have outsized consequences, and paying attention to these details is crucial for long-term success.
3 Myths About parts,dishwasher,warranty,installation That Held Me Back
One persistent misconception I had was thinking OEM parts were optional; turns out, they’re often essential for meeting warranty requirements. Another myth was that smart sensors could be installed and forgotten—calibration is key, or risk invalidating your warranty. Lastly, I believed that troubleshooting tools were unnecessary for DIY repairs—equip yourself properly, and you’ll prevent costly mistakes and warranty disputes.
What Experts Won’t Tell You About parts,dishwasher,warranty,installation
Industry professionals often emphasize the importance of detailed calibration logs and precise installation techniques. They know that a well-documented process not only ensures optimal performance but also serves as proof in warranty claims. My takeaway? Investing time in proper setup, calibration, and record-keeping can be the difference between a smooth repair and a denied warranty. For detailed insights, check this comprehensive guide.
My Essential Toolkit for parts,dishwasher,warranty,installation
I swear by a digital multimeter like the Fluke 117 to verify electrical connections and a calibrated pressure gauge to monitor water inlet pressure accurately. These tools, complemented by a sensor calibration kit, empower me to perform adjustments with confidence. For smart sensor calibration, I rely on precise diagnostic software, which I’ve found invaluable for maintaining device health and warranty compliance. Investing in quality tools ensures that your repairs and installations are both effective and warranty-safe.
Where to Go from Here
Start by reviewing your dishwasher’s manual thoroughly, focusing on the vibration plate and smart sensors. Use high-quality OEM parts, and don’t skip calibration steps—these are proven strategies to extend your appliance’s lifespan and protect your warranty. Keep detailed records of every step, from installation to troubleshooting, to safeguard yourself against potential warranty disputes. Remember, your proactive approach now can save you headaches and money in the future. Ready to put these lessons into action? Share your experiences below—I’d love to hear how you’re taking control of your dishwasher’s health and warranty!
Related Posts
Smart Dishwasher Parts & Warranty: Essential Installation Tips for 2025
Have you ever faced the sinking feeling of opening your…
Stop the Drip: 5 Installation Parts Your 2026 Manual Missed
Ever had that sinking feeling when you hear your brand-new…

Effective Dishwasher Parts & Installation Guide for Smart Dishwashers in 17:45
My Journey to a Sparkling Dishwasher ExperienceWhen I first got…