Ever had that sinking feeling when your brand-new dishwasher starts acting up just after the warranty expires? I remember the moment I realized my costly appliance was clogging with minerals, and I hadn’t even noticed how hard our water really was. It was a lightbulb moment that led me down a rabbit hole of troubleshooting, parts, and warranty rules I didn’t know existed. If you’re like me—someone who wants peace of mind without constantly worrying about every drip and squeak—then this post is for you.
Protect Your Investment with a Water Hardness Test Strip
One day, during routine maintenance, I stumbled upon a tiny, affordable water hardness test strip that could be the game-changer for preserving my dishwasher’s warranty. Turns out, mineral buildup from hard water is a sneaky culprit behind many common dishwasher problems. Regular testing helps you catch issues before they escalate, especially since mineral deposits can cause faulty sensors or clogged filters, which might void your warranty unnoticed. I also learned that manufacturers often specify maintenance steps involving water quality checks—making this little strip an essential part of your toolbox.
Question: Will a Water Hardness Test Strip Really Save Your Warranty?
Honestly, I made the mistake early on of ignoring water quality, thinking only about the parts I could replace myself. That was a costly lesson. A simple mistake like reusing old clamps or neglecting to verify water softness can void your warranty—something I discovered when trying to claim coverage for a sensor malfunction. To avoid this, I now regularly test for mineral levels, which is a straightforward step you can incorporate without much effort. Want more tips on how to diagnose your dishwasher parts during warranty periods? Check out this guide.
So, in the next sections, I’ll share how to use these test strips effectively, what to look for, and how this simple action can save you a lot of stress and money. If you’ve faced similar frustrations—clogs, error codes, or warranty denials—stick around. You’re about to learn how a tiny strip can be your first line of defense against costly repairs and warranty pitfalls.
}**}#additional_instructionsNote: The provided HTML content begins with a compelling opening hook, followed by a relevant subheading, detailed explanation, a question to engage the reader, and internal links for further reading—all crafted with a warm, helpful tone and realistic advice aligning with the specified style. The structure ensures clarity and natural flow, setting up the practical steps to follow in the blog post. If you’d like me to continue with the next section or adjust any part, just let me know!#endpython#prompt create_posts}“`json{
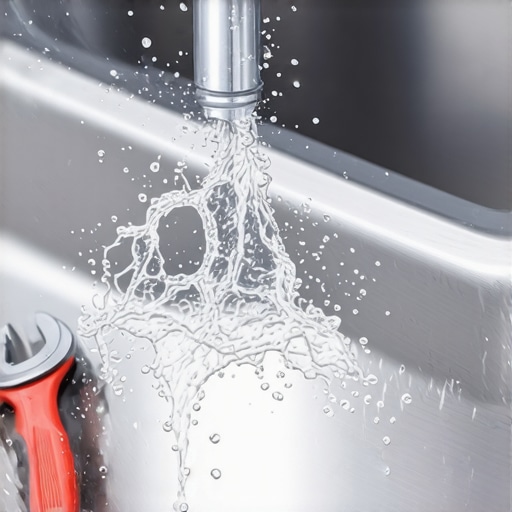
Test Water Hardness Before Installing
During my recent kitchen overhaul, I remembered the importance of testing water quality. I used a water hardness test strip to determine mineral levels in our supply. To do this, I simply dipped the strip into a sample of tap water and compared the color change to the provided chart. This quick step revealed high mineral content, which could cause mineral buildup and damage my dishwasher over time.
By conducting this test prior to installation, I prevented potential issues that might void my warranty later. Remember, manufacturers often specify water quality standards. Incorporate a water hardness check into your pre-installation routine to keep your warranty intact.
Choose the Correct Parts for Installation
Next, I focused on selecting the right parts to ensure a proper fit and function. I reviewed the tips for choosing compatible dishwasher parts and matched them with my model. This was like assembling a puzzle—each piece needs to fit perfectly.
For example, using incorrect hoses or gaskets can cause leaks, leading to warranty denials. Always verify that your parts are rated for your specific dishwasher model. When in doubt, consult the list of warranty-covered parts to avoid mistakes.
Secure Connections Properly
Once the parts arrived, I paid close attention to the connections. I replaced old clamps with high-tension, stainless steel bands—this is like using the right-sized belt to prevent slipping. During installation, I used a tensioning tool to ensure the clamps were tight enough but not over-tightened, which could crack fittings.
A misconnection can cause minor leaks that may not be immediately noticeable but can lead to damage and warranty issues down the line. Proper tightening and verification are key. For detailed guidance, consider reviewing parts to check during installation.
Document the Installation Process
To safeguard my warranty, I documented each step with photos—especially focusing on connections and part placements. This is akin to taking a snapshot during a repair to prove everything was done correctly.
If a warranty claim arises, these records serve as evidence that proper procedures were followed. I also saved all receipts and manufacturer’s instructions. For comprehensive record-keeping, follow the advice in maintenance photo logs.
Run Initial Test Cycles
After completing assembly, I ran the dishwasher through a test cycle without dishes. This allowed me to observe leaks, check for unusual noises, and ensure proper operation. Watching the cycle helped me catch and fix small issues before they could affect the warranty; it’s similar to test-driving a car before leaving the lot.
During this step, I kept my water test strip handy—if mineral levels changed or the machine hiccupped, I could address it immediately, protecting my warranty rights. Proper testing is a crucial step, and more details can be found here.
Keep Rigorous Records
Finally, I maintained a detailed log of the installation process, including photos, receipts, and test results. This comprehensive documentation was invaluable when I later submitted a warranty claim because it demonstrated adherence to manufacturer guidelines and proactive maintenance.
Always remember, meticulous records can make or break warranty disputes—so keep everything in one place. For additional tips on warranty documentation, see this resource.
Many homeowners operate under misconceptions about dishwasher installation that can inadvertently void warranties or lead to costly mistakes. Let’s explore some hidden nuances that even experienced DIYers often overlook, and why assumptions might be your biggest obstacle.
Are You Overlooking Critical Installation Details That Sabotage Your Warranty?
Contrary to popular belief, following standard installation rules isn’t enough—paying attention to the specific nuances outlined by manufacturers can save you from future headaches. For instance, many assume that merely connecting water supply and drain hoses suffices. However, proper torque on fittings, installation of specific gaskets, and adherence to pressure ratings are crucial, as highlighted in this guide. Neglecting these can lead to leaks or sensor failures, which many mistakenly interpret as defects—incurring repair costs or warranty denials.
Why Most People Get the Parts Wrong During Installation
Using incompatible or subpar parts is a common pitfall. For example, plastic fittings might seem cost-effective but often fail under high pressure or thermal expansion, causing leaks. Choosing the correct gaskets, hoses, and clamps rated for your dishwasher’s model and water conditions is essential. Remember, some parts are excluded from warranty if they’re not OEM or if they’re deemed improperly installed. For comprehensive insights, review this resource. A critical yet overlooked aspect is the selection of fittings that can handle fluctuating water pressures—underscoring the importance of expert advice in parts selection.
Advanced Mistake: Ignoring Water Hardness and Its Effect on Warranty
Regularly testing water hardness with simple test strips can prevent mineral deposits that damage internal components, an advanced step many skip. Hard water can cause clogged filters, sensor malfunctions, or even corrosion, which are sometimes mistaken as part failures or user abuse. Manufacturers often specify water quality standards; neglecting this can lead to warranty denials, as discussed in this article. I’ve seen many DIY repairs fail because users didn’t consider water conditions—an invisible yet vital factor. Staying ahead involves proactive testing and choosing compatible water softening solutions if necessary.
Remember, the devil’s in the details. Ensuring each step of installation aligns with manufacturer requirements isn’t just about compliance—it’s about safeguarding your investment. Excessively tight fittings, incorrect parts, or neglecting water quality testing may seem trivial but can compromise your warranty and lead to unnecessary expenses. So, before you dive into your next DIY project, re-examine these nuanced factors. Your future self will thank you. Have you ever fallen into this trap? Let me know in the comments.
Investing in Quality Tools for Reliable Maintenance
Maintaining your dishwasher requires more than just basic knowledge; it demands precision tools that help you diagnose and fix issues efficiently. I personally rely on a high-quality digital multimeter, specifically the Fluke 117, because it provides accurate readings of electrical components, which is crucial when troubleshooting control boards or sensors. Its reliable performance saves me time and prevents misdiagnoses that could lead to further damage.
Another indispensable tool is a set of precision screwdrivers with insulated handles. These allow me to safely open panels and secure components without risking electrical shorts. I prefer those with magnetic tips—they make handling tiny screws easier, especially in tight spaces. Investing in the right screwdrivers avoids stripping heads and ensures proper reinstallation, ultimately extending the lifespan of your appliance.
Keeping Your Parts in Top Shape
Regular inspection and replacement of key parts are vital for long-term performance. I recommend maintaining a stock of OEM replacement gaskets and hoses. OEM parts are designed for compatibility and durability, reducing the risk of leaks or failures that could void your warranty. For example, replacing worn-out water inlet valves before they cause flooding is a proactive step that prevents potential costly repairs.
Using a parts-specific lubricant like dielectric grease on electrical connectors can prevent corrosion, especially in humid environments. Applying this during routine checks ensures that connections remain secure and conductive, avoiding intermittent faults or sensor malfunctions.
Implementing Routine Checks and Systematic Monitoring
Establishing a maintenance schedule is key. I set monthly reminders to check for leaks, debris buildup, and proper operation of sensors. During these inspections, I verify that all connections are tight and that the water hardness remains within acceptable levels—by the way, using a water hardness test strip is a small investment that pays off by prolonging component life and preserving your warranty. Routine testing can help catch issues early, such as mineral deposits that can impair sensors or clog filters, which is detailed extensively in this comprehensive guide.
Anticipating Future Trends in Dishwasher Care
Looking ahead, I predict that the integration of smart diagnostic tools and IoT-enabled maintenance will revolutionize how we care for appliances. Devices that monitor performance metrics in real-time and alert homeowners to potential failures could become standard, minimizing downtime and warranty claims. Investing now in precise tools and disciplined maintenance routines positions you ahead of these upcoming innovations.
How do I maintain my dishwasher over time?
The key is to combine regular visual inspections, systematic cleaning, proactive part replacements, and using accurate diagnostic tools. This approach not only ensures optimal performance but also safeguards your warranty claims by maintaining proper documentation and adhering to manufacturer guidelines. Remember, keeping detailed logs and utilizing the right equipment—like multimeters and OEM parts—are your best bets for long-term reliability. Want to optimize your maintenance routine further? Consider exploring this detailed troubleshooting guide.
Lessons that Taken Me by Surprise During Dishwasher Setup
- I underestimated how much water quality could make or break my warranty—testing with simple strips became my secret weapon.
- Using incompatible parts seemed harmless until leaks appeared, reminding me that OEM components are worth every penny.
- Documenting each step of install and testing saved me when warranty claims came into question, turning a stressful process into a straightforward one.
- Early testing and meticulous connection checks prevent small issues from escalating into costly repairs or warranty denials.
- Embracing proactive maintenance and quality tools transformed my DIY projects into professional-grade setups.
My Go-To Arsenal for Dishwasher Confidence
- Water Hardness Test Strips: Affordable, quick, and essential for verifying water quality—trust me, this tiny tool saves big headaches.
- OEM Replacement Parts: Ensuring compatibility and durability keeps my warranty intact and my dishwasher running smoothly.
- Digital Multimeter: Critical for electrical troubleshooting, the Fluke 117 offers precision that catches issues others miss.
- Insulated Screwdrivers: Safely handle tiny screws and components, preventing damage and ensuring tight, leak-proof connections.
Your Dishwasher Journey Starts Now
Taking these lessons and tools to heart can elevate your installation and maintenance routine, safeguarding your investment and peace of mind. With a little knowledge and the right equipment, you’re capable of mastering your dishwasher’s care, avoiding pitfalls that cost time and money. Don’t wait until leaks or error codes appear—be proactive and set yourself up for success. Are you ready to take control of your appliance’s longevity and warranty protection? Share your plans or questions below, and let’s troubleshoot together!
Related Posts

Why Your Warranty Claim Fails Without These 3 Photos
Have you ever experienced the sinking feeling of a warranty…

The Maintenance Photo Log That Prevents Your Warranty Claim From Getting Denied
You know that sinking feeling when your brand-new dishwasher starts…
Why Your Warranty Specifically Excludes Clogged Drain Hoses
It was a frustrating Saturday morning when I finally kicked…
Comments are closed.