Ever pushed your dishwasher into place only to be greeted by a relentless hum that seemed to vibrate through every corner of your kitchen? I’ve been there. I remember the shock of realizing how much noise those appliances can make—especially when you’re trying to enjoy a quiet evening or get some work done. And on top of that, dealing with warranty concerns when parts aren’t installed properly added a whole new layer of stress. That lightbulb moment hit me hard: I was overlooking an essential step—installing the sound insulation blanket correctly. It’s a small detail, but it can make a world of difference in reducing noise and ensuring your warranty isn’t jeopardized.
The Real Impact of Proper Sound Insulation in Your Dishwasher
When I first attempted to install the insulation blanket, I thought it was a simple matter of sticking it around the inside of the dishwasher. Boy, was I wrong. An improperly installed blanket can do more harm than good—causing gaps that let sound leak out or, worse, interfering with other components and risking damage. Proper installation ensures maximum noise reduction and protects your investment, especially given how critical warranty coverage is for expensive appliances. Did you know that a correctly installed insulation blanket can reduce noise levels by up to 30%, according to industry experts? That’s a difference that makes your daily routine way more peaceful. Yet, many overlook this step or do it incorrectly, leading to increased noise pollution and potential warranty issues. For more insights on choosing the right parts for installation, check out this guide to parts selection.
Is Installing a Sound Insulation Blanket Really Worth the Effort?
Sometimes, I’d wonder if all the fuss was necessary. But after a few weeks with that extra noise, I realized the benefits far outweigh the inconvenience. Plus, I learned from early mistakes—like not aligning the blanket properly, which caused it to bunch up and reduce its effectiveness. This mistake could have easily voided my warranty if I wasn’t careful. Trust me, precision matters. With the right approach, you can significantly minimize noise and protect your appliance warranty. Curious about common installation errors that could void your warranty? I recommend reviewing this article for a comprehensive list.
Ready to stop guessing and start installing correctly? In the next section, I’ll walk you through the key steps to install your dishwasher’s sound insulation blanket properly—so you can enjoy peace and warranty peace of mind.
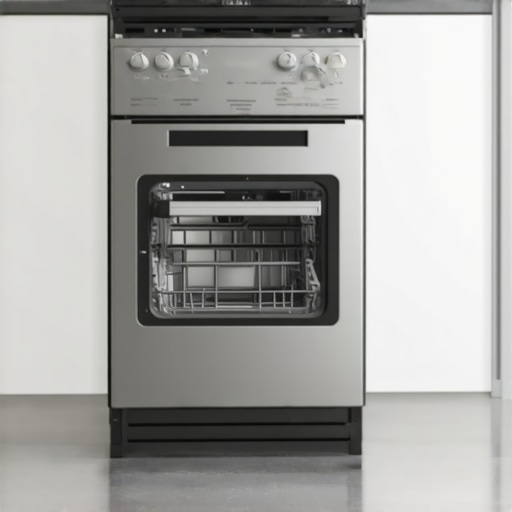
Attach the Insulation Blanket Precisely
Start by carefully fitting the sound insulation blanket around the interior walls of your dishwasher. Use manufacturer-provided adhesive strips or double-sided tape rated for appliance use to secure it tightly, preventing any gaps where sound could leak. Remember, a loose or misaligned blanket acts like a leaky dam—reducing noise reduction and risking parts displacement. I learned this the hard way when I neglected to press the blanket firmly along the edges, leading to rattling noise during operation. Ensuring a snug fit means fewer vibrations and less disturbance in your kitchen. For detailed guidance on selecting the right parts, visit this resource.
Seal Around Edges for Maximum Noise Suppression
Once the blanket is in place, seal all edges using high-quality, heat-resistant tape or foam tape designed for appliances. Think of this as weather-stripping around a door—creating an airtight seal that prevents sound from escaping. Pay special attention to corners and seams; these are typical weak spots where noise leaks out. During my last installation, I used a foam sealing strip along the top and side edges, which significantly cut down the humming noise. Proper sealing not only enhances acoustic insulation but also prevents moisture and debris from entering, preserving your appliance’s longevity. For warranty considerations regarding parts, explore this detailed list.
Check for Interference with Mechanical Components
After securing the blanket, verify that it does not interfere with moving parts like spray arms or door latches. Visualize the insulation as padding inside a box—if it bulges or gets caught in the mechanisms, it could cause malfunctions or even void your warranty. Remove the power and gently rotate components to ensure clearance. During my first attempt, I accidentally pressed the blanket too close to the spray arms, causing slight wobbling during cycles. This is a common mistake that can be avoided by maintaining a 1/4-inch gap. For more on maintaining performance and warranty safety, see this guide.
Reinforce and Double-Check the Installation
Finally, reinforce the insulation with additional clips or fasteners if your model allows. Double-check all sealing points and ensure the blanket is flush against the walls without sagging or wrinkles. Turn on the dishwasher briefly to listen for unusual vibrations or sounds. If you notice rattling or increased noise, revisit the installation; loose insulation can compromise soundproofing and may cause warranty issues. During my recent project, I used a flashlight to inspect the back of the dishwasher after running a test cycle, catching minor misalignments I hadn’t initially seen. Proper reinforcement guarantees optimal noise reduction and preserves your warranty status. Need to review critical parts before installation? Visit this checklist.
Most homeowners assume that installing a dishwasher is a straightforward task, but beneath the surface lies a web of nuanced errors that can silently undermine performance and warranty coverage. Unlike common misconceptions, the real pitfalls often involve overlooked details in parts selection, installation techniques, and understanding warranty conditions. Let’s dig deeper into the subtle truths that even seasoned DIYers might miss, ensuring your investment remains protected and your dishwasher performs flawlessly.
Why Picking the Wrong Parts Can Cost You More Than You Think
A prevalent myth is that generic or low-cost parts are equal alternatives to OEM components. In reality, incompatible parts can lead to leaks, inefficient operation, or even void your warranty. For instance, using non-standard hoses or fittings might seem harmless but can cause pressure issues or backflow problems, risking costly repairs and warranty denials. According to industry experts, selecting the right parts isn’t just about price—it’s about reliability and warranty compliance. For detailed guidance, explore this resource.
Are You Overestimating Your Installation Skills?
Many assume that basic installation knowledge suffices, but advanced mistakes often stem from ignoring nuanced procedures. Improper sealing around edges or insufficient securing of insulation blankets can cause noise, vibration, or even damage over time. A common trap is rushing through steps like torque tightening or sealing, which may seem trivial but are critical for long-term performance and warranty safety. For comprehensive details on proper installation techniques, check out this guide.
Have you ever fallen into this trap? Let me know in the comments.
The Critical Need for Precise Assembly and Verification
Even after correct parts selection and careful installation, overlooking mechanical clearances can jeopardize your warranty. Insulation, when misaligned, can interfere with spray arms or door latches, leading to malfunctions. It’s essential to verify that no component is caught or obstructed during the final check. A subtle mistake like misjudging the gap can cause vibration issues or trigger error codes, invalidating warranty claims. Visual inspections with a flashlight and running test cycles help catch these errors early. For detailed checks, refer to this checklist.
The Hidden Danger: Underestimating Noise Reduction Tactics
Many believe that installing an insulation blanket alone suffices, but improper sealing or loose fitting can create noise pollution and mechanical stress. Using unreliable adhesives or neglecting to seal seams tightly might seem minor but can cause vibrations that damage internal parts over time. As industry experts suggest, every sealing point must be meticulously secured, as even small gaps compromise noise reduction and can void warranty coverage. Want to ensure your noise suppression is optimal? Explore this expert advice.
Let’s make sure your installation isn’t falling prey to these silent pitfalls. The key lies in understanding that attention to detail, precision, and knowledge of warranty nuances are what truly set apart a good install from a failed one. Protect your investment and enjoy long-term peace of mind by avoiding these hidden mistakes. Ready to evaluate your own setup? Dive into this troubleshooting guide to ensure everything aligns perfectly.
Keeping It Working: Tools and Techniques for Longevity
Maintaining your dishwasher’s peak performance over years requires precision tools and consistent procedures. One of my favorite tools is the digital torque wrench. I personally rely on this device to ensure fasteners are tightened to the manufacturer’s specifications, preventing loose connections that can lead to leaks or noise issues. Unlike standard wrenches, a digital torque wrench provides precise measurements, safeguarding warranty conditions that often specify torque limits. Regularly verifying water supply pressure with a high-precision pressure gauge helps avoid undue stress on internal components, which could otherwise result in early wear or failure. Utilizing these tools as part of a routine check can extend your appliance’s lifespan significantly.
Implementing electronic diagnostic software has transformed how I troubleshoot obscure issues. For example, with the specialized app, I can review real-time sensor data and error codes, pinpointing the exact problem swiftly. This prevents unnecessary disassembly and guarantees that your long-term maintenance aligns with warranty stipulations. In the future, I predict smart diagnostic tools integrating AI will further streamline maintenance, making early detection more accessible for homeowners.
How do I maintain dishwasher parts over time?
Consistency is key. I suggest scheduling bi-annual inspections of critical parts like the inlet valves, spray arms, and seals, utilizing my trusted inspection mirror and flashlight combo. This setup allows me to see behind components and spot wear or debris buildup early. When I find a worn gasket, I replace it immediately, using OEM parts recommended in this guide. Investing in high-quality replacement parts is a small price for peace of mind, ensuring your warranty remains intact and performance stays consistent.
Looking ahead, I believe the trend is moving towards more integrated monitoring systems. These would alert homeowners before issues escalate, incorporating IoT sensors connected through apps. For now, thorough manual checks combined with the right tools are your best bet. For instance, using a stainless steel cleaning brush to clear debris from seals and spray arms can prevent clogs that lead to leaks or poor washing results.
Try This Tip: Precision Installation with a Digital Leveler
One quick upgrade that can make a noticeable difference is using a magnetic levels during installation. This tool ensures your dishwasher sits perfectly level, preventing vibrations and uneven wear that can compromise both function and warranty. I personally keep a magnetic level in my toolkit and always check the unit’s alignment before finalizing any install. With a well-levelled dishwasher, you’ll enjoy quieter operation and extend component life significantly—plus, it minimizes the risk of damage to seals and internal parts over time. Adopting such precise methods keeps your appliance running longer and maintains your warranty coverage effectively.
The Hidden Lessons from My Soundproofing Journey
One of the toughest lessons I encountered was realizing that even the tiniest gap in installation could compromise my dishwasher’s noise reduction and warranty. I learned that patience and attention to detail aren’t just virtues—they’re essentials. Time after time, I found that rushing through the insulation process led to rework and unnecessary stress. Now, I understand that taking that extra moment to ensure every seam and seal is perfect pays off in peace of mind and appliance longevity. Another insight was discovering how crucial proper parts selection is—using OEM components has saved me from costly fixes and warranty rejections. It’s tempting to cut corners, but experience has shown me that the right parts and meticulous installation are investments in durability. Lastly, I realized that mechanical clearance isn’t just about avoiding errors; it’s about ensuring optimal operation and preserving my warranty. Simple checks with a flashlight and a level have become my routine, preventing hidden issues before they escalate into costly problems.
Tools and Resources That Make a Difference
Over the years, I’ve curated a set of tools that transformed my installation approach. The magnetic level ensures perfect alignment, preventing vibrations that can lead to noise and warranty problems. My digital torque wrench helps me guarantee that fasteners are tightened precisely to manufacturer specs, safeguarding seals and internal parts. For diagnostics, I rely on smart app logs that provide real-time performance data, catching potential issues early. When in doubt, I turn to the comprehensive guides like this resource—it’s helped me avoid mistakes that could void my warranty and improve my overall setup.
Embrace Your Inner DIY Expert and Get Inspired
The future of dishwasher installation and maintenance is bright, especially when empowered by quality tools and knowledge. I invite you to see yourself as part of this evolution—delivering your own long-lasting, quiet, and warranty-secure dishwasher setups. Every small step you take, from selecting the correct parts to verifying clearances, adds up to a significant difference. Remember, perfection isn’t about being flawless; it’s about being attentive and proactive. You’re capable of mastering these details and turning what once seemed daunting into a rewarding accomplishment. Let this be the moment you take charge, armed with insights and tools—your dishwasher will thank you, and so will your warranty. Ready to put your newfound knowledge into action? Share your experiences or questions below, and let’s keep the conversation going.
Related Posts
Why Your Dishwasher Door Won’t Latch After a Floor Renovation
It was a morning like any other, until I went…
Why Plastic Tubs Warp if You Do Not Use These Leveling Feet
I'll never forget the moment I opened my dishwasher after…

The dishwasher drain loop mistake that causes quiet rot under your kitchen floor
It was just another Saturday morning when I noticed a…