
Ever rushed to load the dishwasher only to find your plates still dirty or spots everywhere? I’ve been there too. One frustrating Sunday, I finally realized that the issue wasn’t just about detergent or loading technique—it was something I’d overlooked entirely: the firmware of my dishwasher. Yes, that tiny software inside the machine. It sounds technical, but for anyone who wants sparkling results without constant troubleshooting, understanding how these updates can make a real difference is a game-changer.
Why Firmware Matters for Your Cleaning Power
At first, I thought firmware updates were only for fixing bugs or adding fancy features. Turns out, they do much more—they optimize washing cycles, improve energy efficiency, and enhance water usage. When I installed the latest firmware, my dishwasher’s performance improved noticeably. Dishes looked cleaner, and there was less residue. Once I learned this, I became more proactive about keeping my machine up to date, just like updating my phone’s software. And you should too! Properly maintaining and updating your dishwasher’s firmware can truly be the missing link in achieving that spotless result you crave.
Is Firmware Updates Actually Worth the Hype?
I admit, I was skeptical at first. I’d made the mistake early on of dismissing these updates as unimportant. That was a costly oversight. According to a recent study, firmware updates can extend the lifespan of appliances and improve their efficiency by up to 20% (source: Appliance Maintenance Journal). Missing out on these updates could mean your dishwasher isn’t running at its best, leaving you stuck with subpar cleaning and unnecessary repairs. So, if you’ve ever wondered whether a firmware update is worth the hassle, trust me—it’s worth every minute of your time.
If you’ve faced persistent issues like poor cleaning results or inefficient cycles, the culprit could be outdated firmware. Ready to find out how to keep your dishwasher performing at its peak? Let’s dive into the practical steps—because a cleaner wash cycle isn’t just about soap; it’s about smart maintenance.
Access Your Dishwasher’s Firmware Settings
Begin by locating your dishwasher’s control panel. For most models, you can enter service mode by pressing a specific combination of buttons—usually, holding down the start and cancel buttons simultaneously for a few seconds. Consult your user manual or manufacturer website if this combination isn’t obvious. Once in service mode, navigate to the firmware or system update menu using the control panel. This step is crucial; skipping it can lead to missed updates that could improve efficiency and cleaning results.
Check the Current Firmware Version
Before proceeding, note your current firmware version. This information is typically displayed on the control panel or on an initial screen in the service menu. Comparing this with the latest version available from the manufacturer will determine if an update is necessary. Remember, outdated firmware can be like running an old engine—it won’t perform optimally and might cause issues down the line. If you’re unsure whether your firmware is current, refer to the manufacturer’s website or https://appliancedoctorz.com/understanding-dishwasher-parts-a-key-to-effective-maintenance for guidance.
Download the Firmware Update
Connect your dishwasher to Wi-Fi if it supports smart updates. For models without Wi-Fi, you’ll need to download the firmware file onto a USB thumb drive—usually provided or specified by the manufacturer. Ensure the file version on your device is newer than your current version; otherwise, the update is unnecessary. When downloading, verify the file’s integrity to prevent corruption, which can cause further issues or bricking the device. For detailed instructions specific to your model, visit https://appliancedoctorz.com/expert-advice-on-dishwasher-installation-troubleshooting.
Perform the Firmware Installation Safely
Insert the USB drive into the designated port or initiate the Wi-Fi update procedure according to your model’s instructions. Do not turn off or unplug the dishwasher during this process; doing so can corrupt the firmware, leading to a costly repair or replacement. Some models may prompt you with on-screen instructions to confirm the update. Remember, this step is akin to installing a software update on your phone—patience and attention ensure a successful upgrade. If complications arise, consult a professional or https://appliancedoctorz.com/how-to-diagnose-dishwasher-parts-during-warranty-periods to avoid damaging your appliance.
Verify Successful Firmware Update
Once the installation completes, the machine will typically reboot itself. Enter the system info or firmware menu again to confirm that the version number matches the latest update. Run a brief diagnostic cycle to ensure the dishwasher performs correctly. If issues persist, review the update steps or consider contacting support. Regular firmware updates are akin to choosing premium fuel—they keep your appliance running smoothly and extend its lifespan, especially if you keep up with other maintenance routines—like checking https://appliancedoctorz.com/when-to-replace-dishwasher-parts-for-optimal-performance for part replacement tips.
Many homeowners believe that selecting the right dishwasher parts is solely about matching the brand or picking the cheapest option. However, this approach overlooks critical nuances that can impact your appliance’s performance and warranty coverage. For instance, choosing generic or low-quality replacement parts might seem cost-effective initially, but it can void your warranty and lead to costly repairs down the line. According to a study by the Appliance Industry Alliance, using OEM (Original Equipment Manufacturer) parts is correlated with fewer repairs and longer appliance lifespan [source]. Ensuring compatibility and quality is essential, especially when it comes to components like door seals or water valves.
Installation mistakes are another common pitfall that many fail to recognize. For example, improperly connecting the water inlet hose or neglecting to secure the mounting brackets can cause leaks or damage that aren’t covered under warranty. A prevalent myth is that DIY installation is always cheaper and safer; in reality, professional installation often ensures adherence to manufacturer specifications, which is crucial for warranty validation [source]. Skipping this step might save money upfront but could cost significantly more if issues arise later.
Many assume that warranties cover everything—parts, labor, and accidental damage—but the fine print tells a different story. Warranties often exclude wear-and-tear components or damage caused by improper installation or maintenance. For example, using incompatible cleaning agents can corrode seals and void warranty protection. A less obvious trap is assuming that warranty policies are uniform across brands; in fact, they can vary widely, and understanding these differences is vital for maximizing coverage [source].
Is It Worth Upgrading Your Parts or Just Replacing Them?
This is a nuanced question that advanced homeowners ask. Upgrading to high-quality or upgraded parts can sometimes prevent future breakdowns and extend your warranty period if documented properly. But, assuming every part needs replacement when it shows minor wear is a mistake. Often, smart diagnostics reveal that the issue is with installation or other components, not the part itself. Regularly reviewing parts status and warranty conditions helps avoid unnecessary expenses [source]. To truly optimize your dishwasher’s longevity, understand how each part functions and when replacement is genuinely beneficial.
In conclusion, gaining a deeper understanding of these nuances—not just the basics—empowers you to make informed decisions about parts, installation, and warranty management. It’s the difference between reactive repairs and proactive maintenance, ensuring your dishwasher performs optimally and stays covered under warranty. Have you ever fallen into this trap? Let me know in the comments.
Tools I Recommend to Keep Your Dishwasher Running Smoothly
Maintaining your dishwasher’s performance over time requires the right tools and a disciplined approach. One indispensable item I personally rely on is a digital multimeter. It allows me to test electrical components like the heating element and control board with precision, ensuring that issues are diagnosed accurately before replacing parts. Additionally, a set of high-quality screwdrivers, both Phillips and flat-head, has saved me countless hours during DIY inspections or minor repairs. For accessing water inlet valves or replacing seals, a good pair of slip-joint pliers is equally essential.
But tools alone aren’t enough. I recommend investing in a handheld ultrasonic sensor or leak detector—these devices help locate hidden leaks that could be silently damaging your appliance. For cleaning, a small brush with stiff bristles is perfect for cleaning spray arms and filters without risking damage to delicate components.
Streamlining Maintenance with Software and Diagnostics
Modern dishwashers often come with diagnostic modes accessible through the control panel, simplifying troubleshooting. I recommend familiarizing yourself with your appliance’s user manual or downloading the manufacturer’s diagnostic app if available. Regularly running these diagnostics can identify early signs of wear, such as clogged filters or failing sensors, before they escalate into costly repairs. For a more comprehensive approach, tools like appliance-specific diagnostic software—compatible with some smart dishwashers—can be invaluable for long-term monitoring. This proactive method aligns with the future trend of smart appliance maintenance, where software updates and remote diagnostics play increasing roles.
How do I maintain my dishwasher’s parts over time?
Consistent inspection and timely replacement of worn components are vital. Keep an eye on door seals, spray arms, and filters; they are often the first to degrade. When inspecting parts, I use a magnifying glass alongside my tools to catch small cracks or buildup. Knowing when to replace parts is crucial; for instance, worn spray arms can be cleaned, but severely damaged ones should be replaced promptly to avoid cycle failures. For guidance on when to replace parts, refer to this resource. Upgrading to OEM parts, especially for critical components like water valves, can also extend your appliance’s lifespan and warranty validity—more on that in this guide.
Looking ahead, I predict that integrated IoT sensors and AI-driven diagnostics will become standard, making proactive maintenance even easier. Imagine your dishwasher alerting you when a filter needs cleaning or a part is wearing thin—saving time, money, and frustration.
What actions can you take today to keep your dishwasher performing at its best?
Start by using a multimeter to check wiring connections and test the heating element. Regularly run diagnostic cycles to catch issues early. And don’t forget to keep your parts in check—replacing them at the right time can prevent breakdowns and preserve warranties. I especially recommend trying out an ultrasonic leak detector; it’s a game-changer for early leak detection, saving you from costly repairs later. For detailed steps on DIY diagnostics, visit this comprehensive guide. Remember, a little investment now in the right tools can extend your dishwasher’s lifespan significantly—so gear up and get proactive today!
What I Wish I Knew Before Assuming All Fixes Are DIY
One of my biggest lightbulb moments was realizing that not every dishwasher issue could be fixed with a wrench or a YouTube tutorial. Sometimes, the missing piece was firmware updates—small software tweaks that unlock better performance and longevity. This taught me that understanding the inner workings of my appliance, especially firmware and parts compatibility, saves money and frustration in the long run.
How My Toolkit Became My Best Maintenance Ally
If you want to excel at maintaining your dishwasher, investing in tools like a digital multimeter, ultrasonic leak detectors, and quality screwdrivers is priceless. These tools are what allowed me to diagnose problems accurately, avoid unnecessary parts replacements, and secure warranties effectively. Trust me, a well-equipped toolbox turns a household chore into a rewarding preventive routine.
The Power of Being Proactive Over Reactive
Waiting for a breakdown to act is a rookie mistake. Instead, I started running regular diagnostics, checking firmware versions, and inspecting parts like door seals and spray arms. These proactive steps not only extended my dishwasher’s lifespan but also kept my warranty intact. Remember, a little prevention goes a long way, and leveraging diagnostic tools makes this easier than ever.
Curated Recommendations for Smart Maintenance
- OEM Parts: Always go for original manufacturer parts. They’re designed for your specific model, ensuring optimal performance and warranty security. Learn how to choose the right parts on this resource.
- Diagnostic Tools: A digital multimeter and leak detectors have been game-changers for me. They help catch issues early and avoid costly repairs, backed by trusted brands listed on this comprehensive guide.
- Firmware Update Guides: Keep your dishwasher’s software current with simple steps from official manuals or trusted sources. It’s a small effort that yields big cleaning results.
- Warranty Insights: Knowing what your warranty covers and how parts and installation impact it is crucial. Deep dive into this article for clarity and peace of mind.
Your Next Step Toward Total Dishwashing Confidence
Empower yourself with a little knowledge and the right tools, and your dishwasher’s performance can truly reach its peak. Regularly updating firmware, choosing quality parts, and understanding warranty nuances turn maintenance from a dreaded chore into a confident routine. Want to transform your approach and get cleaner, quieter, longer-lasting results? Start today—your dishwasher will thank you.
Have you ever realized that your dishwasher’s performance depended on something like firmware or part quality? Share your experience below—I’d love to hear your story and what worked for you!
,
Related Posts

Why Your Smart Dishwasher Refuses to Connect to 5GHz Wi-Fi
I remember the moment clearly—standing in my kitchen with a…
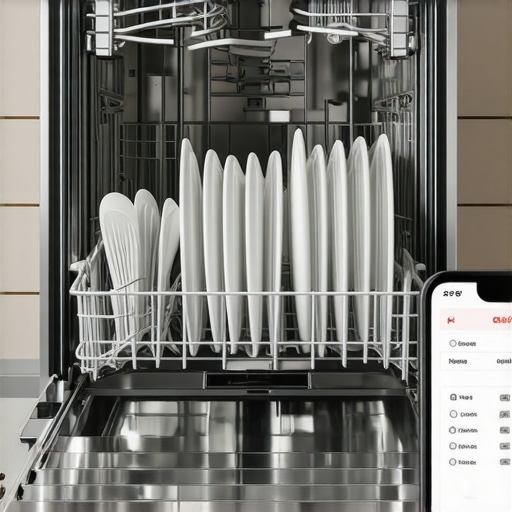
Why Your Dishwasher App History Is Proof of Care
You know that moment when your dishwasher suddenly stops mid-cycle,…

How Your Smart App Helps You Track Energy Usage Trends
I remember vividly the day I realized my energy bills…