
I remember the first time my dishwasher started acting up right before a big dinner. It refused to fill properly, leaving me standing there frustrated and Googling like crazy. That moment was a lightbulb for me—sometimes, you don’t need a full toolbox to troubleshoot certain issues. Especially when it comes to small debris clogging the inlet valve, a tiny thing that can cause big headaches. So, if you’ve ever wondered whether you can check your inlet valve without fancy tools, you’re in the right place.
Spotting the Hidden Clues Without Breaking Out the Toolbox
Many homeowners don’t realize that inspecting a potentially clogged inlet valve can be straightforward and fuss-free. The key is knowing what to look for and understanding that a simple visual check can save you from costly repairs or unnecessary parts replacement. The goal is catching those small debris particles—like grit, food crumbs, or mineral deposits—that can block water flow and disrupt your appliance’s performance. Trust me, early detection can prevent a minor inconvenience from turning into a major disaster.
Is Checking for Debris Really Worth the Hype?
Early in my troubleshooting journey, I made the mistake of ignoring seemingly minor symptoms, thinking they’d resolve on their own. That delay only worsened the problem. It’s a common mistake that can cost you extra repair costs and void warranties. Actually, a quick inspection—done right—can reveal blockages that are easy to clean and reinstate proper water flow. Plus, it avoids unnecessary parts swaps. For more detailed guidance on maintenance, you might find this resource helpful: Understanding Dishwasher Parts.
Knowing how to spot small debris in your inlet valve isn’t just handy; it’s a smart move to keep your dishwasher humming smoothly. Ready to see how you can do this with your bare eyes and a bit of patience? Let’s dive into the simple steps that can make all the difference.
Get Hands-On with Your Dishwasher Inlet Valve
When my dishwasher refused to fill properly, I rolled up my sleeves and inspected the inlet valve myself. To do this, start by unplugging your appliance and turning off the water supply for safety. Remove the lower kickplate or access panel—usually held by screws—giving you direct access to the inlet valve. Use a flashlight to spot any visible debris or mineral buildup blocking the water intake. If you see grit or food particles, a simple rinse can make a difference. Be gentle; sharp objects can scratch the valve or damage connectors.
Disassemble Carefully and Spot Debris
Next, loosen the inlet hose connected to the valve using adjustable pliers. Have a bucket ready to catch any residual water. Once removed, check inside the inlet screen—this is a small filter mesh that traps debris. Use your fingers or a soft brush to clear away particles without applying excessive force, which might damage the screen or the valve. If the screen is heavily clogged, soak it in vinegar to dissolve mineral deposits. Reassemble the hose securely, ensuring there are no leaks.
Remember to Inspect the Water Supply Line
A common oversight is reusing old or kinked water supply hoses, which can simulate inlet problems. Check the condition of your supply line by feeling for soft spots or cracks. If it’s old or damaged, replacing it with a braided steel hose not only improves durability but also reduces the risk of leaks. For guidance on selecting the right part, visit top tips for choosing dishwasher parts. Proper hose selection is crucial; a faulty supply line can cause the same symptoms as a clogged inlet valve.
Final Checks and Testing
After cleaning and reassembling, turn the water supply back on and plug in the machine. Run a short cycle without dishes to observe if the water fills adequately. If the inlet still appears restricted, recheck the connection and screen for missed debris. Sometimes, mineral buildup can be stubborn—consider descaling the inlet with a vinegar solution if necessary.
Note on Warranty and Professional Help
If your inspections reveal persistent issues or if you’re uncomfortable disassembling components, consulting the warranty documentation is wise. Refer to this guide to dishwasher warranty parts to understand coverage and warranty claim procedures. Remember, handling internal components improperly can void warranties, so weigh DIY steps against professional assistance for complex problems.
When it comes to appliances like dishwashers, many homeowners — even those who read online guides — tend to oversimplify critical aspects like warranties and installation. They often believe that once the device is set up, the warranty will automatically cover any future failures. But the reality is more nuanced; understanding the fine print and proper maintenance can significantly impact your warranty claims. For example, many assume that using generic parts will not void their warranty, but in fact, manufacturers often specify OEM (original equipment manufacturer) parts for warranty compliance. According to industry experts, replacing parts with non-approved components can be grounds for warranty denial, especially if failures occur afterward, underscoring the importance of selecting parts wisely; see this comprehensive guide on choosing correct installation parts.
Another common myth is that installation is a one-time event, but in reality, improper setup is a leading cause of premature dishwasher failure. Many assume that as long as the machine isn’t leaking initially, everything is fine. However, subtle issues such as incorrect leveling or inadequate drainage can develop over time, leading to costly repairs. Advanced homeowners can benefit from understanding the importance of proper installation techniques; for instance, ensuring your drain hose includes a high-loop or air gap prevents nasty odors and potential water backups. You can learn more about this in this troubleshooting resource.
A particularly sneaky trap involves aftermarket parts or DIY fixes that seem harmless but jeopardize warranties. This is especially true for parts like inlet valves or spray arms—many untrained DIYers think a quick replacement with generic components suffices. But frequently, these parts are designed with specific tolerances and materials that only OEM parts can guarantee. Using the wrong parts not only risks appliance damage but also voids warranties, as discussed in this detailed explanation.
Moreover, consumers often overlook the importance of professional installation documentation. Officers reviewing warranty claims may ask for proof of proper setup; lacking this, claims can be denied even if the fault is legitimate. To avoid this, always keep receipts, and consider recording installation processes or requesting the installer to provide a detailed report. For more insight, check this article.
So, what is the one mistake many make that could cost them their warranty coverage? It’s neglecting the cumulative impact of small decisions — from the parts you use to how you install and maintain your dishwasher. These nuances matter more than most realize. When in doubt, turn to trusted sources and manufacturer guidelines to safeguard your investment. Remember, proper knowledge is your best tool.
Have you ever fallen into this trap? Let me know in the comments.Maintaining your dishwasher over time requires precision and the right equipment to ensure longevity and optimal performance. I personally rely on a few high-quality tools that make troubleshooting and repairs more manageable. One must-have is a digital multimeter, like the Fluke 115, which allows me to accurately diagnose electrical issues such as faulty heating elements or inconsistent voltage levels. Investing in a good multimeter pays off, especially when dealing with subtle faults that could lead to larger problems if left unchecked.
Next, I always keep a set of fine-nose pliers and a small inspection mirror in my toolkit. These tools help me reach tight spots and visualize areas behind components, reducing the risk of damaging delicate parts. For example, inspecting the water inlet for debris or verifying the proper seating of connectors is much easier with these. Even if you’re not a professional, assembling a basic kit with these tools can save you a trip to the repair shop and ensure you catch issues early.
For effective maintenance, I also recommend investing in a good-quality adjustable wrench and a torque wrench. Proper tightening—especially when securing hoses or electrical connectors—helps prevent leaks and electrical shorts. Remember, over-tightening can damage fittings, so a torque wrench set to manufacturer specifications (which you can find in the appliance manual or detailed at this link) ensures safety and adherence to standards.
How do I maintain dishwasher parts over time?
It’s advisable to regularly check and replace worn-out components like door springs, spray arms, and inlet valves. Using a detailed guide on when to replace parts, you can schedule maintenance before small issues escalate into costly repairs. Keeping the water inlet filter clean and inspecting the drain pump for debris are also crucial; these simple steps significantly extend your dishwasher’s lifespan.
Looking ahead, I predict that in the future, diagnostics will become even more automated. Smart appliances will continuously self-monitor and message us when maintenance is needed, much like modern cars. Until then, integrating these reliable tools into your routine and following best practices will help you keep your dishwasher running smoothly for years to come. For example, periodically testing electrical connections with an appropriate multimeter prevents unexpected breakdowns—try this advanced step, and you’ll be surprised how much it saves you in the long run.
Remember, maintaining your dishwasher isn’t just about quick fixes; it’s about embracing a proactive approach that leverages precise tools and knowledge to prevent problems before they start. Don’t wait for leaks or errors—start inspecting your appliance regularly today!
Lessons No One Tells You About Protecting Your Investment
One of the most eye-opening moments in my appliance journey was realizing that many issues stem not from complex malfunctions but from overlooked details like installing the right water supply line or checking a tiny inlet screen. These small lessons have saved me hundreds in repairs and hassle, emphasizing that knowledge about proper installation and maintenance practices can be a game-changer. Often, it’s the seemingly minor decisions—using OEM parts, securing hoses properly, and understanding warranty fine print—that make all the difference in ensuring longevity and protecting your warranty coverage.
Another insight I’ve gleaned is that DIY troubleshooting isn’t about fixing everything yourself but about knowing when to call in a professional and how to communicate your efforts effectively. Maintaining a record of installations, repairs, and component choices can be invaluable if warranty claims ever come into question. Remember, understanding the nuances of warranty policies—like which parts are covered and how proper installation affects claims—can prevent costly denials later.
Tools and Resources That Changed My Approach
Over time, I’ve curated a toolkit that empowers me to troubleshoot and maintain my dishwasher confidently. A high-quality digital multimeter like the Fluke 115 helps me diagnose subtle electrical issues, avoiding unnecessary replacements. I also rely on a set of fine-nose pliers and a small inspection mirror to reach tight spots and verify connections without causing damage. For parts and installation guidance, selecting OEM components and knowing how to properly secure hoses are crucial steps that have saved me from recurring problems.
Keeping these tools handy and understanding their proper use has been a revelation—transforming how I care for my dishwasher and giving me peace of mind. If you’re serious about prevention, investing in these essentials is a small price for the confidence they bring in maintaining your appliance’s performance over the years.
Seize the Moment and Take Control of Your Dishwasher’s Future
Empowering yourself with the right knowledge and tools to check and maintain your dishwasher isn’t just about fixing problems—it’s about taking proactive steps to ensure it runs smoothly for years. Incorporate regular inspections, familiarize yourself with critical components, and remember that proper installation and part choices directly impact warranties and longevity. By doing so, you turn what once seemed complex into manageable routines, giving you peace and confidence in your appliance’s resilience.
Have you ever faced an issue that turned out to be something small but hidden, like a debris-clogged inlet? Share your experiences below—your story might just help someone else avoid a costly mistake.
Related Posts

How to Test Your Heating Element with a $15 Multimeter
I remember the frustrating feeling all too well—my dishwasher stopped…

How to Replace a Snapped Door Cable Without a Pro
Have you ever pulled open your dishwasher door—and watched in…
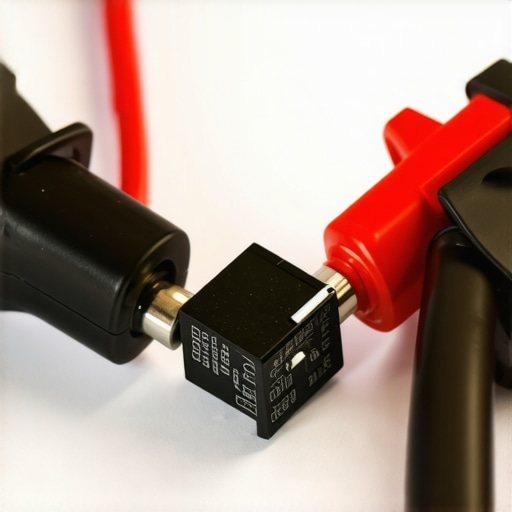
The Most Reliable Way to Test a Thermal Fuse
I was standing in a puddle of cold, greasy water…