
Ever opened your dishwasher after a cycle and wondered why your dishes still come out with spots or film? I remember the lightbulb moment when I realized my spray arms weren’t spinning properly—caused by stubborn clogs blocking water flow. Frustrating, right? Especially when you’ve already invested in a shiny new machine or are trying to squeeze more life out of your current one. I’ve been there, and let me tell you, a simple tool like a toothpick can be a game-changer in restoring your dishwasher’s performance.
Why Cleaning Your Spray Arm Matters More Than You Think
The spray arms in your dishwasher are the unsung heroes, distributing water evenly to clean your plates, glasses, and silverware. But over time, they can get clogged with mineral deposits, food residue, or soap scum. When this happens, water doesn’t spray properly, leading to incomplete cleaning or, worse, water pooling inside, which can cause mold or nasty odors. Regular maintenance is key, and the best part? It’s a task you can do yourself without calling in a pro or replacing parts unnecessarily.
Is Using a Toothpick Actually Effective for Cleaning Spray Arms?
Many folks worry that a tiny toothpick won’t do much or might damage the delicate nozzles. From my experience, a toothpick is perfect for gently removing debris from small holes and jets without risking harm. Early on, I made the mistake of using a metal pin, which scratched the plastic and made the problem worse. Trust me, sticking to non-metal tools like a toothpick or a soft-bristle brush makes all the difference. If you’re curious about the crucial parts that keep your dishwasher running smoothly, check out this essential parts guide.
Now that we understand why this simple step is worth effort, let’s dive into how you can quickly and safely clear those spray arm jets using just a toothpick. You’ll be surprised how much of a difference this makes—almost like giving your dishwasher a mini health boost. Ready to bring back that sparkling clean you deserve? Let’s get started with the step-by-step process and tips to prevent future clogs!
Remove the Spray Arm Carefully
First, locate the spray arm at the bottom of your dishwasher. Use a screwdriver if necessary to unscrew the center nut; think of it as opening a small hatch on a submarine to access its vital components. Once unscrewed, gently lift the spray arm out, being cautious to avoid damaging the plastic fittings. During my last cleaning session, I used a towel underneath to catch any falling parts, preventing a messy cleanup—and it worked like a charm.
Identify Clogged Jets and Nozzles
Inspect the small holes and jets on the spray arm for debris or mineral buildup. These tiny openings are comparable to the nozzles of a garden sprinkler—if blocked, water won’t spray effectively. I noticed a few jets had a chalky deposit, which was ruining my dishes’ shine. Clearing these obstructions is essential to restoring proper water flow.
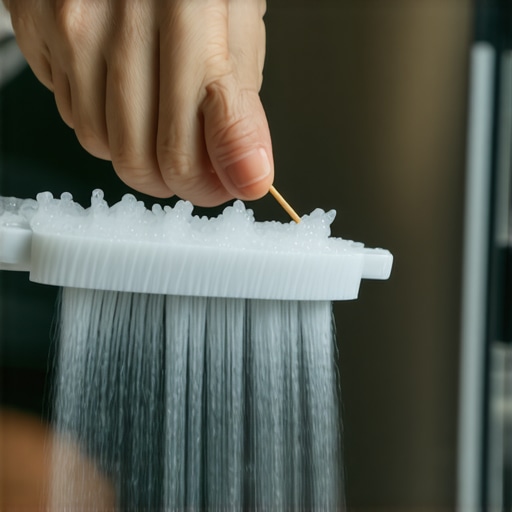
Use a Toothpick to Clear Blockages
Take a clean, wooden toothpick and gently insert it into each jet. Think of it as a tiny repair tool, like threading a needle—delicacy is key. Press down gently to dislodge any accumulated debris, being careful not to scratch or enlarge the holes. In my case, I spent about ten minutes meticulously clearing each jet, which made a noticeable difference in spray performance. Avoid using metal pins, as they can damage the plastic, leading to leaks or further clogs.
Flush Out Fragments and Residue
After clearing the jets, rinse the spray arm under warm water to wash away loosened debris. Hold the arm upright and give it a gentle shake; any remaining gunk should fall out easily. This step is like rinsing a paintbrush after detailed work—crucial for a pristine finish. During my own experience, I found some stubborn deposits that required a second cleaning, but persistence paid off with a fully functional spray arm.
Reinstall and Test Your Dishwasher
Place the spray arm back onto its mount, aligning it precisely like a puzzle piece. Screw it in securely, ensuring it spins freely without wobbling—think of tightening a bicycle wheel before your ride. Run a short cycle to observe water spray; use a flashlight if needed to check for proper jet operation. If spots or uneven spray persist, repeat the cleaning process or consider examining the pump or filter, which can also affect spray performance. For comprehensive maintenance tips, see this guide on replacing dishwasher parts.
 Many homeowners assume they understand their dishwasher’s inner workings or the best way to install and maintain it, but there are subtle nuances that can trip you up. For instance, a common misconception is that all dishwasher warranties automatically cover parts replacement without installing in a specific manner. In reality, manufacturers often specify installation guidelines that, if ignored, can void your warranty—so always verify the proper procedures via trusted sources like this kitchen prep guide. One overlooked point is that not all parts are created equal; some aftermarket replacements might seem identical but lack the precision or durability of original parts, potentially voiding your warranty if not approved by the manufacturer. Always check out essential parts knowledge before DIY swaps.
A prevalent myth is that your dishwasher’s performance isn’t affected by the initial installation setup. However, incorrect leveling, improper hose routing, or neglecting to secure connections properly can lead to recurring issues such as leaks, poor cleaning, or mechanical failures. This is especially true if you overlook the importance of the high loop in your drain hose—a simple yet critical step often skipped, leading to siphoning problems or backflow contamination. For detailed advice, see installation tips.
Experts emphasize the importance of understanding the role specific parts play in overall performance. For example, a worn door gasket might seem minor but can cause water leaks, leading to costly repairs or warranty claim denials. Identifying and replacing such components at the right time is crucial—so stay ahead with timely part replacements.
Now, have you ever fallen into any of these traps? Whether it’s ignoring manufacturer specs or selecting incompatible parts, these small errors could cost you more down the line. Let me know in the comments below or reach out through our contact page. Remember, understanding these nuances helps you maximize your dishwasher’s lifespan and ensures your warranty stays intact.
Keeping Your Dishwasher in Top Shape
Maintaining your dishwasher’s performance over time requires the right tools and a proactive approach. From specialized cleaning instruments to advanced diagnostic software, equipping yourself with the correct equipment can save you time and money in the long run.
My Go-To Maintenance Toolkit
One essential tool I recommend is a precision multimeter. It allows me to quickly check electrical components like thermostats and wiring connections during troubleshooting, ensuring safe and accurate diagnostics. I always carry a multi-tool kit that includes screwdrivers, pliers, and a torch — because sometimes, identifying the issue is as simple as tightening a loose wire or removing debris from a part.
Using Software to Diagnose Issues
Modern dishwashers often contain diagnostic modes accessible via combination button presses or via manufacturer-specific apps. These modes can quickly reveal error codes, such as a pump failure or sensor malfunction, which might not be apparent during normal operation. For example, some models allow you to connect a handheld device to read real-time data, thus predicting potential failures before they happen. This approach aligns with the trend toward smart appliance maintenance, where predictive diagnostics are becoming the norm.
How to Sustain Performance Over Time
Establishing a regular maintenance routine is crucial. This involves checking and replacing worn parts like door gaskets or filters before they cause larger issues. I recommend scheduling a comprehensive checkup at least once a year, verifying essential components such as the diswasher parts that are vital for optimal operation. Additionally, keeping detailed records of repairs and part replacements can help identify recurring issues and inform future maintenance efforts.
Looking Ahead: Technology’s Role
As appliance technology advances, expect to see innovations like AI-powered diagnostics and remote monitoring. These tools will enable homeowners to predict failures more accurately and arrange timely repairs, reducing downtime and extending appliance lifespan. By investing in the right diagnostic tools now, you’re setting yourself up for smoother maintenance routines in the future.
Question: How Do I Maintain My Dishwasher Over Time?
Consistent care involves not just cleaning and replacing parts but also staying informed about new maintenance techniques and tools. Check manufacturer updates and community forums regularly. For instance, understanding when to replace a part like a water inlet valve can prevent costly water damage—more info is available here. So, try integrating a simple step like using a multimeter to test voltage before replacing a component; this proactive measure can save you frustration and expense.

Image prompt: A technician using a digital multimeter to troubleshoot a dishwasher’s electrical connection, detailed view of hand and tool, modern kitchen setting. Alt: Technician diagnosing dishwasher wiring with multimeter. Title: Using a Multimeter for Dishwasher Maintenance
How I Discovered the Power of Gentle Tools over Metal Pins
The first time I used a metal pin to clear a clogged jet, I scratched the plastic, which led to more problems. That lightbulb moment taught me that delicate tools like a toothpick are your best friends when tackling tiny spray arm nozzles. This personal lesson made me rethink aggressive approaches and embrace finesse in DIY repairs.
Why Overlooking Installation Details Could Cost You Your Warranty
I learned the hard way that skipping manufacturer-recommended installation steps, like proper leveling or secure hose routing, can void your warranty. Taking the time to follow trusted guides like kitchen prep guides ensures your investment stays protected and performs optimally.
What I Realized About Choosing Quality Parts for Long-Term Peace of Mind
Initially, I thought generic replacement parts were fine, but I soon faced leaks and recurrent issues. That experience highlighted the importance of selecting parts supported by the manufacturer. Tools like the essential parts guide help me make informed choices that sustain my dishwasher’s performance over years.
My Eye-Opening Encounter with Smart Diagnostics
Discovering how modern dishwashers can ‘talk’ to you through error codes and diagnostics was a game-changer. Using apps and diagnostic modes allowed me to fix issues before they turned into costly repairs. This experience opened my eyes to the future of proactive maintenance and the importance of staying updated with new tech.
Related Posts
How to Clean a Turbidity Sensor Without Scratching the Lens
Have you ever looked at your dishwasher's maintenance routine and…
How to Clean a Turbidity Sensor Without Scratching the Lens
I still vividly remember the day I accidentally scratched my…
The secret to getting plastic Tupperware dry every time
Have you ever pulled a stack of plastic Tupperware out…