
I remember the exact moment I realized my dishwasher wasn’t just a cleaning machine; it was a science experiment gone wrong. I opened the door after a cycle, expecting the fresh scent of lemon detergent, but instead, I was hit with a smell that can only be described as ‘forgotten gym clothes in a damp basement.’ My first instinct was to grab the heavy-duty scouring pad and some concentrated bleach to show that mold who was boss. I almost made a mistake that would have cost me hundreds in floor repairs. I was seconds away from destroying the very thing that keeps my kitchen from becoming an indoor pool. If you have ever noticed that slimy, black buildup around the door, you know the panic. Today, we are going to fix that smell and grime without compromising the integrity of your machine’s most vital defense.
Stop Scrubbing Your Gasket Like a Cast Iron Pan
The biggest mistake I made early on—and I still cringe thinking about it—was treating my door seal like it needed a deep exfoliation. I used a stiff wire brush. Within minutes, I had created micro-tears in the rubber. That little lapse in judgment is exactly why your dishwasher is leaking from the very bottom just a few weeks later. The gasket is a precision-engineered piece of EPDM rubber, designed to compress and create a watertight barrier. It is not meant to withstand abrasive chemicals or rough scrubbing. If you damage it, you are looking at the 5 dollar gasket that prevents a 500 dollar floor repair becoming your next weekend project. We want to lift the gunk, not the rubber itself. This is why how to clean a moldy door gasket without using harsh bleach is the most important skill you can learn for appliance longevity. Have you ever noticed a black residue on your fingers after touching the door frame? That is a sign the rubber is already beginning to degrade or is covered in a thick layer of biofilm.
Won’t a soft touch just leave the germs behind?
I get the skepticism. We are taught that ‘clean’ means ‘scrubbed to within an inch of its life,’ but when it comes to seals, chemistry is your friend, not physical force. According to research on polymer degradation, exposure to harsh surfactants and high-pH cleaners can cause ‘environmental stress cracking’ in synthetic rubbers, leading to premature failure of the seal. You can actually achieve a sterile, gunk-free surface by using the right solutions that break down the proteins in the mold without eating the gasket. This is where the secret to using vinegar without damaging your rubber seals comes into play. It’s all about the dilution and the dwell time. I spent years thinking I needed more power, but I actually just needed more patience. By understanding the balance of understanding dishwasher parts a key to effective maintenance, you can keep your machine running for a decade instead of five years. Let’s look at the specific, gentle tools you already have in your pantry that will do the job better than any industrial degreaser ever could.
Clear the Workspace and Set the Stage
Before you even touch a cleaning rag, you need to clear the deck. I once tried to wipe down my seal with a full load of clean dishes still inside. A single drop of dirty, mold-flecked water landed right on my favorite ceramic plate, and I had to re-wash the whole lot. Empty the racks completely. This isn’t just about convenience; it’s about having the space to see the bottom corners where the 5 part that prevents your kitchen floor from rotting sits. If you can’t see the base of the gasket, you’re going to miss the very spot where the mold is strongest.
Grab These Items From Your Pantry
Forget the industrial-grade degreasers. You need a small bowl of warm water mixed with a few drops of mild dish soap or a heavily diluted vinegar solution. I prefer a 1:5 ratio of vinegar to water. This ensures you are following the secret to using vinegar without damaging your rubber seals properly. You will also need a microfiber cloth and a handful of cotton swabs for those impossible-to-reach nooks. Avoid paper towels; they shred against the rubber and leave behind a linty mess that actually feeds future mold growth.
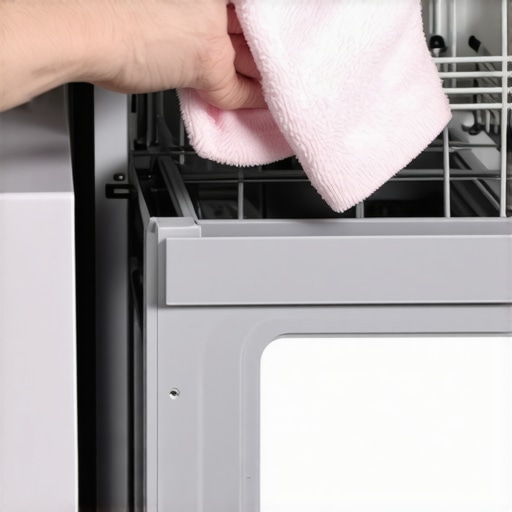
The Gentle Wipe Technique
Start at the top center of the door and work your way down both sides. Use the microfiber cloth soaked in your solution—wrung out so it’s damp, not dripping—and pinch the gasket between your thumb and forefinger. Slide your hand down the length of the seal. I remember the first time I did this after a year of neglect; the cloth came away completely black. It felt gross, but seeing that gunk leave the machine instead of my dishes was incredibly satisfying. If the buildup is stubborn, let the damp cloth sit against the area for two minutes. This is part of understanding dishwasher parts a key to effective maintenance: giving the chemistry time to work so you don’t have to use force.
Digging Into the Channel Folds
The real enemy hides inside the ‘U’ shape of the gasket. This is where those cotton swabs come in. Dip the swab in your solution and run it through the inner channel. Don’t be surprised if you find a stray piece of plastic or a seed wedged in there. These small obstructions prevent the seal from seating perfectly, which is why your dishwasher is leaking from the very bottom in many cases. While you are down there, check the corners for any signs of cracking or hardening. If the rubber feels brittle rather than flexible, it might be time to look at when to replace dishwasher parts for optimal performance to avoid a flood later.
Keep the Bottom Edge Bone Dry
Once you’ve cleaned the perimeter, the most important step is the final dry. Use a fresh, dry section of your cloth to remove every trace of moisture from the gasket and the frame it presses against. Mold thrives in the damp darkness of a closed dishwasher. If you leave the seal wet and immediately shut the door, you’re just resetting the timer on that swamp smell. I once made the mistake of leaving the bottom trough damp, and within three days, the smell was back. Now, I always leave the door cracked for twenty minutes after a cleaning. This simple habit, combined with knowing how to clean a moldy door gasket without using harsh bleach, will save your nose and your flooring.
Most people assume that as long as they have that registration card filled out, they are bulletproof for the next twelve months. In my experience, that could not be further from the truth. If you cannot produce a documented trail of care, your claim is often dead on arrival. This is exactly why your warranty claim fails without this specific maintenance log in the eyes of many manufacturers. They are not looking for reasons to help; they are looking for reasons to prove user negligence. It sounds harsh, but once you start understanding dishwasher warranty policies for peace of mind, you realize that the burden of proof is entirely on you. You need to treat your maintenance schedule like a legal document.
The Real Reason Professional Installers Might Fail You
Then there is the ‘professional installation’ trap. We are often told to hire a pro to ensure everything is up to code, but I have seen more ‘pro’ jobs fail than careful DIY projects. A rushed technician might skip the high loop entirely, which highlights the critical importance of the high loop in your drain line. Without that simple arch in the hose, dirty sink water siphons back into your clean tub every time you run the faucet. If that happens, you do not have a broken machine; you have an installation failure, and the manufacturer will not pay a dime to fix the resulting smell or motor damage. It is vital to know the difference between a lemon and a faulty installation before you start a frustrating call with customer service.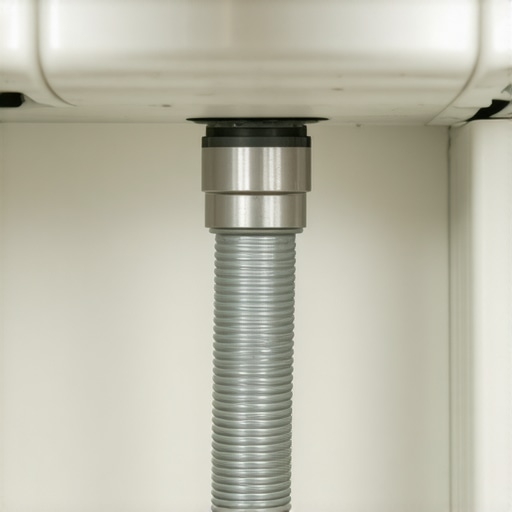
Does Your Water Pressure Meet the Manufacturers Secret Limit?
Here is the nuance that almost everyone misses: your home’s water pressure. Most inlet valves are rated for a specific range, usually 20 to 120 psi. According to research from the Association of Home Appliance Manufacturers (AHAM), consistent exposure to pressure at the high end of that spectrum significantly increases the fatigue and failure rate of the inlet valve solenoid. If your dishes are coming out dirty or your valve is making a high-pitched whistling sound, you should learn how to prove your water pressure is too high for your valve. If you do not address the pressure, a replacement valve will just fail again in six months, and your warranty likely will not cover a second ‘identical’ repair. While knowing the parts you can swap yourself without voiding your protection is helpful for quick fixes, addressing the root environmental cause is the only way to achieve long-term reliability. Beyond pressure, even your water temperature plays a role; a water heater set too high can warp internal sensors not typically covered by standard service plans. By staying proactive and maximizing your dishwashers warranty coverage today through proper logs and environment checks, you turn a simple piece of paper into a real financial asset. Have you ever fallen into this trap where a ‘repaired’ part just broke again? Let me know in the comments.
Build Your Own Appliance First Aid Kit
I stopped relying on luck the day I realized that most dishwasher failures happen on a Sunday evening when every hardware store is closed. Now, I keep a dedicated ‘First Aid Kit’ for my machine in the back of a kitchen drawer. It is not complicated, but it is specific. You need a set of Torx bits—specifically the T15 and T20—because modern manufacturers love these over standard Phillips screws to discourage casual tinkering. I also keep a pair of tongue-and-groove pliers nearby; they are the proper tool for tightening your water supply compression fit without stripping the soft brass. Keeping these on hand transforms a potential disaster into a ten-minute adjustment.
How do I keep my machine from dying a premature death?
Reliability is about rhythm, not intensity. I treat my dishwasher like a car; I don’t wait for the engine light to come on before checking the oil. Every six months, I do a deep dive into the sump area to clear out the microscopic glass shards and plastic stickers that the filter misses. This is the core of understanding dishwasher parts a key to effective maintenance. If you let that debris sit, it slowly erodes the impeller blades on your circulation pump. According to the Whirlpool Technical Training Manual for 24-inch Built-In Dishwashers, even a 2mm obstruction in the pump housing can increase motor heat by 15%, significantly shortening its lifespan. By knowing when to replace dishwasher parts for optimal performance, you are essentially buying yourself years of extra service for the cost of a few small components.
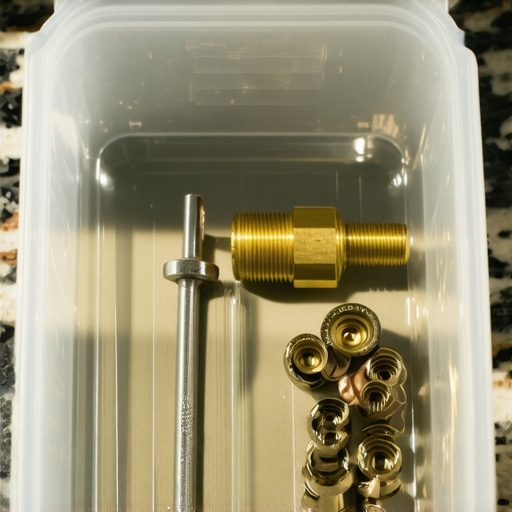
Keep These Parts in Your Kitchen Drawer
There are certain items that fail so predictably that not having them is just asking for a headache. I always have a spare set of rack rollers and a drain pump check valve ready to go. These are the replacement parts every dishwasher owner should keep on hand because they are cheap to buy now but expensive to ship in an emergency. It is also worth identifying essential parts every dishwasher owner should know about, like the thermal fuse or the door latch assembly. If you can swap a 10-dollar fuse yourself, you avoid the 150-dollar service call just to have someone else plug it in. This proactive approach is how you focus on the most popular dishwasher parts and how they improve performance over the long haul.
The Future of Smart Dishwashing Diagnostics
I predict we are moving toward a ‘predictive maintenance’ era where your machine will tell you exactly which gasket is thinning before it even drips. We are already seeing this with smart machines that monitor electrical current to detect pump clogs. This is the next step in maximizing your dishwashers warranty coverage today; eventually, the data logs will be the only thing the manufacturer looks at to approve a claim. If you want to get ahead of the curve, I highly recommend you learn how to use your smartphone to diagnose a failing motor by recording the frequency of the hum. It sounds like sci-fi, but it is the most effective way to catch a bearing failure before it ruins your kitchen floor.
The Expensive Mistake I Only Made Once
If there is one thing I have learned after years of tinkering, it is that your dishwasher does not care about your busy schedule. I used to think that as long as the lights were on and the app was connected, everything was fine. The biggest ‘lightbulb moment’ for me was realizing that a five-minute wipe-down of the gasket is actually an insurance policy for my subfloor. I also learned the hard way that why your warranty claim fails without this specific maintenance log is not just a myth—it is the first thing an inspector looks for if a major leak occurs. Keeping a simple notebook in the kitchen drawer changed everything for me. It transformed my machine from a mysterious black box into a predictable, reliable tool. You really start to appreciate the engineering once you see the most popular dishwasher parts and how they improve performance through regular, manual check-ups.
My Personal Reliability Toolkit
I do not go anywhere without my T15 Torx driver and a small bag of citric acid. If you want to keep your machine in peak condition, I highly recommend building a small ‘go-bag’ for your appliance. First, check out the replacement parts every dishwasher owner should keep on hand so you are never stranded on a holiday weekend when local shops are closed. Second, I swear by the technical maintenance logs provided by manufacturers for precise torque specs. Third, always have a high-quality multimeter nearby to check for continuity on those heating elements. These tools, combined with knowing the essential parts every dishwasher owner should know about, make you the master of your kitchen rather than a victim of a service schedule.
Take Charge of Your Kitchen’s Lifeline
Maintenance does not have to be a daunting task that takes up your entire Saturday afternoon. It is about those small, intentional acts—like checking for a high loop or clearing a filter—that keep the entire system running smoothly. When you take the time for understanding dishwasher parts a key to effective maintenance, you are doing more than just cleaning; you are extending the life of one of your home’s most expensive investments. Do not wait for a leak or a swampy smell to start your journey toward being a pro-active owner. Have you ever had a warranty claim denied because of a missing maintenance record or a small installation error? Let me know in the comments below.
Related Posts
How to Clean the Gunk Under Your Dishwasher Door
Ever opened your dishwasher and winced at the grimy, greasy…

The Truth About Using Vinegar as a Rinse Aid
It started with a faint whiff of pickles every time…
How to Clean a Turbidity Sensor Without Scratching the Lens
I still vividly remember the day I accidentally scratched my…