
I remember standing in my kitchen, sweat dripping onto my brand-new granite, holding a drill bit that was definitely not meant for stone. I was trying to follow the standard top-mount instructions, but I was basically staring at a $2,000 mistake waiting to happen. If you’ve ever felt that panic of realizing your expensive countertops won’t take a screw, you know exactly what I’m talking about. I almost lost my mind trying to make the traditional method work before I realized there was a much simpler path. Today, I am going to show you how to skip the heartache and use a side-mounting bracket kit instead. It is the absolute secret weapon for anyone with stone or solid-surface tops, and honestly, it is way less stressful than trying to be a part-time stonemason.
Why Your Kitchen Design Dictates Your Bracket Choice
Most people assume a dishwasher has to be bolted to the underside of the counter, but that is old-school thinking. If you are preparing your kitchen for dishwasher installation and you see granite, quartz, or marble, you need to pivot immediately. I made the massive mistake early on of thinking I could just use industrial adhesive to stick the top brackets to the stone. Spoiler: it didn’t hold. The first time I pulled the heavy bottom rack out, the whole machine tipped forward like a sinking ship. You have to understand that common dishwasher parts and their role in proper installation include these specialized brackets for a reason. They shift the anchor point from the impossible stone above to the accessible wood cabinets on the sides. It is a more stable connection and it saves your warranty too. Have you ever had your dishwasher nearly fall on your toes because it wasn’t secured properly? It’s a terrifying rite of passage for many DIYers.
Will Side-Mounting Actually Keep My Machine from Tipping?
This is the biggest fear I hear from neighbors and friends. They worry that side screws won’t have the ‘bite’ that top screws do. I can tell you from personal experience that the proper way to secure a side-mount dishwasher bracket creates a rock-solid foundation that actually lasts longer. When you secure your machine to quartz countertops using the side method, you are leveraging the structural integrity of your cabinetry. According to Consumer Reports, improper installation is one of the leading causes of service calls and performance complaints, often because the unit isn’t level or secure. By using the side-mount kit, you ensure the tub stays perfectly aligned, which means the 5-dollar gasket that prevents a 500-dollar floor repair can actually do its job. If the unit shifts, that seal breaks, and your floor is history. I learned that the hard way when I ignored a slight wobble and ended up with a damp subfloor. Let’s make sure that doesn’t happen to you.
Check Your Parts Box for These Specialized Brackets
Before you even slide that machine into the cavity, you need to locate the side-mount kit. Many modern units come with these as standard, but if you bought a floor model or a scratch-and-dent, you might be looking at a bag of generic clips. Think of these brackets as the transition team; they bridge the gap between the metal tub and your wooden cabinet frames. If you don’t have them, you are essentially trying to play a game of Operation with a $1,000 appliance. According to the common dishwasher parts and their role in proper installation, these brackets are specifically designed to flex slightly as the machine vibrates. If you use a rigid DIY hack instead, you risk the screws backing out within six months. I remember once trying to make my own brackets out of plumbing strap because I was too impatient to wait for a delivery. It worked for exactly three loads before the machine started walking out of the cabinet like it was trying to escape. Don’t be like me; use the essential parts every dishwasher owner should know about to ensure a professional finish.
Leveling Your Machine the Right Way
A side-mount installation is only as good as the floor underneath it. If your dishwasher isn’t level before you drive those side screws, you are locking in a permanent tilt. This isn’t just about aesthetics; it is about drainage. Imagine trying to drain a bathtub that is tilted uphill—the pump has to work twice as hard. I always tell people to focus on the one bolt you must check before leveling your machine, which is usually the rear leveling leg adjustment screw located at the bottom front. 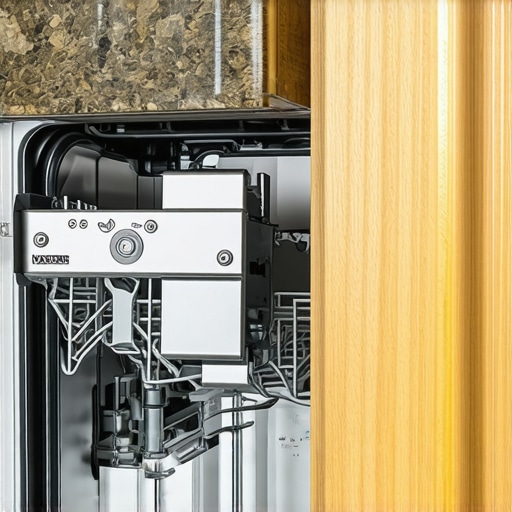 Use a long level across the front and the sides. Once the bubble is dead center, you have the green light to anchor. If you skip this, the door might not seal correctly, and you’ll find yourself searching for the 5-dollar gasket that prevents a 500-dollar floor repair much sooner than you expected.
How to Anchor the Unit Without Splitting Your Cabinets
Now for the actual ‘meat’ of the job: driving the screws. You aren’t just aiming randomly into the wood. You need to find the thickest part of the cabinet face frame. Most people make the mistake of driving a screw straight in and splitting the wood. I did this on a high-end cherry cabinet once and had to spend four hours with wood filler and a touch-up pen. The secret is the pilot hole. Use a drill bit that is slightly smaller than your screw. This clears a path for the threads without stressing the wood fibers. Following the proper way to secure a side-mount dishwasher bracket involves checking that the screw head sits flush within the bracket’s recessed hole. If it sticks out, it can catch on the dishwasher door gasket and tear it. While you are in there, make sure you have followed the correct way to route wiring through a kitchen cabinet so you aren’t pinching any lines while you tighten everything down. Referencing a diy dishwasher installation step-by-step guide during this phase keeps you from missing the small details that lead to a rock-solid, vibration-free setup.
I used to think that as long as the machine turned on and the water stayed inside, I had won the DIY lottery. But after years of fixing my own mistakes and helping friends out of theirs, I’ve realized that the ‘hidden’ nuances of installation are what actually determine if your machine lasts ten years or two. One of the biggest traps people fall into is the allure of the ‘universal’ installation kit. While these are convenient, they often lead to major issues. For example, the problem with universal hoses for high-end European models is that they frequently lack the specific burst-pressure ratings or specialized fittings required by brands like Bosch or Miele. I once saw a ‘universal’ drain hose slip off a high-pressure pump simply because the diameter was off by a fraction of a millimeter. It flooded a brand-new hardwood floor in minutes.
Does Using Third-Party Parts Actually Kill Your Warranty Coverage?
This is where the fear-mongering usually begins. Most big-box retailers will tell you that if you touch the machine or use a non-branded part, your warranty is toast. In my experience, that’s a gross oversimplification. Under the Magnuson-Moss Warranty Act in the United States, manufacturers are actually prohibited from voiding a warranty just because an aftermarket part was used, unless they can prove that specific part caused the failure. However, knowing what happens to your coverage if you use third-party parts is vital. If you install a cheap, off-brand pump and it leaks, the manufacturer is well within their rights to deny the claim for water damage. This is why I always advocate for the real difference between aftermarket and factory gaskets; saving five dollars on a seal is never worth the risk of a thousand-dollar repair bill later.
Another nuance that most beginners ignore is the ‘maintenance log’ trap. You can have a perfectly installed machine, but why your warranty claim fails without this specific maintenance log is usually due to a lack of proof of care. If your heating element burns out because of calcium buildup, and you can’t prove you’ve been descaling the unit in a hard-water area, the manufacturer will label it ‘user neglect.’ It’s a harsh reality that I learned the hard way after a very expensive service call. I highly recommend understanding dishwasher warranty policies for peace of mind before you ever run that first cycle. It isn’t just about the hardware; it’s about the paper trail you leave behind. Have you ever had a warranty claim denied for a silly reason? Let me know in the comments—I’d love to hear your horror stories and see if we can find a workaround together. Ultimately, the goal is maximizing your dishwashers warranty through proper parts selection from day one, so you aren’t left holding the bill when a sensor inevitably decides to quit.
Following up on those installation nuances, let’s talk about the gear that actually stays in my toolbox. After years of stripped nuts and slow leaks, I’ve realized that generic pliers are the enemy of a dry kitchen. I always recommend using the proper tool for tightening your water supply compression fit, specifically a dedicated flare nut wrench. This isn’t just about making the job easier; it is about preventing the microscopic deformities in the brass that eventually lead to high-pressure blowouts. When you are working in the tight space under a sink, you don’t want a tool that slips. I’ve seen enough ‘hand-tightened’ valves fail at 3 AM to know that precision matters more than brute force.
The Specialized Tools That Actually Make a Difference
Beyond the wrenches, there is one item I never start an installation without: a high-quality digital level. While a bubble level works, a digital one helps you account for the slight pitch required for drainage. Most pros don’t talk about it, but a dishwasher slightly tilted toward the rear can actually help the sump pump clear water more effectively. While you are refining the physical setup, remember parts to check when installing a dishwasher for long-term performance, like the inlet valve screen. If you have older galvanized pipes, a single speck of rust can clog that screen on day one, leaving you wondering why your brand-new machine isn’t filling. I personally pull that screen and clean it twice a year now, regardless of whether the machine is acting up or not.
Don’t Let Hard Water Kill Your Heating Element
The biggest silent killer I see in my neighborhood is mineral buildup. You might notice your dishes getting a bit cloudy, but what you don’t see is the thick crust forming on the heater. This is exactly why your hard water is killing your heating element. It acts like insulation, forcing the element to run hotter and longer until it literally cracks. My personal secret weapon is citric acid. I’ve found that the eco-friendly way to descale your machine with citric acid is actually more effective and far cheaper than those fancy scented cleaning pucks. Just a tablespoon in the detergent cup on an empty hot cycle once a month keeps the internals looking like polished chrome. It’s a five-cent fix for a hundred-dollar problem.
How do I keep my dishwasher running like new for years?
Consistency is more important than deep cleaning. According to the IAPMO Uniform Plumbing Code Section 807.4, the physical configuration of your drain line is the primary defense against cross-contamination. I always double-check the critical importance of the high loop in your drain line during my monthly checks. If that loop sags, dirty sink water will siphon back into your clean tub. Beyond the plumbing, you need to know when to replace dishwasher parts for optimal performance. Don’t wait for a flood; if you see a gasket starting to flatten or turn brittle, swap it immediately. It is much cheaper to be proactive than to call a restoration company for a soaked subfloor.
Smart Sensors and the Future of Kitchen Maintenance
Looking ahead to 2025 and beyond, I predict we are going to see a massive shift toward predictive AI diagnostics. We are already seeing machines that can detect the specific vibration of a failing bearing. I love showing people how to use your smartphone to diagnose a failing motor using frequency-analysis apps. In the near future, your dishwasher won’t just tell you it’s broken; it will order its own replacement part before you even notice the dishes aren’t quite clean. For now, take ten minutes today to peek under your sink and verify you have a high loop in your drain line—it is the simplest way to prevent that ‘swamp smell’ from ever starting.
Lessons Learned the Hard Way Between the Cabinets and the Floor
Reflecting on my first few attempts at top-tier dishwasher installation, I see a path littered with unnecessary stress and minor floods. I used to believe that if the machine didn’t move when I yanked it, I was done. The truth is, ‘stable’ and ‘secure’ are two different things. A machine can be stable but still vibrate enough to slowly loosen the drain line over six months. I also learned that ‘level’ isn’t just an aesthetic choice; if the machine tilts slightly forward, water pools against the door gasket instead of the sump, leading to those mysterious slow drips. My biggest lightbulb moment was realizing that expert advice on dishwasher installation troubleshooting often comes down to the basics we ignore, like ensuring the side-mount brackets are exactly flush so they don’t impede the door hinges. If you feel even a tiny bit of resistance when closing the door, stop and check the bracket alignment immediately.
The Gear I Actually Use When the Camera Is Off
I’ve trimmed my installation kit down to the absolute essentials that guarantee a leak-free result every single time. First, I never use generic pliers for water lines; I only use a dedicated flare nut wrench as it is the proper tool for tightening your water supply compression fit without damaging the brass. Second, I keep a small stash of essential parts for troubleshooting dishwasher installation issues, including high-torque worm gear clamps that outperform the flimsy spring clips often found in the box. Lastly, I always keep a bag of citric acid on hand to run an initial cleaning cycle, ensuring any factory residues are cleared out before the first load of dishes. These simple tools turn a stressful afternoon into a predictable, professional-grade job.
#IMAGE_PLACEHOLDER_E#
Set the Foundation for a Decade of Dry Floors
Don’t let the heavy metal and complex wiring of a modern appliance intimidate you. When you take the time to understand common dishwasher parts and how to replace them effectively, you aren’t just saving a hundred bucks on a service call—you are taking full control over the longevity of your kitchen. By opting for side-mounting and double-checking your leveling, you ensure that your dishwasher installation is a one-time event rather than a recurring headache. You have the tools, you have the knowledge, and now you have a rock-solid machine ready to work. Have you ever encountered a cabinet that was too wide or too narrow for your side-mount brackets? Let me know in the comments how you handled the gap!
Related Posts
Why Reusing an Old Copper Water Line is a Disaster Waiting to Happen
I vividly remember the moment I realized my quick fix…
Why Your Dishwasher Needs a High-Loop More Than a Fancy Filter
I'll never forget the day my dishwasher started leaking for…
The correct hose length for a proper dishwasher installation
It was late on a Saturday afternoon when I finally…