
I was flat on my back, a cold puddle of gray water soaking into my favorite flannel shirt, and a flashlight clenched between my teeth. My dishwasher had decided to go on strike right before a dinner party, and I was determined to fix it myself. I’d grabbed a generic ‘universal’ seal from the hardware store, thinking I knew my machine well enough. I didn’t. That generic part was about half an inch too thick, and trying to force it in nearly snapped the door hinge. I felt like a total failure, all because I didn’t have the one piece of data that actually matters: the specific model number. It’s not the name on the front of the door; it’s a secret code hidden in the shadows.
The Truth About Why Your Manual Is Lying to You
You probably have a junk drawer filled with manuals, and if you’re like I was, you think that glossy booklet with ‘Series 500’ on the front is your golden ticket. It isn’t. Manufacturers often use one manual for an entire line of appliances, but the internal guts—the essential parts every dishwasher owner should know about—can vary wildly between sub-models. If you order a pump or a motor based on the manual alone, you’re basically gambling with your weekend. Trust me, I made that mistake early on and ended up with a garage full of plastic bits that didn’t fit a single thing I owned. Today, I’m going to show you exactly where to look so you never have to play the guessing game again.
Is hunting for a tiny sticker really worth the effort?
You might be thinking, ‘Can’t I just look it up by the brand and the year I bought it?’ In a word: No. According to Consumer Reports, appliance manufacturers frequently update internal components mid-production cycle without changing the outward appearance of the unit. This means two machines that look identical on the showroom floor could have completely different common dishwasher parts inside. Finding that specific alphanumeric string is the only way to ensure your replacement water inlet valve or spray arm actually fits on the first try. Plus, having the right number is the only way to ensure your warranty claim doesn’t fail before it even starts. Have you ever spent an hour on hold with customer service only to realize you were looking at the wrong ID tag?
Where These Sneaky Labels Actually Hide
The model number isn’t usually on the back of the machine because, let’s be honest, who wants to pull a hundred-pound appliance out of the cabinetry just to read a label? Instead, designers hide them in plain sight. Most often, you’ll find the ‘rating plate’—that’s the industry term for the sticker—lasered onto the stainless steel inner door frame or tucked along the side of the tub. Open the door and look at the very top edge, or run your hand along the right-hand side. Sometimes it’s printed in a font so small you’ll need your phone’s camera to zoom in, but it’s there. Finding this number is the first step toward a successful repair and, more importantly, keeping your kitchen floor dry.
Snap a Photo Before You Get Started
Once you locate that sticker on the inner door frame or behind the kickplate, don’t just try to memorize it. I once spent twenty minutes upside down with a flashlight, certain I’d memorized ‘WDT750SAKZ,’ only to realize halfway through ordering that I couldn’t remember if the last digit was a ‘2’ or a ‘Z’. Grab your smartphone and take a clear, well-lit photo. This alphanumeric string is your DNA map. Without it, you are likely to buy essential parts for troubleshooting dishwasher installation issues that belong to a completely different revision of your machine. Manufacturers are notorious for changing a wiring harness or a seal mid-year, and that tiny ’01’ or ’02’ at the end of your model number tells the whole story.
Why Generic Parts are a Gamble You Shouldn’t Take
It’s tempting to grab the $15 pump off a random marketplace site instead of the $60 OEM (Original Equipment Manufacturer) version. I learned this the hard way when I replaced a drain pump in my old Bosch. The generic part looked identical, but the internal impeller was made of a thinner plastic that shattered the moment a stray popcorn kernel made its way past the filter. Not only did I have to do the job twice, but the leak from the cheap housing ruined the base of my cabinet. Always consider the difference between oem and generic water inlet valves and pumps; why oem pumps outlast cheap alternatives every time isn’t just marketing—it’s about the tolerances of the materials used. Using the wrong part can lead to a supply line failure that turns your kitchen into a pond.
The Proper Way to Prep for a Part Swap
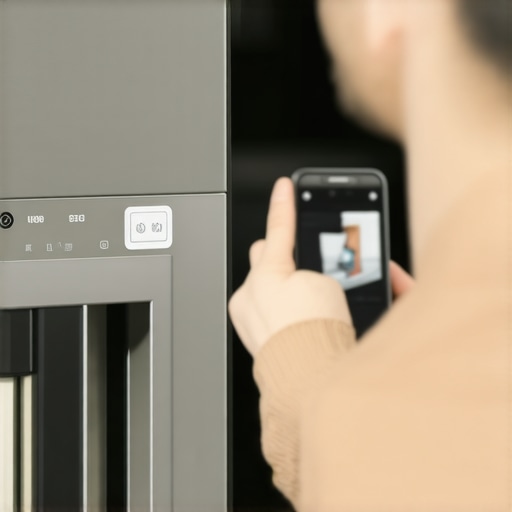
Before you even loosen a single screw, you need to ensure your environment is ready. How to prepare your kitchen for dishwasher installation or repair starts with power and water. Never assume the ‘off’ switch on the front panel actually cuts power to the board. I’ve seen DIYers get a nasty surprise because they didn’t flip the breaker. Once the power is killed and the water supply is shut off, have a shallow pan and a few old towels ready. Even a ‘drained’ machine holds about a quart of water in the sumps and lines. If you’re replacing a faulty water inlet valve in 15 minutes, that water is going to hit your floor the second you disconnect the compression fitting.
Protecting Your Warranty During the Process
If your machine is still relatively new, your biggest hurdle isn’t the repair—it’s the paperwork. Most manufacturers will void a claim if they see evidence of ‘unauthorized’ parts. This is why maximizing your dishwashers warranty through proper parts selection is critical. If a technician comes out later for a major tub leak and sees a non-standard heating element, you’re on the hook for the full bill. How to get your warranty claim approved on the first try often comes down to showing that you used certified components and kept your receipts. I always staple my parts receipt to the original manual and keep it in a dedicated ‘appliance folder’ so I can prove I followed the rules if a major failure happens later.
Checking for Hidden Damage While You Are In There
While you have the kickplate off to replace a frayed door cable without a specialist, take two minutes to inspect the surrounding area. Check for slow leaks behind the kickplate or signs of calcium buildup on the motor housing. Finding these small issues early is the difference between a $20 fix and a $2,000 floor restoration. If you see white, crusty deposits, it’s a sign of hard water damage, which can affect your warranty eligibility if you aren’t careful. Use a bright light to check the thermal fuse and wiring for any signs of scorching, especially if your machine has been tripping the GFCI outlet lately.
Everyone talks about hard water being the ultimate appliance killer, but here is a truth that catches most homeowners off guard: perfectly soft water can be just as destructive. While we’re conditioned to fear limescale, the Association of Home Appliance Manufacturers (AHAM) has found that overly softened water is highly aggressive. It doesn’t just etch your glassware; it can actually leach minerals directly from the metal components of your machine. This is exactly why soft water is ruining your dishwasher interior faster than hard water in many modern homes. If you’ve noticed a rainbow-like sheen on your stainless steel tub that won’t scrub off, you aren’t dealing with dirt—you’re dealing with chemical erosion.
Soft Water Might Be Killing Your Machine Faster
The chemistry of your water changes how every part of your machine functions. When the water is too ‘hungry’ for minerals, it attacks the heating element and the seals. This leads to premature failure that often looks like a manufacturing defect, but a savvy technician will spot the signs of etching immediately. To stay protected, you need to find a balance. This is a nuance often missed in understanding dishwasher parts a key to effective maintenance. If you have a whole-home softener, check your manual to see if you should be bypassing the internal salt reservoir or adjusting the hardness settings on the control board.
Can a smart sensor actually lie to you?
We’ve entered the era of the ‘connected’ kitchen, but more sensors often mean more confusion. I recently helped a friend who was panicking because their phone kept sending leak alerts, yet the floor was bone dry. It turns out, high humidity from a nearby oven or even a slightly loose vent can trigger those sensitive probes. Understanding why your smart app is reporting a leak that is not there can save you a $150 service call. Sometimes, a simple reset of your dishwasher control board is all it takes to clear a ‘ghost’ error code that’s holding your appliance hostage.
Don’t Let an Old Fitting Ruin a New Machine
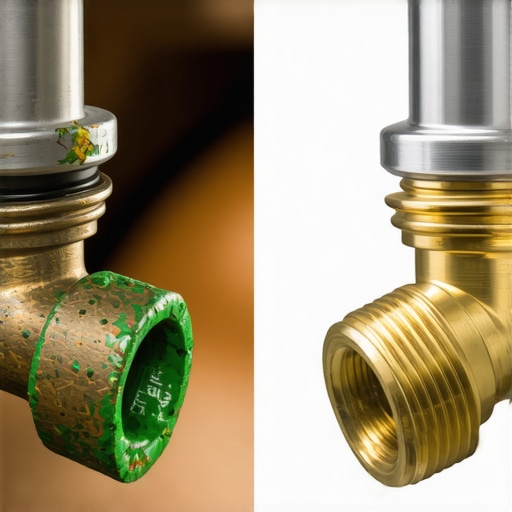
One of the most expensive ‘oops’ factors I see involves the smallest parts. When you’re swapping a unit, it’s tempting to look at that old brass elbow and think, ‘It’s metal, it’s fine.’ It isn’t. Metal fatigue and mineral deposits make those old connections brittle. This is why your installer refuses to reuse your old brass fittings—the risk of a pinhole leak starting three weeks after the installation is simply too high. Always insist on the most durable braided steel hoses and fresh connectors. Saving five dollars on a fitting is the fastest way to end up needing to salvage a flooded kitchen.
Your Professional Receipt is Your Shield
Finally, let’s talk about the paperwork trap. You might be a DIY master, but if you don’t keep a paper trail, your warranty is effectively a suggestion. Manufacturers are increasingly strict; why your warranty claim fails without an authorized receipt is a common heartbreak for many. Even if you do the work yourself, keep the receipts for the parts covered by warranty. Without that proof of purchase and a date-stamped record, you’re essentially uninsured. Have you ever fallen into this trap of losing a receipt and paying full price for a part that should have been free? Let me know in the comments. Keeping a digital folder for maximizing your dishwashers warranty coverage is the best twenty minutes of administrative work you’ll ever do.
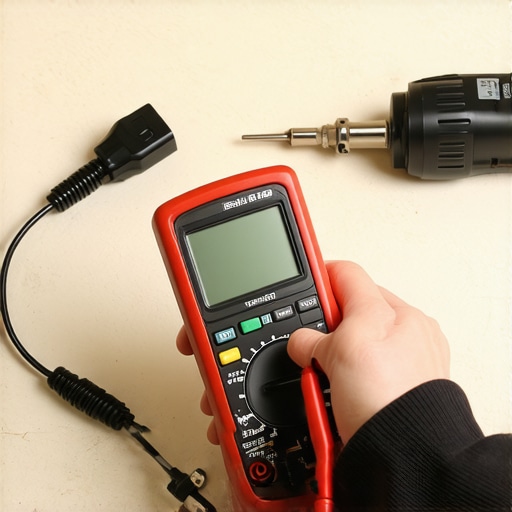
I used to think a standard screwdriver and a ‘can-do’ attitude were enough to handle any kitchen crisis. Then I spent three hours trying to reach a drain clamp with a straight-blade driver, only to realize I was stripping the screw head into oblivion. My knuckles were bleeding, and the dishwasher was still broken. That was the day I invested in a 1/4-inch flexible nut driver. It changed everything. If you want to stop dreading repairs, you need a small, specialized toolkit. Beyond the nut driver, the most important tool you can own is a digital multimeter. When your machine won’t start, guessing if the board is dead is expensive. Using the most reliable way to test a thermal fuse with a meter takes thirty seconds and saves you from buying a $200 control module you don’t actually need.
The two tools that saved my knuckles
I personally use a Klein Tools MM400 because it’s rugged enough to survive being dropped on a tile floor, but any basic unit will work when you are learning how to test your thermal fuse with a basic multimeter. These tools allow you to move from ‘I think it’s broken’ to ‘I know this part has no continuity.’ This level of certainty is what separates a frustrating weekend from a quick fix. According to the International Association of Certified Home Inspectors (InterNACHI), nearly 8% of early appliance failures are actually just small electrical faults or drainage blockages that are misdiagnosed as ‘total losses.’ Don’t let your machine become a statistic because you didn’t spend twenty bucks on a tester.
How do I keep my dishwasher from dying before its time?
Maintenance isn’t just about running a cleaning cycle once a year. It’s about being proactive with the parts to check when installing a dishwasher for long-term performance. Every three months, I pull out the lower rack and go hunting for the hidden drain screen you probably forgot to clean. This isn’t the main filter; it’s a secondary mesh that catches the tiny grit that eventually grinds down your wash motor’s bearings. If you hear a high-pitched whine during the cycle, that grit is already doing its work. Knowing when to replace dishwasher parts for optimal performance—like swapping out your spray arm seals the moment they feel brittle—is the secret to hitting that 12-year lifespan instead of the average 9-year mark.
Predicting the future of your kitchen
We are moving toward a world where your dishwasher will tell you exactly which seal is about to fail before you see a single drop of water. I’ve already started experimenting with vibration sensors that sync to my phone, and the tech is getting scarily accurate. Until your machine is that smart, you have to be the sensor. I highly recommend performing the best way to test for a slow leak behind the kickplate at least twice a year. Just lay a single sheet of paper towel under the motor housing and check it after a heavy load. If it’s crinkled or damp, you’ve caught a disaster in the making. My big advice for you today? Go grab your flashlight, pull that kickplate off, and see what’s actually happening under there. You might just save your floor and your sanity.
Hard Truths About Dishwasher Longevity I Learned the Hard Way
After years of wrestling with appliances, I realized that the Series name on the door is just marketing fluff. The real power is in the specific alphanumeric code hidden on the frame. If you ignore that, you’re buying components for a machine you don’t even own. I also learned that understanding dishwasher warranty policies for peace of mind isn’t just about reading fine print; it’s about documenting every success and repair. Also, don’t ignore your water quality. If you’ve got a softener, keep an eye on it—over-softening can be a silent killer for your stainless steel interior through chemical etching. Finally, never underestimate a simple blockage; common dishwasher parts and their role in proper installation often get overlooked, but they are the foundation of a dry kitchen floor.
My Toolkit for a Leak-Free Kitchen
I never start a job without my big three. First, a 1/4-inch flexible nut driver—it saves your knuckles and reaches the clamps a standard driver can’t touch. Second, a reliable digital multimeter. It’s the only way to stop guessing if a sensor is dead. Finally, I keep a digital scan of every receipt in a dedicated folder. This simple habit is the cornerstone of maximizing your dishwashers warranty coverage today. These tools turn a panicked Sunday afternoon into a controlled, professional-grade repair session. If you are just starting out, check what your dishwasher warranty doesn’t cover and how to avoid fees so you know exactly where your DIY limits should be.
Step Into the Role of the Expert
You don’t need a trade certificate to take care of your home; you just need the right data and a little patience. Whether you’re following a diy dishwasher installation step-by-step guide or just swapping a filter, you are the best advocate for your appliance. Knowing how the most popular dishwasher parts and how they improve performance allows you to stay ahead of the curve and extend the life of your machine by years. Don’t let a tiny leak or a confusing model number stop you from mastering your kitchen. Have you ever struggled with finding the right model number on your machine? Let me know in the comments below!
Related Posts
How to Restore a Rusted Dishwasher Tine in Minutes
I reached for my favorite white dinner plate, the one…

The Only Three Parts You Should Never Buy From a Third-Party Seller
I remember the moment I realized I’d been wasting money…
The $8 Part That Prevents Your Dishwasher From Humming
It was late on a Sunday evening when I first…