There was a moment in my kitchen when I opened my dishwasher after what should have been a simple cycle, only to find standing water and a strange, unpleasant smell. I felt that sinking feeling—had I missed something? Turns out, hidden blockages in the sump basin can cause all sorts of headaches, and I was about to learn that the hard way. If you’ve ever experienced a dishwasher that just won’t drain or a cycle that seems to go haywire, you’re not alone. The good news? There’s a way to uncover those sneaky obstructions before they turn into costly repairs or warranty claims.
Uncovering the Silent Drain Saboteurs
Many homeowners overlook the importance of inspecting the sump basin, thinking that if the machine runs, everything’s fine. But those hidden blockages—like accumulated debris, grease, or even small objects—can silently build up over time, disrupting the drainage system. Regular inspection and cleaning can prevent minor issues from escalating into major failures. In my early days, I made the mistake of ignoring that faint gurgling noise, assuming it was just a normal part of operation. That was a mistake that taught me the value of proactive maintenance. To help you avoid the same pitfalls, I’ll walk you through how to effectively inspect your sump basin for hidden obstructions.
Is Inspecting the Sump Basin Really Worth the Effort?
Absolutely. Skipping this step could mean the difference between a quick fix and a full-blown repair. Plus, understanding what’s happening beneath the surface can extend the lifespan of your appliance. I admit, my initial hesitation was based on fear of making things worse or getting dirty, but taking a few simple steps has saved me countless headaches. Keep in mind, a common mistake I made early on was neglecting to check for early signs of debris buildup, which can be easily avoided by regular inspections. If you want more tips on maintaining your dishwasher’s longevity, don’t forget to visit our comprehensive guide on dishwasher parts.
Now, let’s get into how you can inspect your sump basin effectively and spot those hidden culprits before they cause real trouble.
Prepare for Inspection
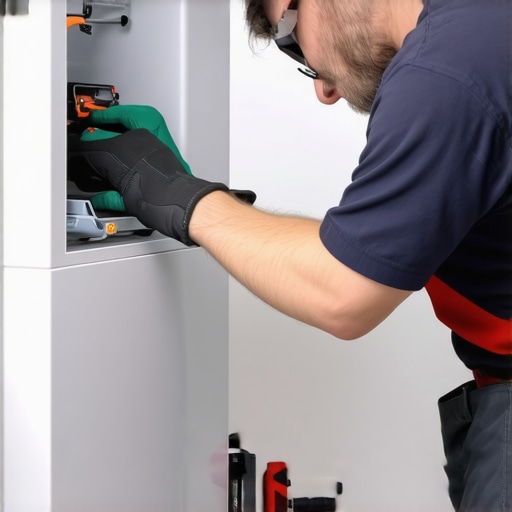
Before beginning, unplug your dishwasher to ensure safety, and gather necessary tools such as a screwdriver, gloves, and a cloth. Think of this process like opening the hood of your car; you need to access internal components carefully. I recall a time when I mistakenly skipped this step and accidentally dropped a small screw into the drainage system. This made me realize the importance of methodical preparation. For a thorough understanding of your appliance, visit our essential parts guide.
Access the Sump Basin
Remove the Lower Panel
Most dishwashers have a kickplate or lower panel that covers the sump basin. Use a screwdriver to unscrew and carefully detach this panel, like removing a cover to a hidden compartment. Remember to keep screws in a safe place to prevent losing them later. When I did this for the first time, I found myself lying on the floor surrounded by tiny screws, but it was worth it for the clear access. To ensure your installation is optimal, check the installation parts.
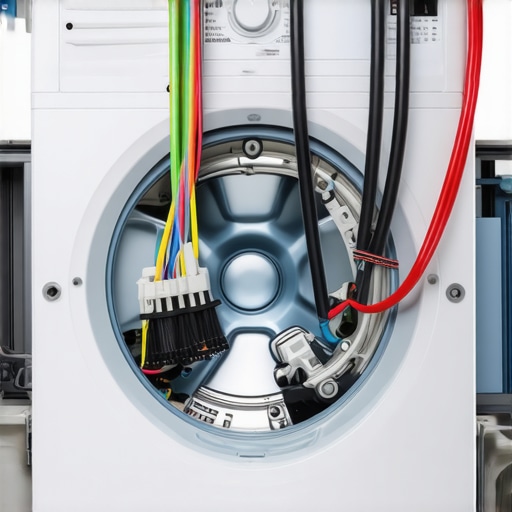
Locate the Sump Basin
The sump basin is typically situated at the bottom center, housing the drain pump and impeller. It’s usually a round or rectangular compartment that collects water and debris. Visualize it as the trap under your sink—designed to collect gunk but prone to clogging if neglected. During my inspection, I noticed a buildup of greasy residues, which threatened to block water flow. Addressing this early prevented a potential overflows and costly repairs, emphasizing the importance of routine checks. For more on parts that commonly fail, see our common parts guide.
Remove Debris and Blockages
Extract Debris Carefully
Using gloves, gently remove any visible debris, like hair, grease, or small objects lodged in the impeller or drain pathway. Think of this like cleaning out a clogged filter—removing the biggest obstructions first makes a real difference. I once pulled out a tiny plastic piece from a clogged impeller, which restored proper drainage and saved my warranty claim. If you’re unsure about what to remove or how, check our repair techniques.
Clear and Clean the Area
Use a cloth or a small brush to wipe away any grease or buildup. If necessary, pour a mixture of vinegar and baking soda into the basin to dissolve stubborn residues. Let it sit for 10-15 minutes before wiping clean. This approach not only improves drainage but can also extend your dishwasher’s lifespan by minimizing corrosion. Remember, neglecting this step can leave behind hidden obstructions that cause cycle failures later. For recommended maintenance routines, see our maintenance tips.
Reassemble and Test
Once clean, reattach the sump basin cover and the lower panel securely. Double-check all screws and clips. Plug in the dishwasher, run a short cycle, and observe the drainage process carefully. If water drains properly without gurgling or standing water, you’ve successfully cleared the obstruction. Remember, consistent maintenance prevents minor issues from escalating into warranty-filling failures. For detailed installation guides, consult our installation tips.
 Many homeowners believe that once their dishwasher is installed and functioning, their job is done. However, misconceptions about parts, warranties, and installation practices can lead to costly mistakes down the line. One common myth is that all replacement parts are interchangeable; in reality, choosing the wrong part can void your warranty or cause damage. For instance, using generic drain pumps instead of OEM parts might save a few bucks initially but often results in premature failure, which isn’t covered under warranty. To avoid this, it’s crucial to understand the importance of selecting the right components—visit our warranty-compatible parts guide for detailed insights.
Another nuance is the misconception that professional installation isn’t necessary. Many assume that DIY efforts are sufficient, but improper setup—like incorrect water supply line connections or overlooking drain loop heights—can lead to leaks or poor performance. An advanced mistake is neglecting to verify electrical connections, which can cause operational failures or safety hazards. A study by the Electrical Safety Foundation International emphasizes that proper electrical grounding and circuit compatibility are vital for appliance longevity and safety. Always refer to our installation checklist to ensure optimal setup.
When it comes to warranties, don’t assume they’re foolproof. Many believe that simply registering the product guarantees coverage, but specific conditions must be met. For example, failure to perform routine maintenance—like cleaning filters or inspecting drain hoses—can render warranty claims invalid. Moreover, understanding what your warranty excludes is critical. Routine issues such as clogs are often considered wear-and-tear and aren’t covered, which underscores the need for proper maintenance. To clarify your coverage scope, review our warranty policies.
Let’s address a crucial question that even advanced homeowners ask: How do you ensure your dishwasher parts and installation practices won’t void your warranty? The key lies in meticulous adherence to manufacturer specifications and documented proof of professional installation if applicable. Using recommended parts and following precise installation protocols, such as correct drain height and sealed electrical connections, guarantees that your warranty remains intact. Remember, a small oversight—like incorrect water inlet pressure—can cause issues that are not covered under warranty, even if the part itself is valid. For in-depth guidance, see our parts replacement strategies.
In conclusion, avoiding these pitfalls requires more than surface-level knowledge. Proactive selection of high-quality parts, adherence to installation best practices, and diligent maintenance can preserve your warranty and extend the life of your dishwasher. Have you ever fallen into this trap? Let me know in the comments and share your experiences. Remember, a little extra effort today can save you a lot of headache tomorrow.
Tools I Trust for Keeping My Dishwasher in Shape
Maintaining your dishwasher effectively requires the right tools, not just for repairs but for routine inspections that prevent issues before they escalate. I personally rely on a set of high-quality, specific tools that streamline maintenance and ensure thorough results. For example, a ratcheting screwdriver with a variety of bits allows me to remove panels and access components swiftly and safely, reducing the risk of damaging delicate parts. Unlike generic screwdrivers, a model with an adjustable torque setting helps prevent over-tightening, which can crack plastic housings or strip screw heads.
Another essential item is a set of plastic and rubber brushes. These are gentle enough for cleaning impellers and drain pathways without scratching, yet effective at removing greasy buildup. I avoid metal brushes for this purpose because they can cause damage, leading to leaks and costly repairs. Additionally, a comprehensive parts guide is invaluable for identifying components during maintenance and understanding their function.
To check for obstructions and ensure optimal performance, I utilize a flexible inspection mirror and a bright LED flashlight. These tools give me a clear view of hidden spaces, like the sump basin, without excessive disassembly. For electrical safety, I always carry a multimeter with automated testing functions—this helps verify circuit integrity and component continuity quickly. Remember, using specialized tools saves time and reduces the chances of making mistakes that could void your warranty.
Embracing Modern Solutions for Longer-Lasting Results
Looking toward the future, I anticipate widespread adoption of smart leak sensors and IoT-connected appliances. These devices can notify you immediately of leaks or drainage issues, allowing proactive intervention. Installing a digital leak detector is one of my top recommendations. Not only does it help prevent water damage, but it also extends the lifespan of your appliance by catching minor problems early.
How do I maintain dishwasher parts and tools over time?
Proper care involves regular cleaning of your tools—especially brushes and inspection mirrors—to prevent grime buildup that could transfer to your dishwasher parts. Store everything in a dedicated toolbox or organizer to avoid losing small components like screws or clips. Replace worn-out tools promptly; a dull screwdriver or damaged brush might seem minor but can cause significant issues during maintenance. Periodic calibration of your electrical testers and updating your knowledge with the latest repair guides ensures your toolkit remains effective. Staying organized and investing in quality tools will save you money and effort long-term. For detailed guidance on selecting the best parts and tools, consult our selection tips.
By combining specific tools with scheduled inspections, you’ll catch potential problems early, prevent costly repairs, and maximize warranty coverage—saving both money and hassle over the years. I encourage you to try integrating a flexible inspection mirror into your routine; it’s a game-changer for spotting hidden obstructions before they cause major issues.
The Hardest Lesson I Learned About dishwasher,parts,warranty,installation
One time I overlooked that small, greasy buildup in the sump basin, thinking a quick wipe was enough. That neglected detail led to a costly repair and a delay in my warranty coverage. Since then, I’ve realized that consistent, thorough inspections of hidden components save me time and money. Now, I know that no matter how advanced your machine is, regular attention to the sump basin and internal parts is crucial to keep everything running smoothly.
My Essential Toolkit for Kitchen Appliance Peace of Mind
I rely heavily on a ratcheting screwdriver with diverse bits—it makes opening panels a breeze without risking damage. A set of gentle brushes helps remove grease from impellers without scratches. For peering into tight spots, a comprehensive parts guide paired with a flexible inspection mirror is invaluable. Lastly, a reliable multimeter ensures electrical safety checks are precise and quick, giving me peace of mind that my maintenance is both thorough and safe.
Keep Your Focus on What Truly Matters: Care Makes All the Difference
You don’t have to be a professional to prolong your dishwasher’s lifespan. Simple, routine inspections—like checking for debris in the sump basin or verifying proper electrical connections—make a difference. Invest in quality tools, stay organized, and remember that each proactive step you take now prevents future headaches. By understanding your machine better and performing regular maintenance, you’re safeguarding your warranty and ensuring optimal performance for years to come. What’s the one small maintenance tip you’ve been neglecting? Share below and let’s learn together.
Related Posts
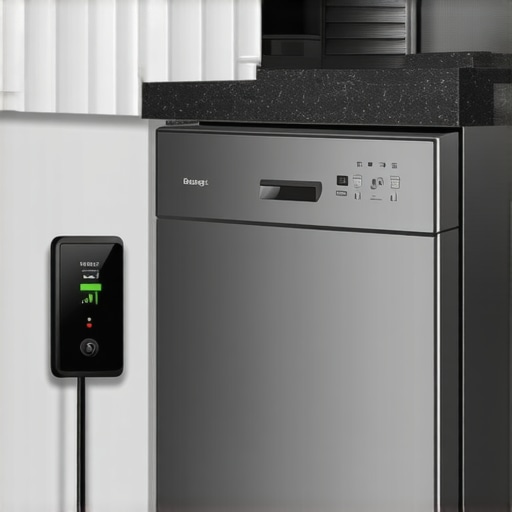
The $12 Surge Protector That Saves Your Dishwasher Control Board
It hit me one morning as I stood in my…
How to Swap a Door Gasket Without Calling a Pro
Have you ever stared at your dishwasher's door and felt…
Stop the Hum: 3 Fixes for a Stalling Wash Motor
Have you ever stood in your kitchen, dishwasher humming along…