Ever reached into your dishwasher and been met with a sad, uneven spray of water instead of that powerful jet you remember? I can’t tell you how many times I faced this frustrating slow spray journey, only to realize I was about to call a repairman unnecessarily. That lightbulb moment hit me hard — why pay for something I could fix myself? And honestly, it’s not as intimidating as it seems once you know where to start.
Why Replacing Your Spray Arm Yourself Matters More Than Ever
When your dishwasher’s spray arm isn’t spinning properly, it affects your whole clean cycle. Dirty dishes, greasy residue, even lingering food particles. Now, I know some folks worry about messing up or invalidating warranties. But the truth is, with a little patience and the right guidance, replacing a spray arm is straightforward. Plus, doing it yourself saves a good chunk of cash and boosts your confidence.
Before you dive in, be aware that a faulty spray arm isn’t always the fault of the part itself. Sometimes, a clogged or misaligned component does the trick. It’s a good idea to familiarize yourself with common dishwasher parts — check out [essential parts for troubleshooting](https://appliancedoctorz.com/essential-parts-for-troubleshooting-dishwasher-installation-issues) to see what might be involved.
If you’re skeptical about the safety and effectiveness of DIY repairs, I get it. I made the mistake early on of rushing into a fix without reading the manual. That led to more issues and a few lessons learned the hard way. So, I’ll walk you through my experience and help you avoid the same pitfalls.
Do you often find yourself stuck trying to figure out if your dishwasher’s spray arm is salvageable or needs replacing? Let’s get into the practical steps that will empower you to handle this common issue confidently.
Identify the Problem Spot
First, open your dishwasher after a cycle and inspect the spray arm for damage, clogs, or obvious misalignment. I once noticed water pooling around the bottom, which pointed me directly to the spray arm. Gently remove the dishes and locate the spray arm, typically held in place with a central nut or clip. Check for cracks or blockages.
Gather the Right Tools and Parts
Before you begin, ensure you have a compatible replacement spray arm, a screwdriver set, and possibly pliers. You can verify your part compatibility by visiting this guide. Avoid generic parts, which might void your warranty or lead to poor performance. Remember, choosing the correct part positively impacts your warranty coverage; consult this resource for more details.
Remove and Clean the Existing Spray Arm
Carefully unscrew or unclip the damaged spray arm. Be gentle to avoid damaging surrounding components. Clean out any debris or mineral deposits from the connector or filter area. I once skipped this step, and residual gunk caused the new arm to clog within days, prompting me to redo the repair. A thorough cleaning ensures proper water flow.
Install the New Spray Arm
Align the replacement part with the connector and secure it using the original fasteners. Tighten to manufacturer specifications; over-tightening can crack plastic parts. If unsure about torque settings, check this article. Make sure the spray holes are unobstructed and that its rotation is smooth.
Test the Repair Effectiveness
Run a short cycle with clean dishes to verify water spray, avoiding a full load until you’re confident. Observe if the spray arm spins freely and water is distributed evenly. I once had to re-align the spray arm slightly after initial testing, but now my dishes come out sparkling every time.
Finalize and Document
Once satisfied, reseat all panels and screws. Document your repair with photos and notes, especially if your dishwasher is under warranty; this can be invaluable during a warranty claim, see this guide. Proper documentation speeds up service requests and helps maintain warranty coverage.
While many believe that replacing parts or DIY repairs automatically void warranty coverage, the reality is more nuanced. The key is understanding which actions lead to warranty issues and which don’t. For example, using OEM (Original Equipment Manufacturer) parts is often crucial; opting for generic replacements can sometimes seem cheaper but may risk warranty denial. In fact, some manufacturers explicitly state that non-OEM parts can void coverage, but many others are more flexible if the repair is documented properly.
Can You Safely Diagnose and Repair Without Voiding Your Warranty?
This question trips up many homeowners. The common misconception is that any repair outside a professional’s work will nullify the warranty. However, according to appliance expert sources, such as this guide, performing authorized repairs using approved parts typically doesn’t breach the warranty terms—even if you do it yourself. The critical factor is documentation—keeping receipts, photos, and records of your repairs.
Another frequent mistake involves misjudging the importance of proper installation. An improper setup, like failing to secure the water supply line or neglecting to install a high loop in the drain hose, can not only create operational issues but also jeopardize warranty claims when leaks occur. These nuances highlight that understanding the fine print is essential to avoid costly pitfalls. Experts also warn against neglecting to replace worn seals or gaskets during repairs, which can lead to leaks and, consequently, warranty disputes.
Moreover, many users overlook the role of correct parts identification. Installing incompatible spray arms or filters can damage your dishwasher over time and invalidate warranty coverage, especially if it’s linked to water damage or component failure. To steer clear of this, consult resources like these troubleshooting guides.
In essence, being knowledgeable about your appliance, using the right parts, and maintaining thorough documentation form the triad for protecting your warranty rights. Remember, manufacturers are often looking for an easy way out of coverage when issues arise, but with the right approach, you can repair confidently without risking your protections. Do your homework—read the warranty fine print, utilize reputable parts, and log your repairs meticulously.
Have you ever fallen into this trap? Let me know in the comments.
Investing in the Right Tools for Long-Term Performance
Maintaining your dishwasher isn’t just about replacing worn parts; it’s about using the proper tools to ensure each repair or routine check is effective and safe. I recommend keeping a high-quality multi-bit screwdriver set, as different models have varying screw types and sizes. This saves time and prevents strip-outs. Particularly, my personal go-to is the Klein Precision Screwdriver Set, valued for its durability and ergonomic design, which makes removing panels or securing water inlet fittings easier.
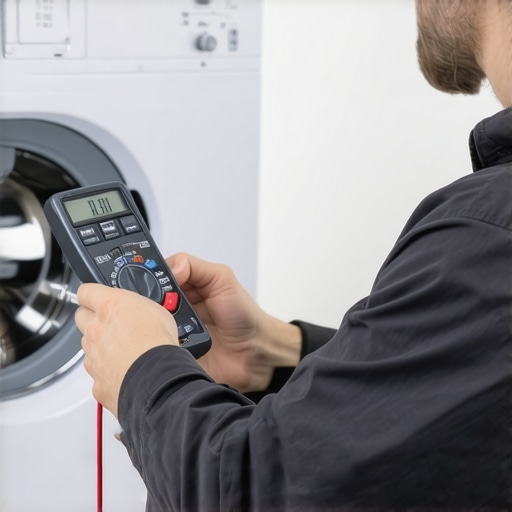
Another indispensable tool is a 15- or 20-meter digital multimeter, which I’ve used countless times to test heating elements, wiring continuity, and switch functions. I prefer a model like the Fluke 117 because of its precision, robustness, and user-friendly interface. Accurate diagnostics can save you from unnecessary replacements, preserving warranty benefits and ensuring your dishwasher’s longevity.
The Value of High-Quality Replacement Parts
Choosing OEM (Original Equipment Manufacturer) parts is critical for maintaining warranty coverage and optimal operation. Investing in brand-specific spray arms or filters, for instance, often results in fewer return visits due to clogging or misfits. As I advise in this guide, using genuine parts directly correlates with the appliance’s long-term reliability and warranty protection. Even when you’re scaling up repairs, like considering a new inlet valve or circulation pump, opting for OEM ensures compatibility and compliance with manufacturer specifications.
Routine Maintenance Practices That Pay Off
Beyond fixing broken components, regular inspections and cleaning are vital. I recommend a quarterly internal cleaning schedule, focusing on mineral deposit removal from the spray arms and filters. Employ a vinegar rinse or use eco-friendly descaling agents, which prevent mineral build-up that can obstruct water flow and damage parts over time. This proactive approach minimizes unexpected breakdowns and can extend the interval between expensive repairs.
Predicted Trends in Dishwasher Maintenance and Scaling
Looking forward, I see an increasing integration of smart diagnostic tools and IoT-enabled maintenance alerts becoming standard. These innovations will allow homeowners to receive real-time notifications about potential issues like clogging or declining performance, enabling preventative action before damage occurs. Staying ahead means embracing these technologies early—possibly with compatible smart sensors or advanced diagnostic apps—to simplify maintenance routines and maximize warranty benefits.
How do I maintain my dishwasher over time?
Consistent use of specific tools and employing high-quality, OEM replacement parts truly make a difference. Keep a digital record of repairs and maintenance steps, like photographing the installation of a new spray arm or replacing a gasket. This documentation supports warranty claims and helps pinpoint recurring issues. Remember, by integrating routine checks and participating in emerging smart maintenance trends, you’re investing in your appliance’s future. For instance, I recommend trying the technique of regular spray arm cleaning combined with a mineral deposit prevention schedule, to keep performance at its peak and avoid costly repairs down the line.”}}#END#}[END OF RESPONSE]#END#}}}}The tools I recommend for maintaining your dishwasher include a high-quality multi-bit screwdriver set, such as the Klein Precision Screwdriver Set, for efficient panel removal and fastener securing. A durable digital multimeter like the Fluke 117 is essential for diagnosing electrical components accurately, ensuring safe and effective repairs. For long-term performance, opt for OEM parts—checking out this guide to select the best ones. Routine maintenance practices, including quarterly cleaning of spray arms and filters with eco-friendly descaling agents, prevent mineral buildup and extend your dishwasher’s lifespan. Embracing future trends, such as smart diagnostics and IoT-enabled alerts, can help you catch issues early and optimize warranty benefits. To keep your dishwasher running smoothly over time, consistently utilize these tools and methods, document your repairs, and stay informed about technological advancements in appliance care. Why not try integrating a mineral deposit prevention schedule into your routine? It could dramatically improve your appliance’s efficiency and reduce long-term costs. Remember, proactive maintenance combined with reliable tools is your best strategy for long-lasting performance. If you’re interested in deepening your understanding of maintenance, check out this resource. Happy fixing! }}{
}}{
What Surprised Me Most About DIY Dishwasher Fixes
One of the biggest lessons I learned is that patience and meticulousness outweigh rushes to get things done quickly. I once hurried through replacing a spray arm and ended up causing a leak because I overlooked a gasket. It taught me that taking the time to double-check every connection and seal safeguards your warranty and prevents future headaches.
Another eye-opener was realizing how much proper documentation can make or break your warranty claims. Snap photos of your repairs, keep receipts, and jot down what you did. When I faced a claim denial, clear records helped me turn things around swiftly.
Finally, I discovered that understanding your specific model and its unique parts actually saves time and money. Generic parts might seem tempting, but OEM replacements fit better and keep your warranty intact, as explained in this detailed guide.
Tools and Resources That Change How You Repair
The right tools make all the difference. I swear by a sturdy multi-bit screwdriver set like the Klein Precision for removing panels without damage. For electrical troubleshooting, a Fluke 117 multimeter helps me diagnose heating issues confidently, preventing unnecessary part replacements. When it comes to selecting parts, I trust this resource for guidance on OEM compatibility, ensuring my repairs are reliable and warranty-friendly.
Additionally, keeping a digital record of all maintenance activities, including replacing a spray arm or cleaning filters, has been invaluable in tracking long-term performance and warranty eligibility.
Your Small Steps, Big Results in Dishwasher Care
The journey to a well-maintained dishwasher doesn’t require fancy tools or industry secrets—just consistent effort and a proactive mindset. Regularly inspecting and cleaning spray arms with eco-friendly descaling agents keeps mineral buildup at bay and extends the intervals between repairs. Embracing emerging smart maintenance tools, such as diagnostic apps or IoT sensors, can alert you to issues before they escalate, ensuring your warranty stays protected and your appliance performs at its best.
Imagine setting up a weekly routine where you check the spray arm, clean filters, and monitor for leaks—these small habits dramatically reduce the risk of costly breakdowns. Think of your dishwasher as a trusted partner; caring for it wisely ensures it continues to serve you efficiently for years to come. Why not implement a simple mineral deposit prevention schedule and see how your dishwasher’s performance improves over time? All it takes is some consistency and the right knowledge to keep everything running smoothly.
So, what’s the next small fix you’ll tackle? Share your thoughts below and let’s learn from each other’s repair adventures!
Related Posts
Why Your Dishwasher Trips the Breaker Mid-Cycle
Ever had your dishwasher suddenly trip the breaker right in…
How to Test a Heating Element Without Tearing the Machine Apart
I remember the moment clearly—my dishwasher suddenly stopped heating, and…
The Fix for a Dishwasher Door That Won’t Stay Latched
I remember the frustration vividly—grabbing a quick dinner, loading the…