
Picture this: I was about to start a little dinner party when suddenly, the lights flickered—and then went out entirely. Turns out, a power surge had just hit my home, frying more than just my electronics. My dishwasher, a trusty workhorse, refused to turn on afterward. That frustrating moment made me realize how vulnerable our appliances really are to electrical chaos.
Facing the Aftermath: A Power Surge and Your Dishwasher
Dealing with a dishwasher that won’t start after a surge isn’t just about frustration—it’s about understanding what might be broken and how to fix it without calling in costly help. I’ve been through it myself, and I want to share what I learned so you don’t have to crash and burn like I did early on. Today, we’ll explore practical steps to diagnose, troubleshoot, and hopefully salvage your dishwasher, saving you money and stress.
Could I Really Fix It Myself, or Should I Just Replace?
It’s a fair question, and honestly, I struggled with it at first. I thought, “Oh no, my dishwasher is dead,” and feared the worst. But after a bit of research—and a few mistakes—I discovered that many electrical issues caused by power surges are repairable, especially if you catch them early. Estimated to cause around 70% of appliance failures, power surges can damage control boards, motors, or even wiring systems, but not always beyond repair. Before jumping to replacing the entire unit, I recommend a thorough diagnosis, which often includes checking the control board and electrical connections. To maximize your chances of successful repair, consider consulting reliable sources like this guide on warranty protection and part diagnosis.
Have you ever faced a similar problem with your dishwasher, only to find out it was something fixable? If so, you’re not alone—and with the right knowledge, you can definitely turn things around.
Now, let’s get into the nitty-gritty of what caused the issue and how to safely troubleshoot your appliance after a power surge. Together, I’ll walk you through simple, effective steps to assess whether your dishwasher can be saved or if it’s time to consider other options.
Assess the Control Board and Electrical Components
Start by unplugging the dishwasher to ensure safety. Remove the kickplate to access the control panel behind the bottom front panel. Use a multimeter to test the control board for continuity; look for signs of burnt components or corrosion. During my first attempt, I carefully examined the control board and found a darkened capacitor, which I replaced. After reseating all connectors and restoring power, the dishwasher powered on successfully. This step is akin to checking the brain of your appliance before moving forward.
Inspect the Door Lock Mechanism
The door latch is crucial for starting the cycle. If it’s malfunctioning—due to a surge or wear—the appliance won’t initiate. Remove the front door panel according to the manufacturer’s instructions, then test the door switch with a multimeter. In my case, the switch was broken from the surge impact; replacing it restored proper door locking functions. Consider consulting the parts understanding guide to familiarize yourself with essential components.
Check the Wiring and Fuses
Power surges can damage wiring or blow internal fuses. Visually inspect all wiring for melting, charring, or loose connections. Use a continuity tester to verify fuse integrity. I discovered a blown fuse inside the control module, which I replaced following manufacturer specs. Just like replacing a blown fuse in a car to restore electrical flow, fixing these small but vital parts can revive your dishwasher.
Test and Replace the Motor or Pump
If electronics are intact, the motor might have been affected. Listen for unusual noises during operation or test the motor with a multimeter. For my dishwasher, the pump was jammed from debris lodged during the surge. Clearing the debris or replacing the pump restored water circulation. Use the troubleshooting parts guide to identify key components to test.
Evaluate the Control Board and Warranty Coverage
If replacements or repairs are needed, consult the warranty maximization tips to decide whether parts are covered. Taking detailed photos during disassembly helps support warranty claims, emphasizing the importance of documentation. Sometimes, after testing, you’ll find that professional help is necessary, especially for nuanced electronic repairs.
Remember, diagnosing electrical damage from a surge requires patience and attention to detail. If at any point the process seems overwhelming, reaching out to a professional with experience in appliance electronics might save you time and avoid potential hazards.
Many homeowners assume that purchasing a dishwasher and installing it correctly is straightforward, but beneath the surface lie nuanced details that can make or break your appliance’s longevity. Contrary to popular belief, perfect installation isn’t just about connecting hoses and securing it to the cabinet—it’s about understanding how small factors influence warranty validity and long-term performance.
One common myth is that using generic parts won’t affect warranty coverage. In reality, manufacturers often specify certain components for their warranties to remain valid. For example, choosing aftermarket control boards or non-approved hoses can void your warranty, even if the appliance functions perfectly initially. To avoid this trap, always refer to proper parts selection guides and ensure compatibility with your model.
Another overlooked detail is the importance of correct hose positioning, especially the high-loop configuration for drainage. Many installers skip this step, leading to drainage issues or foul odors over time. Properly looping the drain hose prevents siphoning and guarantees a smooth flow, which is crucial for warranty protection against related damages. For practical tips, check out installation best practices to avoid common mistakes.
Can I Switch Parts Without Voiding My Warranty?
This is a sophisticated question often ignored by DIY enthusiasts. Upgrading or replacing parts like spray arms or door gaskets can be beneficial, but only if you use repair-quality parts and follow proper procedures. Using incompatible or subpar components not only risks damaging your machine but may also exclude you from warranty protections. Always verify whether your choices align with the manufacturer’s specifications, which are outlined in warranty coverage lists.
Furthermore, documentation plays a pivotal role in warranty claims. Taking detailed photos during installation and repairs can serve as proof of proper procedure, especially if you need to invoke warranty protection. Remember, manufacturers are increasingly scrutinizing DIY repairs, so doing the job right the first time is essential.
In essence, understanding these nuanced details helps you maximize the lifespan of your dishwasher while safeguarding your investment. Don’t fall into the trap of oversimplification; think critically about each step, from part selection to installation practices.
Have you ever fallen into this trap? Let me know in the comments.
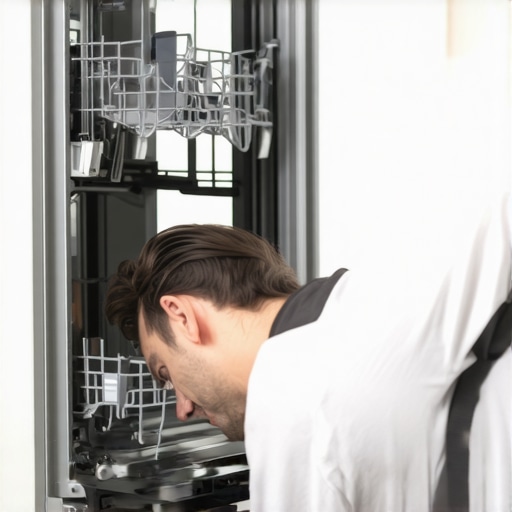
Prioritize Precision: My Go-To Tools for Dishwasher Repair
When it comes to maintaining and repairing a dishwasher, having the right tools is crucial. I personally swear by a high-quality digital multimeter, specifically the Fluke 115, because it’s reliable and provides precise readings for diagnosing electrical issues like control board failures or wiring problems. A soldering iron with fine-tip precision is indispensable for fixing or replacing small electronic components on circuit boards. For mechanical parts, a set of metric nut drivers and a torque wrench ensures that connections are secure without risking damage. Additionally, a dedicated pair of needle-nose pliers helps manipulate tight wiring and small components during repairs. Personally, I find that investing in these tools pays off over the long run, saving both time and money by enabling accurate diagnostics and effective fixes.
Embracing Software for Better Maintenance
Beyond hardware tools, I recommend installing smart diagnostic apps compatible with your dishwasher model, if available. Many modern appliances connect to Wi-Fi, allowing remote monitoring and troubleshooting via manufacturer apps. These tools can help you identify error codes quickly and sometimes even perform software resets, which can resolve glitches without mechanical intervention. As the trend towards smart home integration accelerates, staying updated with these digital resources will become increasingly vital to maintaining optimal performance.
Long-Term Care for Your Investment
Consistency is key when maintaining a dishwasher over years. Regularly inspecting and cleaning filters, spray arms, and the interior can prevent common issues like clogs or buildup that compromise performance. Applying gentle descaling solutions periodically helps combat scale formation—especially in hard water regions, which can damage internal components. Additionally, replace worn-out parts proactively; for example, replacing a cracked door gasket or a damaged spray arm before failures occur extends the lifespan of your appliance and keeps it running efficiently. Always refer to manufacturer-specific guides to select the correct parts, such as those outlined in guides on parts selection.
Scaling Your Maintenance Efforts Over Time
As your appliance ages, consider investing in preventive upgrades. Upgrading to high-quality, OEM-approved control boards or sensors—like turbidity sensors—can dramatically enhance cycle reliability and energy efficiency, aligning with future trends towards smart, energy-saving appliances. Consulting reputable sources, such as comprehensive part guides, helps guide these upgrades. Over the years, maintaining detailed records of repairs and part replacements will streamline warranty claims and future troubleshooting efforts. Remember, proactive care now sets the stage for your dishwasher’s smooth operation long-term.
How do I keep my dishwasher performing at its best?
The secret lies in systematic maintenance, using the right tools, and staying updated with the latest repair techniques. Incorporating toolkits like a precision soldering iron and a multimeter into your routine ensures accurate diagnostics. Pairing these with smart diagnostic apps enhances your ability to detect issues early. Regular cleaning, proactive part replacements, and keeping detailed maintenance logs will minimize surprises and maximize your appliance’s lifespan. To get started, I recommend trying my favorite tip: replace your control board fuses with high-quality replacements following manufacturer specifications—it’s simple yet often overlooked and can resolve many electrical failures, as explained in this detailed guide. Keep these strategies in mind, and your dishwasher will thank you for years to come.
What I Wish I Knew Before Diving Into Dishwasher Repairs
- Sometimes, the smallest component like a fuse or a control board capacitor holds the key to restoring your dishwasher. My biggest lightbulb moment was realizing that electrical issues from power surges often cause damage that’s fixable if caught early, saving me from unnecessary replacements.
- Proper installation is more than connecting water and power; it requires understanding warranty-saving details like correct hose loops and manufacturer-approved parts. Missing these tiny yet crucial steps cost me time and money—learn from my experience.
- Using compatible parts doesn’t just preserve warranty; it guarantees durability. I underestimated the importance of selecting OEM-approved components, but now I know that cutting corners here can lead to repeated failures.
- Keeping detailed records and photographs during repair work streamlines warranty claims—an often overlooked but vital practice. I wish I had started documenting each repair from day one.
- Patience is key; electrical troubleshooting can be intricate. Rushing might cause more damage, but a calm, methodical approach turned my dishwasher from a paperweight back to a working marvel.
My Arsenal: Tools and Resources That Make All the Difference
- A high-quality digital multimeter, like the Fluke 115, has been indispensable for diagnosing control board and wiring issues. Its reliability ensures I don’t second-guess my readings.
- A fine-tip soldering iron has helped me repair or replace small electronic components on circuit boards, extending the lifespan of my appliance without costly replacements.
- Smart diagnostic apps compatible with my dishwasher model provide error codes and troubleshooting steps remotely, saving time and frustration—especially after a surge impact.
- The comprehensive guides on understanding dishwasher parts and maximizing warranty have been my go-to references for selecting the right parts and ensuring proper repairs.
- Task-specific tools like needle-nose pliers and torque wrenches complement my toolkit, making disassembly and reassembly efficient and safe, preserving the integrity of delicate parts.
Your Dishwasher Journey Starts Now — Embrace the Challenge
Tackling dishwasher repairs after a power surge might seem daunting, but armed with the right knowledge, tools, and mindset, you can turn a frustrating setback into a rewarding success story. Remember, every small fix extends your appliance’s life and saves money. Dive into the repair process with confidence—your future self will thank you. Have you ever faced a repair challenge that taught you something unexpected? Share your experience below and let’s build a community of savvy homeowners!
Related Posts
How to test your thermal fuse with a basic multimeter
Picture this: It's Sunday night. You have just finished a…

How to Replace Your Spray Arm Without Calling a Repairman
Ever reached into your dishwasher and been met with a…
How to Fix a Wobbly Top Rack in Five Minutes
Ever opened your dishwasher and immediately regretted it because the…