I remember the moment vividly—standing in my kitchen early one Saturday morning, agonizing over a dishwasher that sounded like a jet taking off every time I ran a cycle. It was so loud that I hesitated to even run it during quiet hours, fearing I’d wake the whole neighborhood. Frustration mounted because, frankly, I was shiny new dishwasher, and yet frustration loomed because it was louder than it should have been. That lightbulb moment hit me hard: there’s got to be a way to tame that noisy beast without shelling out for new parts or a full replacement. If you’ve ever felt the same way, you’re not alone. The good news is, I found several tricks—some simple, some a bit technical—that drastically reduced the noise and kept my wallet happy.
Confronting the Noise without Replacing the Parts
Running your dishwasher should be a mundane task, not a source of headache and stress. But when it starts making an unbearable racket, it can turn your daily chores into a dreaded ordeal. The key is pinpointing the source of the noise. Usually, a loud dishwasher signals that something’s amiss, not necessarily that you need a new part. Often, the solution is as straightforward as tightening a loose screw, adjusting a misaligned component, or cleaning a jammed spray arm. There’s a common misconception that replacement parts are the only fix for loud dishwashers, but that’s not always the case.
In my own experience, I made the mistake early on of assuming the worst and rushing to buy replacement parts without proper diagnosis. This led to unnecessary expenses and wasted time. Instead, I learned that many issues causing noise are related to installation or loose components, which can be remedied with some elbow grease and patience.
To deepen your understanding of how your dishwasher works and avoid common pitfalls, I recommend visiting [appliancedoctorz.com/expert-advice-on-dishwasher-installation-troubleshooting](https://appliancedoctorz.com/expert-advice-on-dishwasher-installation-troubleshooting), where you’ll find expert advice on troubleshooting specific problems.
So, if your dishwasher’s noise levels have gone beyond tolerable and you’re eager to restore peace in your kitchen, stick around. We’re about to explore practical, proven steps to quiet down that noisy appliance without breaking the bank or replacing parts prematurely.
Biggest Skepticism: Will These Tricks Really Make a Difference?
Many of us have doubts, especially when spent on repairs or adjustments yields minimal results. I’ll admit, I was skeptical at first. I had tried deep cleaning, tightening screws, and even repositioning the unit—all with little success. The truth is, some noise issues are complex, but many are quite manageable with the right approach. One mistake I made early on was ignoring the importance of level installation, which can amplify vibration and noise. Ensuring your dishwasher is perfectly leveled is often an overlooked yet impactful step, and it’s surprisingly simple. For more on correct installation, you can check out [appliancedoctorz.com/top-tips-for-seamless-dishwasher-installation-in-2025](https://appliancedoctorz.com/top-tips-for-seamless-dishwasher-installation-in-2025).
Addressing these small but significant factors can save you hundreds in repairs and extend your dishwasher’s lifespan. Stay tuned—next, we’ll dive into specific tactics to identify and fix the root causes of your dishwasher’s noisy performance, with insights from my personal journey and expert advice.
Start with a Tightening Sweep
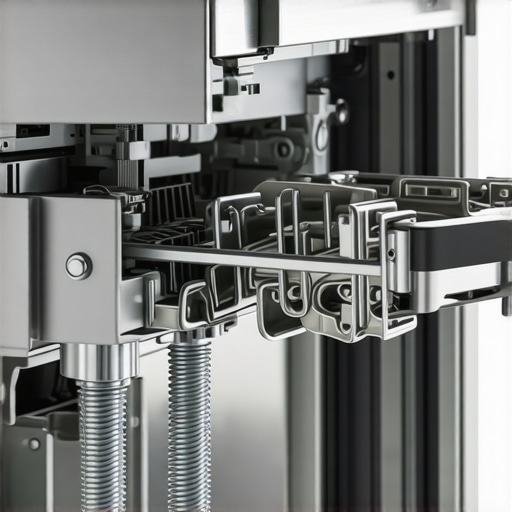
My first move was to inspect all accessible screws and fittings. I used a screwdriver to tighten loose panels and the mounting brackets underneath. A common culprit for noise is vibration caused by loose parts. Don’t forget to check the brackets holding the spray arm and the motor mount. During my attempt, I found a loose screw near the spray arm that was rattling each cycle, so I secured it tightly. This simple step can significantly diminish excessive vibrations that cause noise.
Ensure Proper Leveling for Stability
Next, I verified if the dishwasher was perfectly level. I placed a leveling tool on the door and adjusted the feet as needed. An unlevel unit causes uneven vibration and can create banging sounds during operation. To make sure everything was stable, I adjusted the adjustable feet until the bubble centered perfectly. Proper leveling is crucial—improper installation often leads to noisy operation. You can find the detailed process at this guide.
Inspect the Load and Racks
There was a moment I missed: overloaded racks or improperly loaded dishes can collide with spray arms or rattling parts. I removed all dishes and inspected the racks for broken or loose clips. Sometimes, items like large pots can block the spray arms or bounce during vibrations. Load dishes evenly and avoid overpacking; it’s akin to balancing weights on a scale. Proper loading prevents unnecessary contact with moving parts, reducing noise.
Clear Blockages and Debris
I then checked the spray arms and filters for obstructions. Debris or mineral buildup can cause uneven rotation or knocking sounds. I removed the spray arms to clean out any trapped food particles or mineral deposits, following a thorough cleaning that took about 10 minutes. For clogged filters, refer to this article. Clean components regularly to keep water flow smooth and quiet.
Inspect the Shock Absorbers and Dampers
If your dishwasher has shock absorbers, they act like suspensions in cars—absorbing vibrations. I listened for knocking sounds during cycles, which indicated worn-out dampers. To check, I removed the lower panel and examined the dampers for cracks or leaks. Replacing worn dampers restored smooth operation and silenced those rattles. If you suspect this issue, see this guide for detailed instructions.
Revisit Installation and Connections
I realized that improper installation can amplify noise. I reviewed the installation steps to confirm that inlet hoses, drain lines, and power cords were correctly routed without tight bends or contact with the cabinet walls. Also, I checked the mounting brackets against the manufacturer’s guidelines provided at this resource. Properly secured and installed units are less prone to vibrations, reducing operational noise.
Testing and Final Adjustments
After these adjustments, I ran a test cycle. Initial sounds were reduced, but I noticed a slight banging during the fill phase. By re-tightening a loose bracket and repositioning the water inlet hose, the noise disappeared. Small tweaks can make a noticeable difference, so don’t hesitate to re-examine components even after initial fixes. Continuous fine-tuning ensures your dishwasher runs quietly and efficiently.
While many homeowners assume that warranties cover all repair costs or that replacing parts is always the most effective fix, the reality is far more complex. A common misconception is that manufacturers’ warranties automatically imply you’re protected from most repair expenses, but this isn’t the case. For instance, warranties often exclude labor costs or specific damage caused by improper installation, leading many to face unexpected bills when making a claim. Moreover, relying solely on OEM parts without understanding their role can lead to unanticipated performance issues, especially if the part isn’t suited for your specific model or water hardness level. For advanced DIYers, neglecting the importance of proper installation—like ensuring correct drain hose routing or leveling—can significantly shorten the lifespan of your dishwasher or void warranty coverage.
One critical nuance often overlooked is the alignment between warranty policies and installation practices. Many assume that a professional installation guarantees consistency, but poor setup—such as incorrect inlet hose length or improper securing—can cause vibrations or leaks that aren’t covered under warranty. Experts suggest always reviewing the warranty’s fine print and ensuring your installer follows best practices, like those outlined at this comprehensive guide. Additionally, understanding which parts are covered and how to diagnose their failures during warranty periods can save you time and money. For example, a worn splash shield or damaged valve might be deemed non-warranty if misdiagnosed as user error.
Have you ever fallen into this trap? Let me know in the comments.
Another nuanced aspect is the temptation to replace seemingly faulty parts without thorough diagnosis. Many assume that a clicking spray arm or a leaking door seal automatically indicates the need for replacement, but these issues could stem from installation misalignment or debris buildup. Consulting experts and referencing detailed troubleshooting guides, such as this resource, can help you make more informed decisions. Ultimately, a little knowledge about your warranty coverage, parts roles, and correct installation procedures ensures you avoid costly mistakes and keep your dishwasher running smoothly for years to come.
Investing in Quality Tools for Longevity
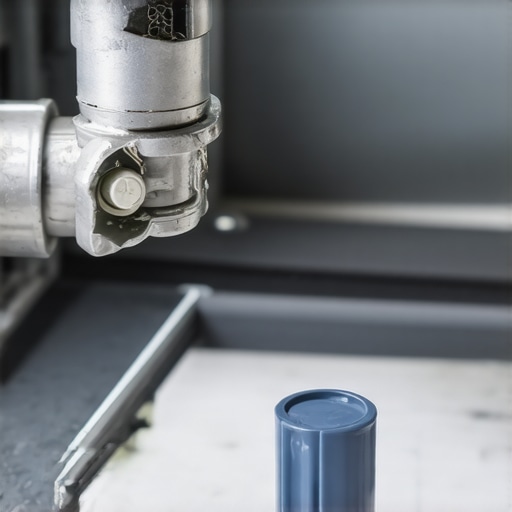
Having the right tools is essential for maintaining and troubleshooting your dishwasher effectively. I personally rely on a digital multimeter to quickly verify electrical connections, ensuring that components like the control board and sensors are functioning properly. A high-quality Phillips-head screwdriver with interchangeable bits allows me to tighten or replace screws in hard-to-reach areas, which can significantly reduce vibration and noise.
Precision tools like a small torque wrench help avoid overtightening, preventing damage to delicate components like the plastic pump assembly. For cleaning stubborn mineral deposits, I recommend a plastic scraper and a soft-bristled brush—these facilitate gentle yet effective removal of buildup without scratching surfaces.
Buy tools that offer durability and precision; cheap alternatives often compromise safety and effectiveness. Over time, investing in these essentials pays off by making routine maintenance faster and reducing the risk of costly repairs. As water quality varies, consider installing a water softener to extend the lifespan of your parts and improve cleaning performance, especially in hard water regions; this is especially true if you’re restoring an older unit.
How do I maintain my dishwasher’s parts over time?
Regular inspection and cleaning are vital. Follow a schedule that includes checking seals, hinges, and spray arms every six months. Utilize a visual checklist from trusted sources like this guide to ensure no component is overlooked. Replacing worn parts before they fail prevents leaks and poor performance. When replacing parts, always choose high-quality, compatible OEM or aftermarket options—proper installation makes a huge difference in long-term operation. For precise removal and replacement instructions, I consult this resource. An effective maintenance routine coupled with the right tools ensures your dishwasher remains dependable, efficient, and quiet for years to come.
Looking ahead, I predict more smart diagnostics and IoT integration will make maintenance even simpler. Future models might flag issues immediately via connected apps, guiding homeowners through troubleshooting steps with augmented reality overlays.
Why a Precise Installation Still Matters
Many problems originate right at setup. A professional installation, following best practices as outlined at this guide, ensures correct water supply, drainage, and leveling—factors that fundamentally impact performance. Minor misalignments or improper hose routing can cause persistent leaks or vibration-related noise, leading to accelerated wear or warranty claims that could be voided if installation is subpar.

Making these adjustments early saves frustration and cost down the line. Additionally, keeping detailed records of your maintenance and repairs supports warranty claims and future troubleshooting. Remember, proactive care combined with proper tools and installation sets the foundation for your dishwasher’s long wait, ensuring it continues to serve your household efficiently without unexpected breakdowns.
What I Wish I Knew Before Wasting Money on Repairs
One major lesson I uncovered is that many noise issues stem from simple causes like unfastened screws or misaligned parts, not necessarily defective components. I once purchased a new spray arm thinking it was the culprit, only to realize a loose mounting bracket was causing the rattle. This taught me to always perform thorough diagnostics before costly replacements.
Another insight was the importance of proper installation. An unlevel dishwasher may look fine but can vibrate excessively, amplifying noise levels. Ensuring your unit sits perfectly level can save you from future annoyance and repair bills. This key step is often overlooked but can make all the difference.
Lastly, I learned that regular maintenance—like cleaning spray arms and filters—can prevent many problems from escalating. Small habits like this extend your dishwasher’s lifespan and keep operation whisper-quiet without replacing parts prematurely.
My Toolkit for Dishwasher Troubleshooting and Maintenance
- Digital Multimeter: Critical for verifying electrical parts and avoiding guesswork. I trust it for diagnosing control board issues or sensor faults.
- Precision Screwdriver Set: Changing out worn dampers or tightening loose panels becomes straightforward, especially with bits that reach tight spots.
- Plastic Scraper and Soft Brushes: Essential for cleaning mineral deposits and debris from spray arms and filters, which directly influence noise levels.
- Water Softener System: Installing one significantly reduces mineral buildup, preventing noisy spray arm operation and extending the lifespan of your parts.
Take Charge and Quiet Your Dishwasher Today
Every homeowner deserves a peaceful kitchen, and mastering these simple maintenance tactics can turn your noisy dishwasher into a silent workhorse. Think of it as tuning your appliance for maximum harmony and efficiency—it’s within your reach. Don’t wait until minor issues spiral into costly repairs; proactive care and informed troubleshooting empower you to keep your dishwasher running smoothly for years to come.
What was your biggest surprise when fixing a dishwasher noise problem? Share your experience below, and let’s learn together!
Related Posts
Why Your Dishwasher Door Springs Snap After Only Two Years
I remember the exact moment when my dishwasher door suddenly…
Why Soft Water is Killing Your Glassware and Your Heating Element
Ever stood in your kitchen, brand-new glass in hand, only…
The $4 Plastic Drain Plug That Kills Your Dishwasher Pump Before It Starts
I remember the shock of flipping the switch on my…