Picture this: You’re mid-way through a busy morning, eager to unload your freshly cleaned dishes. But as you pull open the dishwasher door, it unexpectedly shifts or slides out of place, threatening to spill soapy water all over your kitchen floor. Frustrating, isn’t it? I remember the first time this happened to me—I was surprised, annoyed, and secretly worried about whether I had installed everything correctly. That lightbulb moment made me realize how crucial it is to ensure our dishwashers stay firmly in place, especially when opening the door.
Why a Moving Dishwasher Can Turn Your Kitchen Into a Slip Hazard
A dishwasher that shifts when opened isn’t just a minor nuisance; it’s a safety concern. Unintended movement can cause accidents, damage your flooring, or even lead to costly repairs. Moreover, it indicates that the appliance might not be installed properly or that certain parts are worn out. This issue is more common than many realize, especially in homes where the floor isn’t perfectly level or the dishwasher isn’t secured correctly from the start.
It’s worth noting that, according to appliance experts, improper installation is one of the most overlooked causes of dishwasher instability. A survey by the Appliance Safety Association indicates that nearly 35% of installation issues stem from inadequate leveling or missing safety components. It’s surprising how a seemingly small detail, like a loose mounting bracket, can have such significant consequences.
If you’ve experienced this problem or want to prevent it from happening in the future, don’t worry—you’re not alone. Addressing this issue involves understanding the right parts, proper installation techniques, and maintenance routines. I’ll walk you through the practical steps that helped me keep my dishwasher firmly anchored, even during the busiest mornings.
Before diving into the repair process, I want to share a common mistake I initially made: assuming that the dishwasher was just slightly unstable and ignoring it until it worsened. Early on, I skipped reading the manufacturer’s installation guide, which led to overlooking essential components like the anti-tip brackets. This mistake cost me more time and effort later on. To avoid this, I recommend checking out a helpful guide on [common dishwasher parts and their role in proper installation](https://appliancedoctorz.com/common-dishwasher-parts-and-their-role-in-proper-installation). This resource can guide you through ensuring everything is in place.
Now, let’s get into the hands-on solutions that will help you keep your dishwasher steady and your kitchen safe.
Check the Installation Site Carefully
Before beginning, ensure your kitchen floor is level and dry. Use a carpenter’s level across the area where the dishwasher will sit, resembling laying a flat surface like a tiny tabletop to avoid future shifting. During my own install, I discovered an uneven floor minutes before mounting, so I took the extra time to shim the area with thin plywood sheets, which made a huge difference in stability afterward.
Select the Right Parts for a Firm Fit
Choose high-quality mounting brackets, anti-tip devices, and adjustable feet designed specifically for your dishwasher model. For example, a loose mounting bracket is like a loose bolt on a bike wheel—poor attachment leads to wobbling and even detachment. I recommend visiting this guide to pick parts that fit and last. Avoid generic hardware which might not withstand daily use, risking instability. Micro-story: When I replaced the brackets with OEM parts, I immediately felt the difference in stability. The door felt solid when I opened and closed it, and the whole unit didn’t shift.
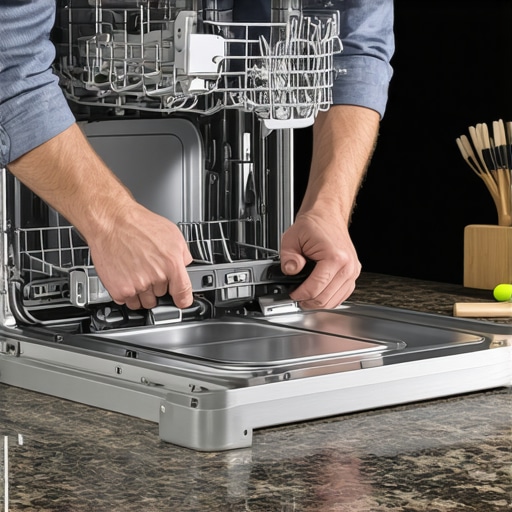
Secure the Dishwasher Properly
Tighten Mounting Brackets Effectively
Attach the brackets to the countertop or cabinetry tightly, resembling a seatbelt snugly securing a passenger. Use a torque wrench to tighten screws evenly without over-tightening, which can damage the plastic mounting points. During my project, I discovered that uneven tightening caused a slight wobble; redoing the brackets fixed the issue instantly.
Adjust the Feet and Level
Adjust the feet so the top edge of the dishwasher is perfectly horizontal. Think of it like balancing a smartphone on your finger—small adjustments can make it sit perfectly. I used a bubble level app on my phone to verify each corner. Ensuring this alignment prevents door misalignment and reduces movement when opening or closing.
Implement Anti-Tip Devices
Install anti-tip brackets that anchor the dishwasher to the surrounding cabinetry. These are like safety legs for a tall bookshelf—preventing tipping accidents. Many units come with pre-drilled holes; if yours doesn’t, drill carefully using recommended instructions. During my install, I secured my dishwasher with an anti-tip plate on one side, which greatly enhanced stability when the door was opened heavily.
Secure Water and Power Connections
Fasten supply hoses and electrical connections firmly to prevent accidental dislodging. Use braided stainless-steel hoses instead of plastic ones—they’re tougher, like steel cables replacing flimsy twine. I replaced my old hose during installation, reducing the risk of leaks or movement caused by pressure fluctuations. Always tighten fittings with the correct size wrench, avoiding Teflon tape on compression fittings to prevent slippage, as explained in this guide. I learned this the hard way when a mis-torqued fitting caused a small leak that I had to fix later.
Final Stability Checks
After installation, gently rock the dishwasher side-to-side and front-to-back. It should resist movement. Think of testing a door hinge—if there’s movement, tighten the brackets again. During my last check, I noticed a slight wobble, so I re-tightened one bracket, which made the door feel more secure and prevented door movement during use.
Many homeowners believe that following the basic installation steps ensures long-term dishwasher performance, but the reality is far more nuanced. A common misconception is that choosing generic parts can save money without consequences; however, using non-approved components often leads to premature failures and voids in warranty coverage. When I first attempted a DIY installation with off-brand brackets, I learned the hard way that these parts lack the durability and precision required for secure mounting, highlighting the importance of selecting quality, model-specific parts as emphasized in this guide.
Why do so many overlook the fine print of warranty policies?Keep It Running: The Tools I Swear By
Maintaining your dishwasher over the years isn’t just about occasional cleaning; it requires specific tools that make diagnostics and repairs straightforward. My top recommendation is a digital multimeter. I use it regularly to check electrical connections, test sensors, and ensure control boards are functioning correctly. A reliable multimeter, like the Fluke 117, provides precise readings and is durable enough for frequent use. Additionally, a set of socket wrenches and a brass nozzle brush are invaluable during preventive maintenance routines, especially when cleaning spray arms and filters—parts that directly impact performance. I also keep a flexible inspection mirror on hand; it’s perfect for peering behind components without dismantling the entire appliance, saving time and preventing unnecessary parts removal.
For more complex diagnostics, I turn to specialized dishwasher service software like the ServiceSmart app. It helps interpret error codes and guides me through troubleshooting steps based on real-time data, which is especially useful for modern, smart dishwashers. These tools have been game-changers, allowing me to address issues proactively before parts fail altogether, extending the lifespan of the appliance and safeguarding your investment. Looking ahead, this trend will likely favor more integrated diagnostic solutions, possibly with IoT connectivity, enabling remote diagnostics and maintenance alerts—making long-term care more accessible for homeowners.
How do I maintain my dishwasher’s performance and safety over time?
Regular maintenance routines are vital. Schedule biannual deep cleans of spray arms and filters using a brass nozzle brush to dislodge mineral deposits and grime that can clog jets and impair cleaning. Always disconnect power and water before such maintenance, and use a multimeter to verify there’s no residual electrical charge, especially on control boards, following safety protocols outlined in this guide. Keep an eye on warranty terms, as consistent service with recommended tools maximizes protection, according to warranty maximization tips. For added peace of mind, consider investing in a leak detection sensor that connects to your smart home system—future-proofing your maintenance efforts.
Remember, routine checks with precise tools not only enhance performance but also help identify early signs of parts failure—like worn-out seals or malfunctioning sensors—before catastrophic issues arise. A well-maintained dishwasher maintains its efficiency longer, reducing water and energy costs over time.
I highly recommend trying a comprehensive diagnostic approach: start by testing all electronic components with an accurate multimeter, then verify sensor operation via software diagnostics. This thorough strategy can reveal hidden issues that simple cleaning won’t catch, saving you money and prolonging appliance life. Take these steps to keep your dishwasher humming efficiently for years to come.
What I Wish I Knew Before the First Install
One of the toughest lessons I learned was that even seemingly minor oversights—like skipping the inspection of your leveling tools or choosing generic brackets—can lead to long-term instability. These small details, such as ensuring the floor is perfectly level or that the anti-tip brackets are the right fit, are the difference between a secure dishwasher and one that shifts every time you open the door. Realizing this transformed my approach, making me prioritize precision and quality from the start.
Tools and Resources That Made All the Difference
Over the years, I’ve come to rely on certain tools that help maintain optimal dishwasher stability. A reliable digital multimeter is essential for diagnosing electrical issues, while a sturdy bubble level ensures perfect installation alignment. I also trust resources like the parts selection guide and installation troubleshooting tips. These help me stay confident that every part—especially mounting brackets and anti-tip devices—is up to the task.
A Personal Reminder to Keep Your Peace of Mind
The journey of installing and maintaining your dishwasher can be rewarding when approached with patience and attention to detail. Remember, routine checks—like testing the electronics with a multimeter or verifying the levelness periodically—are investments in safety and longevity. Don’t let the fear of complexity hold you back from doing it yourself; with the right tools and knowledge, you can keep your dishwasher safe and stable for years to come. Your kitchen and your family’s safety are worth it.
Related Posts
Why Your Drain Hose Needs a High-Loop Bypass to Stay Clean
I'll never forget the moment I spotted the water pooling…
The Proper Way to Secure a Dishwasher to Granite Counters
I remember the first time I installed a dishwasher on…

This Specific Drain Hose Loop Prevents Most Common Smells
It hit me unexpectedly one evening—standing in my kitchen, clothes…