
Have you ever poured your dishwasher’s rinse cycle, only to realize your plates didn’t come out as spotless as you’d hoped? That sinking feeling of wasting water and energy, yet still dealing with grimy dishes, hit me hard early on. I used to think that bigger water amounts were the only way to get everything clean, but I was mistaken. One day, I had a lightbulb moment: I was overdoing it with water, and it was costing me in more ways than one.
My Wake-Up Call: When I Realized Less Water Could Mean Better Results
It all started with a stubborn casserole dish—dried-on sauce that just wouldn’t budge. I instinctively cranked up the water level during the wash, believing more was better. Surprisingly, the dishes still came out dull and sometimes with streaks. That’s when I wondered: could I be wasting water without gaining anything? After some experimentation, I discovered that changing my approach not only saved gallons but also improved my dishes’ sparkle. The secret? Using smarter techniques and understanding my dishwasher better.
Is Water Conservation Really Worth the Effort?
At first, I was skeptical. I thought, “Can I truly reduce water and still get my plates clean?” I made a common mistake early on—ignoring the importance of proper loading. Overloading the dishwasher or blocking spray arms with large utensils can make less water and optimized spray improperly wash the dishes. To avoid this, I started following expert advice, such as checking dishwasher parts and their role, which helped me understand how critical water flow actually is.
Research indicates that modern dishwashers are designed to use less water while maintaining cleaning efficiency, but only if used correctly. Knowing how to adjust my loading, select the right cycles, and prevent leaks has been a game-changer. I found that by adopting water-saving tips, I was not only reducing my bills but also extending the life of my machine. It’s truly a win-win. But I want to help you avoid the pitfalls I stumbled into. That’s why, next, we’ll look at simple, practical steps that you can take today to use less water and still get perfect cleaning results.
Check Your Water Supply and Pressure
Start by verifying your home’s water pressure is within the optimal range for your dishwasher, typically between 20-120 psi. Low pressure can lead to inadequate cleaning and the need for more water. Use a simple pressure gauge or consult a plumber if you’re unsure. I once faced stubborn stains on my dishes, and after adjusting my supply line to ensure proper pressure, I noticed a significant improvement in cleaning quality without increasing water consumption.
Inspect and Clean the Spray Arms
Clogged or worn spray arms can hinder water distribution, causing dirtier dishes and excess water usage as the machine compensates. Remove the spray arms regularly and clean out any mineral deposits or debris, especially if you live in hard water areas. I once disassembled mine after noticing water wasn’t reaching the top rack, and cleaning out the tiny nozzles restored proper coverage and reduced water waste. Learn how to clean your spray arms effectively.
Adjust Loading Techniques for Better Water Coverage
Overloading or improperly placing items blocks water jets and causes re-washing, which wastes water and energy. Arrange dishes to allow free movement of water and avoid stacking items tightly. I once loaded my utensils vertically to maximize spray access, which improved cleaning and cut down on unnecessary rinse cycles. Visualize your dishwasher’s water pathways; if obstructed, water can’t clean efficiently, leading to waste.
Select Energy-Saving Cycles with Proper Settings
Modern dishwashers offer eco-friendly modes that use less water but still deliver cleanliness. Use these cycles whenever possible, especially for lightly soiled dishes. Also, avoid using heat-dry options that prolong drying phases and increase cycle length, consuming more water and energy. Remember, shorter, eco modes can be just as effective if your dishes aren’t heavily soiled, saving both water and money.
Perform Routine Maintenance and Troubleshooting
Regularly check and replace worn parts, such as the inlet valve or filters, to maintain optimal water flow. If your dishwasher isn’t filling properly, inspect the inlet valve for clogs or malfunctions, which can lead to excessive cycle water use or poor rinsing. I once diagnosed my unit during a warranty check (see how to diagnose parts during warranty), and replacing a faulty valve restored efficiency and water savings. Keep an eye on leak sensors and seals to prevent wastage and ensure your machine operates at peak performance.
Why Most People Get Dishwasher Installations Wrong
Many homeowners assume that installing a dishwasher is a straightforward process—simply hook it up and turn it on. However, this misconception can lead to costly mistakes, especially concerning proper part selection and warranty coverage. For example, choosing the wrong inlet valve or neglecting to install an anti-siphon device can cause leaks or damage that voids warranties. To avoid this, I recommend consulting detailed guides like parts to check during installation to ensure your setup is both effective and compliant with warranty terms.
Common Misunderstandings About Dishwasher Parts
There’s a widespread myth that all replacement parts are interchangeable or of equal quality. In reality, using generic or incompatible parts can result in poor performance or damage to your machine. For instance, installing a cheap water inlet valve might save money initially but could lead to leaks or insufficient water flow over time. Always refer to tips for choosing the right parts to ensure durability and optimal performance.
How Warranty Policies Can Surprised Even Savvy Owners
Many assume that their warranty covers any malfunction, but this isn’t always the case. Some warranties exclude damages caused by improper installation, neglect, or using incompatible parts. For example, a faulty door latch might be covered, but if your installation didn’t include a proper mounting bracket, the damage from a door misalignment may not be reimbursed. To maximize your coverage, it’s vital to understand how to maximize your warranty through correct installation and part selection.
Advanced Insights: Are DIY Repairs Worth the Risk?
While DIY fixes might seem cost-effective, improper repairs can cause more damage and void warranties. This is especially true when replacing critical parts like the spray arm or inlet valve, which require precision and understanding of the machine’s inner workings. According to experts, consulting professional technicians or thoroughly understanding essential parts and troubleshooting can prevent costly errors. The ‘Oops’ factor here is real—failing to adhere to these practices often results in water leaks, noise issues, or even total failure.
Have you ever fallen into this trap? Let me know in the comments!
Investing in Quality Maintenance Tools
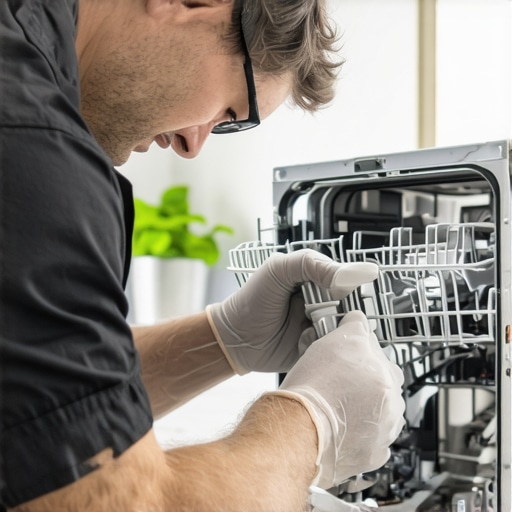
Having the right tools is crucial for effective dishwasher upkeep. I personally rely on a high-quality microfiber cloth to remove mineral deposits and a durable spray arm cleaning brush to reach those hard-to-access nozzles. A digital multimeter is invaluable for diagnosing electrical issues, ensuring safety while troubleshooting. For more detailed diagnostics, I recommend using a digital multimeter to verify voltage and continuity in components like the inlet valve or control board.
Streamlining Long-Term Maintenance with Methodical Checks
Consistency is key to longevity. I set aside a weekly routine: inspecting the door gasket for mold, cleaning the filters, and checking spray arms for clogs. Using an ultrasonic cleaner to remove mineral buildup from parts like spray arms and nozzles makes a noticeable difference. Regularly maintaining these components helps avoid costly repairs and ensures optimal performance. Remember, replacing worn parts proactively, like the inlet valve, can save you from an unexpected breakdown—see when to replace parts for guidance.
Future Trends: Smart Maintenance and Monitoring
The future points towards smart, IoT-enabled dishwashers that can self-diagnose issues and alert you via smartphone apps. Already, some models integrate leak sensors and remote diagnostics, which I’ve found incredibly helpful in preemptively catching problems. I predict that enhanced software algorithms will soon recommend specific maintenance actions based on usage patterns, reducing downtime and extending lifespan. Investing in these technologies early can make maintenance more proactive than ever.
How do I keep my dishwasher in top shape over time?
The best way to ensure long-term performance is a combination of regular inspections, using quality replacement parts, and staying informed about firmware updates for smart models. When parts like filters or pumps show signs of wear, replacing them promptly can prevent larger failures. Also, always refer to expert guides like troubleshooting essential parts to understand what needs attention before a problem escalates. Finally, leveraging advanced tools, like a digital multimeter, allows you to verify component functionality with confidence. I challenge you to try diagnosing your control module with a multimeter today—it’s a game-changer for DIY maintenance.
Over the years, I’ve learned that maintaining a dishwasher isn’t just about replacing parts or following routines—it’s about understanding the unseen factors that contribute to its health. My journey revealed some invaluable lessons that many DIY enthusiasts overlook, yet they can dramatically extend your appliance’s life and performance.
Lessons Hidden in Plain Sight That Changed My Perspective
- Never underestimate the power of proper installation: I once skipped a step during setup and faced persistent leaks. Ensuring every part, especially the inlet valve and drain hose, is correctly installed according to expert advice (check essential parts here) can prevent costly damage and voided warranties.
- Water quality impacts everything: Using hard water without proper maintenance quickly led to mineral deposits clogging spray nozzles. Regularly flushing out deposits (learn how to clean spray arms) saved me from premature replacement of parts.
- Routine checks are your best friends: Habitual inspection of filters, door gaskets, and spray arms (discover more about vital parts) prevented minor issues from snowballing into major failures.
- Understanding warranty nuances prevents surprises: I found that many warranty claims are declined without proper documentation or proof of correct part installation. Knowing how to document and when to seek professional diagnostics (see diagnostic tips) keeps my coverage intact.
- Tools make a difference: Investing in a digital multimeter for electrical troubleshooting (get expert guidance) empowers me to identify issues early and avoid unnecessary repairs.
Unlock Your Dishwasher’s Potential with These Gems
- Deep-clean spray arms and filters regularly: Simple maintenance that prevents clogs and ensures optimal water flow.
- Choose quality replacement parts: Opt for OEM or high-quality alternatives to ensure durability and warranty compliance.
- Stay informed: Follow trusted sources and expert guides to keep up with latest maintenance practices (read more here).
- Schedule periodic professional checks: An annual tune-up can catch hidden issues early and extend your appliance’s life.
Start Today and Revolutionize Your Dishwasher Care
Remember, the key to a long-lasting dishwasher isn’t just in occasional repairs but in ongoing, informed care. Embrace these insights, equip yourself with the right tools, and see how your appliance responds—cleaner dishes, lower water bills, and fewer surprises await. Your dishwasher can be more than just a machine; it can be a reliable partner in your home, saving you time and money every day.
What’s the first step you’re going to take to improve your dishwasher maintenance routine? Share your thoughts below—I’d love to hear your experiences!
Related Posts
How to Clean Your Dishwasher Interior Without Harsh Chemicals
It happened again. I opened my dishwasher expecting sparkling dishes,…
Why This Specific Detergent Pod Is Ruining Your Seals
It started with a tiny leak under my dishwasher that…
Why the ‘Eco’ Button Might Be Breeding Bacteria in Your Gasket
It was a typical Sunday afternoon when I opened my…