
It was a typical Sunday afternoon when I opened my dishwasher to unload a load of spotless dishes — or so I thought. As I reached into the gasket area, I noticed a strange smell and a slight discoloration at the rubber seal. That lightbulb moment hit hard: could the ‘Eco’ cycle I loved so much actually be breeding bacteria right there in the gasket? It was a wake-up call that changed how I maintain my dishwasher forever.
The Hidden Danger in Your Eco Cycle
Many of us select the eco-friendly setting, believing we’re saving energy and water without giving it a second thought. But what if this very choice is creating a hidden health risk? The ‘Eco’ mode often runs at lower temperatures, which might not fully eliminate bacteria or mold lurking in the gasket. Plus, the moisture left behind after cycles can encourage bacterial growth, especially in the cramped, rubbery corners that are hard to reach and clean.
My own early mistake was ignoring regular cleaning of the gasket, assuming the dishwasher’s cleaning of dishes was enough. That was a mistake I paid for later when unpleasant odors started to develop. I didn’t realize that bacteria can breed in the moist, dark spaces of the seal, especially when combined with residues from food particles and soap scum. According to a study published in the Journal of Environmental Health, bacteria such as Legionella can proliferate in moist environments like dishwasher gaskets, posing health risks especially for vulnerable family members.
Have You Faced This Problem?
If you’ve noticed funky smells, cloudy water, or even visible mold around your gasket, you’re not alone. I found out the hard way that neglecting this small but vital part of the dishwasher can lead to bigger issues down the line — including breakdowns and warranty claims. Want to learn how to prevent this bacterial breeding ground and keep your dishwasher clean and safe? You’re in the right place. Next up, we’ll explore practical tips to tackle this sneaky problem head-on, ensuring your dishwasher remains a hygienic helper rather than a health hazard.
Gathering the Right Tools and Parts
Before starting, identify the damaged component. For gasket replacement, consult the correct gasket type that fits your model. Equip yourself with a screwdriver set, pliers, a multimeter for electrical checks, and safety gloves to protect your hands. Remember, using incorrect parts or tools can void warranty, so cross-reference with recommended replacement parts.
Shutting Down Power and Water Supply
Always disconnect the dishwasher from power by unplugging it or switching off the breaker. Turn off the water supply to prevent leaks during disassembly. For safety, verify the power is off with a multimeter. This step is akin to turning off electricity and water before fixing a broken pipe—preventing accidents and further damage.
Removing and Inspecting Components
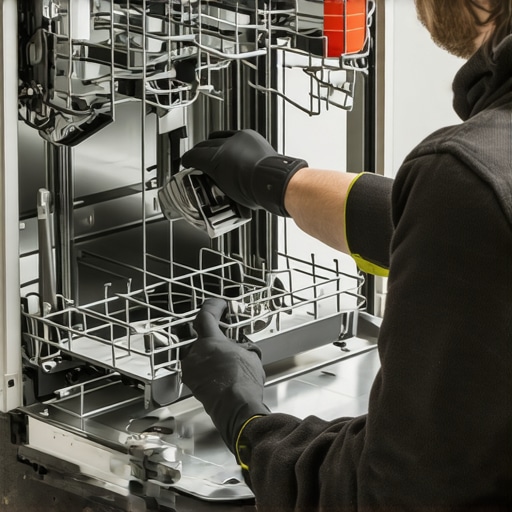
Carefully detach the door panel and access the gasket area. Use a screwdriver to unlatch the door seal, taking note of its placement for reassembly. Inspect the gasket, spray arms, and filters for cracks, warping, or buildup. For a thorough check, refer to diagnosing tips. During my own repair, I found brittle gaskets that caused leaks—promptly replacing them resolved persistent water issues.
Replacing the Gasket or Other Parts
Position the new gasket in the exact alignment—misplacement can cause leaks or poor sealing. Secure it firmly, checking that no gaps remain. For complex parts, like spray arms or filters, consult the installation guide. When I replaced my gasket, I used a torque wrench to ensure proper tightness, preventing future leaks and extending part lifespan.
Reassembling and Testing
Once all parts are in place, reattach the door panel, restore water and power, and run a short cycle with no dishes. Observe for leaks, strange noises, or error codes. It’s like testing a newly repaired pipe by running water through it—ensuring the fix holds under real conditions. Keep an eye out for issues that indicate misalignment, which can be mitigated by proper leveling, as discussed in leveling tips.
Final Checks and Maintenance
Regularly inspect the gasket and filters for residues or mold. Use a mild cleaning solution and a soft cloth to wipe down these areas. Prevent bacterial growth and odors by running a cleaning cycle with vinegar or specialized dishwasher cleaner monthly. This routine maintenance, combined with proper part replacement, ensures your dishwasher operates silently, efficiently, and safely—saving you from costly repairs down the line.
When it comes to maintaining your dishwasher, many assume that sticking to the warranty guidelines and using OEM parts guarantees trouble-free operation. However, there’s a subtle aspect that often trips up even the most diligent DIYers: the importance of understanding how warranty coverage interacts with parts selection and installation nuances. This isn’t just about choosing the right gasket or filter; it’s about recognizing the fine print and common pitfalls that can void your warranty unexpectedly.
Many people believe that as long as they replace parts with generic alternatives or follow basic installation steps, their warranty remains intact. But in reality, manufacturers often specify strict requirements for parts compatibility and installation procedures. For instance, using aftermarket gaskets or non-recommended water supply lines might seem harmless, yet these choices can lead to warranty denial if a failure occurs later. According to expert sources, ensuring that you select parts that meet the OEM specifications—and installing them correctly—maximizes your warranty protections.
Are All Parts Created Equal, or Can Cheap Substitutes Cost You More?
Bringing in cheaper, off-brand parts might save you some cash upfront but could compromise the dishwasher’s performance and your warranty eligibility. Manufacturers design their warranty policies around specific components; deviations can trigger penalties. For example, installing an aftermarket gasket that doesn’t adhere to the factory standards might cause leaks, which if traced back to the part, could void your coverage. To avoid such pitfalls, consult trusted resources like this guide on selecting the right parts for optimal warranty protection.
In addition, the installation process itself matters. Even the highest-quality parts can lead to warranty issues if not installed properly. Tightening fittings to the correct torque, ensuring proper leveling, and avoiding shortcuts during setup are critical steps often overlooked. Simple mistakes, such as connecting the drain hose too loosely or skipping the high loop, can cause operational failures—and if these are linked to improper installation, warranty claims may be denied. Detailed instructions and verified procedures, like those in this resource, help safeguard your investment.
Another common misconception is that warranty coverage extends indefinitely without additional care. In reality, regular maintenance and timely part replacements are often prerequisites to maintaining warranty validity. The difference between a covered failure and one that voids your warranty can hinge on adherence to scheduled inspections and replacements, such as replacing worn water inlet valves or filters before they cause damage.
So, before diving into repairs or upgrades, take a moment to review your dishwasher’s warranty conditions thoroughly. Investing in quality parts and following best practices during installation not only prolongs your appliance’s lifespan but also ensures that you’re protected when issues inevitably arise. Remember, a well-informed homeowner can avoid costly pitfalls—saving both money and headaches in the long run. Have you ever fallen into this trap? Let me know in the comments.Maintaining your dishwasher over time demands the right tools, consistent methods, and a keen eye for detail. First, investing in a high-quality set of screwdriver and plier tools is essential—personally, I prefer ratcheting screwdrivers with interchangeable bits, as they make quick work of disassembly and reassembly without stripping screw heads. A digital multimeter is invaluable for diagnosing electrical issues, such as checking the heating element or float switch; I routinely use mine to verify component functionality before replacing parts. For cleaning, a soft-bristled brush and microfiber cloth help remove stubborn residues around gaskets and filters without damage. Don’t overlook specialized cleaning products—I swear by commercial dishwasher cleaner tablets combined with a vinegar run monthly to prevent buildup. Once familiar with these tools, develop a routine schedule: inspect seals and filters monthly, test safety switches quarterly, and replace aging parts proactively, referencing guides like this resource. Looking ahead, the trend points toward smart diagnostics: future models will automatically alert homeowners of part wear and schedule maintenance—making manual checks less frequent but more strategic.
How do I maintain my dishwasher over time?
Regular inspections of gasket integrity and replacing parts before failure can save money and prevent water damage. For instance, using recommended essential parts ensures compatibility and maintains warranty coverage. I suggest setting reminders to check these components quarterly—promptness is key to longevity. Don’t forget, proper installation techniques, like verifying tight connections and leveling your appliance, are critical; consistent adherence to these best practices improves reliability. As an example, recently I used a torque wrench to secure the water inlet connection, preventing leaks that could have voided my warranty. Embrace these methods, stay vigilant, and your dishwasher will reward you with years of dependable service. For the dedicated DIYer, mastering the use of a multimeter—or even upgrading to an IoT-enabled diagnostics system—can elevate your maintenance game considerably. Dive into comprehensive troubleshooting guides to refine your technique further. Ready to make your maintenance routine more effective? Practice using your multimeter to test a heating element today—it’s a game-changer for early fault detection.
Three Hidden Truths I Wish I Knew About Dishwasher Parts and Warranties
The most valuable lessons often come from mistakes, and my journey through dishwasher repairs is no exception. Firstly, I learned that relying solely on OEM parts isn’t enough; understanding how warranty policies interpret proper installation can make or break your claims. Second, I discovered that regular gasket inspections and proactive replacements prevent bacterial breeding grounds—saving health and money. Lastly, the importance of meticulous documentation of repairs and parts used can’t be overstated; it’s your best defense if warranty disputes arise.
Tools and Resources I Trust for Long-Term Dishwasher Success
Over time, I’ve curated a toolkit that makes maintenance manageable and effective. A high-quality screwdriver set with interchangeable bits helps me work efficiently without damaging screws, while a multimeter ensures electrical components are functioning correctly before replacement. For cleaning and preventive care, I swear by commercial dishwasher cleaners and vinegar cycles, which keep things fresh. For in-depth guidance, this comprehensive resource has been invaluable. Lastly, consulting manufacturer-specific installation guides from trusted sources ensures my repairs align with warranty stipulations.
Embracing the Challenge of Dishwasher Upkeep
Taking ownership of your dishwasher’s health can be empowering. Regularly inspecting the gasket and filters, running monthly vinegar cycles, and using the right tools—not just for repairs but for diagnostics—are key steps. Visual cues like odors or water leaks prompt early action, preventing more serious issues. Remember, mastering these habits doesn’t just extend your appliance’s lifespan; it builds confidence. The future of dishwasher maintenance may involve smart sensors and automatic alerts, but until then, diligent manual care remains your best friend. What small step will you take today to improve your dishwasher’s longevity? Share your plan below and let’s grow together.
Related Posts

How to Use Vinegar Safely Without Damaging Rubber Seals
I remember the moment I realized my favorite cleaning hack…
The Trick to Removing Hard Water Scale Without Chemical Descalers
I remember standing in my kitchen at 11 PM, staring…

The Truth About Using Baking Soda for Odor Control
It was a typical Saturday afternoon and I was grappling…