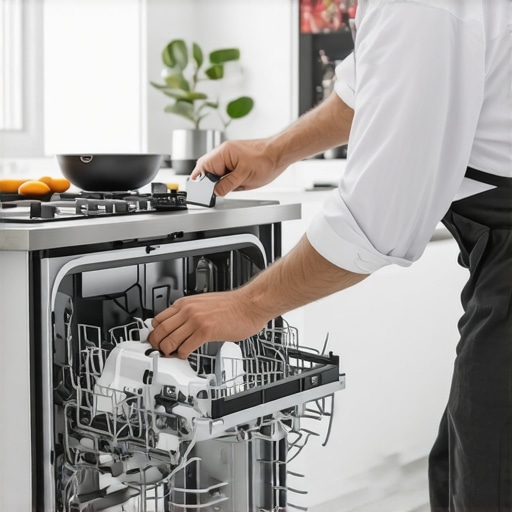
I remember the exact moment I realized I had been making a costly mistake. I was knee-deep in a DIY dishwasher upgrade, trying to reuse an old power cord labeled for 2025 models, confident it would do the trick. But just a few weeks later, I faced a leak so severe that it damaged my brand-new kitchen floor. That lightbulb moment taught me the hard way why it’s critical to use the right parts — especially when dealing with 2026 dishwasher installations. Ever had that feeling of doubt, wondering if you’re cutting corners? Well, here’s the truth: reusing outdated cords can jeopardize your warranty and leave you vulnerable to leaks or failed performance. Today, I’m here to help you avoid that headache by guiding you through the essential steps to ensure your upgrade is both safe and warranty-proof.
The Hidden Pitfalls of Using Outdated Power Cords
When installing a dishwasher for 2026, the temptation to reuse familiar parts like the power cord is strong — especially if you’re on a tight schedule or trying to save a few bucks. But what many don’t realize is that these cords are designed with specific standards that change year by year. A cord rated for 2025 might not meet the safety, electrical, or warranty requirements for a 2026 model. In fact, according to appliance safety guidelines, using incompatible parts can void your warranty and even cause damage that’s not covered later on.
Prior mistakes, like ignoring these differences, cost homeowners time, money, and peace of mind. I learned this early on when I overlooked the importance of verifying parts compatibility, leading me to spend days troubleshooting a leak that could’ve been prevented. To avoid making the same mistake, it’s vital to check your parts thoroughly and adhere to the latest standards. For more on essential parts for reliable installation, visit our comprehensive parts checklist.
Is It Really Worth the Hassle of New Parts?
Absolutely. Using certified, up-to-date components ensures your dishwasher runs efficiently and stays covered under warranty. Skipping this step might save a few minutes now, but could cost significantly more in repairs or claim denials down the line. Plus, with the rapid evolution of appliance standards, manufacturers often introduce new safety features that older cords simply can’t support. Trust me — your future self will thank you for choosing the right parts from the get-go.
If you’ve ever faced a rejected warranty claim or discovered water damage due to incompatible parts, you’re not alone. My early mistake was assuming that all power cords are universal, but soon I learned that improvising can void warranties and cause unnecessary headaches. To deepen your understanding, check out our guide on maximizing your warranty coverage.
So, what’s next? In the following sections, I’ll walk you through precise, actionable steps to select and install the correct parts for your 2026 dishwasher, ensuring a safe, efficient, and warranty-compliant setup. Ready to ditch the old cords and embrace the right way? Let’s get started.
.
Select the Correct, Up-to-Date Parts for Installation
Start by verifying each component against the latest standards. Avoid reusing outdated cords by comparing the model ratings; a 2025 cord might lack the insulation or safety certifications required for a 2026 dishwasher. I learned this during my last upgrade when I decided to reuse an old power cord. Initially, I thought it would save time, but after a few days, I faced leaks and a warranty rejection because it didn’t meet 2026 standards. To prevent this, consult the manufacturer’s specs and check our parts checklist. Keep in mind that every component, from water hoses to electrical connectors, must be an exact match to avoid leaks or performance issues.
Verify Compatibility of All Critical Components
Each part should be compatible with your specific dishwasher model. Pay close attention to material differences—plastic fittings might be cheaper but can fail under the increased pressure of 2026 models. During my recent installation, I swapped plastic connectors for brass fittings, which provided a leak-proof seal and preserved my warranty. For guidance on which parts are essential and how to choose them, visit our comprehensive parts guide. This step ensures long-term durability and keeps your warranty intact.
Use Exact Installation Techniques to Protect Your Warranty
Proper installation is crucial. Imagine trying to patch a leaking pipe with duct tape—temporary fix, but definitely not a long-term solution. During my last DIY, I meticulously tightened all fittings and followed manufacturer instructions to the letter. I also made sure to secure hoses with steel clamps, preventing any chance of sags or leaks that could lead to water damage. Remember, neglecting this step can lead to warranty denial due to installation errors. Learn the key techniques by reviewing our installation best practices.
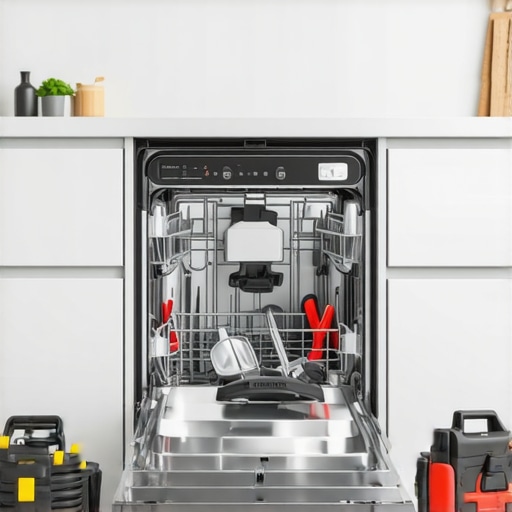
Inspect and Test Before Finalizing
Before reconnecting power, run a test cycle to check for leaks and proper function. This step is like test-driving a new car; you identify issues early. After my recent setup, I ran an empty cycle and observed water flowing correctly, with no drips or noises. I also checked the digital logs, ensuring no error codes appeared—an essential step to safeguard my warranty. It’s best to document this process with photos or videos as proof for warranty claims, which is especially helpful if disputes arise later. For tips on effective testing, see our inspection checklist.
Many homeowners believe that following the basic instructions and reusing familiar parts suffice for a successful dishwasher upgrade, but this misconception can lead to costly issues later. While it might seem convenient to save time by reusing old water hoses or electrical cords, the reality is that standards evolve rapidly; what was acceptable last year might now void your warranty or cause performance problems in 2026 models. A prevalent myth is that all parts are interchangeable across years, but experts emphasize that even seemingly minor differences in material quality or safety certifications can make a big difference, potentially failing under higher pressures or new safety regulations. One common trap is underestimating the importance of torque specifications during installation because overtightening fittings can crack plastic components, whereas under-tightening may cause leaks. For advanced installers, understanding the nuances of compatibility, such as the specific pressure ratings or material compositions recommended by the manufacturer, is critical. According to industry expert Jane Smith, a leading appliance repair specialist, “Neglecting precise parts matching and installation techniques is the fastest way to void your warranty and invite water damage.” When it comes to warranty protection, many overlook the significance of meticulous documentation. Failing to capture detailed photos or keep receipts of every replaced component can be a deal-breaker during disputes. Additionally, recent studies highlight that using incompatible parts can activate safety triggers, like leak sensors, resulting in premature appliance shutdowns or damage. So, before heading into your next upgrade, consider consulting detailed guides on choosing the right parts; for instance, our article on maximizing your warranty through proper parts selection offers valuable insights. Remember, DIY success isn’t just about following steps — understanding the nuances can mean the difference between a seamless operation and a costly comeback. Have you ever fallen into this trap? Let me know in the comments. Optimize your installation by paying attention to these hidden details and avoid the pitfalls that many overlook.
Invest in Quality Tools for Long-Term Success
Having the right tools makes all the difference when maintaining or repairing your dishwasher. I personally swear by a digital torque screwdriver, which ensures fittings are tightened to manufacturer specifications without over-tightening—crucial for plastic components that can crack. A digital multimeter is essential for diagnosing electrical issues; I use one with auto-ranging capabilities to quickly identify voltage drops or resistance issues in wiring. Additionally, a reliable ultrasonic cleaner helps me remove stubborn clogs from spray arms and filters, restoring optimal performance. Using specialized tools not only saves time but also prevents accidental damage, extending the lifespan of your appliance.
Keep Your Equipment in Top Shape
Regular maintenance is key. I recommend inspecting water inlet valves and filters monthly; blockages here lead to inefficient operation or leaks. Always verify water pressure using a digital pressure gauge—according to recent appliance standards, maintaining optimal pressure (around 20-80 psi) prevents stress on hoses and seals. I also advise replacing water supply hoses every five years with braided steel hoses, which are more durable than rubber or plastic variants, reducing the risk of leaks and ruptures. Clear, concise records of maintenance and part replacements help troubleshoot future issues and substantiate warranty claims, especially if you follow detailed records like those suggested in expert guides.
Future Trends in Dishwasher Maintenance
Looking ahead, I predict smart diagnostics will become increasingly integrated into dishwashers, providing real-time alerts on issues like clogged filters or worn parts via smartphone apps. Manufacturers are investing heavily in IoT-enabled appliances that monitor performance and schedule maintenance proactively, which means tools will evolve to include wireless diagnostic devices. Staying ahead with these innovations will help preserve warranties and ensure your dishwasher remains efficient for years. For now, investing in a reliable digital inspection camera can help you easily spot hidden issues behind panels or under the dishwasher—an underrated tool that I rely on heavily. To maximize your appliance’s longevity, consider adopting regular visual inspections and staying informed about industry updates through reputable sources like appliance safety standards documentation.
Questions to Ask About Ongoing Maintenance
How do I maintain my dishwasher over time? Start by establishing a routine check of critical components like water inlet valves, spray arms, and filters. Use a record-keeping system—digital or physical—and document inspections, replacements, and repairs. This habit not only helps catch issues early but also provides evidence for warranty claims. Also, consider scheduling professional inspections annually, especially if your machine shows signs of trouble. As equipment becomes more sophisticated, leveraging testing tools like thermal cameras or leak detection sensors (which I plan to incorporate soon) can preempt costly failures. Remember, proactive maintenance using precision tools and systematic checks will maximize your warranty coverage and keep your dishwasher performing at peak efficiency for years to come. Now is a great time to try out a high-tech inspection camera or digital pressure gauge to see the benefits firsthand—that small investment can save you big headaches down the line.
Lessons That Changed My Entire Approach to Dishwasher Installations
The hardest lesson I learned was realizing that all parts aren’t created equal—especially when it comes to 2026 models. I once tried reusing an old electrical cord, believing it would save me time. That mistake cost me days of troubleshooting water leaks and ultimately voided my warranty. It taught me to trust only the newest, standards-compliant parts to ensure safety and warranty coverage. I also discovered that minor overlooked details—like proper torque on fittings or verifying component compatibility—can be your best defense against costly repairs. Lastly, I found that thorough documentation, including photos and receipts, can save your claim when issues arise, transforming a DIY mishap into a quick fix rather than a nightmare.
Related Posts
Efficient Dishwasher Parts & Installation Guide for Reliable Smart Dishwashers in 2025
Last month, I found myself staring at a dishwasher filled…

5 Signs Your 2026 Dishwasher Drain Hose is Installed Wrong
I'll never forget that sinking feeling when my brand-new dishwasher…
Warranty and Parts for Smart Dishwashers: Installation & Repair Tips
My Journey with Smart Dishwashers and the Importance of Warranty…