It happened again. My dishwasher, usually the quiet hero of my kitchen, started overflowing mid-cycle, water flooding onto the floor and turning my peaceful Saturday into a frantic cleanup session. That tiny, almost invisible component—something I almost ignored—was the culprit. Turns out, a simple $10 part was causing all this chaos. Have you ever faced a similar frustrating moment, wondering why your machine keeps overfilling despite everything seeming fine? If so, you’re not alone.
Why That Small Part Can Cause Big Problems in Your Dishwasher
Overfilling is a common headache, and often, the root cause is a tiny, overlooked component—usually something like a float switch or a specific sensor that monitors water levels. When this part malfunctions or gets clogged, your dishwasher can’t accurately gauge how much water is needed, leading to overflows, leaks, or incomplete washes. The good news? Many of these issues can be solved with a modest investment and a little know-how.
But first, let me be honest. Early on, I made the mistake of thinking I could fix this problem by just cleaning the filter or adjusting the water supply. Wrong move. It turned out that the real fix was replacing a small, inexpensive part designed explicitly to prevent overfilling. If I had known about this simple solution early, I would’ve saved myself hours of mess and anxiety. To find out exactly how this part works and how to identify it, check out the detailed guide on [understanding dishwasher parts](https://appliancedoctorz.com/understanding-dishwasher-parts-a-key-to-effective-maintenance).
So, what’s the secret? It’s often a specific component—like a float switch or a fill valve—that acts as the machine’s gatekeeper for water level management. When functioning properly, it detects when enough water has entered and signals the machine to stop filling. When it fails, overflows become inevitable. Fortunately, replacing these small parts is straightforward and cost-effective.
Now, if you’re like me, you might be skeptical: ‘Is replacing this tiny part really worth the trouble?’ Believe me, I’ve been there. And I understand the doubt because I almost ignored the importance of this component. But the truth is, addressing these minor parts not only resolves overfilling but also extends the life of your dishwasher and preserves your sanity.
If you want to learn about the common mistakes people make and how to avoid costly repairs, I recommend reading about [what your dishwasher warranty doesn’t cover](https://appliancedoctorz.com/what-your-dishwasher-warranty-doesnt-cover-and-how-to-avoid-fees). In the next section, I’ll walk you through the exact steps to diagnose whether this little part is faulty and how to replace it effortlessly.
Locate and Access the Float Switch
First, open your dishwasher and remove the lower kick plate to access the interior components. Use a screwdriver to unscrew the panel, revealing the float switch assembly, typically situated at the bottom of the tub. I once had my unit apart before realizing I needed to disconnect the wiring harness, which made reassembly tricky, but careful steps saved the day.
Identify the Float Switch
The float switch resembles a small, cylindrical sensor connected to wires. It works like a buoy—rising with the water level to signal when to stop filling. Sometimes, debris or mineral buildup hampers its function, so cleaning it first can prevent unnecessary replacements. But if cleaning doesn’t solve the issue, it’s time to replace.
Disconnect the Faulty Part
Carefully disconnect the wires from the float switch, noting their arrangement or taking a photo for reference. Use needle-nose pliers if needed. Gently unclip or unscrew the switch from its mounting point. This disconnection is akin to unhooking a fish—delicate handling ensures no damage to surrounding parts.
Prepare the Replacement Part
Make sure you have the correct replacement float switch. Check the model number or consult the manufacturer’s guide. For example, I always compare the old and new units side by side, ensuring the connectors and size match precisely. Proper compatibility prevents future headaches.
Install the New Float Switch
Connect the wires to the new switch, securing them firmly. Mount the switch in the original position, ensuring it moves freely without obstruction. Secure with screws or clips as needed. Think of it as mounting a tiny gatekeeper—proper placement guarantees accurate water level detection.
Test Your Repair
Before reassembling everything fully, run a short cycle to confirm the float switch operates correctly. Observe if the water fills and stops as intended. This step was crucial in my experience when I saw my dishwasher fill to the correct level without overflows, saving a cleanup later. If issues persist, recheck connections or consider wiring faults.
Reassemble and Final Check
Replace the kick plate and secure all panels. Ensure no tools or debris are left inside. Run a full wash cycle to verify the fix. A proper replacement of a faulty float switch restores water level control, preventing future overflows and ensuring your dishwasher runs efficiently. For more on diagnosing issues early, see this troubleshooting guide.
Many homeowners believe that warranties cover all possible repairs and part replacements, but the truth is far more nuanced. One common misconception is that a standard warranty will automatically cover any replacement part or repair, leading people to delay important documentation or overlooked maintenance. In reality, manufacturers often exclude certain parts or conditions, making it crucial to understand the specifics of your coverage. For instance, certain warranty policies require proof of proper installation, which many neglect, resulting in denied claims. To maximize your warranty benefits, it’s wise to familiarize yourself with the detailed policy, available at https://appliancedoctorz.com/understanding-dishwasher-parts-a-key-to-effective-maintenance.
Another trap homeowners fall into involves assuming that all replacement parts are created equal. Not all parts fit or function identically, and choosing incompatible components can cause further damage and void your warranty. Always ensure compatibility by consulting trusted sources or professional guides—like https://appliancedoctorz.com/top-tips-for-selecting-the-right-parts-for-dishwasher-installation—before purchasing replacement items. Avoid the mistake of reusing old parts or opting for cheap, third-party substitutes, as these can lead to unexpected breakdowns and costly repairs.
Installing parts yourself may seem straightforward, but improper installation is a leading cause of warranty disputes and appliance failures. Even a small misstep, such as incorrect tightening or wiring, can jeopardize your coverage. For complex setups, consulting expert advice at https://appliancedoctorz.com/expert-advice-on-dishwasher-installation-troubleshooting is highly recommended. Remember, a professional installation isn’t just about peace of mind—it’s often a requirement for warranty validity. Don’t fall into the trap of assuming that DIY always equals savings; sometimes, risking improper installation can cost you more in the long run.
Now, let’s tackle a more advanced question you might have: How can subtle installation errors cause long-term issues despite appearing correct at first? Research indicates that minor misalignments or loose connections at critical points, such as water inlet valves or mounting brackets, can lead to recurring leaks or component wear over time. These issues are not immediately obvious but can trigger warranty declinations if neglected. Proactively inspecting your setup and maintaining thorough documentation can save you from costly disputes—learn more about transmitting proper documentation at https://appliancedoctorz.com/how-to-claim-your-warranty-when-the-manufacturer-disappears.
Knowing the intricacies of warranty terms, parts compatibility, and installation practices provides you with a strategic advantage. It’s about more than simple troubleshooting; it’s about comprehensive knowledge that safeguards your investment and ensures smooth repairs. If you’ve ever fallen into one of these traps, let me know in the comments. Being aware of these nuances can make all the difference between a quick fix and a costly mistake.
Keeping your dishwasher running smoothly over the years requires more than just occasional cleaning. The right tools and methods can make all the difference, ensuring long-term durability and performance. I personally recommend investing in a quality multimeter; it’s essential for diagnosing electrical issues, testing connections, and verifying the integrity of components like sensors and control boards. For example, when troubleshooting mysterious cycles or error codes, I use a multimeter to measure continuity and voltage drops, which helps pinpoint faulty parts without unnecessary replacements.
Another tool I rely on is a digital torque wrench, especially when tightening hose fittings or mounting brackets. Over-tightening can damage threads or cause leaks, while under-tightening risks water damage or component failure. Using a torque wrench with correct specifications prevents these issues and extends your appliance’s lifespan. Reliable brands like Tekton provide precise control and durability, making them invaluable in my toolkit.
Regularly inspecting and cleaning important parts like the filter, spray arms, and inlet valve also contributes significantly to longevity. I use a nylon brush and a gentle vinegar solution to remove mineral buildup, which I’ve found is crucial in areas with hard water—more details on maintaining dishwasher parts effectively can be found at this guide. Maintaining these parts prevents strain on the motor and pumps, reducing early failure risks.
Looking ahead, I predict that smart diagnostic tools will become more integrated into household appliances, enabling real-time alerts and automated maintenance recommendations. Devices that monitor vibration, noise levels, and water flow could notify homeowners of issues before they escalate, saving time and money. As technology advances, staying updated with compatible diagnostic software and apps will be a key part of long-term maintenance strategies.
How do I maintain my dishwasher over time?
Establishing a routine of visual inspections, cleaning critical components, and using proper tools will serve you well. Keep a maintenance log to track repairs and part replacements, ensuring timely upgrades. For complex repairs or upgrades, consulting trusted sources like this expert advice can help you avoid costly mistakes. Don’t forget to verify compatibility when purchasing replacement parts; for guidance, visit this resource.
To get the most out of your dishwasher, try implementing a preventative maintenance schedule using these advanced tools. For instance, periodically testing electrical components with a multimeter can reveal issues early, preventing breakdowns and costly repairs. Remember, keeping detailed records of your maintenance efforts not only prolongs appliance life but also strengthens your warranty claims if needed. For further insights into warranty coverage and how to maximize it, check this article.

3 Unexpected Lessons That Changed My Approach to Dishwasher Care
One of the most eye-opening moments was realizing that tiny, overlooked parts like the float switch could cause major issues, emphasizing the importance of inspecting every component regularly. I also learned that proper installation, including correct torque and alignment, can prevent long-term damage and voided warranties. Lastly, understanding the fine print of warranty policies taught me to document every repair and recognize what’s truly covered, saving me money and stress in the long run.
Tools and Resources That Transformed My DIY Repairs
Equipping myself with a quality multimeter and a digital torque wrench proved invaluable for diagnosing electrical issues and ensuring secure fittings. Trusted guides like the comprehensive Understanding Dishwasher Parts article and expert tutorials on installation troubleshooting have expanded my confidence. These resources help me make informed decisions, avoid common pitfalls, and extend my dishwasher’s lifespan.
Fuel Your Passion for Smarter Maintenance—Take Action Today
Your dishwasher’s performance depends on your dedication to understanding its parts and proper installation. Don’t wait for unexpected leaks or costly repairs to remind you of their importance. With each repair, you gain confidence and save money—so start learning, inspecting, and caring for your appliance more intentionally now. Your kitchen will thank you for the effort, and you’ll enjoy a quieter, more reliable dishwasher for years to come.
Have you ever faced a surprise breakdown due to overlooked parts or improper installation? Share your stories below—I’d love to hear how you overcame those challenges and what lessons you learned along the way!
Related Posts
Why This $8 Zinc Leveling Foot Prevents Your Tub from Warping
I remember the moment I realized my bathtub was slowly…
The $6 Brass Compression Nut That Stops Silent Cabinet Rot
I remember the moment clearly—my kitchen was flooded, and I…
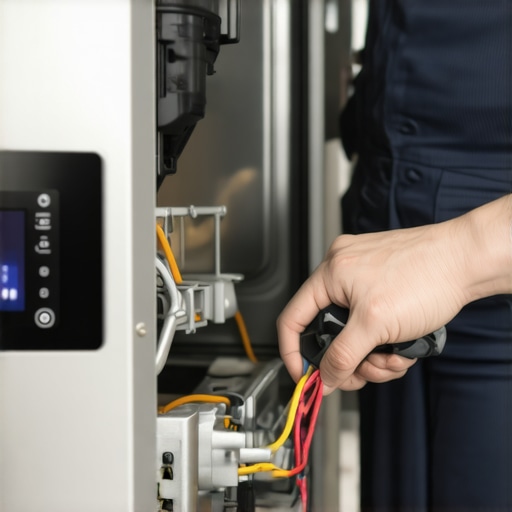
The Part Most People Forget When Switching Dishwasher Brands
I'll never forget the moment I hit the start button…