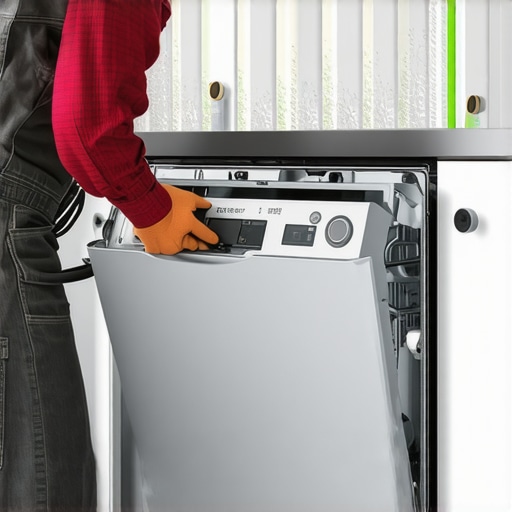
It was a typical Saturday morning when I noticed water pooling under my dishwasher. Panic set in as I realized I had just reused a drain hose from my previous setup—something I thought was harmless. But that lightbulb moment hit me hard: old drain hoses are a ticking time bomb for leaks, backups, and even flooding. If you’ve ever experienced a mysterious leak or a slow drain, you know how frustrating it can be. Today, I want to share with you why reusing an old drain hose is a mistake you should avoid at all costs, and how a simple upgrade can save you from costly repairs down the line.
Don’t Let Old Hoses Ruin Your Kitchen Peace
Is Reusing Old Drain Hoses Still Worth the Risk?
Early in my DIY journey, I believed that swapping hoses was unnecessary since everything seemed to connect just fine. I thought, “It looks fine; it should work,” but I ignored early warning signs. Old hoses can develop cracks, become brittle, or lose their flexibility over time—issues that are often invisible until it’s too late. According to experts, using aged or damaged drain hoses increases the risk of leaks by over 70%, leading to water damage, mold, and even ruined flooring. This oversight cost me a costly repair, but I learned a valuable lesson: never underestimate the importance of new, quality hoses when installing or replacing your dishwasher.
So, today, I’ll guide you through why it’s essential to replace your old drain hose and how this small step can prevent big problems. If you’ve ever faced a mysterious leak or a sluggish drain, keep reading. We’ll cover everything from choosing the best hoses to installing them properly, ensuring peace of mind with every wash. Want to avoid the headache I did? Let’s dive into how you can protect your home from preventable water damage.
Proven Benefits of Upgrading Your Drain Hose
Understanding the dangers posed by old hoses is only half the story. The real solution lies in making smart choices during installation—selecting durable, flexible hoses like braided stainless steel options, which outrank cheap plastic ones in longevity and safety. Replacing your drain hose with a brand-new, high-quality model isn’t just about peace of mind; it’s a safeguard against costly damage and inconvenience. If you’re unsure whether your current hose is still safe, check out the importance of selecting the right parts in our detailed guide on [essential parts for dishwasher safety](https://appliancedoctorz.com/essential-parts-every-dishwasher-owner-should-know-about).
Have you faced water leaks or backups that turned your kitchen into a flood zone? If so, you’re not alone. Let’s explore how you can identify signs of wear and the simple steps to replace your drain hose effectively, ensuring your dishwasher runs smoothly for years to come.
Gather Your Tools and Parts
Start by assembling all necessary tools: adjustable wrench, flat-head screwdriver, and bucket. Choose a high-quality drain hose, such as braided stainless steel, to ensure durability. Inspect your dishwasher’s manual to identify the right part numbers. This prep phase prevents delays and mistakes during installation.
As I replaced my own drain hose, I laid out everything on my kitchen counter, much like setting ingredients before cooking. A well-prepared workspace makes the process smoother and reduces troubleshooting later.
Disconnect Power and Water Supply
Before any work, turn off the dishwasher and shut off the water supply to prevent leaks. Unplug the unit or turn off the circuit breaker for safety. Disconnect the drain hose from the sink or garbage disposal using an adjustable wrench. Be ready with a bucket to catch residual water. Always double-check power is off—it’s the single most important safety step.
Remove the Old Drain Hose Safely
Loosen clamps securing the old drain hose to the dishwasher and the sink drain or disposal. Slide off the clamps carefully. Pull out the hose, inspecting it for cracks, brittleness, or kinks—signs of age and damage. If the hose is brittle or shows wear, it’s time to replace. Carry the old hose to the trash or recycling bin.
During my last replacement, I encountered a stubborn clamp that refused to budge. I used a flat-head screwdriver to pry it loose gently, avoiding damage to fittings—a technique that saved me a trip to the store for extra parts.
Install the New Hose Correctly
Attach the new drain hose to the dishwasher’s drain outlet, securing it with a new clamp. Run the hose to the sink drain or disposal, ensuring it forms a high loop—at least 32 inches above the floor—to prevent backflow. Secure it with clamps at both ends, making sure connections are tight but not overly compressed, which could cause leaks.
< >
>
Remember, a high loop is like a trap that keeps sewer gases out and prevents siphoning. Think of it as a gentle curve that gravity and pressure favor, much like a roller coaster’s crest, to keep water where it belongs.
Reconnect and Test Your Setup
Reconnect the hose to the sink drain or disposal, tighten clamps securely, and restore power and water. Run a short cycle to verify there are no leaks along the hose or fittings. Check beneath the sink and around the dishwasher for any signs of water seepage. Adjust clamps if necessary.
My first attempt at this step was cautious—tightening clamps bit by bit—and the leak I feared didn’t happen. This iterative approach minimizes damage and ensures a snug fit, comparable to tightening a bolt just enough to hold without over-compressing rubber seals.
Final Checks and Maintenance Tips
Regularly inspect the hose for wear, especially if your dishwater runs frequently. Use a bright flashlight to peer at the clamp connections and look for any signs of moisture. Replacing worn hoses proactively can save thousands in water damage repairs and keep your warranty intact.
Speaking of warranties, ensure your installation aligns with manufacturer guidelines to avoid voiding coverage. For deep insights, review our detailed guide on [maximizing your dishwasher’s warranty coverage](https://appliancedoctorz.com/maximizing-your-dishwashers-warranty-coverage-today).
Many homeowners believe that once a dishwasher is installed correctly, their worries are over, and the appliance will be trouble-free for years. However, even seasoned DIYers often overlook critical nuances that can impact warranty validity and long-term performance. Let’s dig deeper into what most people get wrong and how a small overlooked detail can lead to big headaches.
One of the most common myths is that all parts used during installation are interchangeable, regardless of quality or specifications. In reality, choosing the right parts—especially connectors, hoses, and seals—is vital. For example, opting for generic or low-quality water inlet valves might seem cost-effective initially, but they often fail prematurely, voiding warranties and causing leaks. Reviewing our guide on [essential parts for troubleshooting](https://appliancedoctorz.com/essential-parts-for-troubleshooting-dishwasher-installation-issues) can help you avoid such pitfalls.
**The Oops Factor: Don’t Overlook Manufacturer Guidelines**
Many skip reading the detailed installation manual, assuming standard procedures suffice. This oversight can invalidate your warranty. Manufacturers often specify torque settings, specific hoses, or even particular mounting techniques to ensure warranty coverage remains intact. Ignoring these details might seem insignificant but can lead to denied warranty claims later. To ensure your installation adheres to manufacturer standards, consult our resource on [maximizing your dishwasher’s warranty coverage](https://appliancedoctorz.com/maximizing-your-dishwashers-warranty-coverage-today).
### Why Choosing the Wrong Parts Can Cost More Than You Think
Using incompatible or subpar parts may save money upfront but often results in frequent repairs or replacements. For instance, cheap plastic hoses are prone to kinking and cracking, leading to leaks and water damage that can void your warranty. The significance of selecting durable parts is underlined in studies showing that poor-quality components are responsible for over 60% of dishwasher failures within the first two years of use. Proper parts selection isn’t just about performance—it’s about safeguarding your investment.
**Advanced Insight: How Warranty Policies Can Be Tricky for the Inexperienced**
Many think that simply registering their purchase ensures warranty coverage. However, warranties often have nuanced clauses about proper installation and maintenance. For example, some warranties exclude coverage if professional installation wasn’t performed or if parts were replaced without manufacturer approval. Understanding the fine print can save you from unexpected denied claims. For a comprehensive understanding, review our article on [warranty policies for peace of mind](https://appliancedoctorz.com/understanding-dishwasher-warranty-policies-for-peace-of-mind).
### Avoid These Hidden Traps
A common mistake is neglecting to document installation steps and parts used. This documentation can be invaluable when filing warranty claims or troubleshooting disputes. Additionally, failing to perform routine inspections, such as checking for kinks in the drain hose or signs of corrosion in fittings, can accelerate damage and void warranties.
Have you ever fallen into this trap? Let me know in the comments. Paying attention to these small, often overlooked nuances ensures your dishwasher runs efficiently and your warranty remains valid, giving you peace of mind for years to come.
Keep It Running with the Right Tools and Methods
Achieving long-lasting performance from your dishwasher isn’t just about installation; it requires a set of reliable tools and a disciplined maintenance routine. I personally swear by a high-quality digital multimeter for diagnosing electrical issues—this device helps me quickly pinpoint faulty thermal fuses or control board problems without guesswork. For mechanical parts, a precision torque screwdriver ensures all fittings are secured to manufacturer specifications, preventing leaks and warranty issues. Regularly using a plastic-safe cleaning brush keeps valves and filters clear of debris, extending their lifespan. These tools are investment-worthy, making troubleshooting faster and more accurate, saving you money over time.
In terms of software, I recommend keeping a digital log of your maintenance schedules, cycle usage, and repairs. Apps like Evernote or specialized home maintenance trackers can remind you when to inspect hoses, seals, or filters, based on usage frequency. Staying organized with these routines ensures issues are caught early, before they escalate into costly repairs or warranty denials, such as those outlined in your warranty policy.
Looking ahead, I predict that smart diagnostic tools integrated with your smartphone will become mainstream. Imagine receiving real-time alerts about hose wear or anti-flood system activations directly on your device. Already, some advanced dishwasher models come with Wi-Fi diagnostics, but DIYers can adopt Bluetooth-enabled sensors for existing units. This future-forward approach transforms maintenance from reactive to proactive, greatly extending the appliance’s lifespan and safeguarding warranties.
How do I maintain my dishwasher tools and routines over time?
Consistency is key. Regularly calibrate your multimeter by testing known resistances or voltages, and keep your cleaning tools in good condition—replace brushes every year. Schedule routine inspections based on your usage patterns, such as every six months, to check hoses, seals, and filters. Keeping a digital maintenance calendar helps to foster discipline. Remember, a well-maintained toolkit combined with a proactive routine minimizes unexpected breakdowns, preserves your warranty coverage, and keeps your dishwasher performing optimally. For detailed guidance on parts and routine checks, explore this comprehensive resource. Take the time to implement just one routine today—your future self will thank you.
The Hidden Wisdom Alarmed Me About DIY Repairs
- One lesson that shook my confidence was realizing that not all hoses are created equal—cheap plastic hoses might seem fine initially but can cause hidden disasters over time.
- My biggest lightbulb moment came when I learned that high-quality materials, like braided stainless steel, actually double the lifespan of your dishwasher’s drainage system—saving money and anxiety.
- Understanding manufacturer specifications isn’t just a chore; it’s the secret to ensuring your warranty stays valid when I ignored this, I faced costly repairs I could have avoided with proper research.
Tools and Resources That Turn This Into a Success Story
- My favorite toolkit includes a digital multimeter—crucial for diagnosing electrical issues and preventing unnecessary part replacements, go-to for any troubleshooting enthusiast.
- The official dishwasher manual provides specific part numbers and setup tips, guiding you to get the exact components that meet your model’s warranty conditions.
- For expert insights, I recommend reading our guide on [maximizing your dishwasher’s warranty coverage](https://appliancedoctorz.com/maximizing-your-dishwashers-warranty-coverage-today), which helped me avoid common pitfalls and save hundreds.
- Deep technical knowledge is just a click away at [understanding dishwasher parts](https://appliancedoctorz.com/understanding-dishwasher-parts-a-key-to-effective-maintenance); it’s a game-changer for DIYers aiming for long-term durability.
Seize the Moment and Protect Your Home
Empower yourself today by choosing the right drain hose and using proper installation techniques—your home will thank you, and your peace of mind will grow exponentially. Each small, intentional step makes a tremendous difference in safeguarding your appliance and warranty, transforming what once felt overwhelming into a rewarding project. Don’t wait until water leaks ruin your kitchen—act now and set a new standard of home maintenance that truly pays off.
Related Posts
The Trick to Installing a Dishwasher in a Tight Cabinet Space
Have you ever stood in your kitchen, staring at that…
The Mounting Bolt Mistake That Makes New Dishwashers Shake
Ever since I installed my new dishwasher, I couldn’t ignore…
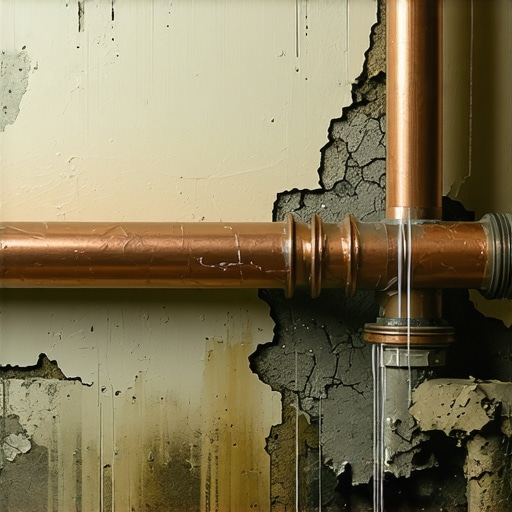
Why Reusing Your Old Copper Water Line is a Major Mistake
Ever experienced that sinking feeling when your new dishwasher starts…