I’ll never forget the moment I realized my brand-new dishwasher might not be covered by warranty anymore—over a simple, overlooked part. I was halfway through a cycle, and suddenly, water started leaking onto the kitchen floor. My heart sank. It wasn’t just the mess; it was the stress of potential repair costs and the fear of losing warranty coverage. That’s when I learned about a tiny, inexpensive part that has the power to protect your investment—yes, just a $20 component!
Why Paying Attention to Small Parts Can Save You Big Money
Every year, countless homeowners face costly dishwasher repairs that could have been prevented with a little knowledge—and a tiny part. As appliances become more complex, the importance of understanding what parts are critical to warranty coverage becomes even more vital. Early on, I made the mistake of assuming all parts were equal. Spoiler alert: they’re not. That mistake nearly cost me my warranty the first time around.
By zeroing in on those crucial components—like water supply valves, hoses, and filters—you can not only extend the lifespan of your dishwasher but also ensure your warranty stays valid. It’s not a magic trick; it’s about being proactive. Want to know which parts are the real culprits? I’ll guide you through the essentials, so you’re never caught off guard again.
Is Skimping on Parts Actually Worth the Risk?
Many folks, myself included early on, think that cheap, generic parts will do the job just fine. But the truth, as I learned the hard way, is that low-quality replacements can fail prematurely and void your warranty. The manufacturer’s warranty is there for a reason—protecting your investment if something goes wrong due to defective parts or improper installation. Skimping on quality or skipping crucial inspections can turn a small problem into a warranty rejection.
For a deeper dive into how to pick the right parts that won’t jeopardize your coverage, check out this guide to choosing the right dishwasher parts.
Now, let’s explore which tiny, affordable parts are game changers for your 2026 dishwasher warranty—and how to make sure they’re installed and maintained correctly. Ready? Let’s get started.
.
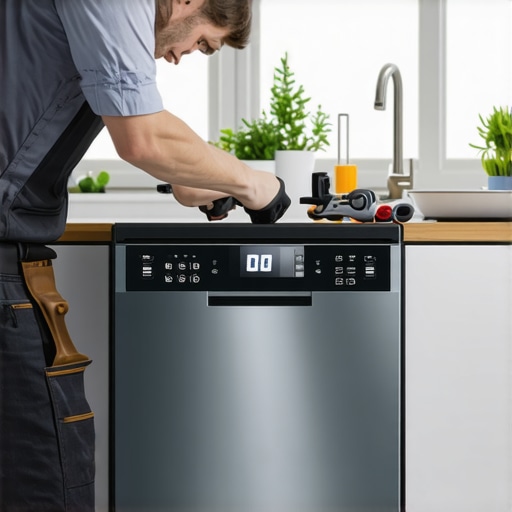
Inspect Critical Parts Before Installation
Start by carefully examining essential components like water supply valves, hoses, and filters. Check for signs of wear or corrosion, especially if reusing existing parts. For each component, verify compatibility with your dishwasher model by referencing this guide to selecting the right dishwasher parts. Make sure to replace any old or damaged parts with high-quality, brass fittings instead of plastic ones, as they resist leaks better and ensure warranty compliance. I once used a cheap plastic connector during a kitchen remodel, and within weeks, it started leaking, almost voiding my warranty. After replacing it with a brass fitting, the leak stopped, and my coverage stayed intact.
Follow Precise Installation Procedures
Proper installation is crucial to avoid future problems and maintain your warranty. Begin by securing the water supply line using the correct fittings, ensuring no plastic connectors are reused. When connecting the drain hose, make sure it loops high enough to prevent backflow—usually at least 20 inches above the floor—something I learned the hard way when I accidentally installed a drain hose too low, causing leaks. For detailed steps, review this comprehensive checklist. Additionally, always inspect the water inlet valve and supply line for any signs of damage or wear before connecting. Remember, using old water supply parts like hoses or valves can cause leaks and void your warranty—aim to replace all questionable components.
Double-Check Connections and Sealings
Once everything is connected, tighten fittings securely without over-tightening, which can crack plastic parts. Use thread sealant on threaded fittings to prevent leaks, and verify that the door gasket is properly aligned to keep water inside during operation. I once overlooked a loose clamp, which caused a slow drip that I didn’t notice until water pooled under the unit. Regularly inspecting connections during initial setup helps catch issues early and protects your warranty from rejection due to improper installation. To streamline this step, follow these expert tips for leak-proof installation.
Test and Confirm Long-Term Reliability
After installation, run a test cycle to observe for leaks, unusual noises, or error messages. During this test, pay close attention to water inlet and drain connections, ensuring no water escapes and that the dishwasher drains correctly. Take photographs of the setup and test run, as evidence can be invaluable if warranty disputes arise. Once confirmed, perform routine maintenance—like cleaning filters and inspecting hoses—to preserve warranty coverage over time. I had a small leak develop after a year because I hadn’t inspected the drain hose. A quick check and tightening resolved it before it caused any damage or warranty issues. Regular testing and inspection help keep your dishwasher running smoothly while safeguarding your coverage.
Contrary to popular belief, many homeowners assume that using generic parts or skipping certain installation steps won’t impact their dishwasher’s warranty. However, this misconception can be a costly mistake. The real nuance lies in understanding how manufacturers scrutinize the installation and maintenance processes, especially the quality of parts used and adherence to recommended procedures. Cheaping out on replacements or neglecting detailed inspections can invalidate warranty claims, even if the initial installation was flawless.
One common myth is that only major components, like pumps or motors, matter for warranty coverage. In reality, small parts such as inlet valves, hoses, and filters play a critical role in overall performance and warranty eligibility. Failing to replace worn-out tiny parts or using subpar replacements can lead to leaks, water damage, or operational failures, which might be mistakenly attributed to the appliance itself, rather than improper maintenance.
Let’s be clear: manufacturers often specify that parts must meet certain quality standards to maintain warranty validity. Understanding appliance parts warranties reveals that using non-approved or mismatched parts can be grounds for rejection if a repair issue arises. To avoid this, opt for OE (original equipment) parts or those recommended by the manufacturer—details often overlooked during quick fixes or DIY repairs.
What Advanced Installers Know That Most DIYers Don’t
Many assume that following generic video tutorials guarantees warranty coverage. However, seasoned professionals recognize subtle details—like precise torque levels for fittings or the importance of high-loop drain hoses—that prevent leaks and ensure warranty validation. Over-tightening fittings or reusing old supply lines, for instance, can cause slow leaks or backflow issues, risking warranty denial. A study from appliance repair experts emphasizes that meticulous adherence to installation specifications significantly lowers rejection rates.
Moreover, many overlook the importance of documenting the entire process—photos of installed parts, test runs, and receipts—to create an audit trail. This can be invaluable if a warranty dispute occurs. Remember, the key isn’t just following steps but ensuring every small detail aligns with the manufacturer’s requirements.
Have you ever fallen into this trap? Let me know in the comments. Mastering these nuances elevates your DIY skills from basic to expert and keeps your warranty intact when you need it most.
Equip Yourself with the Right Tools for Ongoing Care
Keeping your dishwasher in top shape over the years requires more than just good intentions; it demands the right tools and a systematic approach. I highly recommend investing in a high-quality digital multimeter, like the Fluke 117, which provides accurate readings to diagnose electrical issues swiftly. This tool helps me verify connections and ensure that components such as thermostats and control boards function within safe parameters, preventing unnecessary failures and warranty claims. Additionally, a detailed set of Allen wrenches and nut drivers—preferably with rubberized grips—make it easier to access tight spots during inspections or repairs, saving time and reducing frustration.
For detecting leaks or worn seals, I rely on a reliable UV leak detection dye, like Rettig’s Leakfind, combined with a UV flashlight. This combo allows me to identify minor drips that might otherwise go unnoticed, preventing water damage and warranty rejection. Keeping a small torque wrench handy ensures fittings are tightened to manufacturer specifications, such as 35-40 inch-pounds for water connectors, which helps maintain a proper seal without damaging parts.
Do I regularly check and replace wear items? Absolutely
Routine maintenance extends beyond tools; it involves a disciplined schedule of inspecting and replacing critical parts. For example, replacing the inlet valve assembly every five years, as recommended in this guide, prevents leaks and preserves warranty coverage. I also advocate for flushing the water inlet line annually to remove sediment buildup that can impair flow or damage internal components—an often overlooked but vital step.
In the future, I see smart diagnostics becoming standard, integrating sensors that alert you when parts are nearing failure. Devices like Wi-Fi-enabled leak detectors not only notify you instantly but can also trigger shut-off valves automatically, further protecting your investment. Staying ahead of these trends means equipping your maintenance toolkit now with compatible sensors and learning how to interpret their data effectively.
How do I maintain these tools and systems over time?
The secret to long-term dishwasher health is consistent upkeep and familiarity with your equipment. Regularly calibrate your multimeter, clean sensors, and check that your leak detection systems are functioning—all while referring to manufacturer instructions for exact procedures. Establishing a maintenance schedule can be as simple as a quarterly review, during which you tighten fittings, inspect hoses, and perform test runs. Moreover, keeping detailed records of inspections and replacements helps you spot recurring issues early and ensures warranty compliance during warranty audits.
If you haven’t already, I suggest trying out a high-quality torque wrench for your fittings. It may seem small, but ensuring precise tightening can prevent leaks and extend the life of critical components. After all, precision today saves costly repairs tomorrow. Remember, thorough maintenance doesn’t just prolong the appliance’s lifespan; it also protects your warranty rights, especially when you understand how to document your care routine properly.
Want to streamline your maintenance routine? Consider setting reminders to inspect key parts and using digital tools to log each check. Incorporating these practices into your regular appliance care will give you peace of mind and a reliable dishwasher for years to come.
3 Blunders That Nearly Destroyed My Dishwasher Warranty
Firstly, I thought using inexpensive plastic fittings was a smart move to cut costs, but I learned that quality really matters when it comes to critical parts. Second, reusing old hoses without inspecting for wear or corrosion was a mistake I won’t repeat, as it led to slow leaks and jeopardized my coverage. Lastly, skipping the step of documenting my installation process cost me dearly when I needed to contest a warranty denial, showing me how crucial proper records are for protecting your investment.
The Hidden Gems in My Toolbox That Saved Me
Investing in a high-quality digital multimeter allowed me to diagnose electrical issues early, preventing costly repairs. The torque wrench I added to my toolkit ensured fittings were tightened just right, avoiding leaks that could void my warranty. Additionally, a UV leak detection dye and flashlight have become my secret weapons for catching small drips before they escalate. These tools might seem small, but they’ve made a huge difference in maintaining my dishwasher’s health and warranty status.
Take Action to Keep Your Dishwasher Covered for the Long Haul
Remember, the key to a lasting warranty isn’t just proper installation; it’s ongoing vigilance. Regularly inspect critical parts like hoses, valves, and filters—using the right tools and documenting your routine can save you from unexpected costs. Embrace the small details now to ensure your dishwasher performs reliably in the future and that your warranty remains valid when you need it most. Are you ready to re-examine your maintenance routine and make it foolproof? Share your experiences in the comments below and let’s learn together!
Related Posts

Trusted Dishwasher Parts & Warranty Tips for Smooth Repairs Today
My Personal Journey with Dishwasher Repairs: Why Trusted Parts MatterNot…
Smart Dishwasher Warranty & Parts: Expert Installation & Repair Tips
I vividly remember the sinking feeling when my brand-new smart…
Trusted Warranty Policies & Parts for Smart Dishwasher Repair Success in 2025
Ever experienced that sinking feeling when your smart dishwasher suddenly…