Have you ever been in the middle of a dishwasher repair or maintenance and wondered whether to go factory original or an aftermarket part? I can’t tell you how many times I faced this dilemma, only to realize later that a simple choice could make or break my appliance’s performance—and my peace of mind. It was a lightbulb moment for me: not all gaskets are created equal, and understanding the critical difference can save you time, money, and countless headaches.
Why Choosing the Right Gasket Matters More Than You Think
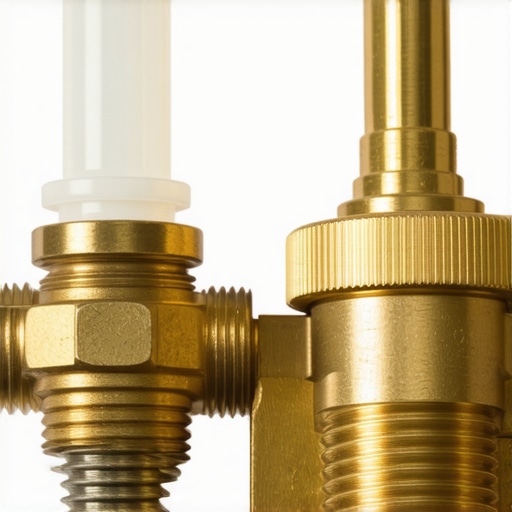
When I first started tinkering with dishwashers, I often relied on aftermarket gaskets because they seemed cheaper and readily available. However, I learned the hard way that a gasket isn’t just a small rubber ring; it’s the barrier that keeps water where it belongs. Opting for a subpar gasket led to leaks, water damage, and even warranty issues. That’s when I started digging deeper. Turns out, factory gaskets are designed specifically for your appliance, meeting stringent OEM standards, while aftermarket options can vary wildly in quality and fit. If you want to avoid flaky seals and water sprays where they shouldn’t be, understanding these differences is essential.
Is All Gasket Replacement Created Equal?
Early in my repair journey, I made the mistake of assuming that any gasket would do—until I realized that cheaper, generic options often don’t hold up under heat, pressure, or over time. This mistake taught me that factory gaskets are made with precise materials tested for durability and perfect fit. Genuine parts usually guarantee the best performance, especially for critical components like door seals. For a detailed comparison and tips on selecting the right parts, check out these top tips for selecting the right parts. It’s a valuable resource to help you avoid common pitfalls.
So, what about aftermarket gaskets? They can be tempting, especially if you’re on a tight budget or need a quick fix. But be wary—low-quality replacements might seem like a deal, yet they can end up costing you more in the long run. If you’re interested in how to diagnose gasket issues or ensure your repairs hold, I recommend reviewing how to diagnose dishwasher parts during warranty periods. It’s a good starting point to understand what to look for during replacement.
Choosing the right gasket is just one piece of the puzzle in ensuring your dishwasher runs smoothly and stays under warranty. Are you facing recurring leaks or failed seals? Don’t worry—I’ll guide you through the essential steps to make informed decisions and avoid costly mistakes. Let’s dive in.
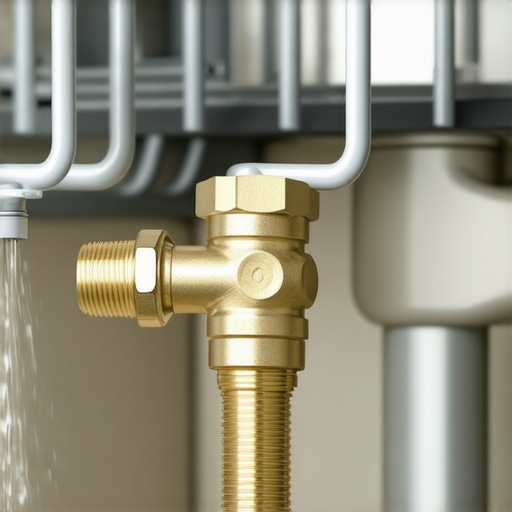
Gather the Right Tools and Parts
Before starting the gasket replacement, collect essential tools such as a screwdriver set, pliers, and a putty knife. Opt for a factory OEM gasket to guarantee a precise fit and durability, as this will prevent leaks and safeguard your warranty. Check your dishwasher model number to order the correct part, and review top tips for selecting the right parts to ensure compatibility.
Prepare the Dishwasher for Disassembly
Power off the dishwasher and disconnect it from the electrical outlet. Turn off the water supply to avoid accidental leaks during disassembly. Open the dishwasher door and remove the screws securing the outer panel. Carefully detach the panel to access the door seal area. Think of this step as carefully peeling back a protective layer—patience here saves you from damaging clips or wires later.
Remove the Old Gasket Carefully
Gently peel back the existing gasket from the door frame using a putty knife. Be cautious not to scratch the metal surface, as this could compromise the new gasket’s sealing ability. Examine the gasket channel for debris or residue; cleaning it thoroughly with a soft cloth will enhance adhesion of the new gasket. Remember, a clean surface ensures a tight seal, preventing future leaks.
Install the New Gasket Precisely
Align the new gasket with the door frame, starting from one corner and working your way around. Press firmly along the entire length to ensure it seats securely into the channel. Verify that the gasket’s lip is positioned correctly to contact the door, creating an effective seal. Take your time—this step is vital, akin to fitting a key into its lock: improper placement leads to a malfunction. For detailed guidance, consult parts to check during installation.
Test the Seal and Reassemble
Before restoring everything, close the door gently and inspect the gasket for uniform contact. Run a short test cycle with minimal dishes inside—observe for leaks around the gasket area. If water escapes, double-check that the gasket is seated evenly. Once confirmed, reattach the outer panel and secure all screws tightly. This confidence-building practice mirrors quality control and ensures your repair lasts.
Final Checks to Protect Your Warranty
Ensure all parts are correctly installed and no tools or debris are left inside. Reconnect the water supply and power, then run a full cycle to test functionality. Document the repair with photos, especially if it’s warranty-related, and keep receipts for the new gasket. Proper installation now sets a foundation that aligns with warranty requirements, much like following a recipe precisely guarantees a perfect result. For additional insights, review maximizing your dishwasher’s warranty, to prevent issues down the line.Many homeowners believe that replacing dishwasher parts or filing warranty claims is a straightforward process, but hidden nuances can trip even seasoned DIYers. One widespread myth is that aftermarket parts are always a cost-effective substitute for OEM components. In reality, these generic parts often lack the precise materials and fit required for long-term durability, leading to leaks, warranty issues, or even damage to the appliance. Relying solely on cheaper parts can create a false economy—saving money upfront but costing more in repairs and potential warranty rejections. Experts emphasize that understanding the specifications and compatibility of parts is crucial; for instance, consulting detailed guides like tips for selecting the right parts can prevent costly mistakes. A common mistake is not recognizing that certain installation errors—such as improper sealing or misaligned gaskets—invalidate warranty claims or cause early failure. The key is meticulous installation and verifying that every part conforms to OEM standards. Now, consider the myths surrounding warranty coverage. Many assume that all repairs or part replacements are automatically eligible for warranty repair; however, manufacturers often specify conditions, like the use of approved parts or professional installation, which, if overlooked, can void coverage. To navigate this complex landscape, reviewing resources like comprehensive warranty coverage info is vital. Additionally, advanced readers might ask: How do subtle installation mistakes affect warranty eligibility and long-term performance? The answer lies in understanding that even minor misalignments or overlooked connections can lead to leaks or component failures, which many manufacturers carefully audit before honoring warranty claims. Expert studies reinforce that precision during installation directly correlates with warranty success and appliance lifespan. Remember, a thorough inspection and adherence to recommended procedures—like properly sealing gaskets and securing hoses—are your best defense against avoiding common pitfalls. Have you ever fallen into this trap? Let me know in the comments. Ensuring knowledge of these nuanced details separates a quick fix from a long-lasting repair, saving you time, money, and frustration.
Mastering Maintenance with Precision Tools
Sticking to the right tools is essential to ensure your dishwasher stays reliable over years of use. I personally swear by a high-quality digital multimeter to diagnose electrical issues accurately. Unlike basic testers, my preferred model provides detailed voltage and resistance readings, helping me pinpoint faults without guesswork. Additionally, a set of micro-screwdrivers with fine tips proves invaluable when removing intricate panels or adjusting small parts; cheap sets often strip screws or break easily, so investing in durability saves frustration. For sealing and gasket repairs, I rely on a professional-grade silicone sealant that withstands heat and moisture, ensuring long-term watertightness. When tightening compression fittings, using a torque wrench set to manufacturer specifications prevents damage—over-tightening can crack plastic components, while under-tightening leads to leaks. Incorporate these tools into your routine, and you’ll find troubleshooting becomes faster and more confident.
Software and Diagnostic Protocols
Beyond physical tools, leveraging diagnostic software has revolutionized maintenance. I use a dedicated appliance troubleshooting app that connects via Wi-Fi with compatible dishwashers. This allows reading error codes remotely, viewing cycle histories, and performing firmware updates conveniently. For older models lacking smart features, a standard multimeter and a wiring diagram from the manufacturer’s technical documentation are your best friends. Regularly running diagnostic checks ensures early detection of minor issues before they escalate, saving time and money. As the industry advances, future tools might integrate AI-based diagnostics that interpret sensor data automatically, streamlining maintenance even further.
Long-Term Results Come from Consistent Care
Consistency is key. Establishing a regular maintenance schedule—such as inspecting seals quarterly and cleaning filters monthly with soft brushes—keeps problems at bay. Maintaining detailed records of your repairs and parts replacements (including photos and dates) enhances warranty claims and resale value. For instance, properly documenting gasket replacements with timestamps can be instrumental if warranty issues arise later, aligning with tips from maximizing warranty benefits. Over time, this proactive approach reduces downtime, extends your dishwasher’s lifespan, and ensures optimal performance.
Preparing for Future Trends in Dishwasher Maintenance
As technology evolves, expect tools that monitor appliance health in real-time and predict failures before symptoms appear, much like how predictive maintenance operates in industrial settings. Manufacturers are also likely to develop integrated diagnostic dashboards that notify homeowners and technicians of issues via smartphone alerts. Embracing these innovations now—such as learning how to interpret error codes accurately—positions you ahead of the curve. I recommend trying out advanced troubleshooting apps and staying updated with manufacturer firmware releases to leverage these improvements fully.
How do I maintain my dishwasher over time?
To keep your dishwasher functioning flawlessly, incorporate routine inspections using precise tools like digital multimeters and torque wrenches. Keep detailed logs of repairs, and utilize diagnostic software whenever possible. As future technology progresses, staying informed about new diagnostic tools and firmware upgrades will be vital in maintaining peak performance. Ultimately, a combination of the right equipment, consistent care, and a proactive mindset ensures your dishwasher remains dependable for years to come. Want a quick win? Start by testing your appliance with a troubleshooting app—it’s a game-changer for early detection and maintenance efficiency.

What I Almost Missed About Proper Seal Installation
During my first major dishwasher repair, I underestimated the importance of aligning the gasket perfectly. It seemed like a small detail, but that oversight led to an unexpected leak. The lightbulb moment here was realizing that even tiny misalignments can compromise the appliance’s water-tight seal, risking warranty voidance and costly repairs. Precision during gasket installation isn’t just a tip; it’s a game-changer.
Why Choosing OEM Parts Can Make All the Difference
I used aftermarket gaskets initially, thinking they’d save me money. However, I learned that OEM gaskets are crafted with the exact materials and tolerances specified by the manufacturer, ensuring perfect fit and durability. Trusting genuine parts has kept my dishwasher leak-free and warranty intact, reaffirming that quality often trumps cost savings in appliance repair.
Avoiding Common Pitfalls That Could Void Your Warranty
One mistake I see often is improper sealing due to rushing the installation process. Manufacturers are strict about proper procedures, and shortcuts can lead to warranty rejections. Reading detailed guides and taking your time during installation, like reviewing these tips for selecting the right parts, can save you from these headaches.
Investing in the Right Tools for Peace of Mind
Using specialized tools such as torque wrenches and digital multimeters during installation gave me confidence that everything was secured correctly. These tools help prevent overtightening or omissions, which could cause leaks or damage. Over time, having the proper toolkit becomes an essential memory in your repair repertoire, ensuring each job is performed correctly the first time.
Why Documenting Repairs Protects Your Investment
Keeping detailed records and photos of gasket replacements and repairs proved invaluable when I needed warranty service. Cloud-storing these documents not only simplifies warranty claims but also provides proof that the job was done properly—safeguarding against potential disputes. This proactive step is a small effort with big long-term benefits.
Related Posts
The Difference Between a $5 Plastic Valve and the Brass Fitting You Actually Need
It was late on a Saturday afternoon when I finally…

The $9 Replacement Gasket That Stops Door Edge Leaks
I remember the moment vividly. I was mid-cycle, the dishwasher…
The $20 Valve That Stops Your Dishwasher from Siphoning
It happened to me during a busy weekend—my brand-new dishwasher…
Comments are closed.