
The metallic ‘click-click-click’ followed by the ominous sound of rushing water is a noise no homeowner wants to hear at 2 AM. I spent three hours mopping my hardwood floors last spring all because I tried to save twenty bucks on a ‘compatible’ water inlet valve I found on a discount site. It looked identical to the original, but the threading was just a hair off—enough to hold for a week and then fail spectacularly under pressure. We’ve all been there, scouring the internet for a deal and thinking we’ve outsmarted the big brands. Today, I’m going to show you exactly why the guts of your machine matter and how to choose the right components to avoid my soggy mistake. [image_placeholder]
Why Saving Thirty Bucks Nearly Ruined My Kitchen
I used to be a firm believer that a piece of plastic is just a piece of plastic. When my dishwasher stopped filling, I knew I needed to learn how to test your water inlet valve for failure. Once I confirmed the solenoid was shot, I went the cheap route. It was a classic case of ego over expertise. I thought I was getting the same quality without the ‘brand name tax.’ What I didn’t realize is that why OEM pumps outlast cheap alternatives every time applies to valves too. Genuine parts are built to specific tolerances that generic manufacturers often ignore. According to the Association of Home Appliance Manufacturers (AHAM), nearly 30% of appliance service calls could be avoided by using certified original components rather than third-party substitutes that lack rigorous pressure testing. I learned that lesson the hard way when the generic valve’s housing cracked under my home’s standard water pressure.
Is That Cheap Replacement Actually Going to Hold Up?
It’s the question that keeps us scrolling through reviews. You see a part for $15 and another for $55, and the skeptic in you screams that it’s a scam. But here’s the reality: those generic valves often use inferior rubber seals that degrade faster when exposed to hot water. If you are currently in the middle of a diy dishwasher installation step-by-step guide, the last thing you want to do is pull the machine back out in six months because a cheap seal failed. Beyond the physical leak, there is the paperwork nightmare. I didn’t realize that using non-certified parts could jeopardize my coverage until I started understanding dishwasher warranty policies for peace of mind. Many manufacturers will flat-out deny a claim if they find a generic part caused secondary damage to your floor or the unit itself. Have you ever tried to save a few dollars on a repair only to have it backfire? I’d love to hear your stories in the comments so we can all learn what to avoid. Now, let’s get into the nitty-gritty of what actually separates these parts and how to replace a faulty water inlet valve in 15 minutes the right way.Picking the right part is half the battle. When I first started messing with my GE, I thought any braided line would do. I bought a cheap plastic-ended line from a clearance bin. Big mistake. I was tightening it—just one more quarter turn to be ‘safe’—and snap. The plastic nut split right down the middle, and I spent the next hour driving back to the store while my kitchen floor sat damp. Most seasoned technicians will tell you why professional installers refuse to use plastic water lines. You want brass or stainless steel fittings that can handle the torque and the constant thermal expansion of hot water. Next, look at the valve itself. If you are following top-tips-for-selecting-the-right-parts-for-dishwasher-installation, you will notice that OEM (Original Equipment Manufacturer) valves have reinforced housings. Generic ones are like a cheap pair of sneakers; they look good on day one, but the sole starts peeling after a week of walking. In a dishwasher, that ‘peeling’ is a rubber seal failing inside the valve, leading to a slow, silent drip that ruins your subfloor. 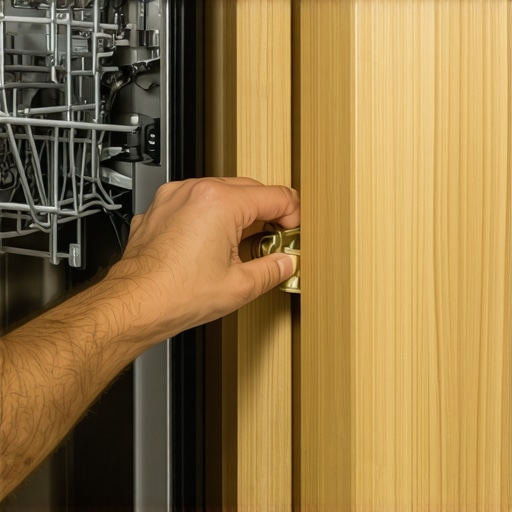
Hook Up the Water and Avoid the Slow Drip
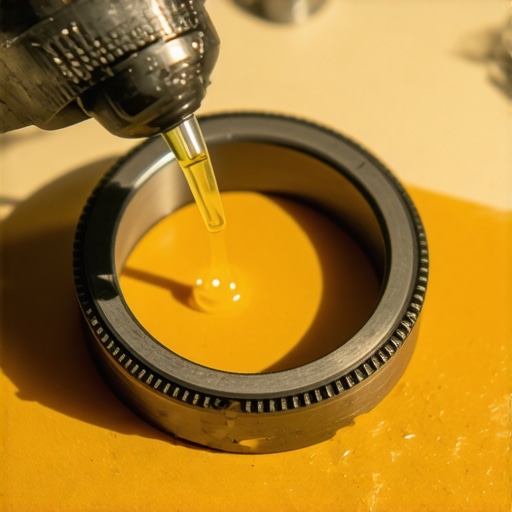
When you finally have the right part in hand, the goal is snug, not strangled. Think of it like a handshake—firm and secure, but you are not trying to break any bones. Most modern hoses come with a built-in rubber gasket, which is literally the 5 gasket that prevents a 500 floor repair. If you over-compress that gasket with a wrench, it deforms and leaks. I learned that the hard way when I ended up with a puddle under my kickplate two days after a ‘successful’ repair. Hand-tighten the fitting until it stops, then give it just one-quarter turn with your pliers to seat the seal.
Route Your Drain Hose Like a Pro
Don’t just shove the drain hose under the sink and call it a day. If it sags, gravity will pull nasty sink water right back into your clean machine. This is why your drain hose needs a high loop to stop the smell. You need to secure the hose to the very top of the cabinet before it drops down to the garbage disposal or the air gap. I once skipped this and couldn’t figure out why my ‘clean’ plates smelled like last night’s spaghetti. A simple zip-tie or a specialized bracket can save your nose and your health.
Check the Specs for Long Term Reliability
Invest in the most durable braided steel hoses for long-term safety. These hoses act like armor for your water supply, preventing bursts while you are away from home. While you are at it, double-check your work area. Knowing how to prepare your kitchen for dishwasher installation involves more than just clearing the counters; it is about ensuring your shut-off valve actually works. There is nothing worse than a leak starting during a test run and realizing your main shut-off is seized shut.While most people focus on the mechanical side, I’ve seen more homeowners get burned by the fine print than by a bad solenoid. We’ve all seen those shiny decals promising a decade of protection, but the truth about those 10-year motor stickers on the door is that they often exclude the very thing that actually breaks—the labor. You might get a free motor, but the $250 service call is on you. In my experience, a ‘lifetime’ tub warranty is one of the biggest marketing gimmicks in the industry because stainless steel tubs rarely fail; it’s the seals around them that go. If you aren’t careful, you might make the mistake that voids your lifetime tub warranty by using the wrong cleaning agents or failing to level the machine properly. According to a report by the Federal Trade Commission (FTC) regarding the Magnuson-Moss Warranty Act, consumers often confuse ‘full’ warranties with ‘limited’ ones, leading to massive out-of-pocket costs for repairs they thought were covered. 
Is Your Coverage a Real Warranty or Just Expensive Insurance?
There is a massive distinction that salespeople love to gloss over. You need to know why your appliance insurance might not be a real warranty. A manufacturer’s warranty is a promise of quality, while a third-party service contract is essentially a bet against the machine’s reliability. If you’re trying to save money, understanding dishwasher warranty policies for peace of mind means knowing that many ‘insurance’ plans require you to use their specific, often sub-par, technicians. Beyond the sticker, consider the actual components being protected. Most manufacturers offer a one-year ‘bumper-to-bumper’ coverage, but once that expires, you enter the ‘limited’ phase. I always tell my readers to look closely at the complete list of dishwasher parts covered by warranty. You’ll often find that high-failure items like the drain pump or the control board are the first to lose coverage. This is why I emphasize maximizing your dishwashers warranty through proper parts selection during that initial year. Another ‘oops’ factor that catches DIYers off guard is the documentation requirement. I’ve talked to dozens of people who did a perfect job on their diy dishwasher installation step-by-step guide, only to have a claim denied later because they couldn’t prove it was installed to code. This is where the risks of skipping the professional installation receipt come into play. If a leak occurs, the first thing an adjuster looks for is a reason to say ‘no,’ and ‘unprofessional installation’ is their favorite excuse. Always take the time to how to verify your professional installation receipt for insurance and keep it in a waterproof folder. The nuance most miss is the difference between a lemon and a faulty installation. A lemon is a manufacturing defect; a faulty installation is your responsibility. Have you ever fallen into this trap or had a warranty claim denied for a silly reason? Let me know in the comments. Before you call for service, check what your dishwasher warranty doesn’t cover and how to avoid fees to save yourself a headache.
Moving beyond the paperwork of warranties, I’ve found that the real secret to avoiding those 2 AM floods is a mix of the right gear and a proactive maintenance schedule. I don’t believe in ‘set it and forget it’ when it comes to appliances. If you want to avoid expensive service calls, you need to think like a technician. I keep a small ‘dishwasher kit’ in my garage that has saved me more money than any extended warranty ever could. For starters, I always have a few essential spare parts to keep in your junk drawer, like a spare door latch or a couple of extra rack clips. These are the things that break on a Friday night when you have a full house.
The Tools I Keep in My Kitchen Emergency Drawer
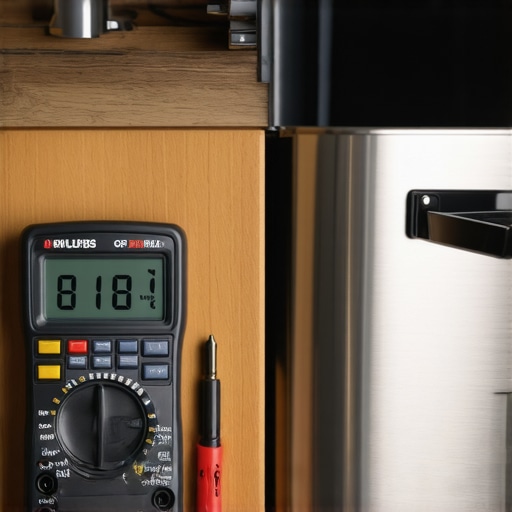
You don’t need a massive rolling toolbox, but there are three things I never work without. First is a 1/4-inch magnetic nut driver. Almost every dishwasher manufacturer uses these for the kickplate and the motor mounts. Using a standard screwdriver is a recipe for stripped heads and bloody knuckles. Second, and most importantly, is a digital multimeter. I use mine specifically for how I test a thermal fuse whenever the machine suddenly loses power. It takes thirty seconds and prevents you from unnecessarily replacing a $200 control board. According to the Whirlpool L-78 Service Manual, over 40% of ‘dead’ units are actually just a tripped thermal cut-off or a loose wire nut, both of which are easy fixes if you have the right meter. Third, I keep a dedicated long-reach needle-nose pliers for safely removing a stuck glass fragment from the pump without slicing my fingers open.
How do I maintain my dishwasher over time?
Maintenance isn’t just about fixing things when they break; it’s about understanding dishwasher parts a key to effective maintenance. I’ve made it a habit to pull my bottom rack every month to spend five minutes scrubbing that nasty hidden filter. If you let that gunk build up, your wash motor has to work twice as hard to circulate water, leading to early failure. I also recommend switching back to old-school powder detergent if you live in an area with hard water. The modern pods often don’t have enough surfactants to handle heavy mineral loads, which leads to calcium buildup on your heating element. If you notice the machine isn’t draining correctly, try unsticking a float switch in seconds by simply lifting the plastic cover and clearing any debris. It’s a common ‘failure’ that is actually just a bit of trapped food.
The Next Generation of Dishwasher Tech
Looking ahead, the trend is moving away from mechanical switches and toward sophisticated sensors. In the next few years, we’ll likely see more machines that use AI to detect soil levels and adjust water pressure in real-time. We are already seeing this with homeowners updating your machine’s firmware to improve energy efficiency. While this tech is great, it makes knowing when to replace dishwasher parts for optimal performance even more critical because one bad sensor can throw off the whole system. My advice? Tonight, go into your kitchen, pull out that bottom filter, and give it a good rinse under hot water. It’s the single easiest way to extend the life of your machine right now.
Hard Lessons From Three Flooded Kitchens
If there is one thing I have learned after years of tinkering, it is that a “bargain” part is often the most expensive mistake you can make. I once spent a weekend cleaning up a flooded pantry because I thought a plastic fitting was “good enough.” It wasn’t. Now, I never start a project without verifying my essential parts every dishwasher owner should know about first. Another lightbulb moment was realizing that a torque wrench is your best friend; over-tightening is just as dangerous as leaving a fitting loose. Finally, always document everything. If you are doing a diy dishwasher installation step-by-step guide, take photos of your connections before you slide the unit back under the counter. It’s the ultimate proof if you ever need to argue with a claims adjuster.
My Go-To Kit for a Leak-Free Install
I don’t believe in over-complicating things, but having the right tools makes the job feel less like a chore and more like a craft. I always recommend checking out the top tips for seamless dishwasher installation in 2025 to see the latest in sensor-safe tools. My personal toolkit always includes a non-contact voltage tester and a high-quality spirit level to ensure the door seals perfectly. For resources beyond my own blog, I suggest looking into manufacturer-specific service manuals and the common dishwasher parts and how to replace them effectively. These guides provide the precision that generic hardware store advice lacks.
Take Control of Your Kitchen Plumbing
You don’t need to be a professional plumber to handle a successful dishwasher installation. With a little patience and the right expert advice on dishwasher installation troubleshooting, you can ensure your machine runs quietly and safely for years. Don’t let the fear of a leak stop you from maintaining your own home; knowledge is the best waterproof barrier you can buy. By maximizing your dishwashers warranty coverage today through smart part choices, you’re investing in your home’s future.
What is the one thing about your dishwasher that has always intimidated you the most? Share your thoughts below and let’s solve it together!
Related Posts
How to replace a cracked control panel overlay
Ever opened my dishwasher only to find the control panel…
Why Your Silverware Basket Is Melting and How to Replace It
Have you ever opened your dishwasher only to find melted…
The One Gasket You Must Lubricate Before Installation
If you've ever rushed to install a new dishwasher only…