Ever felt that sudden drop in your dishwasher’s water pressure right in the middle of cleaning your best plate? I’ve been there, frustrated and scratching my head. The moment my dishwasher struggled to rinse off the soap and left behind cloudy spots, I realized something wasn’t right. It was almost like an invisible force was obstructing the flow, ruining the entire cycle and wasting my time and water.
The Surprising Culprit Behind Your Water Woes
After some digging—mainly replacing parts and tweaking connections—I stumbled upon the culprit: an often-overlooked debris filter that gradually gets clogged over time. This tiny filter, usually hidden deep inside the unit, is designed to catch the smallest debris that could otherwise cause bigger damage. But if you ignore it, it becomes a silent assassin of water pressure, slowly choking your dishwasher’s performance.
This problem isn’t just annoying; it can lead to premature wear and tear, costly repairs, and even void your warranty if not caught early. And trust me, I made the mistake of ignoring it at first, thinking routine cleaning was enough. Turns out, that was a rookie error. Proper maintenance and understanding of your dishwasher’s internal parts can save you money and extend its life. You can find more about understanding dishwasher parts to better grasp what’s happening inside.
Why This Small Filter Can Cause Big Problems
Think of it like a tiny gatekeeper. When it’s clear, water flows freely, ensuring optimal cleaning and rinsing. When it’s clogged, water struggles to reach the spray arms, resulting in poor washing performance and, yep, that dreaded pressure drop. And because it’s tucked away, many folks forget it exists until their dishwasher is barely functioning.
Is It Really Worth the Fuss?
Now, I get it—some might think, “How complicated can this be?” But neglecting simple checks like the debris filter can lead to bigger headaches and expenses later. A quick peek and clean can restore your machine’s performance and save you from costly replacements. For a thorough guide on installing and checking parts properly, you might want to review parts checklists during installation.
If you’ve ever faced sluggish cycles or inconsistent cleaning, chances are this little filter is the villain. So, let’s roll up our sleeves and get to know this hidden hero, ensuring it doesn’t sabotage your water pressure anymore. Ready to see how a simple cleaning can make all the difference? Stay tuned for the practical steps and tips coming up next.
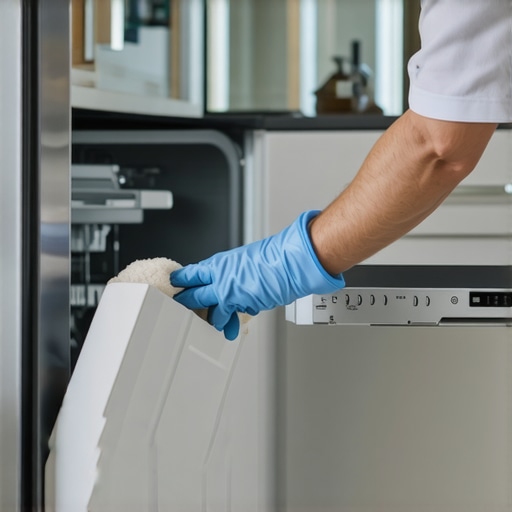
Remove the Lower Dishrack for Better Access
Start by pulling out the bottom rack to expose the debris filter assembly. Usually, this involves sliding the rack out carefully, just like removing a drawer. Once removed, you’ll see the filter cover and related components. I remember the first time I did this, I was nervous about breaking something, but with gentle steps, I navigated the process smoothly.
Unscrew or Unlock the Filter Cover
Depending on your dishwasher model, the debris filter cover might be secured by a screw or just twisted into place. Use a screwdriver if needed, or simply turn the cover counterclockwise to unlock it. Think of this step as opening a lid — firm but gentle pressure prevents damage. During my maintenance, I learned that forcing it could strip the threads, so patience is key.
Extract and Inspect the Debris Filter
Carefully lift out the filter and examine it for clogs, debris, or buildup. It’s not uncommon to find food particles, grease, or mineral deposits. If you’re unfamiliar with its appearance, refer to related parts and their roles to understand its function. When I did this, I found years of grime that had significantly reduced water flow.
Clean the Filter Thoroughly
Wash the filter under running warm water, using a soft brush or an old toothbrush to dislodge stubborn particles. For sticky buildup, soak the filter in a mixture of vinegar and water for 15 minutes. During my cleanup, I discovered that a simple vinegar soak made a huge difference, restoring the filter’s flow capacity. Regular cleaning prevents clogs and maintains optimal performance.
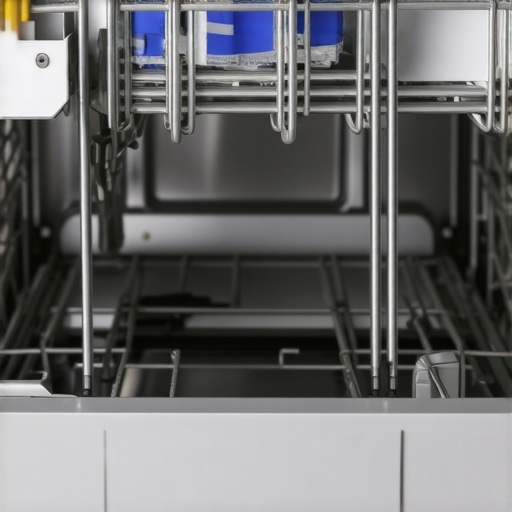
Clear Any Obstructions Inside the Filter Housing
Check the filter housing inside the dishwasher for debris or obstructions. Use a thin brush or a pipe cleaner to reach tight spots. This prevents debris from being trapped elsewhere and causing water pressure drops. My first attempt at this revealed small particles lodged deep inside — clearing them improved cycle times noticeably. Remember, small debris can block the water pathways, mimicking a clogged filter.
Reassemble and Secure the Filter
Place the clean filter back into its housing, aligning it properly with the threads or locking mechanism. Twist or screw it in tightly but avoid over-tightening, which can damage threads. Once reassembled, replace the lower rack. I made sure everything was secure by giving a gentle tug — loose parts can cause leaks or noise during operation.
Test the Dishwasher for Proper Water Flow
Run a short cycle to verify water pressure and cleaning performance. Observe the spray arms and listen for any irregular sounds. During my test run, I noticed the water spray was stronger and coverage was better, confirming the effectiveness of the cleaning process. This step ensures your maintenance yields tangible results.
Schedule Regular Maintenance
To keep your dishwasher performing at its best, repeat this cleaning process every 3-6 months, especially if you notice water pressure issues or spots on dishes. Regular attention to the debris filter extends the lifespan of internal parts and prevents costly repairs. Trust me, a little effort now saves a lot later — I avoided professional repairs by staying proactive.
For more detailed guidance tailored to your dishwasher model, consult specific installation and maintenance resources, like parts checklists during installation or warranty considerations.
Many homeowners believe that installing a dishwasher is a straightforward task, and that the warranty will cover any future issues. However, these assumptions can lead to costly mistakes and missed opportunities for proper maintenance. Let’s explore some advanced insights and misconceptions that often trip up even experienced DIY enthusiasts.
One prevalent myth is that using generic or third-party parts won’t affect your warranty. In reality, manufacturers often specify certain approved components to ensure reliable performance and warranty validity. Using incompatible parts, such as non-recommended spray arms or water inlet valves, can void your warranty, leaving you unprotected during critical repairs. For a comprehensive understanding of what parts are covered, consider reviewing the most popular dishwasher parts and their roles.
An often-overlooked nuance is the proper installation of the water supply line. Many assume that sealing with Teflon tape or plumber’s putty is sufficient, but the key is the quality and type of fittings used. Reusing old or damaged fittings can cause leaks or pressure drops that mimic more serious malfunctions. This can lead to unnecessary replacement of expensive parts, or even warranty claims denied due to improper installation. For tips on avoiding this, see guidelines on installing dishwasher parts correctly.
A critical trap involves misunderstanding warranty coverage itself. Many believe that warranties cover all damages from water leaks or electrical issues. However, some manufacturers specify that improper maintenance, like neglecting to clean filters or ignoring signs of wear, voids the warranty. A prime example is ignoring the debris filter, which, if neglected, can cause pressure issues that seem unrelated but are actually linked to preventable problems. To avoid voiding your warranty unknowingly, review how understanding parts can protect your warranty.
For advanced users wondering how to spot subtle issues early, considering the environmental conditions of your installation is crucial. High water hardness or fluctuating electrical supply can accelerate wear or cause erratic behavior, which is often mistaken for manufacturing defects. Regularly testing your water’s mineral content and ensuring stable power can help maintain your dishwasher’s longevity.
Before we wrap up, I want to highlight a common mistake in choosing installation services: ignoring the importance of following local plumbing codes. Not only can this lead to leaks and water damage, but it may also void your warranty if the installation is deemed non-compliant. Always ensure that your installer adheres to local regulations, and consider consulting professional advice on installation standards.
Have you ever fallen into this trap? Let me know in the comments. Remember, understanding these hidden nuances can save you money, frustration, and protect your warranty. Don’t overlook the details—your dishwasher’s performance depends on it.
Invest in the Right Tools for Reliable Repairs
Having a well-stocked toolbox is crucial for maintaining your dishwasher effectively. I personally recommend a versatile multi-purpose screwdriver set with interchangeable bits, which allows you to handle various screws and fasteners without hassle. A high-quality toothbrush or small wire brush is invaluable for cleaning filters and spray arms thoroughly. Additionally, a digital multimeter helps verify electrical components like switches and control boards, giving you confidence in diagnosing issues.
Why Regular Cleaning Extends Your Dishwasher’s Life
Consistent maintenance prevents small problems from escalating into costly repairs. I make it a habit to check and clean my debris filter every 3-6 months, especially in hard water areas where mineral buildup is common. This proactive approach reduces strain on the pump and spray arms and possibly prevents leaks. Consider setting a reminder on your calendar; it’s a simple step that pays off long-term. When cleaning, I soak the filter in vinegar to dissolve stubborn deposits—a trick I learned from this comprehensive guide on dishwasher parts.
Embrace Smart Monitoring to Catch Issues Early
My favorite upgrade is integrating smart home technology, like leak sensors and Wi-Fi-enabled status alerts. These devices notify me immediately if there’s a potential leak or malfunction, allowing me to address issues before damage occurs. Tools like the smart dishwasher app provide real-time diagnostics and troubleshooting tips. As technology advances, I predict more appliances will incorporate AI-driven maintenance predictions, extending warranties and reducing downtime.
How do I maintain my dishwasher over time?
Beyond cleaning, inspecting hoses for cracks or leaks and ensuring proper drainage are critical. Replace worn-out parts promptly to prevent water damage or component failure. I often refer to guidelines on replacing parts before failure to keep my machine functioning at peak performance. Additionally, verifying the electrical connections annually helps avoid unexpected shutdowns or safety hazards.
Future Trends in Dishwasher Maintenance
As smart technology becomes more integrated, I believe diagnostic tools will become more accessible and user-friendly, empowering homeowners to perform complex repairs confidently. The development of durable, corrosion-resistant parts promises longer intervals between maintenance, reducing costs and effort. Staying ahead involves adopting these innovations early and being proactive with regular inspections.
To kickstart your maintenance routine, try using a multi-purpose screwdriver set combined with a vinegar soak for your filters. This small step can significantly improve your dishwasher’s lifespan and efficiency.
Lessons I Didn’t Expect to Learn About Dishwasher Repairs
- One of my biggest surprises was realizing how often a tiny debris filter plays a starring role in water pressure issues — neglecting it cost me more than I want to admit.
- Regular cleaning wasn’t enough; understanding the subtle signs of buildup inside the filter housing truly kept my machine humming and my water bills low.
- I discovered that using incompatible parts, even unintentionally, can sabotage warranties and lead to costly repairs — always double-check before replacing components.
- Beyond the technicalities, I’ve learned that proactive maintenance transforms frustration into confidence — tackling issues early saves money and time.
- Finally, investing in the right tools and understanding model-specific quirks makes DIY fixes more manageable and rewarding, turning a chore into a craft.
My Go-To Sources for Dishwasher Wisdom
- Understanding dishwasher parts: This resource helped me decode what each component does and how to care for them correctly, preventing premature failures.
- Parts to check during installation: A comprehensive guide that saved me from costly mistakes during setup and taught me best practices for long-term reliability.
- Replacement tips for common parts: This gave me confidence when replacing worn components, ensuring proper fit and function without voiding warranties.
- Diagnosing issues within warranty periods: An invaluable resource for timely troubleshooting to minimize downtime and preserve warranty coverage.
Your Next Step Toward Dishwasher Confidence
Remember, the real power lies in understanding your dishwasher beyond the surface. By mastering small but critical details like deburring that debris filter and respecting model-specific nuances, you can make maintenance an empowering experience. Don’t wait for a pressure drop or a leak to remind you — proactive care transforms a frustrating chore into a satisfying skill. Are you ready to take control of your dishwasher’s health and extend its lifespan? Share your thoughts or ask questions below — your journey to hassle-free appliance ownership starts now.
,
Related Posts
How to Clean the Gunk Under Your Dishwasher Door
Ever opened your dishwasher and winced at the grimy, greasy…
The Hidden Filter Under Your Spray Arm You Are Probably Ignoring
Ever had a dishwashER that suddenly stopped cleaning as well…

The Water Hardness Setting Most People Forget to Change
You know that sinking feeling when your new dishwasher starts…