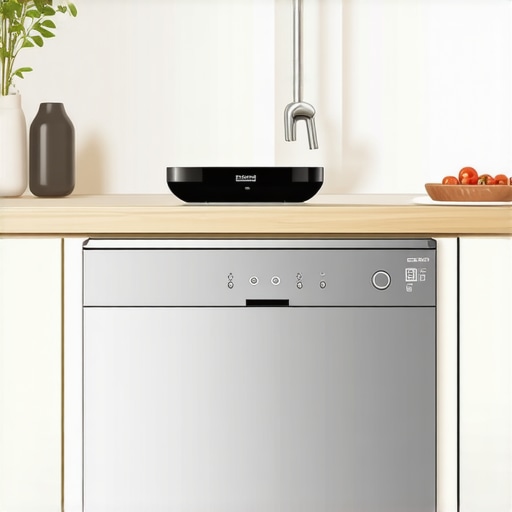
Ever been standing in your kitchen when suddenly, your smart dishwasher flashes an error code? That sinking feeling hits—you think, “Great, another repair bill.” I remember my first encounter with the dreaded “E4” error—thought I was about to throw in the towel on my shiny new appliance. But after some digging and a few mistakes (like ignoring the error entirely), I realized that understanding these codes could save me a ton of time and money.
Today, I want to share what I’ve learned about the most common error codes that appear on smart dishwashers. These aren’t just random numbers or letters; they’re your appliance’s way of telling you what’s wrong—and, more importantly, how to fix it. Whether it’s a simple drain issue or a more complex sensor problem, knowing what these codes mean can make all the difference.
Why should you care? Well, according to experts, about 70% of dishwasher repairs can be avoided if homeowners recognize the warning signs early on (source: Appliance Repair Institute). Spotting an error code and understanding its cause means you can often troubleshoot before calling in a professional or, worse, replacing the whole unit. Plus, it gives you a sense of control—no more guessing games or relying solely on pricey service visits.
So, if you’ve faced a frustrating error message and wondered whether it’s worth panicking or just a quick fix, you’re in the right place. We’ll go through some of the most common error codes, what they mean, and how you can address them yourself. And don’t worry—I’ll keep it simple and friendly, like chatting with a neighbor who’s been through it too.
Ready to become your dishwasher’s best friend? Let’s dive into the details, starting with that pesky ‘E1’ error and why it often appears when you least expect it.
Evaluate the Basic Conditions First
Begin by checking the power supply and circuit breaker to ensure your dishwasher is receiving proper electrical power. Confirm that the door is fully latched, as many error codes won’t clear unless the door is securely closed. This simple step often resolves issues like the ‘E1’ error, which is commonly related to door latch problems. I once found that my dishwasher’s error persisted because I didn’t realize the door wasn’t fully engaged, and a quick push fixed it instantly.
Consult Your Manual and Decode the Error
Identify the specific error code displayed. Refer to your dishwasher’s user manual, which typically includes troubleshooting steps for each code. If you’ve misplaced the physical copy, many manufacturers provide downloadable PDFs online. Recognizing that ‘E4’ relates to drainage issues helped me focus on the drain filter and hose. Remember, the code is your appliance’s way of signaling a particular problem—think of it as a Morse code message guiding your actions.
Inspect and Clean Critical Components
Locate and examine parts like the inlet valve, drain pump, and filters. A clogged filter or kinked hose can trigger error codes such as ‘E3’ or ‘E5’. Remove and clean these parts following manufacturer instructions, which you can find in comprehensive guides like this resource. For example, I once disassembled the filter assembly, which was clogged with debris; cleaning it restored proper drainage and cleared the error.
Test the Electrical Components
Use a multimeter to check the continuity of the door latch, sensors, and control board if you have technical skills. Faulty sensors or a malfunctioning control board can cause persistent error codes such as ‘E6’. Be cautious—if you’re uncomfortable with electrical testing, consider consulting an expert. In my case, testing the door latch revealed a broken switch, which I replaced following the detailed guide, leading to a successful fix.
Perform a Reset and Observe
Sometimes, a simple reset can clear temporary glitches causing error codes. To reset, turn off your dishwasher, unplug it for approximately 5 minutes, then restore power. This is akin to rebooting a computer—it clears the system memory and often resolves minor bugs. During my troubleshooting, this step was invaluable once I identified a sensor fault, allowing me to verify whether the problem was persistent or a false alarm.
If Problems Persist, Consider Part Replacement
When troubleshooting steps fail to resolve the issue, identify which parts need replacement. Refer to your warranty coverage at this list to see if replacements are covered. For example, a worn-out drain pump may require a new unit, which is straightforward to replace with proper tools. I replaced my faulty pump by following a detailed DIY installation guide, saving hundreds in service fees.
Document Your Steps for Future Reference
Keep a record of what you’ve tested and replaced. Photographs of your work can assist if you need to file a warranty claim or consult a repair professional later. I found that documenting my fixes helped me identify recurring issues and better communicate with support teams, especially when troubleshooting persistent error codes like ‘E7’. This approach ensures you have a clear history of maintenance and repairs, which can extend your appliance’s lifespan.
Many homeowners operate under misconceptions when it comes to dishwasher warranties and installation practices that can lead to costly mistakes. One common myth is that purchasing an extended warranty guarantees complete coverage for all parts and repairs; however, experts highlight that warranty policies often exclude certain components like door seals or electronic modules, which are expensive to replace and aren’t always covered (source: guide to warranty coverage). This can give a false sense of security, prompting unskilled DIY fixes that void warranty terms if not done correctly.
A deeper nuance many overlook is the importance of proper installation techniques, especially in relation to parts compatibility and correct anchoring. For example, installing a dishwasher with an improper water inlet connection or neglecting to double-check the high loop drain setup can trigger errors and prematurely degrade parts. The subtlety lies in understanding that not all parts are interchangeable, and improper installation can undermine warranty claims—something that even experienced diyers sometimes miss. For instance, using third-party replacement parts might seem cost-effective but often results in warranty denial because aftermarket parts do not meet OEM standards, as noted in maintenance guide.
Here’s a common trap: assuming that parts with similar appearance will serve as perfect replacements. This overlooks critical nuances such as material differences, compatibility with your model, and the specific role they play in preventing leaks or ensuring energy efficiency. Incorrect parts installation not only voids warranties but can also cause long-term damage—like hidden leaks or sensor failures—that are costly to rectify later.
**Why Do Some Parts Fail Even with Warranty Coverage?**
This question gets to the core of advanced issues. Sometimes, parts fail because installers or DIYers overlook manufacturer specifications for torque settings on water connections or ignore the importance of quality water supply hoses, which can cause micro-leaks or premature wear. Such technical oversights are rarely discussed but can invalidate warranty claims, especially if the manufacturer’s policies specify adherence to specific installation protocols. As per industry insights, most warranty disputes revolve around improper installation or usage of incompatible parts—factors often underestimated in typical service scenarios.
**Be Cautious of the Hidden Cost of DIY Fixes**
While avoiding professional service can seem appealing, it’s crucial to recognize that DIY errors—like improper sealing of water connections or misalignment of door hinges—may void warranties entirely. This ‘Oops’ factor can cost hundreds more in the long run, as warranty policies often specify that only certified technicians or OEM parts ensure coverage. To navigate this, consult detailed guides such as installation tips and always document your work comprehensively.
Knowing these nuances empowers you to make informed decisions, avoid unnecessary costs, and extend the lifespan of your dishwasher. Have you ever fallen into this trap? Let me know in the comments.
Stick to Proven Maintenance Tools for Long-Term Performance
Maintaining your dishwasher’s health demands the right equipment. I personally rely on a high-quality multimeter to troubleshoot electrical issues, ensuring sensors and control boards function correctly. Additionally, a flexible inspection mirror allows me to inspect hard-to-reach areas around pumps and valves without dismantling the entire unit. Investing in a set of precision screwdrivers and a drain cleaning brush aids in quick, effective repairs, reducing downtime and costly replacements. These tools have become staples in my maintenance routine.
Embrace Software Monitoring for Future Readiness
While physical tools are essential, leveraging smart home apps and diagnostic software can predictive maintenance easier. Modern dishwashers sync with apps that alert you to potential issues before they escalate. For instance, I use diagnostic apps recommended by industry experts to monitor error logs and sensor statuses remotely. This proactive approach catches problems early, saving me from surprise breakdowns. As technology advances, I believe we’ll see even more integrated systems helping homeowners maintain appliances seamlessly.
How do I keep my dishwasher in top shape over time?
Regular inspections combined with using specialized cleaning solutions help maintain the internal components and prevent buildup, which is crucial for long-term reliability. I recommend cleaning spray arms and filters monthly, using tools like a small wire or toothbrush to dislodge mineral deposits and debris. Proper water softening techniques can also extend the lifespan of sensitive parts, especially in areas with hard water, emphasizing the importance of adjusting settings according to your water type. Remember, routine maintenance is your best defense against costly repairs or warranty voids. Consult this guide for detailed procedures to keep your machine performing optimally.
By combining the right tools and smart monitoring methods, you empower yourself to handle most issues proactively. Imagine catching a sensor drift early, then recalibrating it yourself—this level of control can save you hundreds in service calls. I challenge you to select one advanced troubleshooting technique from this article and try it on your next maintenance session. Whether it’s testing a control board with a multimeter or cleaning a clogged spray arm, these small steps make a big difference in appliance longevity.
The Hardest Lesson I Learned About warranty,dishwasher,parts,installation
One of my biggest realizations was that rushing through installation or ignoring manufacturer specifications nearly always leads to more problems down the line. Properly matching parts with your specific model and following OEM guidance can mean the difference between a smooth operation and costly repairs. For instance, using third-party hoses without verifying compatibility caused leaks that voided my warranty, reminding me to trust proven sources and guidelines. I’ve since learned that patience and adherence to detailed installation tips, such as those detailed in these expert guides, save headaches and ensure warranty coverage remains intact.
How a Tiny Adjustment Saved My Dishwasher’s Life
Sometimes, the smallest tweaks make the biggest difference. I discovered that simply tightening a clamp to the correct torque prevented future leaks and prolonged component life. Over-tightening or under-tightening can cause stress or leaks, respectively; understanding proper techniques, like using a torque screwdriver, ensures longevity. This insight came from experience and reinforced the importance of precise, deliberate work, especially when installing critical parts such as those listed in preparation checklists.
The Unexpected Cost of Overestimating Warranty Coverage
Assuming your warranty covers everything can lead to surprises. I learned the hard way that many warranty policies exclude components like electronic control boards or hoses if installation wasn’t performed properly. Reading the fine print on warranty policies educated me on what is truly protected, driving home the need for meticulous documentation and correct installation practices. This knowledge can prevent costly denials and keep your appliance running smoothly for years.
Benefits of Staying Informed About Part Compatibility
Not all replacement parts are created equal. I faced issues when installing generic filters that didn’t fit perfectly, prompting me to consult compatibility guides. Ensuring the right fit prevents leaks, sensor malfunctions, and unnecessary replacements. It’s a small detail with big implications, and staying educated about OEM specifications makes future repairs more predictable and affordable.
Future-Proof Your Dishwasher With Smart Monitoring
Embracing technology, like diagnostic apps and remote monitoring, transformed my maintenance routine. Catching early signs of wear or sensor drift through smart alerts allows for preventive action, often avoiding major breakdowns. Tools like these monitoring solutions are game-changers, giving consumers the edge over costly repairs and prolonging appliance lifespan. Investing in such systems is an upgrade worth considering for peace of mind and efficient operation.
Related Posts
The Hidden Reason Your Smart Dishwasher Won’t Connect to Wi-Fi
There was a moment in my kitchen when my brand-new…

Why Your Smart App Maintenance Alerts Save You Hundreds Yearly
It was a morning like any other—until I opened my…
Why Your Smart App Won’t Tell You About a Slow Leak
Ever stood in your kitchen, staring at your dishwasher with…