Ever found yourself deep in a thrift store or scrolling through online listings, eyeing a second-hand dishwasher that seems like a steal? I’ve been there. One day, I almost bought a cheap unit without a second thought—only to discover it was a ticking time bomb of leaks and broken parts when I finally tried to install it. That lightbulb moment taught me a critical lesson: never buy a used dishwasher without knowing exactly what you’re getting into.
Why Skipping a Proper Inspection Can Cost You Big
It’s tempting to overlook the details, especially when a deal seems too good to pass up. But trust me, a quick glance won’t cut it. I’ve learned that a thorough inspection can save you from costly repairs or worse, ending up with a machine that doesn’t work at all. Believe it or not, studies show that about 30% of faulty appliances don’t even make it past the purchase stage because the buyer missed obvious signs.
In today’s post, I’m going to walk you through my tried-and-true method for inspecting a second-hand dishwasher. Whether you’re a seasoned DIYer or just dipping your toes into appliance shopping, these tips will arm you with the knowledge to make a smart, confident purchase.
Is an inspection really worth the effort?
Maybe you’re thinking, “Can’t I just trust the seller?” or “Isn’t it enough to test it briefly?” I made that mistake early on—thinking a quick run through was enough. But I learned the hard way that those quick checks miss leaks, cracked seals, or faulty motors that can hide behind the surface. Taking the time to inspect thoroughly is the best way to avoid unpleasant surprises later. For example, checking for water stains or rust around the door and under the unit can reveal hidden leaks, while listening carefully during a cycle can alert you to weird noises that signal internal issues.
If you want to be confident you’re not throwing money away on a lemon, keep reading. I’ll guide you through everything you need to know—step-by-step—to evaluate a second-hand dishwasher properly. And, just as importantly, I’ll share some common mistakes to avoid, so you don’t learn these lessons the hard way like I did.
Ready to become a savvy second-hand dishwasher inspector? Let’s dive into the essential checks that will save you headaches and cash—because knowing what to look for is the first step toward an appliance that works as hard as you do.
.
Check the Exterior and Seal Integrity
Begin with visual inspection of the dishwasher’s exterior. Look for rust, dents, or cracks—these can indicate internal damage or future failures. Pay special attention to door seals; a brittle or cracked gasket can cause leaks and reduce cleaning efficiency. When I bought my last used unit, a visible crack on the door gasket was a red flag, prompting me to negotiate a lower price or pass on the purchase. To test the seal, close the door and listen for any hissing sounds or check for gaps, which could compromise water tightness. Remember, leaks can lead to mold or costly repairs if ignored.
Examine Internal Components Carefully
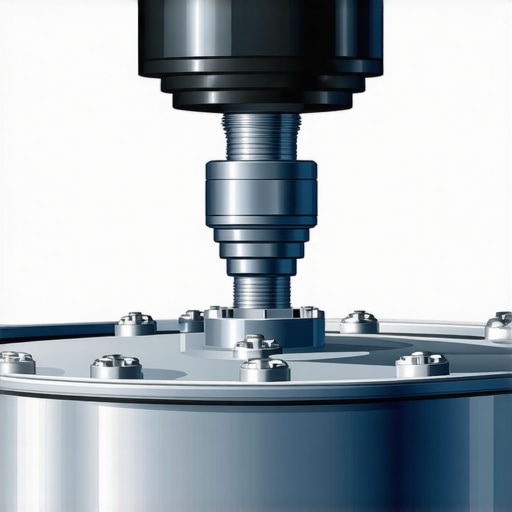
Open the unit and look inside for signs of water stains, mold, or mineral deposits, especially around the sump area and spray arms. Remove the filter and inspect for clogs or debris, which can hinder operation. During my last inspection, a clogged filter was easy to spot, but the real gem was finding mineral buildup inside the spray arms—indicative of hard water issues that might require additional maintenance or parts replacement. Turn the spray arms manually to ensure they spin freely without obstructions. This step mimics a test drive for a used car—it’s about feeling the internal health of the machine.
Test the Mechanical and Electrical Life
Connect the dishwasher to a water supply cautiously, ensuring the inlet valve isn’t leaking. Listen for the sound of water filling during the cycle initiation—any hissing or irregular noises could signal valve or pump issues. When I tested an older model, the inlet valve hissed loudly, hinting at failure soon. Next, activate a short cycle and observe the operation: listen for unusual noises from the pump or motor. For electrical safety, check the power cord and plug for damages. When I assisted a friend, I used a multimeter to verify voltage and grounding, which saved from potential hazards. Remember, a quiet, smooth operation indicates good condition.
Inspect for Hidden Leaks and Corrosion
Water stains or rust around the base suggest prior leaks. Tilt the machine slightly backward and frontward to see if water drips from hidden areas. During my experience, I found a small rust patch near the drain pump, which later needed replacing. Use a flashlight to peer into the sump basin and inspect the condition of the rubber pump impeller. If accessible, gently spin the impeller or move the motor shaft; resistance or grinding sounds are signs of internal wear. Check the drain hose connections for secure fittings and signs of wear, as loose or broken clamps can cause leaks. Remember, corrosion can be a silent killer—don’t overlook these signs.
Assess the Warranty and Parts Compatibility
Before making any purchase, verify the model number and compare it with available warranty coverage. Some parts, like the door springs or spray arms, are easy to replace and often covered under warranty. I once bought a dishwasher with a warranty that covered the motor but not the water inlet valve—knowing this prevented costly surprises. Use online resources to cross-reference parts and check if replacement components are readily available. For high-value units, consider the warranty’s longevity and what it explicitly includes, especially regarding labor costs. Proper verification prevents buying into a lemon.
Perform a Final Test Run and Observe
Power on the dishwasher and initiate a short cycle to observe operation firsthand. Check for leaks during filling and draining phases. Listen for uneven noises or vibrations that might indicate component misalignment or internal damage. When I performed such a test on a used model, a slight wobble in the pump was apparent, suggesting it needed realignment or replacement. Ensure the unit drains completely at the end of the cycle without residual water. These final checks confirm the internal condition and functionality, giving confidence in your purchase decision.
Remember, thorough inspection isn’t just about spotting flaws; it’s about understanding the machine’s story and predicting its future performance. Each step you take reduces risk and ensures you won’t be the one caught off guard by hidden faults or premature failures. Dive in with confidence, armed with this step-by-step guide, and turn what seems like a gamble into a smart investment.
,Many homeowners assume that understanding basic parts, warranties, and installation is enough to make a smart purchase. However, there are subtle pitfalls and misconceptions that can trip up even the most diligent shoppers. One common myth is that all warranties are created equal, leading buyers to overlook the fine print or misunderstand what is actually covered. In reality, many warranties exclude essential components like filters or seals, and they often have strict conditions—like requiring professional installation—to remain valid. To get the most out of your warranty, it’s crucial to read the policy carefully and understand what parts are protected. For example, some warranty providers won’t cover damage caused by incorrect installation, so jumping into DIY without proper knowledge can void your coverage. Always verify the warranty specifics through trusted sources such as maximizing your warranty coverage.
Another frequently misunderstood aspect is the importance of selecting the right parts for your dishwasher, especially when trying to upgrade or replace components. Many assume that cheap, generic parts will suffice, but they often lack the durability or compatibility of OEM (Original Equipment Manufacturer) parts. Using subpar replacements can lead to leaks, poor cleaning, or even damage to other components. This is why it’s wise to consult expert advice or trusted sources—like essential parts to know—to ensure you’re choosing high-quality replacements.
When it comes to installation, one sneaky trap is neglecting the importance of proper drainage setup. Many people believe that connecting the drain hose with a simple downward loop suffices, but this can cause silent leaks or odors over time. Installing a high-loop or an air gap correctly not only meets code but also prevents backflow contamination. A common mistake is to reuse old hoses or clamps, which might seem cost-effective but actually risk future failure. Investing in quality fittings and following expert installation guides, such as top tips for installation, ensures a long-lasting, safe setup.
Finally, advanced users should consider how new smart features impact installation and warranty. Connecting a dishwasher to your home’s Wi-Fi can enhance maintenance and troubleshooting but also introduces new vulnerabilities. An improperly secured connection or a firmware glitch could trigger false leak alerts or disable smart functionalities. Attention to detail during setup, including secure routing of cables and proper grounding, can prevent such issues. For a comprehensive approach, review smart connection tips.
Have you ever fallen into this trap? Let me know in the comments. The bottom line is that the devil is in the details—whether it’s understanding warranty exclusions, choosing quality parts, or executing a perfect installation. Getting these nuances right can save you time, money, and countless headaches in the long run.
Maintaining your dishwasher over time requires the right tools and a bit of know-how. I personally rely on a few specific items that make troubleshooting and upkeep much easier—saving me both time and money in the long run. A quality multimeter, for example, is essential for diagnosing electrical issues accurately. I use mine to verify voltage at the inlet valve or test the motor windings, ensuring that any electrical faults are clearly identified before replacing parts.
Another tool I swear by is a detailed service manual tailored to your dishwasher’s brand and model. It provides schematics and step-by-step instructions that are invaluable during complex repairs or routine inspections. To keep everything running efficiently, I also recommend investing in a high-quality, flexible extension hose—especially if your unit is installed in a tight space. This reduces stress on the connections and minimizes leaks caused by strain or improper fittings.
For routine maintenance, a microfiber cloth and a gentle gasket cleaner help me keep seals and door latches in top shape. Regularly inspecting and cleaning the rubber gasket prevents mold buildup and ensures a proper seal, which is crucial for water conservation and cleaning effectiveness.
Looking ahead, I predict an increasing integration of smart diagnostic tools that can connect directly to your smartphone, giving real-time alerts about potential issues before they escalate. Such technology could revolutionize maintenance routines and extend the lifespan of appliances.
How do I maintain my dishwasher over time?
The key is a combination of regular inspection, routine cleaning, and prompt part replacement when signs of wear appear. For instance, checking the operation of spray arms and replacing worn-out bearings or seals early can prevent more serious damage. Following manufacturer guidelines and scheduling annual check-ups—perhaps with a professional—can catch small problems before they turn big.
Remember, using the right tools enhances your ability to diagnose and repair effectively. I recommend trying out a multimeter first if you haven’t used one before; it’s surprisingly straightforward and incredibly useful. Consistent maintenance not only keeps your dishwasher performing at its best but also maximizes warranty coverage—just make sure to keep records of your inspections and repairs, which can be handy when dealing with warranty claims or future resale. For more tips on warranty management, check out maximizing your warranty coverage.
What I Wish I Knew Before Jumping into the Second-Hand Market
One of the toughest lessons I learned was that appearances can be deceiving. A dishwasher that looks pristine on the outside might be suffering from hidden leaks or internal corrosion. Trusting just a quick glance or surface test can cost you dearly—I’ve wasted money on units that failed within months. The real breakthrough came when I started examining the machine from every angle, paying close attention to rust, water stains, and seal integrity, which often reveal the true story behind a used dishwasher.
Another insight was the importance of understanding warranty nuances. I once purchased a seemingly perfect model, only to find later that certain key components weren’t covered, leading to unexpected out-of-pocket expenses. Reading the fine print and verifying what parts are protected can make or break your investment. The right knowledge turns a potential money pit into a reliable appliance that serves you well for years.
Then there’s installation. I used to think connecting the hoses and plugging it in was enough—until missteps caused leaks or improper drainage. Learning proper hookup techniques, like ensuring a high-loop drain or secure fittings, is crucial. Investing time in correct setup prevents headaches down the line, and sometimes, even saves your warranty.
Finally, I realized that routine checks and preventive maintenance are the secret to longevity. Regularly inspecting spray arms, filters, and seals keeps the dishwasher running smoothly, avoiding costly repairs. Equipping yourself with a tool kit and a maintenance schedule can transform your approach from reactive to proactive, extending the life of your appliance significantly.
Tools That Keep My Dishwasher Running Smoothly
My essential toolkit starts with a quality multimeter—this simple device helps me quickly diagnose electrical issues like faulty motors or bad wiring without guesswork. For detailed guidance, I rely on brand-specific service manuals available online, which break down complex repairs into manageable steps. A flexible silicone extension hose proves invaluable during installation or cleaning, especially in tight spaces where stock hoses kink easily.
Keeping rubber gaskets and seals clean and pliable is part of my routine. I use a gentle gasket cleaner and a microfiber cloth for regular upkeep, preventing mold buildup and ensuring water tightness. For detecting hidden leaks, I sometimes tilt the machine gently to see if water appears in unlikely spots—early warning signs of internal wear. Having these tools and habits in place means fewer surprises and more confidence in my appliance decisions.
Looking ahead, I’m excited about smart diagnostic gadgets that sync with apps, alerting me to issues before they become major problems. Embracing technology like leak sensors or remote monitoring could redefine how homeowners care for their dishwashers, making maintenance even easier and more intuitive.
Seize Control and Keep Your Dishwasher in Top Shape
Taking the time to thoroughly inspect, understand warranty details, and equip yourself with the right tools transforms your approach from unsure to unstoppable. Second-hand dishwashers can be a fantastic deal—if you know what to look for and how to care for them. Learning the nuances ensures your investment is a smart one, paying dividends in performance and longevity.
So, what’s your biggest concern when buying or maintaining a used dishwasher? Have you ever uncovered a hidden flaw that saved you from a costly mistake? Share your experiences in the comments below—your insights could help others make confident, informed choices!
Related Posts

The $9 Replacement Gasket That Stops Door Edge Leaks
I remember the moment vividly. I was mid-cycle, the dishwasher…

The Secret to Quiet Cycles: Sound Dampening Sheets
I remember the moment clearly—standing in my kitchen, staring at…
The $10 Part That Stops Your Machine from Overfilling
It happened again. My dishwasher, usually the quiet hero of…