
Have you ever opened your dishwasher after a cycle and noticed that peculiar, slimy buildup on your lower spray arm? I still remember the lightbulb moment when I realized my problem wasn’t just a stubborn clog but a sign of something more overlooked — gunk hiding deep within those tiny holes. It’s frustrating because you think, “Isn’t this supposed to make life easier?” But instead, you’re stuck with dishes that aren’t as spotless as they should be, and an appliance that’s fighting you every step of the way. That’s when I decided to crack the code on cleaning out those sneaky clogs.
Why The Lower Spray Arm Gets Blocked More Often Than You Think
The spray arm is the unsung hero of your dishwasher, responsible for distributing water evenly over your dishes. Yet, it’s also where debris, grease, and mineral deposits love to hide, especially if your water supply isn’t the cleanest or if you forget to clean your filter regularly. Over time, this build-up turns into a stubborn gunk that clogs those tiny nozzles, reducing spray effectiveness and leaving residue on your plates. Interestingly, studies show that mineral deposits alone can cause a 50% reduction in spray efficiency if not addressed (source: Appliance Doctor Z).
Early on, I made the mistake of just wiping the visible parts or giving the spray arm a quick rinse, thinking that would do the trick. But it wasn’t until I disassembled the arm and gave those nozzles a thorough clean that I finally saw a real improvement. Trust me — if your dishes are coming out with spots, or worse, with leftover gunk, the spray arm could be the culprit. Ready to learn how to make that sneaky arm squeaky clean again? Let’s dive into the steps that will restore your dishwasher’s performance and your sanity.
Disassemble the Spray Arm Carefully
Start by unplugging your dishwasher to ensure safety. Locate the spray arm at the bottom of the tub—usually held in place with a central nut or clip. Use a socket wrench or screwdriver to remove it, depending on your model. Remember, take a photo before disassembly to recall the assembly order later. When I did this for the first time, I used the wrong screwdriver size, causing a bit of frustration, but ultimately, it made the cleaning process easier.
Remove and Clean Nozzles and Holes
Once the spray arm is off, inspect the tiny nozzles for mineral deposits or debris. Use a toothpick or the small end of a pipe cleaner to gently poke and clear each hole. For stubborn clogs, soak the spray arm in a mixture of vinegar and warm water for 30 minutes to dissolve mineral buildup. I once forgot about soaking, and the nozzles remained partially blocked, reducing water flow. Soaking ensures a thorough clean.
Use a Needle or Pin for Small Nozzles
For the tiniest holes, a sewing needle or pin can be effective. Gently insert the needle into each nozzle to loosen any residual debris. Be cautious not to damage the nozzle or enlarge the hole, as this can reduce spray efficiency. During my last clean, I used a fine pin and instantly improved water spray without needing to buy new parts.
Flush the Spray Arm and Nozzles
Rinse the spray arm under running warm water to wash out loosened debris. Hold it with your hand or use a brush for stubborn spots. If the spray pattern looks uneven after cleaning, rotate the nozzles gently to realign any dislodged parts. I noticed uneven spraying once and fixed it by adjusting the nozzles, restoring optimal water flow.
Reassemble and Test
After cleaning, reinstall the spray arm in the reverse order of removal. Secure it tightly but avoid over-tightening, which can crack plastic parts. Plug the dishwasher back in and run a short cycle to observe spray patterns. Check if water hits dishes evenly and if spots or residue are reduced. When I tested after cleaning, I saw a marked improvement in cleaning performance, and the spray no longer sprayed unevenly.
Maintain Regular Cleaning to Prevent Future Clogs
Prevention is key. Regularly inspect and clean the spray arm, especially if you notice decreased cleaning efficiency. Consider adding a descaling agent every few months if you have hard water, which can cause mineral deposits inside the nozzles. For persistent issues, check your water supply and filters, and consult the best dishwasher parts to ensure everything is functioning properly. Taking these steps now saves time and hassle later, ensuring your dishwasher remains efficient and your dishes come out spotless.
Most homeowners believe that once they register their dishwasher’s warranty, their coverage is a straightforward shield against any potential mishaps. However, the reality is far more complex. Many fail to realize that nuances in warranty policies, part quality, and installation practices can significantly impact whether a claim gets approved. Let’s dig deeper into these often-overlooked details so you can avoid common pitfalls and secure the protection you deserve.
Debunking the Myth of Zero-Exception Warranties
A widespread misconception is that manufacturer warranties cover all breakdowns and parts without exception. In truth, warranties often have fine print clauses that exclude damage caused by improper installation, use of third-party parts, or neglecting routine maintenance. For example, using incompatible parts or skipping regular cleaning can void your coverage, even if you experience a technical fault. This emphasizes the importance of understanding your warranty policy thoroughly; comprehensive knowledge of warranty nuances can prevent unexpected out-of-pocket expenses.
The Trap of DIY Installation Without Proper Knowledge
Many homeowners attempt to save money by installing their dishwashers themselves. While a DIY approach can be rewarding, it carries the risk of overlooking critical details. Improper leveling, incorrect water inlet connections, or inadequate sealing can lead to long-term issues and may even void your warranty. Manufacturers often specify that professional installation ensures all parts are correctly assembled and aligned, which is vital for optimal performance and warranty validity. To avoid this, consult expert resources or hire certified installers; proper installation tips are essential for beginners.
Advanced Tip: How Do Warranty Proofs Impact Your Claims?
For those seeking to maximize warranty benefits, maintaining detailed records can make all the difference. Photos of installation, receipts for parts, and documentation of regular maintenance serve as proof in case of disputes. Additionally, some manufacturers require that parts replaced during repairs be original or approved third-party components; using unauthorized parts might void your warranty altogether. To clarify these intricacies, review your warranty policy carefully and consider consulting a professional if uncertain—see warranty documentation guidelines for guidance.
Selecting the right parts during repairs or upgrades is another layer of complexity. Substandard or incompatible parts, even if cheaper, can lead to premature failure and end your warranty coverage. It’s wise to use manufacturer-recommended components; in this context, knowing key parts helps ensure longevity and warranty compliance.
Finally, avoid the common mistake of neglecting regular maintenance, which often leads to preventable failures. Routine checks and timely replacements extend your dishwasher’s life and ensure ongoing warranty validity. Remember, a well-maintained dishwasher not only performs better but also safeguards your claims when issues arise.
Have you ever fallen into this trap? Let me know in the comments.
Equip Yourself with the Right Tools for Long-Term Care
Maintaining a dishwasher isn’t just about cleaning; it involves using specialized tools that ensure thorough care and avoid costly repairs. I personally swear by a set of precision screwdrivers, such as the Wiha precision screwdriver set, which I use to disassemble components without damaging delicate plastic parts. Additionally, a pistol-grip spray bottle filled with a vinegar and water solution makes rinsing nozzles effortless, preventing mineral buildup that can clog spray arms. For more stubborn deposits, a small brush with firm bristles helps scrub away grime without scratching surfaces. The key is selecting tools designed specifically for appliance maintenance, which minimizes errors and saves time in the long run. In the future, I predict smart diagnostic tools integrated with mobile apps will become standard, enabling real-time troubleshooting and maintenance alerts.
Routine Checks Save You Money and Time
Consistently inspecting critical components—like spray arms, filters, and seals—prevents minor issues from escalating into expensive repairs. An effective method I recommend involves monthly visual inspections combined with simple tests, such as running a short cycle with a cleaning tablet to detect water flow issues early. Using a digital moisture meter to check for hidden leaks can also help you address issues before they cause water damage or mold growth. Remember, staying proactive with maintenance extends your dishwasher’s lifespan and keeps warranty coverage intact. If you’re unsure about which replacement parts to use, my favorite resource is the list of essential dishwasher parts. Regular upkeep well beyond initial installation is crucial for dependable performance.
Scaling Up for Larger Homes or Commercial Use
Scaling your dishwasher maintenance routine for bigger setups requires more advanced tools, such as ultrasonic cleaning devices for nozzles. These devices generate high-frequency vibrations that dislodge stubborn mineral deposits from tiny passageways, something manual cleaning can’t match. Additionally, implementing programmable scheduling software, like the latest from Home Automation Inc., allows for automatic periodic cleaning cycles, reducing manual effort. When considering expansion, always audit your water supply and filtration systems; upgrading to high-capacity filters can drastically reduce mineral build-up and protect your investment. Looking ahead, integrating remote diagnostics with smart sensor networks will enable you to monitor multiple units simultaneously, alerting you at signs of declining performance or impending failure.
How do I maintain my dishwasher over time?
In addition to using the appropriate tools mentioned earlier, it’s vital to follow a routine schedule of checks and cleanings. Regularly replacing worn-out seals and inspecting spray nozzles ensures consistent water coverage and prevents leak-related warranty voids. Proper installation also plays a significant role; reviewing your setup with professional installation tips can help you catch potential issues early. Don’t forget to maintain a detailed maintenance log, including dates and parts replaced, which can be invaluable if warranty claims become necessary. For instance, documenting your cleaning routines and part replacements aligns with warranty requirements and strengthens your case if a defect occurs.
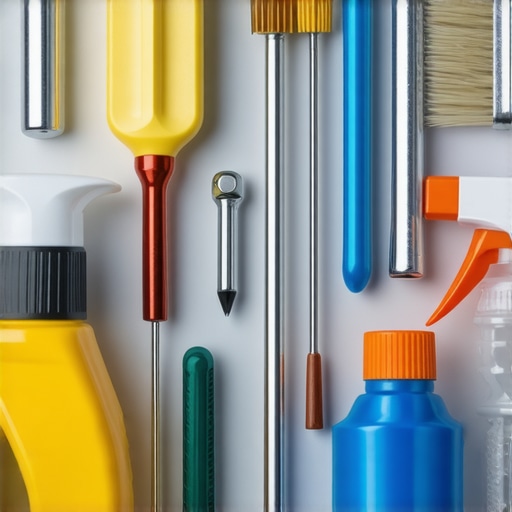
What I Wish I Knew About Dishwasher Maintenance That Nobody Tells You
Over the years, I learned that consistent upkeep is more about proactive care than reactive repairs. I underestimated how essential regular nozzle cleaning was until I faced stubborn residue on my plates; a simple soak in vinegar could have prevented all that hassle. The lightbulb moment was realizing that deep, systematic attention to parts like spray arms saves time and money down the line.
Another lesson was understanding the fine print of warranties—many of us assume registration covers everything, but neglecting routine maintenance or improper installation can void those precious protections. It made me realize that being informed about warranty nuances, such as using approved parts and seeking professional help when needed, is a game-changer.
Lastly, I discovered that investing in the right tools, like precision screwdrivers and cleaning brushes, dramatically reduces repair time and prevents accidental damage. These small but vital investments ensure your dishwasher performs optimally for years to come, making your home life smoother and more satisfying.
Related Posts
How to Flush Out the Hard Water Deposits in Your Spray Arms
Ever fired up your dishwasher only to find those stubborn…
Why You Should Never Use Hand Soap in the Machine
It was a typical Saturday morning when I reached into…

Why Hard Water Is the Enemy of Your Smart Sensor
It was a quiet Sunday afternoon when I first noticed…