
I’ll never forget the first time I installed my brand-new dishwasher and watched the whole kitchen tremble. It was like a miniature earthquake every time it ran. I thought I had screwed something up, or maybe I was cursed with a faulty appliance. That lightbulb moment hit hard: a seemingly perfect purchase was causing chaos in my own home. Have you experienced something similar? A brand-new dishwasher that seems eager to turn your kitchen into a dance floor? You’re not alone.
Understanding why your dishwasher vibrates so aggressively
Dishwashers are designed to do one thing—clean your dishes efficiently. But when they shake and rattle like a giant on steroids, it’s not just annoying; it can damage the appliance and your flooring. The good news? Most of this chaos stems from simple installation issues or unbalanced setups. Early on, I made the mistake of ignoring the importance of proper leveling, which only worsened the vibrations. According to experts, improper installation is among the top causes of excessive noise and movement during operation (source).
Let’s face it—when your new appliance turns your kitchen into a peppy dance hall, you’re left questioning whether it’s worth the investment. But before you start returning units or calling for repairs, there are straightforward steps to fix this. We’ll dive into these soon, along with some insider tips that I’ve learned from personal experience.
Will fixing the vibration really make a difference?
Absolutely. Not only will a stable dishwasher quiet down your space, but it also prolongs your appliance’s lifespan. Plus, it prevents damage to your cabinets and flooring. Trust me, a little attention to detail during installation goes a long way, and I’ve found that many folks overlook crucial steps like ensuring the machine is perfectly level or securing the anti-vibration pads. Want to know how I remedied this and how you can too? Keep reading.
Ready to turn that shaking nightmare into a smooth operation? The next sections will walk you through simple, effective strategies, and even some professional tips so you can enjoy your dishwasher without the unintended home earthquake. For a comprehensive DIY approach, I recommend checking out this step-by-step installation guide.
Ensure the Dishwasher Is Properly Level
First, I pulled out my dishwasher, grabbed a trusty level, and checked its positioning. Think of the machine like a boat; if it’s tilted, it’ll rock and shake. I found one corner lower than the others, so I adjusted the adjustable feet, tightening or loosening them until the bubble sat perfectly centered. After testing with a quick run, the vibration reduced significantly. Remember, even a tiny tilt can cause big shakes, so take your time getting it just right.
Check the Anti-Vibration Pads
Next, I examined the rubber pads beneath the dishwasher, which act like shock absorbers for your car. If these are worn out or missing, vibrations will echo through your cabinets. I replaced damaged pads with new ones, ensuring they fit snugly. Just like in a car, these pads dampen movement and keep your dishwasher steady during cycles.
Secure the Drain Hose Properly
A loose or improperly routed drain hose can cause the unit to shake. I inspected the hose, ensuring it’s tightly connected and routed along the wall, avoiding kinks or loops that trap water. I used clamps to secure it firmly, which prevents movement during operation. Proper drainage is essential, not just for function but also for reducing vibrations.
Level the Floor with Shims or Matting
Sometimes, the floor itself is uneven. I placed shims under the adjustable feet or laid a rubber mat underneath to create a stable, level base. Think of it as padding on a wobbly table—adding a firm, flat foundation minimizes rocking. This step made a noticeable difference in reducing noise and vibrations during my next wash.
Check Internal Components for Looseness
Inside, parts like the spray arms and racks can become loose over time, causing imbalance. I removed the spray arms to inspect their bearings, tightening any loose screws. I also examined the dishracks, ensuring they glide smoothly. Keeping internal parts secure is akin to balancing the wheels on a bicycle—misalignment leads to wobbling. Simple tightening here and there can restore stability.
Replace Damaged or Worn-Parts
If vibrations persist, it might be time to look at worn components like the motor mounts or suspension structures. I used a screwdriver to check for cracks or looseness, replacing parts from [this](https://appliancedoctorz.com/essential-parts-for-troubleshooting-dishwasher-installation-issues) guide. Remember, faulty parts can cause more than just noise—they can compromise the entire unit’s lifespan.
Verify Proper Installation Practices
Finally, I revisited the installation process, following a comprehensive [DIY guide](https://appliancedoctorz.com/diy-dishwasher-installation-step-by-step-guide). Ensuring correct leveling, securing water and drain connections, and anchoring the unit to the cabinet frame all contribute to a stable setup. Think of it like assembling furniture—you need all screws tight and parts aligned to prevent wobbling.
Secure to the Cabinet Frame
Using brackets or clips to anchor the dishwasher to surrounding cabinetry prevents movement during operation. I installed these following manufacturer instructions, which made the entire installation feel more solid. This is crucial for preventing persistent vibrations and extending the appliance’s longevity.
Many homeowners fall prey to misconceptions when it comes to dishwashers, which can lead to costly mistakes. One widespread myth is that all dishwasher parts are interchangeable or universally compatible. In reality, using incompatible or generic parts can void your warranty and even damage your appliance. For instance, relying solely on third-party components without verifying their compatibility or adherence to manufacturer standards might seem cost-effective initially but can result in poor performance or failure to honor warranty coverage. To prevent this, always consult expert guides like [maximizing your dishwasher’s warranty through proper parts selection](https://appliancedoctorz.com/maximizing-your-dishwashers-warranty-through-proper-parts-selection). Another common mistake involves installation procedures. Many assume that guided tutorials suffice, yet overlooking detailed steps such as proper leveling, securing water hoses, or anchoring the unit can lead to excessive vibration, leaks, or even early failure. I learned this the hard way, but you can avoid it by following comprehensive installation guides like [this step-by-step DIY installation](https://appliancedoctorz.com/diy-dishwasher-installation-step-by-step-guide). Approaching warranties with a DIY mindset might seem economical, but misunderstanding what is covered can backfire. Some assume that warranty claims cover all damage, including those caused by improper installation or one-time mishaps. However, manufacturer policies often exclude damages resulting from neglect or incorrect setup. Familiarize yourself with policies like [understanding dishwasher warranty policies](https://appliancedoctorz.com/understanding-dishwasher-warranty-policies-for-peace-of-mind) to know what is and isn’t covered. A subtle but critical nuance involves the timing and documentation of repairs. Many forget to log maintenance and keep receipts, which can be vital when claiming warranty service or parts replacement. Regularly referencing [how to maximize warranty coverage](https://appliancedoctorz.com/maximizing-your-dishwashers-warranty-through-proper-parts-selection) helps ensure you’re protected. Lastly, beware of common pitfalls such as ignoring signs of internal component wear or bypassing manufacturer-approved parts, which can jeopardize warranty validity. In the long run, understanding these nuances can save you hundreds of dollars and prevent frustration. Make sure your installation practices align with expert advice, and always verify the compatibility of parts before making replacements. Have you ever fallen into this trap? Let me know in the comments.
Mastering Long-Term Maintenance with Precision Tools
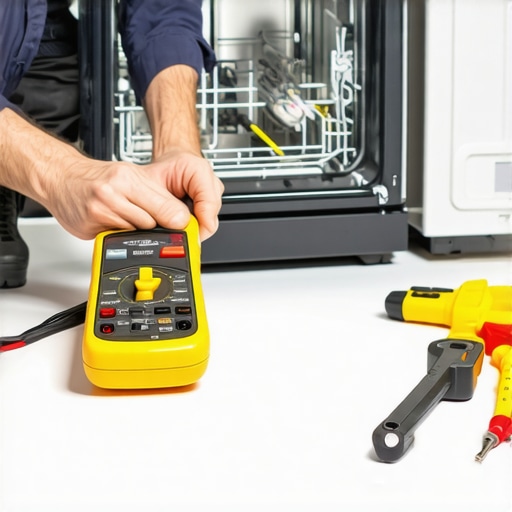
Ensuring your dishwasher remains reliable over the years involves a combination of proper tools and disciplined maintenance routines. I personally rely on a high-quality digital multimeter, like the Fluke 117, to regularly check electrical components. This device allows me to verify the continuity of wiring and diagnose faulty sensors or switches quickly, saving time and preventing unnecessary replacements. Additionally, a set of precision screwdrivers with magnetic tips simplifies the process of removing panels and internal parts without stripping screws or losing small components.
For more stubborn clogs or mineral deposits, I turn to a specialized spray arm cleaning kit, which includes soft brushes and safe descaling solutions. When combined with a vinegar-based cleaning regimen, these tools help maintain water flow efficiency, which is crucial for preventing issues like poor cleaning or long cycle times. Regularly inspecting and cleaning these parts can extend their lifespan significantly.
Stay Ahead with Software and Diagnostic Apps
Beyond physical tools, I integrate diagnostic software compatible with smart dishwashers, such as the manufacturer’s app ecosystem, which provides real-time alerts for issues like water temperature drops or drain faults. These apps often include troubleshooting guides, which, when paired with hardware checks, enable a proactive approach—addressing problems before they escalate. Predictions about future trends suggest an increased reliance on IoT-enabled diagnostics, reducing the need for invasive inspections.
How do I maintain my dishwasher over time?
Consistency is key. I schedule biannual inspections using a checklist from the essential parts guide to identify wear and tear early. This includes testing water inlet valves, inspecting door gaskets, and replacing worn suspension parts. Staying vigilant with routine tasks prevents minor issues from becoming costly repairs and minimizes warranty claims, especially when parts are replaced with certified components as recommended in warranty maximization advice.
Looking ahead, I predict that advancements in AI diagnostics and robotic maintenance tools will enable even homeowners to perform sophisticated repairs with minimal effort. Until then, I recommend investing in reliable tools and sticking to a disciplined maintenance schedule. Try adopting a digital multimeter for troubleshooting your next internal sensor issue—it can provide quick, definitive answers and save you time and money.
#{ }
}
What Nobody Tells You About Vibrating Dishwashers
During my journey fixing my noisy dishwasher, I realized that the biggest lesson was understanding how a few small details can make a huge difference in performance and longevity. For example, I used to overlook the importance of a properly leveled machine, which caused constant shaking and even affected my warranty claims. That lightbulb moment taught me to respect the subtle details like securing the unit to the cabinet frame and checking internal components regularly. These lessons are crucial, especially since many homeowners unknowingly skip these steps, risking damage and costly repairs.
Related Posts
The Proper Way to Secure Your Machine to a Quartz Countertop
I remember the moment vividly—my brand-new dishwasher wobbling ominously, leaning…
The Cabinet Steam Barrier Most DIYers Skip Until the Wood Rots
I remember the moment clearly — water was quietly dripping…
Why Your Dishwasher Needs a High-Loop More Than a Fancy Filter
I'll never forget the day my dishwasher started leaking for…