
Have you ever stood in front of your dishwasher, water still dripping from a recent cycle, only to realize the door won’t stay closed? Or perhaps it slams shut unexpectedly, risking a busted handle or a flooded kitchen floor. That moment of frustration hits hard—trust me, I’ve been there too. I remember the lightbulb moment when I tried to fix my dishwasher’s stubborn door spring myself, only to find myself knee-deep in a jumble of parts, feeling overwhelmed and questioning if I’d bitten off more than I could chew.
Why DIY Dishwasher Spring Repairs Can Feel Like a Minefield
The truth is, the door spring not only keeps things simple but also ensures safety and efficiency during operation. When it fails, the entire washing process can become a chore—literally. I’ve learned that understanding the intricacies of your own appliance can save you time and money, but it can also backfire if you’re relying on incomplete info or rushing into repairs without proper guidance. Believe me, a mistake early on—like neglecting to disconnect the power or ignoring the warranty coverage—can turn a quick fix into a bigger headache.
Is DIY Always Worth It or Just a Risk?
Let’s face it: DIY projects are rewarding, but not every repair is suited for that. I winged it with my first attempt at fixing the dishwasher spring, and while I saved some cash, I also risked further damage, which could have voided my warranty. A wrong move, like installing a part incorrectly, can lead to leaks, subpar wash cycles, or even safety hazards. It’s crucial to weigh the pros and cons—knowing when to call in a professional or when a DIY fix is genuinely feasible. If you’re feeling unsure about your skills, check out this step-by-step guide for safe and effective installation and repair tips.
Stay tuned as I share the steps I took to fix my dishwasher door spring properly, along with some common pitfalls to avoid. Plus, I’ll help you decide whether tackling this repair yourself is a smart move or if you should think about getting professional help. After all, protecting your appliance warranty and ensuring a safe, leak-free kitchen is worth every bit of effort. Ready to get your hands dirty—safely? Let’s dive into the details.
Disconnect Power and Clear the Workspace
Before diving into any repair, turn off the dishwasher at the circuit breaker to prevent electrical hazards. Remove any dishes and clear the area around the appliance. I once started a repair without flipping the breaker—imagine the shock when I touched live components! Ensuring safety is paramount.
Accessing the Spring Mechanism
Open the dishwasher door fully and locate the spring assembly, typically on the sides of the door frame. Use a screwdriver or ratchet wrench to remove the panel covers or screws holding the inner door panel, being careful to keep track of all fasteners. Think of this like opening a car door to access its hood—necessary to reach the inner workings.
Identify Worn or Broken Springs
Inspect the springs for visible signs of damage, such as stretching, rust, or breakage. In my experience, a spring that’s stretched like a rubber band losing its tension will no longer support the weight properly, causing the door to fall or slam shut. Prepare to replace the faulty spring with a new one designed for your model.
Removing and Replacing the Spring
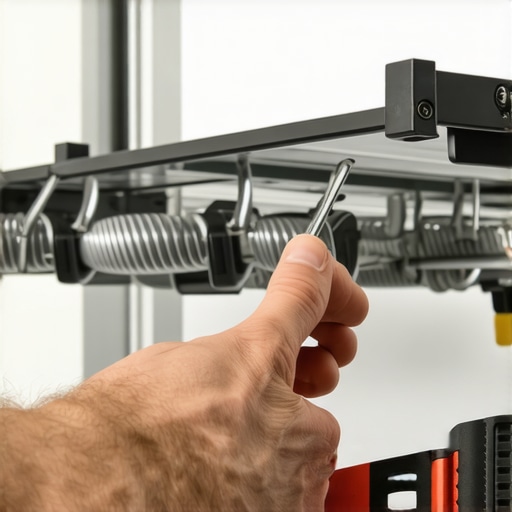
Carefully disconnect the broken spring from its anchor points using pliers. Remember, springs are under tension—it’s like a coiled snake ready to snap back. Wear safety gloves and work slowly to prevent injury. Install the new spring by attaching it to the same anchor points, ensuring it’s seated securely. Tighten any clamps or hooks as needed.
Reassembling and Testing Your Repair
Reattach the door panel and secure all screws. Before restoring power, manually open and close the door several times to test the tension and movement. When I replaced my dishwasher spring, I found that the door swung smoothly and stayed closed—an instant win. Turn the circuit back on and run a short cycle to confirm the fix.
Adjusting and Troubleshooting
If the door still doesn’t close properly or swings open unexpectedly, double-check the spring tension and attachment points. Sometimes, the spring may need slight repositioning or additional tension adjustment. Consulting [this comprehensive repair guide](https://appliancedoctorz.com/diy-dishwasher-installation-step-by-step-guide) can provide further tips and safety recommendations. Remember, ensuring the proper tension not only keeps your dishwasher functioning optimally but also protects your warranty through proper maintenance.
Protect Your Warranty While Repairing
Always verify whether your repair affects warranty coverage by reviewing [your appliance’s warranty policies](https://appliancedoctorz.com/understanding-dishwasher-warranty-policies-for-peace-of-mind). Document your repair process with photos, especially if replacing parts, to facilitate warranty claims if needed. Knowing when to seek professional help or replace a part entirely can save you time and prevent costly damage.
Replacing a dishwasher spring might seem daunting, but with proper steps and safety measures, it becomes a manageable DIY task. Keep an eye on signs of wear to prevent further damage, and don’t hesitate to consult specialized guides for detailed instructions. Safety first, and soon your dishwasher will operate like new—and you’ll have avoided the cost of professional repairs.
 When it comes to home appliances like dishwashers, many homeowners operate under misconceptions that can lead to costly mistakes and voided warranties. One common myth is that all replacement parts are interchangeable across models and brands. In reality, appliance manufacturers often design specific parts tailored to their machines, and substituting generic parts may compromise functionality or safety. According to industry experts, using manufacturer-approved parts not only preserves performance but also ensures your warranty remains intact. Another misconception involves installation: many believe that DIY installation is straightforward, but overlooking subtle nuances—like correct water line connections or proper leveling—can cause leaks or damage, ultimately voiding your warranty. For detailed guidance on selecting suitable parts and the installation process, check out [this comprehensive step-by-step guide](https://appliancedoctorz.com/diy-dishwasher-installation-step-by-step-guide). A less obvious trap pertains to warranty coverage itself; homeowners often assume that any repair covered under warranty frees them from future concerns. However, warranty policies vary dramatically. Some cover parts but not labor—meaning you could be left paying hefty service fees despite initial coverage. For clarity, consult [this detailed guide on dishwasher parts and warranty policies](https://appliancedoctorz.com/guide-to-dishwasher-parts-warranty-what-you-need-to-know) to understand what is and isn’t covered. An advanced nuance that often gets overlooked is the importance of maintaining proper documentation during repairs and part replacements. Keeping detailed records, including photos and receipts, can be crucial when contesting warranty claims or proving proper DIY procedures. Studies indicate that well-documented repairs increase warranty claim approval rates significantly. Have you ever fallen into this trap? Let me know in the comments! Remember, understanding these subtle distinctions empowers you to make informed decisions, avoiding pitfalls that could cost both time and money.
Keeping Your Dishwasher in Top Shape with the Right Tools
Ensuring your dishwasher remains reliable over the years requires more than just occasional cleaning. Having the right set of tools can make routine maintenance, minor repairs, and troubleshooting much more manageable. I personally recommend investing in a quality digital multimeter—specifically a model like the Fluke 115—which allows you to quickly test electrical components such as the control board, heater elements, and sensors. Its accuracy and ease of use save me time and help prevent unnecessary replacements. Additionally, a detailed user manual for your dishwasher model is invaluable; it provides specific part numbers, wiring diagrams, and troubleshooting steps—saving you from guesswork during repairs. Consider keeping a small container of appliance-specific lubricant, like white lithium grease, to keep moving parts operating smoothly, especially door hinges and spray arms.
Implementing Effective Maintenance Routines
Regularly inspecting seals, hoses, and filters prevents leaks and performance issues. A dedicated soft-bristled brush makes cleaning spray arms and filters effortless, ensuring replaced water flows uninhibited. For water quality management, I use a handheld TDS meter to monitor mineral levels in your water supply—high mineral content can damage components and reduce efficiency. Using manufacturer-approved cleaning tablets periodically helps prevent lime and calcium buildup within the machine, prolonging its lifespan. Planning semi-annual checkups using these tools can significantly extend your appliance’s functional life and warranty coverage, especially when paired with diligent documentation that includes photographs of maintenance routines.
Planning for Long-Term Success and Scaling Up
As your needs evolve, you might consider upgrading your dishwasher or adding smart features. The future of appliance maintenance leans toward smart diagnostics—many models now include Wi-Fi connectivity and app-based monitoring. To stay ahead, I recommend integrating a smart multi-sensor system, such as the Fibaro Door/Window Sensor, which can alert you to leaks or irregular door closures before they lead to costly damage. Regularly reviewing warranty policies and understanding what’s covered helps you decide whether to perform DIY repairs or seek professional assistance; links like this guide provide great insights. As I see it, the trend is moving toward more user-friendly diagnostics and longer-lasting parts, driven by innovations in sensor technology and software updates.
How do I maintain my dishwasher over time without losing warranty coverage?
Consistent, documented maintenance using the right tools, along with adhering to manufacturer-recommended practices, ensures your dishwasher performs optimally for years to come. For instance, referencing this detailed warranty guide helps you stay compliant while avoiding voiding repairs. Embrace preventative checks—inspect hoses, filters, and interior components—and keep records of all maintenance activities and parts replacements. A proactive approach not only preserves your warranty but also minimizes unexpected breakdowns.
Before you tie everything together, try calibrating your water hardness sensor using a TDS meter combined with the manufacturer’s calibration procedures. This advanced tip can optimize detergent efficiency, prevent mineral buildup, and extend component life. Remember, mastering even small maintenance tasks boosts your confidence and keeps your appliance running smoothly, saving money in the long run.
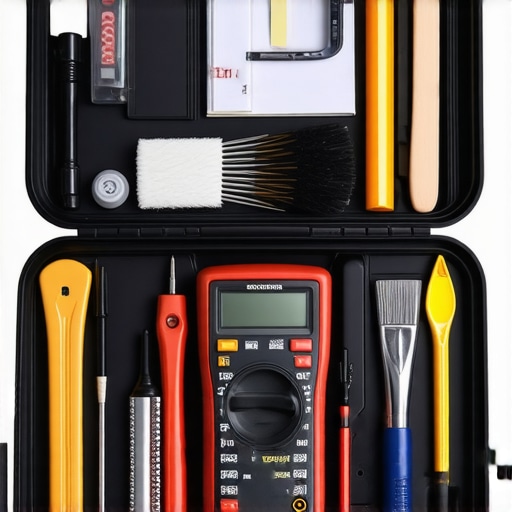
Here’s an illustrative image showing essential interior tools for dishwasher maintenance, including a multimeter, brushes, and calibration equipment. Proper tool selection is crucial—using inferior or inappropriate tools can lead to damage or incomplete repairs. For more detailed equipment recommendations tailored to your model, consult guides like this article on troubleshooting parts.
Lessons That Changed My Repair Approach
- Don’t Rush Safety Checks: I once tried to fix my dishwasher without disconnecting the power, leading to a jolt and a realization that safety is non-negotiable. Never overlook turning off the circuit breaker before diving into repairs.
- Parts Compatibility Matters: Using generic springs seemed convenient at the start, but I learned that manufacturer-approved parts ensure proper tension and longevity. Always verify part numbers before purchasing replacements.
- Patience Trumps Speed: Rushing to replace the spring without inspecting the attachment points resulted in a secondary issue. Taking your time and double-checking connections prevents rework and damage.
- Document Everything: Keeping photos of the repair process helped me with warranty claims and future maintenance. Clear records can save you significant headaches down the line.
- Know When to Call a Professional: My stubbornness almost cost me more repair expenses; recognizing my limits and consulting guides or professionals can be wiser than risking more damage.
Tools and Resources That Made the Difference
- Step-by-step DIY Guide: A comprehensive resource that demystified the process and highlighted safety precautions, making me confident in my work.
- Warranty Insights: Understanding what parts are covered and how to document repairs helped me protect my investment and avoid unnecessary costs.
- Warranty Coverage Tips: Practical advice on maintaining warranty eligibility encouraged me to keep records and perform proactive maintenance.
- Warranty Policies Explanation: A clear explanation that helped me distinguish between covered repairs and potential out-of-pocket expenses, guiding my decisions effectively.
Keep Moving Forward with Confidence
Taking charge of your dishwasher repairs can be empowering, especially when armed with the right knowledge and tools. Remember, each repair, big or small, deepens your understanding and builds confidence for future maintenance. Embrace the learning curve, stay patient, and don’t hesitate to seek professional help when needed. Your dishwasher’s performance depends on your proactive care—so get out there and make every repair count. Have you ever tackled a tricky repair that turned out to be simpler than expected? Share your story below and inspire others to take action!
.
Related Posts
The Simple Reason Your Dishes Are Still Wet After the Heat Cycle
Have you ever opened your dishwasher after what you thought…
How to Test a Heating Element Without Tearing the Machine Apart
I remember the moment clearly—my dishwasher suddenly stopped heating, and…

How to Replace a Snapped Door Cable Without a Pro
Have you ever pulled open your dishwasher door—and watched in…