Why You Must Replace Your Rubber Hoses Every Five Years
13 July, 2026Noor O.0 Comments1 category
It was a moment I won’t forget—walking into my kitchen to find a lake where my spotless floor should have been. Turns out, my aging dishwasher’s rubber hose had sprung a leak overnight. I’ve learned the hard way that rubber hoses, often overlooked, can become ticking time bombs if neglected. Today, I want to share my experience and explain why replacing those humble hoses every five years isn’t just good advice—it’s essential for preventing costly water disasters.
Protect Your Home Before It’s Too Late
Ever had a close call with water damage? You’re not alone. Many homeowners discover the hard way that a simple rubber hose can cause thousands in repairs if it fails unexpectedly. Regular replacement can be a straightforward, cost-effective way to safeguard your investment. In fact, according to the Insurance Information Institute, water damage claims account for nearly 40% of all homeowners insurance claims, often due to hose failures. Don’t let your home become a statistic—taking proactive steps matters.
Could You Be Overlooking a Hidden Danger?
When I first installed my dishwasher, I didn’t think twice about the rubber hose. I assumed it would last forever. Spoiler alert: It didn’t. Early on, I made the mistake of inspecting only the visible parts and ignoring the age of the hoses behind the scenes. This oversight almost cost me dearly. If I had known then what I know now—namely, that rubber hoses tend to deteriorate over time—I would have replaced them much sooner.
In fact, many homeowners assume warranties or professional installations cover these parts, but that’s not always the case. Be sure to check out what your dishwasher warranty covers. Regularly replacing hoses isn’t just good maintenance—it’s a wise investment in peace of mind.
In the next sections, we’ll go over the practical steps you can take to identify, assess, and replace your rubber hoses before they become a problem. Because when it comes to water damage, early action can save you thousands—and a whole lot of stress.
Identify the Right Hoses Before You Begin
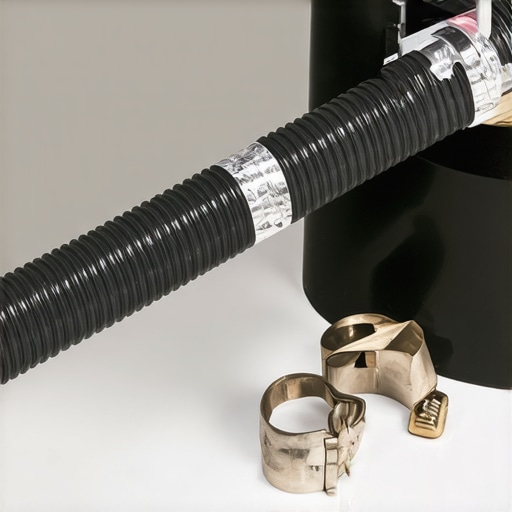
Start by turning off the power and water supply to your dishwasher. Locate the existing rubber hoses—usually behind the unit— and check their age. If they’re over five years old or show signs of damage like cracks or leaks, it’s time for replacements. Use this guide to familiarize yourself with typical dishwasher hoses and parts.
Choose the Correct Replacement Hoses
Select hoses designed for dishwasher use, preferably reinforced with a braided stainless steel exterior for durability. Be cautious of cheap, plastic-lined hoses, as they can fail prematurely. Remember, high-quality hoses reduce the risk of water damage and often come with extended warranties—check warranty coverage to ensure your investment is protected.
Gather Necessary Tools and Materials
Have adjustable wrenches, basin or towels for water drips, a new hose set, and Teflon tape ready. These tools make installation smoother and prevent leaks down the line. I once attempted an install without Teflon tape and faced drips; now I always include it in my toolkit.
Detach the Old Hoses Carefully
Loosen the clamps holding the old hoses with an adjustable wrench. Be prepared for residual water—place towels or a basin underneath to catch leaks. Slowly disconnect the hoses, inspecting them for corrosion or wear, and dispose of them properly.
Connect the New Hoses Securely
Attach the new hoses to the respective inlet and outlet fittings. Tighten the clamps snugly but avoid over-tightening, which can crush the hoses or damage fittings. Use Teflon tape on threaded fittings for a better seal. Tightening with the correct torque prevented leaks in my last upgrade—it’s a simple step but makes a difference.
Test Your Installation for Leaks
Turn on the water supply and power, then run a short cycle. Observe the connections carefully—look for drips or moisture. If you notice leaks, tighten the clamps slightly or reapply Teflon tape. This step ensures your work is sealed properly before finalizing the job.
Note on Warranty and Troubleshooting
If issues arise during or after installation, consult this troubleshooting guide. Proper installation not only prevents water damage but also maintains your warranty coverage, provided you use OEM parts and follow manufacturer instructions.
Document Your Work and Keep Records
Take photos of your completed setup—useful if you need to make warranty claims later. Keep receipts for the hoses and tools; some warranties require proof of purchase if issues occur.
Many homeowners believe that once a dishwasher is installed and under warranty, their worries are over, but the reality is far more nuanced. One prevalent myth is that warranty coverage automatically includes installation errors or outdated parts, which isn’t always true. According to experts at Appliance Doctor, understanding the specifics of your warranty is crucial—many plans exclude issues caused by improper installation or non-OEM parts. This misconception can lead to costly expenses if failings are misattributed or overlooked.
Another frequent mistake involves neglecting the subtle nuances of part selection. For example, choosing cheap, plastic-lined hoses over reinforced stainless steel ones might save money upfront but significantly increases the risk of leaks and voids in warranty coverage. High-quality parts not only enhance performance but also align with warranty stipulations, ensuring coverage remains intact. Focus on parts listed in your warranty coverage, like those detailed in this resource to make informed choices.
Installation error is another trap many fall into, especially when attempting DIY fixes without comprehensive knowledge. For instance, improper drain loop height or incorrect hose connections can cause water backflow, damage, or warranty voidance. Even seasoned DIYers should consult a step-by-step guide to verify their work, avoiding hidden pitfalls.
How Can You Ensure Proper Warranty Claims Without Falling Into These Snags?
Verification is key—document every step of installation and repairs with photos, especially when using aftermarket parts. Proof of correct procedures and genuine parts can be vital when filing warranty claims, as highlighted in this article. Additionally, always opt for OEM parts and professional installation if uncertain, as they are often a prerequisite for warranty validity, according to current industry recommendations.
Keep in mind that warranties are specific and detailed. Misunderstanding the fine print can lead to unnecessary expenses or voided coverage. Regular maintenance, correct part selection, and proper installation practices are your best defenses against unexpected costs. If you’re unsure, consulting a professional or referencing trusted guides can save you time and money in the long run.
Have you ever fallen into this trap? Let me know in the comments. Remember, the devil is often in the details, and being proactive about understanding these nuances can empower you to protect your appliance investments effectively.
Smart Tools for Reliable Maintenance
One of my favorite investments in maintaining my dishwasher’s longevity is a quality digital multimeter. I rely on it to quickly check the continuity of electrical components like the heating element or the inlet valve, saving time and preventing unnecessary part replacements. Additionally, I swear by a two-in-one screwdriver and nut driver set, which allows me to access tight spaces easily when inspecting hoses or tightening fittings. These tools are essential because they provide precision and reduce the risk of damaging delicate parts during maintenance.
Installing a diagnostic leak detection system can also be a game-changer. It continuously monitors water flow and notifies you immediately if an unexpected leak occurs, dramatically reducing potential water damage. In my experience, combining these tools with routine visual inspections—checking for cracks, corrosion, or bulging hoses—keeps my dishwasher in reliable shape.
Embracing Digital Diagnostics and Software
For long-term maintenance, investing in a digital diagnostic scanner compatible with your dishwasher’s control board is worthwhile. These devices connect via Bluetooth or Wi-Fi, providing real-time error codes and suggested fixes, which accelerates troubleshooting. Personally, I use a device that interfaces directly with the appliance’s diagnostic port, enabling me to clear error codes and monitor performance metrics remotely. This proactive approach helps prevent small issues from turning into costly repairs.
Moreover, staying updated with firmware updates from the manufacturer can help improve efficiency and address known bugs. As appliance software becomes more sophisticated, regular updates will become even more critical for optimal operation. Future trends predict increased integration of IoT devices capable of predictive maintenance, alerting homeowners about worn-out parts before failure occurs.
How do I maintain my dishwasher over time?
Regularly scheduled inspections are key. I recommend checking the condition of the rubber door gasket, hoses, and filters at least every six months. Replacing worn parts promptly—especially those covered under warranty, as detailed in warranty coverage resources—can extend your appliance’s life significantly. Additionally, using high-quality, reinforced hoses reduces risks of leaks. Remember, even the best tools and parts are only effective when combined with consistent maintenance routines. If you’re eager to step up your game, try installing a leak sensor that integrates with your home’s smart system for peace of mind and immediate alerts.
What I Learned About Warranty and Installation From My Own Mishaps
One of my biggest realizations was that trusting warranties blindly can be costly if you overlook their fine print. After a failed leak caused by an old hose, I discovered that warranty coverage often excludes damages from improper installation or non-OEM parts. This taught me to always verify what my warranty truly covers, ensuring I don’t waste money on repairs that aren’t protected.
Why Skimping on Parts Can Backfire Big Time
Replacing a rubber hose with a cheap, plastic-lined alternative seemed like a good idea at the time, but it ended up causing leaks and voiding my warranty. Now, I swear by reinforced stainless steel hoses, which I trust because they last longer and meet warranty requirements. Choosing quality components is an investment that pays off in peace of mind and fewer emergencies.
The Critical Role of Proper Installation Techniques
Attempting DIY installation without following industry best practices led to a leak that nearly destroyed my kitchen floor. It made me realize that precise wiring, correct hose positioning, and secure connections are essential. Consulting professional guides, like this detailed guide, can save you from repeated mistakes and costly repairs.
Tools and Records That Saved Me Time and Money
Keeping meticulous records of parts, receipts, and installation photos proved invaluable during warranty claims. A good digital multimeter helped me diagnose electrical issues early, preventing unnecessary part replacements. These tools and habits transformed my maintenance approach from reactive to proactive, saving stress and cash.
More Than Just Repairs—Building Confidence in Maintenance
Beyond fixing leaks, I learned to tune into my appliance’s changing needs—like inspecting the door gasket or updating firmware. This mindset shift empowered me to handle small issues myself, reducing dependency on costly professional service and extending my dishwasher’s lifespan. Remember, every small step in maintenance accumulates into substantial savings and reliability.