
It was a morning like any other, until I opened my dishwasher and found a mountain of dirty dishes soaking in murky water. The cycle had abruptly stopped, and I was left wondering what went wrong. After some digging, I realized that mineral buildup from hard water was silently sabotaging my appliance—and I had no idea how to spot the warning signs early. That’s when I discovered the power of a water hardness test strip, and everything changed.
Why Ignoring Water Quality Can Cost You Big Time
Most homeowners don’t think twice about their home’s water supply until something breaks down. But the truth is, hard water — packed with minerals like calcium and magnesium — can cause scale buildup inside your dishwasher, leading to clogged nozzles, inefficient cleaning, and even damage to the heating element. Over time, this mineral accumulation can reduce your appliance’s lifespan and increase energy costs. I learned this lesson the hard way when my dishwasher suddenly stopped working, right in the middle of a dinner party prep. It was frustrating, expensive, and utterly avoidable if I’d just caught the signs earlier.
Thankfully, there’s an easy, affordable solution: using a water hardness test strip. Just a quick dip into your water supply gives a clear indication of mineral levels. Personally, I wish I had started using one sooner—saving myself a ton of trouble.
Is a Water Hardness Test Strip Really Worth It?
When I first heard about these strips, I was skeptical—pretty sure it was just another gimmick. But after making the mistake of ignoring the signs of mineral buildup early on, I realized how vital this tool can be. It alerted me to adjust my water softening system and clean my dishwasher’s filters before costly repairs became unavoidable. Remember, a small investment in prevention can save you hundreds down the line. If you want to keep your dishwasher running smoothly and extend its life, I highly recommend giving water testing a try. For more tips on maintaining your appliances, check out this guide on diagnosing dishwasher parts during warranty.
Now that I’ve shared my experience, let’s dive into exactly how a simple test strip can help you catch these issues early, and what steps to take next to keep your appliance in top shape.
Performing a Water Hardness Test Step-by-Step
Start by gathering a reliable water hardness test strip and a clean container. Dip the strip into a sample of your tap water, ensuring it is submerged for the specified time, usually a few seconds. Remove and compare the color change to the provided chart within the recommended timeframe to determine mineral levels. I vividly remember testing my water last month—after years of ignoring the signs, I finally caught the high mineral concentration early, preventing costly repairs.
Preparing Your Testing Environment
Ensure the sample water is fresh—avoid standing or stagnant water that may alter results. Use a sterile container to collect a sample close to your dishwasher’s water intake point. Consistency is key; test at the same time of day to monitor variations, especially if you notice fluctuating water quality. When I tested mine during the mid-morning water bill reading, I noticed the mineral levels spiked after a heavy rain, confirming my suspicion of hard water issues.
Interpreting Test Results Accurately
Check the color change on your strip against the chart immediately after testing. For example, a deep violet indicates very hard water, while a light pink suggests soft water. Record the readings periodically to identify trends over time. This practice helped me realize that my mineral levels were consistently high in winter, prompting me to install a water softener before my dishwasher suffered irreversible damage.
Implementing Actions Based on Test Outcomes
If your test indicates hard water, consider installing a salt-based water softener tailored for household appliances. Before doing so, consult your appliance’s warranty guide to understand if mineral buildup is excluded from coverage—this guide explains warranty exclusions. Similar to how choosing the correct parts during installation ensures longevity, selecting the right water treatment is critical. When I installed mine, I made sure to check the plumbing connections against recommended specifications to avoid leaks or pressure issues.
Regularly inspect your dishwasher’s filters and spray arms for scale buildup. Clean or replace parts as needed, referencing this resource on installing parts. Using descaling agents periodically can also prevent mineral deposits from forming inside critical components. During one particularly thorough cleaning session, I removed and soaked my spray arms, which improved water circulation and cleaning performance noticeably.
Monitoring Water Quality Over Time
Set a schedule to test your water every few months, especially if your area’s water supply is prone to fluctuations. Keep a log of your results to catch trends early. For instance, I kept a spreadsheet that showed spikes in mineral content after spring rains, prompting me to adjust my treatment plan accordingly. Remember, proactive testing and maintenance are the best defenses against appliance damage caused by mineral buildup.

Myth Busting: Warranties Cover Everything? Think Again
Many homeowners assume that their dishwasher’s warranty is a catch-all shield that covers any repair or replacement, but that isn’t always true. The reality is, warranties often exclude specific issues—like damage caused by improper installation or neglecting routine maintenance. For example, scale buildup from hard water isn’t typically covered, yet it can lead to costly repairs. Relying solely on the warranty without understanding its limitations can leave you financially vulnerable. As per industry expert advice, reviewing your warranty exclusions through this resource is crucial to avoid surprises.
Installation Mistakes That Sabotage Your Dishwasher’s Lifespan
One of the most common yet overlooked errors is improper leveling during installation. A dishwasher that isn’t perfectly level can suffer uneven stress on components like door seals and suspension springs, leading to early failure. Additionally, skipping the high loop in the drain hose or failing to secure it correctly can cause drainage issues or water leaks, which might be mistaken for faulty parts. These mistakes may seem minor but significantly impact your appliance’s performance and longevity. For an in-depth look, check out this guide on proper installation practices.
Advanced homeowner question: How does improper water softening influence dishwasher parts longevity?
Great question. Using untreated hard water accelerates scale buildup inside critical components such as the heating element, spray arms, and filters. This mineral accumulation hampers cleaning efficiency and can cause parts like the circulating pump or thermistor to fail prematurely. Research from industry studies indicates that hard water reduces dishwasher lifespan by up to 30%, emphasizing the importance of adequate water softening. For best results, consider using quality water treatment systems as part of your setup.
Choosing and Maintaining Parts for Optimal Performance
Many homeowners make the mistake of replacing parts with generic or low-quality alternatives, risking further damage. Selecting the right parts designed for your model ensures compatibility and durability. Moreover, neglecting routine inspections—like cleaning filters or checking spray arms—can lead to deteriorating performance. Regular maintenance, combined with informed parts selection, extends your dishwasher’s lifespan and maintains peak efficiency.
For detailed guidance on diagnosing issues and deciding when to replace parts, visit this comprehensive resource.
Learn from Common Pitfalls
Understanding the intricacies of warranties, installation, and parts maintenance helps avoid costly mistakes. Remember, superficial fixes or assumptions about coverage can backfire. Take the time to educate yourself, invest in quality parts, and follow proper installation procedures. Doing so not only saves money but also ensures your dishwasher runs efficiently for years to come. Have you ever fallen into this trap? Let me know in the comments.
Tools I Recommend for Long-Term Dishwasher Care
Over the years, I’ve found that investing in specific tools can make maintenance much more manageable and effective. A quality digital multimeter is invaluable for testing components like heating elements and sensors; I personally use the Fluke 115 because of its accuracy and durability. Regularly inspecting your appliance with a magnetic inspection mirror helps spot hidden corrosion or buildup in hard-to-see areas, especially behind the spray arms. When removing parts like filters or spray arms, I recommend a precision screwdriver set—the Wiha SoftFinish line offers the perfect balance of grip and delicate handling. These tools together enable proactive maintenance, preventing small issues from becoming costly repairs.
Maintaining Your Dishwasher Over Time
Consistency is key. Schedule a bi-monthly check-up where you clean filters, inspect spray arms, and run test cycles with descaling agents. To monitor performance, I keep a log of cycle times and water temperature—any deviations can signal underlying issues needing attention. Incorporate routine water testing using a water hardness test strip to catch mineral buildup early. Additionally, reading error codes from your dishwasher’s control panel can help diagnose issues before they escalate. Regularly updating your knowledge with resources like installation checklists ensures you’re informed on best practices.
Why Scale Prevention Will Shape Future Maintenance
As technology advances, smart monitoring systems are beginning to alert homeowners to potential issues like mineral buildup or component failures in real-time. I predict that integrating IoT-enabled sensors into household appliances will become standard, giving us proactive insights and scheduling maintenance automatically. Meanwhile, tools like smartphone apps that sync with your dishwasher can provide diagnostic information and step-by-step troubleshooting guides—saving time and money. Staying ahead with such innovations will be crucial for long-term appliance health.
How do I maintain parts and scale buildup over time?
One of the most effective methods is to establish a scheduled descaling routine using manufacturer-approved descaling agents, especially if living in hard water areas. Also, regularly inspecting and replacing worn-out parts—such as gaskets, spray arms, or filters—before they fail is critical. When replacing parts, prioritize OEM components; my experience shows aftermarket parts can sometimes compromise performance. Check out this guide for detailed advice on selecting the right parts. Remember, consistent maintenance not only prolongs your dishwasher’s lifespan but also ensures it continues to perform optimally.
Harnessing Precision Tools to Capture Hidden Damage
Using a thermal imaging camera can reveal hidden hotspots indicative of failing heating elements or wiring issues—saving you from unexpected breakdowns. I personally use the Fluke Ti300 because it provides clear, actionable visuals, allowing me to identify problem areas during routine checks. Combining this with a screwdriver torque wrench ensures parts are secured to manufacturer specifications, preventing damage or leaks. These tools may seem advanced, but they are investments that pay off by catching problems early. If you’re ready to elevate your maintenance game, I encourage you to try a thermal camera on your next inspection—it’s transformative for diagnosing elusive issues.
Lessons Only the Experts Often Overlook
- One major insight I’ve uncovered is that routine water quality testing isn’t just a chore—it’s a safeguard. Many homeowners assume their water is fine until a breakdown occurs, but catching mineral buildup early can save hundreds in repairs. It took a close call with a costly repair for me to realize the value of periodic testing, and now it’s part of my maintenance ritual.
- Another epiphany was understanding how installation mishaps can silently sabotage your dishwasher. For instance, improper leveling or missing high loops in drain hoses can lead to leaks or premature failure. Learning to check and correct these small details has genuinely boosted my appliance’s lifespan.
- I also discovered that warranties often have hidden exclusions, especially regarding scale buildup and neglect. Knowing where your coverage ends motivates you to take preventive steps—like using water softeners or descaling agents—to keep claims viable and your dishwasher in top shape.
- Realizing the importance of selecting quality replacement parts was a game-changer. Not all aftermarket components are created equal, and sticking with OEM parts ensures optimal performance and longevity. It’s worth investing in trusted suppliers and familiarizing myself with proper installation procedures.
- Finally, embracing advanced diagnostic tools such as thermal imaging cameras and multimeters has enabled me to identify issues before they escalate into emergencies. These tools have been invaluable in detecting hidden problems—like failing heating elements—saving time and money in the long run.
Tools That Elevated My Maintenance Routine
- Investing in a reliable digital multimeter, like the Fluke 115, has made testing electrical components straightforward. Its precision helps me catch problems early, preventing unexpected breakdowns.
- A high-quality thermal imaging camera, such as the Fluke Ti300, offers visual insights into heating faults or wiring issues that are otherwise hard to detect. It’s like having a superpower for appliance diagnostics.
- My toolbox also includes a magnetic inspection mirror, which allows me to see behind spray arms and filters without dismantling everything. Spotting corrosion or debris early maintains water circulation and cleaning efficiency.
- Using a dedicated screwdriver set, like Wiha SoftFinish, ensures safe and delicate handling of sensitive parts during inspections or replacements. Proper tool use is essential for long-term maintenance success.
Getting Proactive With Your Dishwasher’s Future
Thinking ahead makes all the difference. Regular water testing, combined with routine part checks, creates a proactive shield against costly repairs and premature replacements. Embracing these habits is like giving your dishwasher a personalized health plan, which results in fewer unexpected breakdowns.
Plus, staying informed about warranty specifics and properly installing or replacing parts can mean the difference between a repair covered and one paid out-of-pocket. Remember, small investments in preventive care today lead to significant savings—and peace of mind—tomorrow.
So, are you ready to take control of your dishwasher’s health? Starting with simple steps like testing your water regularly or using the right tools can create a big impact. Your appliances—and your wallet—will thank you for it.
Related Posts

How to Remove Rust Spots from Your Stainless Steel Racks
It was a quiet Saturday morning when I spotted that…
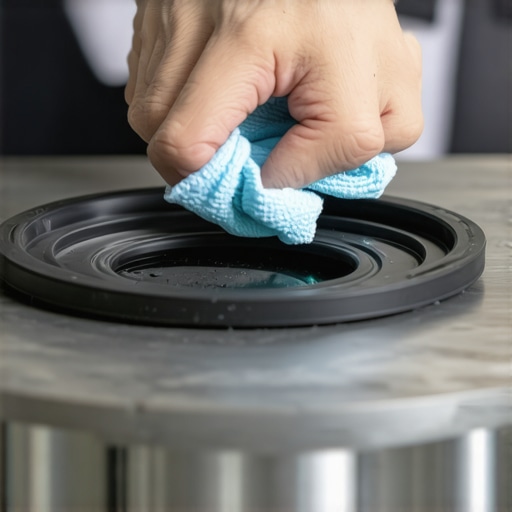
How to Clean the Gasket Without Damaging the Rubber Seal
I'll never forget the moment I first realized I was…

Why You Should Never Use Hand Soap to Clean the Interior
It was a frustrating Saturday morning when I discovered my…