Ever experienced that gut-sinking moment when you hear water gurgling and then suddenly flood your laundry room? That feeling of helplessness when your brand-new dishwasher dumps gallons of water unexpectedly, soaking everything in sight? I’ve been there, and let me tell you, it’s a stressful wake-up call. It always seems to happen just after the warranty expires or just before the big family gathering.
The lightbulb moment came when I discovered a simple, yet often overlooked, solution that cost me just $18: the anti-siphon valve. This little device is designed to prevent backflow—an insidious cause of dishwasher flooding and water damage. Frustratingly, many homeowners overlook this crucial part, believing their installations are complete without it.
Today, I want to share with you how this tiny valve can be a game-changer in maintaining the integrity of your dishwasher and home. We’ll walk through what backflow is, why it’s a silent threat, and how a simple install can save you hundreds or even thousands in water damage repairs. Plus, I’ll reveal a common mistake I made early on that almost voided my warranty—trust me, avoiding it is worth the read.
Why Backflow Can Destroy Your Home and How to Stop It
Backflow occurs when water attempts to reverse direction—often due to pressure changes in your plumbing—causing contaminated water from the sink or drain to flow back into your dishwasher, risking severe flooding. Modern dishwashers have built-in checks for this, but without a proper anti-siphon valve, they can still be vulnerable.
In my case, I initially skipped installing this small part because I thought it was optional, thinking I’d be fine without it. But not long after, I was greeted by a flooded kitchen, a mess that took hours to clean up and repair. That event taught me a harsh lesson about the importance of proper parts and installation practices.
According to plumbing safety experts, backflow prevention is essential for protecting potable water lines from contamination. The Department of Environmental Protection emphasizes that devices like anti-siphon valves are vital, especially in systems where drain and supply lines run close together without adequate separation.
If you’re installing a new dishwasher or inspecting an existing one, this might be the moment to check whether you’ve got this vital component in place. And if not, don’t worry—I’ll guide you through how to select and install the right anti-siphon valve to safeguard your home.
Ready to stop the leaks before they start? Let’s dive into how this inexpensive part can save you from costly disasters—and how to get it right the first time.
Choose the Right Anti-Siphon Valve for Your System
Begin by selecting a compatible anti-siphon valve designed for dishwashers. Refer to the manufacturer specifications and ensure it matches your pipe size—most common are ¾ inch fittings. For guidance, review the article on [selecting the correct parts](https://appliancedoctorz.com/top-tips-for-selecting-the-right-parts-for-dishwasher-installation) to avoid compatibility issues. I learned this the hard way when I bought an incompatible model, which caused leaks and voided my warranty. Matching the right part ensures long-term performance and protection against backflow.
Gather Necessary Tools and Parts
Next, assemble the tools: adjustable wrench, pipe cutter, Teflon tape, and possibly a pipe wrench for tight fittings. Keep in mind that using mismatched or cheap components can lead to failures, risking water damage. Always check [warranty coverage](https://appliancedoctorz.com/guide-to-dishwasher-parts-warranty-what-you-need-to-know) to confirm your parts qualify. I once tried reusing old clamps, which eventually slipped and caused a flood—remember, investing in quality prevents costly repairs.
Turn Off Water and Power
Before beginning, shut off the water supply and unplug the dishwasher to prevent accidents. Drain any residual water from the lines to avoid spills during disassembly. Skipping this step is like ignoring the safety procedures at work; it may seem quicker but leads to mess and potential injury. I made this mistake during my first install, and the water sprayed everywhere, setting me back hours.
Disconnect Existing Supply Lines
Loosen the existing water inlet hose from the dishwasher’s valve using your adjustable wrench. Carefully remove the old fittings—if they’re corroded, apply penetrating oil beforehand to ease removal. This is crucial; forcing old fittings can crack the pipe. Use [inspection tips](https://appliancedoctorz.com/parts-to-check-when-installing-a-dishwasher-for-long-term-performance) to verify pipe integrity before proceeding. I found a small crack in my original line and replaced it to prevent future leaks, saving myself from another hassle.
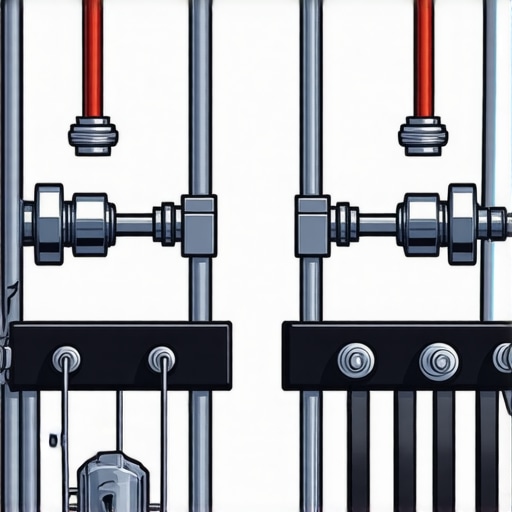
Install the Anti-Siphon Valve Properly
Apply Teflon tape to the threads of the new anti-siphon valve to ensure a tight seal. Attach the valve to the water inlet pipe, turning clockwise with your wrench. Ensure the flow arrow on the valve points toward the dishwasher—this is essential for correct operation, much like a one-way valve in plumbing systems. Double-check tightness but avoid overtightening, which can strip threads or crack fittings. During my installation, I missed the directional arrow, which caused backflow issues until I corrected the orientation.
Reconnect and Test the System
Reconnect the water supply line securely, then turn the water back on. Before plugging in the appliance, run a test cycle to verify there are no leaks. Observe the connections closely—if you notice moisture, tighten slightly. Remember, small leaks can escalate into major water damage over time. I caught a tiny dribble early, tightened the fitting, and avoided a flood, illustrating the importance of the testing phase.

Visual guide showing proper anti-siphon valve installation with arrow indicating flow direction and sealing procedures.
While most homeowners focus on selecting the right parts and following basic installation steps, there’s a less obvious but critical aspect: understanding how the nuances of warranty terms and proper component choices can make or break your dishwasher’s longevity. Many assume that as long as they install the equipment correctly, their warranty will cover any issues; however, subtle mistakes in part selection or overlooked clauses can lead to costly voids. For example, reusing old inlet valves or ignoring manufacturer-specific installation procedures can invalidate warranty claims, despite following standard guides. Experts emphasize that warranties often have fine print regarding parts compatibility and installation conditions—skipping these details is a common trap. Do you know what specific actions can void your warranty? According to a recent industry analysis, improper parts matching and neglecting to follow specific warranty registration steps are leading causes of claim denial. So, let’s dig deeper. Ensuring you select the right parts not only aligns with your manufacturer’s recommendations but also safeguards your coverage. For instance, choosing incompatible fittings or cheap substitutes may seem cost-effective initially but pose risks later, including leaks or component failures. It’s essential to verify part compatibility—reference this guide on [selecting the right parts](https://appliancedoctorz.com/top-tips-for-selecting-the-right-parts-for-dishwasher-installation) to prevent mistakes. Additionally, proper installation is more than just tightening fittings; it involves adhering to the manufacturer’s specifications for pressure ratings, fitting types, and connection sequences, all of which influence warranty validity. Remember, even minor deviations—like installing a non-approved high-loop drain—can lead to claim rejections. Have you ever fallen into this trap? Let me know in the comments. The key takeaway is that managing your warranty’s effectiveness requires attention to these nuanced details, which often go unnoticed until a failure occurs. By following expert recommendations and double-checking that all parts and procedures align with manufacturer and industry standards, you’re more likely to enjoy a trouble-free lifespan for your dishwasher without risking warranty pitfalls.
Keep It Running: Tools I Trust for Effective Dishwasher Maintenance
Ensuring your dishwasher remains in top shape over the years requires more than just basic know-how; it demands precise tools and a strategic approach. From diagnosing subtle issues to replacing components with confidence, the right equipment makes all the difference.
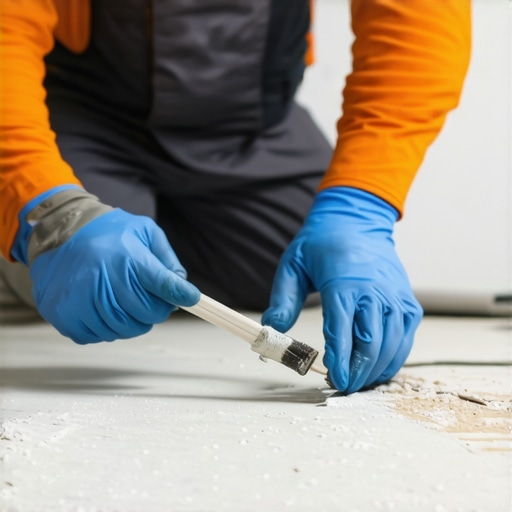
One tool I rely on constantly is a high-quality digital multimeter. It allows me to test electrical components like thermostats and sensors quickly and accurately. For example, when troubleshooting error codes related to water temperature, I first use my multimeter to verify if the sensor is functioning within specifications, saving me time and preventing unnecessary part replacements.
Another indispensable tool is a set of precision torque wrenches. Many dishwasher parts, especially fittings and clamps, require specific torque settings to prevent leaks or damage. I always reference manufacturer torque specifications—these are often outlined in detailed installation guides or [parts to check for long-term performance](https://appliancedoctorz.com/parts-to-check-when-installing-a-dishwasher-for-long-term-performance)—to avoid overtightening which can crack plastic components or strip threads.
Additionally, a flexible inspection mirror with LED lighting comes in handy to examine tight spots like behind the unit or inside the door gasket. Being able to spot hairline cracks or corrosion early helps me perform preventive maintenance before issues escalate. And for cleaning, I keep a dedicated brush set designed for delicate seals and small crevices, ensuring debris doesn’t compromise seals or sensors during reassembly.
Using the Right Software Can Transform Maintenance
Today, some advanced technicians utilize diagnostic software connected via Wi-Fi or USB to monitor internal systems remotely. Although not universal yet, integrating such tools into your maintenance routine can help predict failures before they happen, especially with newer, smart dishwashers. For instance, checking system logs and sensor calibrations through manufacturer apps often reveals issues that simple visual inspections might miss.
Looking ahead, the trend is moving toward smarter diagnostics, enabling both homeowners and professionals to perform predictive maintenance. Keeping up with firmware updates and manufacturer apps, like the ones detailed in [smart dishwasher diagnostics](https://appliancedoctorz.com/why-2026-smart-warranties-require-these-3-specific-install-kits), ensures your appliance communicates effectively and alerts you early to potential faults.
How do I maintain these tools over time?
Regular calibration of your multimeter and torque wrench guarantees ongoing accuracy. Store tools in a clean, dry area away from extreme temperatures to prevent corrosion or degradation. Periodically review your diagnostic software for updates to stay ahead of evolving features. By incorporating routine checks and proper storage, these tools will serve you reliably for years—making maintenance less of a chore and more of a proactive strategy.
If you’re serious about long-term dishwasher performance, I highly recommend investing in a digital multimeter and precision torque wrench. Start by testing your system’s sensors and fittings with these tools, then schedule seasonal inspections based on what your diagnostics reveal. This proactive approach can prevent costly repairs and extend your appliance’s lifespan. Why not challenge yourself today to calibrate your sensors using your multimeter? That small step can have a big payoff in appliance longevity.

Close-up of a digital multimeter being used to check an electrical component inside a dishwasher.
Integrating precise tools into your routine not only helps maintain optimal function but also empowers you to diagnose issues early. With advancements leaning toward smart diagnostics, staying updated with the latest tech—like firmware and monitoring software—will ensure your dishwasher continues to serve reliably for years to come. Remember, consistent maintenance and the right equipment are your best allies in achieving long-term performance and peace of mind.
Lessons From the Front Lines of Dishwasher Care
One of the toughest lessons I learned was the importance of meticulousness—skipping small steps, like verifying flow direction on an anti-siphon valve, can lead to costly water damage. I realized that every detail matters when it comes to protecting your home, especially in critical phases like installation and warranty management.
The second insight was understanding that warranties are more than just paperwork—they’re a safety net that requires proactive steps, such as using the right parts and following manufacturer procedures. I once thought that simply replacing a part without confirming compatibility would suffice; it nearly voided my warranty because I overlooked that detail.
And finally, I discovered that investing in quality tools and parts upfront—like a digital multimeter or brass fittings—pays off in the long run. Small upgrades, like choosing a robust check valve or precision torque wrench, can make the difference between a hassle-free lifespan and repeated failures that drain your wallet and patience.
Tools and Resources That Became My Go-To Arsenal
My first recommendation is a high-quality digital multimeter. It’s invaluable for diagnosing sensor or electrical issues, especially in smart dishwashers. Next, a precision torque wrench ensures fittings are tightened correctly, avoiding leaks or damage. I also rely on specialized install kits tailored for 2026 models, which streamline the process and safeguard your warranty. Lastly, keeping detailed documentation of your parts and installation steps** is vital—trust me, it’s a lifesaver when warranty claims come into play.
Get Inspired to Take Action Today
Remember, safeguarding your dishwasher with proper parts and installation practices isn’t just about avoiding floods—it’s about securing peace of mind for years to come. Using the right tools and understanding warranty intricacies empowers you to be your own best advocate. So, why wait? Start inspecting your connections, verify your parts, and embrace the proactive stance that keeps your home safe and your dishwasher running smoothly.
What’s the first step you’ll take today to ensure your dishwasher’s protection and warranty validity? Share your plan below—I’d love to hear how you’re putting these tips into action!
Related Posts
4 Parts Every 2026 Dishwasher Installation Needs for Zero Leaks
It was late at night when I finally finished installing…
![Why Your 2026 Dishwasher Needs a High-Loop Hose Kit [Update]](https://appliancedoctorz.com/wp-content/uploads/2026/02/Why-Your-2026-Dishwasher-Needs-a-High-Loop-Hose-Kit-Update.jpeg)
Why Your 2026 Dishwasher Needs a High-Loop Hose Kit [Update]
I remember the moment clearly — my dishwasher started leaking…
Forget the Teflon: Why 2026 Installs Require Liquid Sealant
It was an early morning, and I was eager to…