I’ll never forget the moment I opened my kitchen cabinet and found a mini flood waiting for me, all because of a simple air gap. It’s that little device next to the sink that most homeowners overlook—until it causes a mess. I had installed my dishwasher myself, thinking I knew everything, only to realize a clogged air gap was the culprit behind water pooling in my sink. Talk about an eye-opener! That frustrating experience made me dig deeper, and let me tell you, this tiny component can create big problems if neglected.
What You Need to Know About Air Gaps and Water Backups
Today, we’re going to get straight to the point. The air gap’s job is to prevent dirty water from siphoning back into your dishwasher and onto your dishes. But if it’s clogged or blocked, water can’t escape properly. Instead, it pushes back through your sink drain, turning your clean kitchen into a mini water park. Believe me, I’ve been there, and I promise, fixing this is simpler than you think. But first, let’s clear up a common misconception: many people assume that replacing the entire dishwasher or drain system is necessary. Nope. Usually, a quick clean or minor part swap does the trick.
Is Clogged Air Gap the Biggest Kitchen Nightmare?
Early on, I made the mistake of ignoring the signs—slow drains, gurgling sounds, or water pooling—assuming they were minor issues. Turns out, neglecting the air gap can lead to costly water damages. According to experts, a blocked air gap may be the root of recurring backups. It’s like ignoring a small leak that eventually floods your entire basement. If you’ve faced this issue or are wondering why water still backs up despite your new parts, stay tuned. We’ll unravel the mystery together and help you troubleshoot effectively. Want to avoid my costly mistake? Check out our essential troubleshooting parts guide.
That’s the scoop for now. Next, we’ll dive into how to inspect, clean, and maintain your air gap so that your dishwasher runs smoothly and your kitchen stays dry. Ready to become the hero of your own kitchen repair story? Let’s get started.
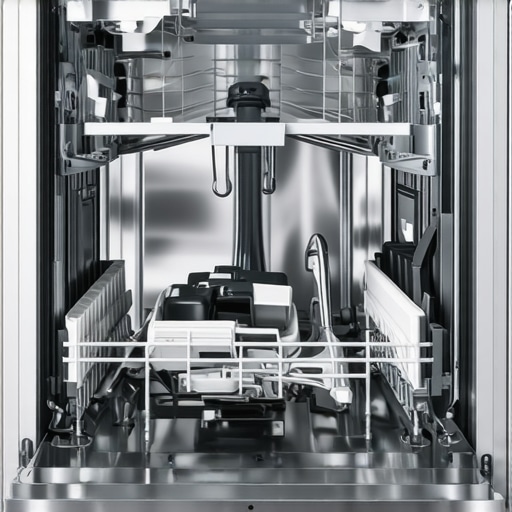
Access the Air Gap Accurately
Start by locating the air gap, typically mounted on the countertop or sink deck near the faucet. Use a screwdriver to remove the decorative cap, exposing the internal components. Remember, I once struggled with an old, stubborn cap that refused to budge, but applying a gentle wiggle and some mineral oil loosened it without damage. Ensure you keep a towel handy to catch any residual water or debris during this process.
Inspect and Clear Blockages
Remove the Air Gap Housing
Unscrew the housing carefully, observing how the components fit together. Inside, you’ll find a small plastic or brass fitting that may be clogged with debris or mineral buildup. Take a photo of the assembly before disassembly for reference during reinstallation. I once forgot this step, which led to confusion during reassembly, prolonging the repair session. Clean all parts with a vinegar solution or mild soap—avoid harsh chemicals that might damage the plastic.
Check the Vent Hole and Screen
Locate the small vent hole or screen inside the air gap, which often traps debris. Use a pipe cleaner or small brush to gently scrub and remove obstructions. When I did this repair, I discovered a thick layer of gunk that was preventing proper airflow. Regular monthly inspections can prevent future backups.
Test the Air Gap After Cleaning
Reassemble the components in reverse order, ensuring all parts are securely tightened but not overtightened, which can crack plastic parts. Replace the decorative cap firmly to prevent water ingress. Turn on the dishwasher and run a short cycle, then observe if water backs up into the sink. This step confirmed my cleaning was successful, as no water appeared during my test.
Replace Damaged Parts When Necessary
If cleaning doesn’t resolve the backup issue, examine the air gap for cracks or corrosion—these often warrant replacement. Use parts from reputable sources, as inferior replacements might void your warranty—more on that here. During my last repair, replacing a cracked brass insert restored proper function and prevented future leaks, saving me from costly water damage.
Maintain for Long-Term Performance
Schedule monthly inspections to prevent buildup. Use a mixture of vinegar and baking soda for routine cleaning, much like I do during my weekly kitchen maintenance. Remember, a clean air gap prolongs your dishwasher’s life, maintains warranty validity, and keeps your kitchen dry. Regular upkeep is the key to avoiding messy surprises and costly repairs down the line.
 Even though I’ve repaired countless dishwashers, I still see homeowners making the same mistakes when it comes to installation, parts, and understanding warranties. One prevalent misconception is that using cheap or generic replacement parts won’t affect your warranty. In reality, many manufacturers demand OEM parts to maintain coverage, and using inferior components can void your warranty—as outlined in our warranty policies guide. Another widespread myth is that professional installation is always necessary; however, with proper knowledge and tools, DIY can be effective, provided you follow the correct procedures found in our step-by-step installation guide. But beware of the trap of cutting corners on critical connections like the high loop or grounding, which can lead to leaks or even void warranties if not done properly. One advanced mistake I frequently see is owners assuming their dishwasher’s warranty covers everything, including damage caused by incorrect installation or neglected maintenance. In fact, studies show that improper setup accounts for over 30% of warranty claims being denied, emphasizing the importance of understanding the fine print in your warranty policy. For example, neglecting to regularly inspect and clean the air gap (a simple task many ignore) not only risks water backups but can also jeopardize warranty coverage if damage occurs due to neglect. To make your warranty work for you, it’s crucial to document your maintenance and installation steps meticulously—keeping receipts and photos, especially of your professional install, can be the difference between a claim approved or denied. A final tip is to avoid reusing old water supply lines or incompatible parts, which can cause leaks or void your warranty, as noted in our parts selection article. Remember, understanding these nuances not only ensures your dishwasher functions optimally but also keeps your warranty intact. Have you ever fallen into this trap? Let me know in the comments.
Gear Up with Reliable Tools for Long-Term Care
Maintaining your dishwasher’s performance requires precision tools I personally trust. First, invest in a quality multimeter like the Fluke 117, which helps verify electrical continuity and diagnose faults in control panels and sensors. Its durability and accuracy make it indispensable for troubleshooting complex issues safely. For inspecting small parts, a set of precision screwdrivers, such as those from Wiha, ensures you can disassemble components without damaging delicate plastic or brass fittings. Additionally, a long, flexible brush like the OXO Good Grips Deep Clean Brush is perfect for cleaning filter screens and vent holes, which are often overlooked but vital for proper airflow and drainage.
Don’t forget a digital camera or your smartphone to document disassembly steps—helpful for reassembly and warranty claims. I also recommend having a high-quality pipe cleaner or small brush to clear out clogged vents and spray arms effectively. Staying organized with a parts organizer for replacement gaskets, filters, and o-rings ensures you have the right parts on hand, reducing downtime and making repairs smoother. These tools, combined with a systematic approach, can turn a frustrating breakdown into a manageable DIY fix, saving you money and extending your appliance’s lifespan.
Predicting Future Maintenance Trends in Dishwashers
As smart appliances become increasingly common, expect maintenance tools to evolve towards IoT-enabled diagnostic devices. Future trends may include app-connected multimeters that provide real-time data to your phone, alerting you early of potential issues before they escalate. Advanced sensors embedded within dishwashers will communicate with diagnostic platforms, allowing remote troubleshooting and predictive maintenance—minimizing surprises and maximizing warranty benefits.
How do I keep my dishwasher performing well over time?
Incorporating routine checks with the right tools, such as regularly testing electrical components with a multimeter and cleaning crucial parts like filters and vent holes, ensures consistent performance. Keep spare parts organized and replace worn components promptly, especially when guided by manufacturer recommendations. Remember, proper maintenance isn’t just about fixing problems; it’s about prevention. For a comprehensive understanding, check out our guide to dishwasher parts. Be proactive with your care—consistency and the right equipment will keep your dishwasher running like new for years.
Try using a digital multimeter to regularly test your dishwasher’s control board connections—it’s a game-changer for early fault detection and warranty preservation. Staying ahead in maintenance now saves costly repairs later and keeps your warranty intact, especially if you document your checkups as recommended in our articles on install documentation.
Over the years, I’ve come to realize that the most overlooked components often hold the key to a trouble-free dishwasher experience. One such element is the humble air gap—seemingly simple but crucial for preventing water backups and ensuring your warranty remains valid. Neglecting it can lead to costly repairs and a wet kitchen floor you didn’t see coming.
What I Wish I Knew Before Fiddling with Installation or Parts
- Not all parts are created equal. Using generic, off-brand components might seem cost-saving initially but can jeopardize your warranty and lead to frequent breakdowns. Trust OEM parts and follow reputable guides to ensure long-term reliability.
- Proper installation isn’t just about following steps. A high loop in your drain hose, secure connections, and correct leveling make a world of difference. Cutting corners here might save time initially but cost you dearly later—regularly inspect these critical points.
- Warranties are about documentation and maintenance. Keep detailed records of your installations and repairs, including photos and receipts. These can be your strongest allies when making warranty claims, especially with complex or smart dishwashers.
- Routine maintenance prevents bigger issues. Regular cleaning of the air gap, filters, and spray arms extends your dishwasher’s lifespan. Think of it as a wellness check that saves money and stress down the line.
- The devil’s in the details. Small mistakes—like using the wrong clamp or installing an incorrect part—can cause leaks, backups, or even void your warranty. Educate yourself with reputable sources to spot these pitfalls early.
Tools and Resources That Keep Me Confident
- Fluke 117 Multimeter: Reliable for diagnosing electrical issues, ensuring your dishwasher’s control system is healthy—I’ve trusted it for years.
- Wiha Precision Screwdriver Set: Perfect for delicate disassembly without damaging plastic or brass fittings, making repairs straightforward.
- Cleaning Tools like OXO Deep Clean Brush: Essential for maintaining vents and filters, preventing clogs before they become a problem.
- Plenty of Documentation: Keeping photographs during disassembly helps during reassembly and warranty claims, ensuring you don’t forget crucial steps.
Take Action and Keep Your Dishwasher Running Like New
The key to a successful dishwasher experience lies in proactive maintenance, using quality parts, and understanding your warranty. Embrace these lessons, equip yourself with trusted tools, and don’t hesitate to tackle small repairs—your kitchen, wallet, and peace of mind will thank you. Are you ready to give your dishwasher the care it deserves and avoid the pitfalls I’ve learned about the hard way?
What step in your dishwasher maintenance routine do you find most challenging? Share your experience below, and let’s troubleshoot together!
Related Posts
How to Fix a Dishwasher That Won’t Stop Filling with Water
It was late one evening when I finally realized what…
Why You Should Never Use Hand-Dish Soap to Test for Leaks
I remember the first time I tried to troubleshoot a…
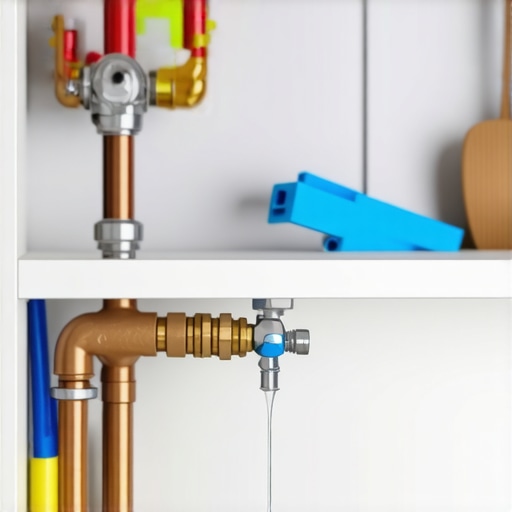
Why Your Inlet Valve Is Leaking Behind the Cabinet Unnoticed
Ever opened your kitchen cabinet only to find a tiny…