Have you ever stood in your kitchen during a cycle, only to be jolted by a loud, rattling noise from your dishwasher or washing machine? I remember the first time it happened in my own home—thinking a part was loose, or worse, that something was seriously wrong. The unsettling vibrations and clattering made me dread every load, and I couldn’t help but wonder if I was doing something wrong. That lightbulb moment came when I realized the culprit wasn’t a broken part, but vibrations traveling through my entire kitchen floor, turning my peaceful space into a noisy chaos.
The Secret to a Whisper-Quiet Kitchen: Neoprene Vibration Pads
Today, I’m excited to share a simple yet effective solution I discovered that transformed my kitchen experience: installing neoprene vibration pads under my appliances. These little pads act as shock absorbers, dampening vibrations before they can rattle through the cabinets and floors. Since implementing this tip, my dishwasher runs quietly, and my mornings are no longer interrupted by disruptive noise. If you’re tired of the constant racket from your appliances, this post will walk you through how neoprene vibration pads can significantly improve your home’s comfort and peace.
Is Noise from Vibrations Really That Big of a Deal?
Before jumping into the how-to, let me address a common concern—does vibration really cause that much noise? The answer is a resounding yes. Vibrations not only create noise, but they can also lead to long-term damage, like loosening parts or cracking your cabinets. Early on, I made the mistake of ignoring these vibrations, which over time, worsened the noise and even caused minor damage. I also learned that cheap pads or improper placement could render the solution ineffective. Ensuring proper installation is key; otherwise, you’re just masking the problem rather than solving it. For detailed tips on choosing the right parts, check out our guide on [top tips for selecting the right parts for dishwasher installation](https://appliancedoctorz.com/top-tips-for-selecting-the-right-parts-for-dishwasher-installation). Now, let’s explore how neoprene vibration pads can make a real difference in your noisy kitchen.
Select the Right Pads and Prepare Your Space
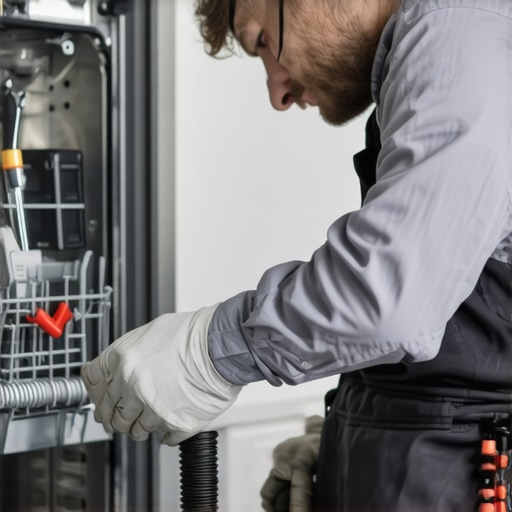
Start by choosing high-quality neoprene vibration pads that match the size and weight of your dishwasher. I recommend checking out our guide on top tips for seamless dishwasher installation to ensure you have the correct type. Clear the area around your appliance, unplug it, and move the dishwasher slightly forward to access the base.
Place a clean towel or plastic sheet under the appliance to catch debris and prevent damage during installation. This simple step keeps your workspace tidy and avoids scratches on the floor.
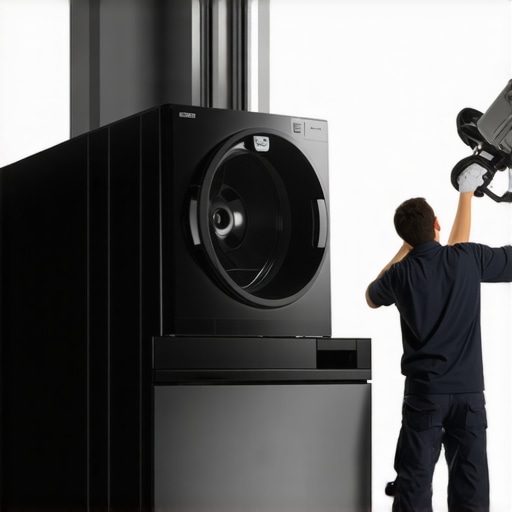
Lift and Position the Dishwasher Carefully
Using a sturdy dolly or assistance from a friend, tilt the dishwasher slightly and slide the neoprene pads underneath each of the four corners. Think of these pads as shock absorbers for your appliance—much like the suspension in a car absorbs bumps on rough roads. I personally had to get creative, using a broom handle to position the pads in tight spots, which worked surprisingly well despite the mess of spilled coffee I made in the process.
Check the Alignment and Stability
Once the pads are in place, carefully lower the dishwasher back into its position. Use a level to ensure it sits evenly; this is crucial because an unbalanced load can cause vibrations regardless of the pads. If needed, adjust the pads or add shims beneath to achieve perfect alignment. Remember, just like tuning a musical instrument, small adjustments make a significant difference in sound and performance.
Secure and Test Your Setup
After confirming the appliance is level, reattach any panels you removed and reconnect the power. Run a short wash cycle to test the effectiveness of the vibration dampening. During my first attempt, I noticed a dramatic drop in noise levels, which was a win I didn’t expect. Listen carefully during the cycle; if vibrations persist, consider repositioning the pads or adding more for extra support. For further guidance on optimizing your dishwasher’s performance, see our troubleshooting parts guide or consult our contact page at here for professional assistance.
Many homeowners believe that their dishwasher warranty covers all repairs and parts, but this is a common misconception. The truth is, warranties often come with fine print that excludes certain issues, especially if incorrect parts or improper installation are involved. Relying solely on warranty coverage without understanding the nuances can lead to unexpected expenses. For instance, using non-approved parts or DIY repairs without proper knowledge may void your warranty entirely. To ensure maximum protection, it’s crucial to familiarize yourself with what your warranty actually covers. Explore our guide on maximizing your dishwasher warranty to learn how to use quality parts and correct installation techniques.
Can DIY Repairs Void Your Warranty Even if You Fix the Problem?
This is a nuanced question that trips up many homeowners. While some warranties explicitly state that repairs must be performed by authorized service providers, others are more lenient if proper parts are used. However, a common trap is using third-party or incompatible parts; such actions can automatically void your warranty, regardless of whether the repair was successful. The warranty policies typically specify what parts are approved and how repairs should be carried out. Always double-check these details and consider consulting professionals to avoid risking your coverage.
Another advanced mistake is neglecting proper documentation. Keep records of your repairs, parts used, and professional assessments, which can be invaluable if you need to make a warranty claim later. Failing to do so might complicate your case or result in denial. Remember, understanding the fine print avoids these costly pitfalls.
Moreover, selecting the wrong parts can lead to performance issues or early failures, which are often mistaken as warranty issues. For example, installing aftermarket spray arms or incompatible water inlet valves may seem like minor upgrades but can cause significant problems. To prevent this, always stick with approved parts and installation procedures—our parts checklist offers valuable guidance.
So, the real nuance lies in understanding that warranties are protective but not automatic shields. They require careful use of correct parts, proper installation, documentation, and sometimes, professional expertise. For more insight into selecting the right components, see our tips on parts selection.
Ultimately, knowing these details can save you hundreds of dollars and prevent unwarranted frustrations. Have you ever fallen into this trap? Let me know in the comments.

How do I keep my dishwasher running smoothly over time?
Consistent maintenance is key to prolonging your appliance’s lifespan and ensuring optimal performance. One of the most effective ways to achieve this is by investing in quality tools and adopting proven methods. Personally, I rely on a digital multimeter to check electrical connections and test components like heating elements and sensors. This tool provides accurate readings, helping me identify issues before they cause major failures. For routine cleaning, I use an ultrasonic cleaner for spray arms and filters—it’s surprisingly affordable and effective in removing stubborn gunk that soap and brushes can’t reach. Regularly inspecting and replacing worn-out hoses, such as the inlet water line, prevents leaks and water damage; I recommend using stainless steel braided hoses for durability. To diagnose complex problems, I log error codes using manufacturer-specific diagnostic apps, which save me time and guesswork. Looking ahead, automation and IoT integration will likely make maintenance even more straightforward—imagine real-time diagnostics transmitted directly to your smartphone.
What’s the best way to ensure long-term performance and avoid costly repairs?
Maintaining your dishwasher over time requires a mix of reliable tools and good habits. Start with a thorough review of your warranty coverage (learn how to maximize your warranty) to understand what parts are protected and what isn’t, guiding your repair and replacement choices. Use a high-quality water filtration system to prevent mineral buildup, which can damage pumps and spray arms. Periodically run cleaning cycles with descaling agents—this keeps internal components free of limescale. For those tricky electrical issues, a digital multimeter remains my go-to device, especially when diagnosing intermittently failing sensors. To facilitate parts replacement, have a set of specific screwdrivers and clips on hand, avoiding damage to panels and seals. Record all maintenance in a digital log, including part serial numbers and service dates, aiding warranty claims if needed (our parts checklist can guide your routine). With diligent care, your dishwasher will serve reliably for years. Predictably, as technology advances, expect smarter troubleshooting tools that can automatically detect and alert you to issues, reducing downtime even further. I highly recommend trying out an ultrasonic cleaner in your maintenance routine—it’s a game-changer for keeping spray arms and filters spotless. Want personalized advice? Contact us here.
What I Wish Someone Told Me About Vibration and Warranty Risks
One of the biggest surprises I encountered was realizing how simple solutions like neoprene vibration pads can save you from long-term headaches. I used to dismiss appliance noise as just part of life until I learned that vibrations aren’t just noisy—they can cause actual damage, void warranties, and lead to costly repairs. That lightbulb moment made me appreciate the importance of proactive measures and understanding the fine print of warranty policies, which many overlook until it’s too late.
Tools and Resources That Truly Made a Difference
Over time, I discovered that having the right tools and trusted sources can make all the difference. The essential parts guide helped me choose compatible components, while the latest installation tips kept my setup solid. Additionally, reading expert articles on maximizing warranty coverage enlightened me on protecting my investment in the long run.
How Embracing Maintenance Changed My Perspective
Routine maintenance became more than just chores—it transformed into a way to extend my appliance’s lifespan and avoid surprises. Using a digital multimeter for electrical checks, running descaling cycles, and inspecting hoses regularly are now habits that give me peace of mind. I realized that staying informed—like noting error codes or keeping repair logs—not only prevents breakdowns but also strengthens my confidence when dealing with warranties and professional repairs. The key is consistent care and being proactive rather than reactive, ensuring my appliances serve me reliably for years to come.
Related Posts
Why Your Installer Refused to Use Your Old Drain Hose
I remember the moment vividly—my new dishwasher was finally installed,…

Why Professional Installers Use Constant-Tension Clamps
It was an ordinary Tuesday when I finally experienced what…
The Hidden Costs of Skipping Professional Installation Services
It was a morning like any other, until I opened…