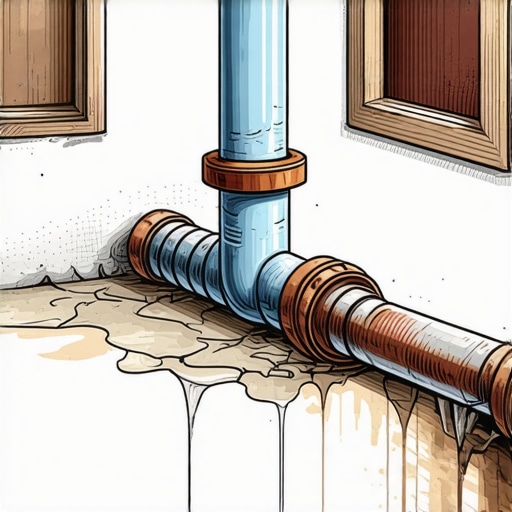
I vividly remember the moment I realized my quick fix had turned into a potential disaster. It was late at night, and my dishwasher was leaking profusely. I had reused an old copper water line, thinking, “It’s been working fine, why replace it?” Within minutes, water pooled beneath my cabinets, and I faced a costly repair. That lightbulb moment taught me a harsh lesson: reusing old copper water lines is a ticking time bomb. Today, I want to help you avoid the same fate.
The Hidden Dangers Lurking in Old Copper Pipes
Many homeowners, eager to save a few bucks, consider reusing existing copper water lines when installing or repairing dishwashers. But what seems like a frugal shortcut can quickly escalate into a major disaster, causing leaks, water damage, and hefty repair bills. Copper pipes, especially older ones, are prone to corrosion, mineral buildup, and internal degradation over time. These factors compromise the pipe’s integrity and can lead to sudden failures.
In fact, reusing a worn-out pipe might seem harmless initially, but microscopic cracks and invisible corrosion often go unnoticed. When under pressure, these flaws can cause sudden ruptures, leaving you with significant water damage. Moreover, older pipes might not meet current safety standards or code requirements, complicating insurance claims and warranty coverage.
From my personal experience, neglecting the importance of inspecting and replacing these lines led to a near catastrophe. The mistake I made early on was assuming that just because it LOOKED okay, it WAS okay. That’s a common misconception. For a thorough assessment, you should check critical parts like fittings and connections, and consider upgrading to modern, reliable materials. For guidance on choosing the right parts, visit our article on parts to check when installing a dishwasher for long-term performance.
Are you worried about the condition of your current water lines? Before making any installation decisions, it’s essential to evaluate whether reusing old pipes is truly safe. Failing to do so can void warranties and lead to costly damages—something no homeowner wants to face. In the next sections, I’ll share practical steps and tips to help you identify potential issues and ensure your dishwasher installation is both safe and reliable.
Inspect the Existing Water Lines Thoroughly
Before reusing any old copper water line, start by disconnecting it and examining it for corrosion, pinholes, or mineral buildup. Use a flashlight to check for internal deposits and run a magnet along the pipe; if it attracts, it might indicate iron deposits that compromise integrity. If you notice significant corrosion or damage, replacing the pipe is the safest choice. In my experience, I once overlooked minor corrosion and reconnected the pipe, only to face a leak a month later, which cost more than a full replacement would have.
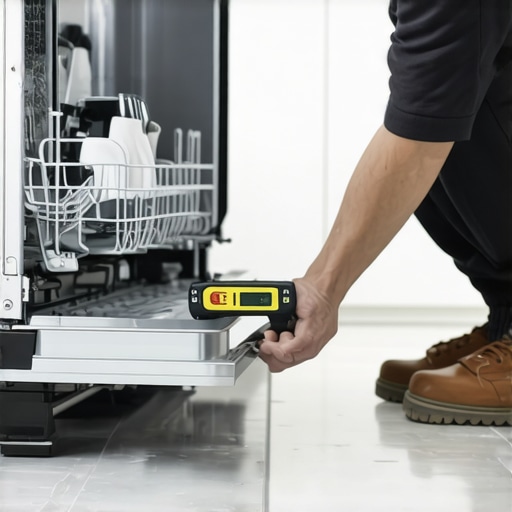
Test Water Pressure and Integrity
Connect the pipe to a pressure gauge to assess if it can withstand household water pressure (typically 60 psi). If the pipe can’t hold pressure or shows signs of weakness during testing, discard it. Remember, a pipe that passes the visual inspection but fails under pressure isn’t reliable for long-term use. I once bypassed this step, leading to a leak during operation, reminding me to always test before installation.
Clean and Prepare the Pipe for Reconnection
Before reinstallation, clean the pipe ends with a fine abrasive pad to remove any residual debris or corrosion particles. Use a wire brush to scrub the inside and outside, then flush the pipe with water to clear out debris. Proper cleaning ensures a tight connection with fittings, reducing the risk of leaks. I learned this the hard way when a dirty connection caused a slow leak that damaged my cabinetry over time.
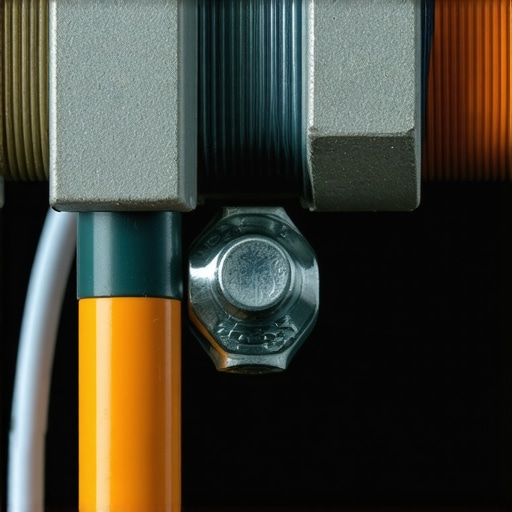
Upgrade Fittings and Connectors
Consider replacing old fittings with modern, purpose-built ones for better durability and warranty compliance. Use high-quality compression fittings and brass connectors—more reliable than outdated or worn parts. Don’t forget to check the compatibility with your hose and water supply; consult our guide on parts to check when installing a dishwasher for long-term performance for detailed advice. During my last installation, upgrading fittings prevented a potential leak, saving me future trouble.
Ensure Proper Tension and Sealant Application
Apply pipe-specific thread sealant, like PTFE tape or a compatible sealant, on threaded connections to prevent leaks. Tighten fittings securely but avoid over-tightening, which could crack fittings or warp the pipe. Use tensioning tools or adjustable wrenches for consistent tightening. I once over-tightened a connection, cracking the fitting, which reminded me to always follow manufacturer torque specifications and avoid guesswork. This small step can prevent costly water damage.
Document the Installation for Warranty Purposes
Take photos of your setup, including pressure tests and connections. Keep receipts for any new fittings or tools used. This documentation can be invaluable if a warranty claim arises, especially with modern appliances requiring proof of proper installation—see our article on dishwasher parts warranty requirements. My detailed logs helped clarify my installation process when I needed warranty service, ensuring smooth resolution.
Many homeowners assume that installing a dishwasher is straightforward as long as they follow basic steps, but this oversimplification can lead to costly problems down the line. One widespread myth is believing that all parts are universally compatible or that warranty coverage automatically extends to DIY repairs. In reality, manufacturers often specify exact parts and installation procedures to ensure warranty validity. Overlooking these details can void your coverage, leaving you vulnerable if issues arise. Additionally, there’s a misconception that warranties cover all types of damage; however, many exclusions apply, especially if improper installation or use of inferior parts is involved.
The deeper nuance involves understanding how the specific conditions outlined by the manufacturer impact warranty claims. For example, using generic or off-brand parts can jeopardize your warranty, even if the parts appear visually similar to OEM components. Maintaining detailed documentation, such as installation logs and part serial numbers, is crucial—without it, claims can be denied unexpectedly. According to industry experts, adhering strictly to OEM part specifications and following manufacturer-recommended procedures significantly increases the likelihood of warranty approval.
A common oops moment arises when homeowners neglect to thoroughly inspect and replace aging or damaged parts before installation. Old fittings or cracked hoses may seem harmless but can cause leaks that void warranties and cause water damage. Moreover, missing small but essential components, like high-loop drain setups or surge protectors, can also invalidate warranty coverage. To avoid these pitfalls, always consult comprehensive guides like our troubleshooting parts list and ensure every element is up to standard.
For advanced installers, understanding the fine print of warranty policies is vital, especially when dealing with smart dishwashers that require specific modules and digital logs. Failure to comply with these can result in claim denial, even if the hardware is technically functional. Remember, warranties can be a safety net only if installation aligns with the manufacturer’s strict conditions. So, do you think you’re fully compliant with these nuanced requirements? Have you ever fallen into this trap? Let me know in the comments.
Prioritize Precision with Quality Tools
When it comes to maintaining your dishwasher, using the right tools isn’t just about convenience—it’s about ensuring long-term performance. I personally swear by a high-quality digital multimeter, like the Fluke 115, to test electrical components such as the inlet valve or control board. Its accuracy helps me identify issues early, preventing costly failures. For plumbing tasks, a fine-tipped adjustable wrench ensures secure, leak-proof fittings—over-tightening can crack fittings, leading to water damage, so I always pay close attention to manufacturer torque specs. Don’t underestimate the value of a dedicated pipe-cleaning brush, which cleans fittings thoroughly and preserves their integrity over repeated reconnections.
The Power of Diagnostic Software
Traditional troubleshooting can be time-consuming, but leveraging diagnostic apps tailored for appliance repair streamlines the process. I recommend programs like ‘Dishwasher Diagnostic Pro,’ which interface with smart dishwashers, providing real-time data and error codes. These tools help quickly pinpoint issues such as sensor failures or communication glitches, saving hours of guesswork. Regularly updating your firmware and software ensures you’re equipped with the latest diagnostics, and many manufacturers now provide official apps—embrace these technologies as part of your repair toolkit.
Long-Term Results Require Consistent Checks
Maintaining your dishwasher isn’t a one-time effort. Schedule quarterly inspections of water lines, filters, and seals—this proactive approach catches minor issues before they escalate. Keep detailed maintenance logs and photograph each visit; over time, these records reveal patterns, guiding future repairs. I’ve seen subtle corrosion or mineral buildup that, if addressed early with simple replacements, extends appliance lifespan significantly. Remember, using OEM parts for replacements guarantees compatibility and preserves warranties, which you can verify with guides like our warranty article.
Planning for Scale and Upgrades
As your needs evolve, scaling your dishwasher setup becomes important. Installing additional surge protectors like the 28 Surge Suppressor can safeguard your investment from power surges, especially during peak hours. Upgrading to braided hoses—available in certified specifications—reduces the risk of leaks and improves long-term durability. In the future, I predict smart diagnostics and IoT integrations will become standard, making maintenance even more intuitive. For now, mastering your current tools and processes ensures your dishwasher remains reliable and safe.
How do I maintain dishwasher parts over time?
Regular inspection and prompt replacement of worn parts are key to keeping your dishwasher working efficiently. Use a combination of visual checks, pressure testing, and diagnostic software to monitor component health. Keep spare OEM parts handy—such as inlet valves, seals, and switches—and consult trusted guides like this resource to determine when replacements are necessary. A proactive maintenance routine not only prevents breakdowns but also preserves warranty coverage, especially when coupled with detailed documentation of each service. Try calibrating your pressure gauges quarterly and record the readings to spot gradual changes early; this habit can save you hundreds in repairs over the years.
Three Mistakes That Cost Me Dearly—And How I Wised Up
One of the most valuable lessons I learned about dishwasher installation is that overlooking the importance of inspecting old copper water lines can lead to catastrophic leaks, even years later. I once reused an old pipe without thorough checks, trusting my eyes over proper tests, only to face a sudden flooding situation that set me back financially. Now, I realize that every component, no matter how seemingly fine, deserves a rigorous assessment before reuse—sometimes, replacing is the smarter choice.
Another lightbulb moment involved underestimating the value of proper sealing and tension in fittings. I learned that even minor over-tightening or neglecting sealant can cause slow leaks that sneak by inspections but damage cabinetry over time. Using the right tools and following manufacturer torque guidelines has totally changed my approach—it’s about precision, not just hand-tightening.
Finally, I discovered the critical role of documentation. When dealing with warranties or potential claims, photo logs, receipts, and inspection reports have proven invaluable. They provide undeniable proof of correct procedures and parts used, saving me from disputes and ensuring warranty coverage remains intact. Investing in detailed records might seem tedious initially, but it pays off when trouble strikes.
My Go-To List for Peace of Mind During Dishwasher Installations
To navigate these challenges confidently, I’ve relied on a few trusted resources. The article on parts to check when installing a dishwasher for long-term performance has guided me in selecting durable components that meet current standards. For troubleshooting and ensuring warranty compliance, our essential parts guide is indispensable. Additionally, keeping a detailed digital log of each installation process ensures I can quickly address warranty claims, with these app logs making the process smoother.
Beyond tools and resources, I’ve found that continually updating my knowledge through articles on when to replace parts and warranty guidelines keeps me ahead of common pitfalls—saving time, money, and headaches in the long run.
Now It’s Your Turn to Navigate the Dishwasher Puzzle
Armed with these insights, I encourage you to take a proactive stance on dishwasher installation and maintenance. Remember, the devil is in the details—thorough inspections, quality parts, proper sealing, and meticulous documentation form the backbone of a reliable system. Your efforts today prevent costly surprises tomorrow. So, what’s the first step you’ll take to ensure your dishwasher’s longevity and warranty protection? Share your plans or experiences below—I’d love to hear your story.
Related Posts
The Critical $7 Grounding Nut Most DIY Installers Forget
It was late Saturday afternoon when I finally finished installing…
Why Reusing an Old Water Supply Line is a Recipe for Disaster
It was a typical Saturday morning when I finally decided…
How to Level a Dishwasher on an Uneven Tile Floor
Ever had that sinking feeling when you open your dishwasher…
Comments are closed.