It was a quiet Sunday afternoon when I finally decided to tackle the stubborn mold spot lurking beneath my kitchen sink. I had recently replaced my dishwasher and reused the old water supply line, thinking I was saving a few bucks. Little did I realize, that seemingly harmless decision would lead to a lingering mold problem, making my cabinets smell damp and look unclean despite regular cleaning efforts.
The Hidden Dangers of Reusing Water Supply Lines
In my experience, reusing water supply lines might seem like a smart way to cut costs or save time during installation. But what I overlooked was how these old hoses can be silent culprits in mold growth and water leaks. The moist environment created by condensation, combined with the often overlooked tiny cracks or debris inside the lines, creates perfect conditions for mold to thrive. This isn’t just about a musty smell; it can impact your health and damage your cabinetry if left unchecked.
Could This Be Happening in Your Home?
If you’ve recently replaced your dishwasher or faucet but reused your old supply lines, have you noticed unexplained dampness or a mildew smell? These signs often point to hidden leaks or mold development. Early detection is crucial to prevent costly repairs and health risks. Interestingly, the EPA estimates that indoor mold can trigger respiratory issues and allergies, especially in sensitive individuals. So, it’s not just an aesthetic issue—it’s a health matter.
One mistake I made early on was dismissing the significance of inspecting those supply lines thoroughly. Assumed they were still good as new because they appeared clean from the outside. However, internal corrosion or minor cracks can be invisible without proper inspection. For reliable advice on choosing the right parts and ensuring your installation’s longevity, I recommend visiting this guide on selecting quality installation parts. The key is understanding what makes a supply line safe and resistant to mold growth, which I didn’t realize at first.
Now, I’m committed to resetting my approach—because a small oversight can lead to persistent problems. So, in the upcoming sections, we’ll dive into practical steps to prevent mold and ensure your water lines do their job without causing damage. Whether you’re a seasoned DIYer or just starting, this knowledge can save you time, money, and discomfort.
,
Inspect the Existing Supply Line Thoroughly
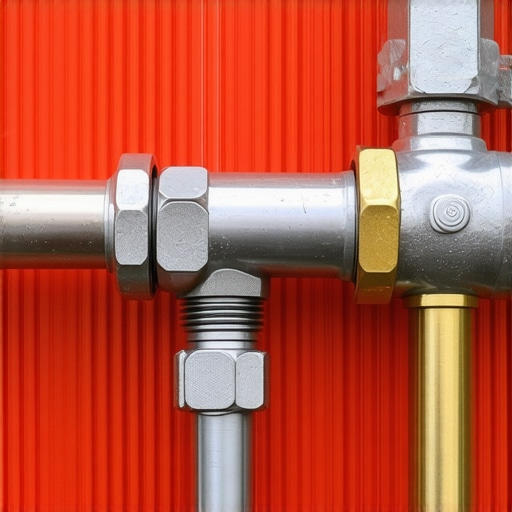
Before touching any fittings, disconnect the water supply and carefully examine the hose for cracks, corrosion, or signs of wear. Use a flashlight to look inside and feel for any brittleness. I once assumed an old hose was still good because it looked fine externally, but when I started to disconnect it, a small crack caused a minor water leak that could have been prevented with proper inspection. This initial step ensures you’re working with a safe, reliable part or prepares you to replace it.
Choose the Right Replacement Part
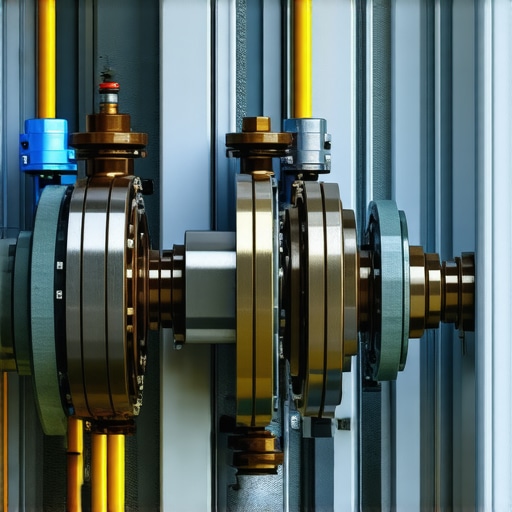
Select a high-quality, durable supply hose made of braided stainless steel or reinforced rubber, which resist mold, kinks, and corrosion. Avoid cheap plastic lines, as they degrade quickly and are more prone to leaks. Check the length and fittings compatibility with your dishwasher’s model. For an optimal upgrade, I opted for a braided stainless steel hose, which provides peace of mind knowing it’s less likely to develop mold or leaks over time. Proper selection guarantees both safety and compliance with warranty conditions — for more on resilient parts, visit this guide on choosing quality parts.
Gather Proper Tools and Prepare Workspace
Ensure you have adjustable wrenches, slip-joint pliers, a bucket, towels, and safety gloves. Turn off the water valve before starting to prevent flooding. I once neglected to close the water supply, leading to a minor splash on the floor; subsequently, I made a habit of shutting off water and placing towels as a safety measure. This preparation minimizes mess and damage, making the replacement process smoother.
Disconnect the Old Hose Correctly
Use the adjustable wrench to loosen the compression nut securing the hose to the water valve. Hold the fitting steady with pliers if needed, then carefully detach the hose. Check the inlet port for debris or corrosion, as these can affect the new connection. I remember once rushing this step and stripping the nut, which required a trip to the hardware store—an avoidable mistake. Gentle, steady tightening prevents damage.
Install the New Supply Line Properly
Attach the new hose to the water inlet, finger-tightening the compression nut before using the wrench to snug it securely—avoid over-tightening, which can cause leaks or damage. Make sure the other end is correctly connected to the supply valve. Tighten evenly to prevent strain. I learned from experience that uneven tightening can cause future leaks, so I tightened alternately on both ends. For best practice, consult this article on installation tips.
Test for Leaks and Final Checks
Turn the water supply back on and observe the connections for leaks, tightening fittings slightly if needed. Run a short cycle on your dishwasher, and check both the supply hose and fittings afterward. A trick I used was to place a paper towel around the connection points—if it gets wet, tighten slightly until dry. This step confirms a proper installation, helping avoid water damage or mold growth later.
Many believe that choosing generic parts or ignoring warranty stipulations won’t impact their dishwasher’s longevity, but in reality, these overlooked details can lead to costly repairs and voided warranties. For example, it’s a common myth that all replacement hoses are created equal; however, using subpar materials or improper fittings can cause leaks and mold issues, despite the manufacturer’s claims. Additionally, some think that warranty coverage is foolproof—yet, many warranties exclude damage caused by improper installation or use of non-approved parts, emphasizing the importance of understanding the fine print. Professionals often warn that neglecting to select the right parts not only jeopardizes performance but also risks non-coverage during warranty claims; check this guide on maximizing your warranty via proper parts.
Have you ever fallen into this trap? Let me know in the comments.
Another advanced mistake is assuming that an easy DIY installation bypasses the need for detailed knowledge. A seemingly simple task like connecting water supply lines can trigger leaks later if the fittings are misaligned or over-tightened, which can damage internal seals and void warranties. A common misconception is that tightness equals safety—yet, overtightening compression fittings can deform them, leading to micro-leaks over time. To avoid this, consult this expert advice on proper installation techniques.
Understanding these fine nuances helps ensure your dishwasher runs efficiently and remains protected under warranty. Keep in mind that some issues, such as improper part selection or incorrect installation procedures, are often undetectable until they cause significant damage. That’s why investing in proper knowledge, or hiring qualified professionals when in doubt, can save you from future headaches. Remember, many warranties also have specific requirements about the parts used and installation methods, as explained in this detailed warranty policy overview.
So, next time you replace a part or install a dishwasher, double-check the compatibility and quality of your choices. Recognize that these aren’t merely trivial details but critical factors that influence your appliance’s lifespan. Are you aware of the hidden fine print in your manufacturer’s warranty? If not, take time to review it now, ensuring your investment remains protected. For more expert insights, visit this resource on troubleshooting parts.
The Importance of Proper Maintenance and Quality Tools
Maintaining your dishwasher over time requires more than just occasional cleaning; it demands the right tools, a systematic approach, and understanding the equipment’s nuances. From inspecting supply lines to troubleshooting complex issues, having the right gear can make all the difference in extending your appliance’s lifespan.
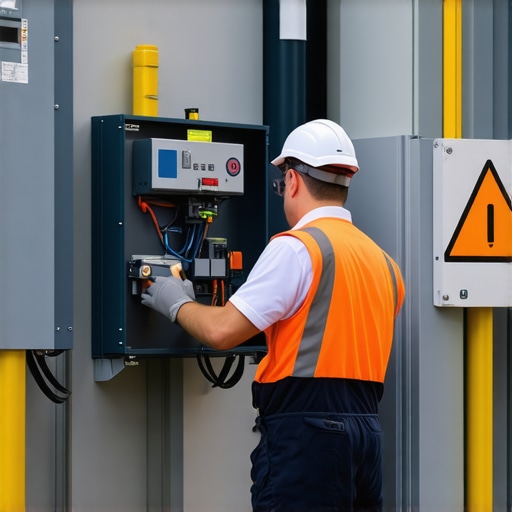
One tool I swear by is a digital multimeter. It’s invaluable for checking electrical components like thermal fuses or control boards, ensuring they’re functioning correctly. Personally, I keep mine calibrated regularly, referencing this expert guide to ensure accurate readings. This prevents me from replacing parts unnecessarily and helps detect issues early.
Next, consider investing in a stainless steel braided hose. Unlike traditional rubber lines, these resist mold, corrosion, and kinking, which are critical for long-term performance. During routine checks, I inspect these hoses for signs of wear, replacing them proactively based on advice from this article. Regular inspection combined with quality parts can prevent costly leaks and water damage.
Additionally, a plumbing torque wrench is perfect for connecting supply lines accurately. Over-tightening can deform fittings and cause leaks, so I use my torque wrench set to manufacturer-specified settings, which I got from an appliance repair specialist. This precise approach aligns with recommendations found in the industry’s best practices, like those outlined in this resource.
To maintain your dishwasher’s interior, a soft microfiber cloth and specialized cleaning tablets are essential. I recommend cleaning the spray arms and filters every few months to prevent blockages that affect cleaning performance. Modern tools like ultrasonic cleaners can also help dislodge debris without disassembling parts, a technique I learned from this troubleshooting guide.
In the future, I foresee smart diagnostic tools integrated into appliances, allowing remote monitoring and automatic alerts for maintenance needs. Until then, employing these precise tools and methods will keep your dishwasher running smoothly and protect your investment.
How do I keep my dishwasher working seamlessly over time?
The key is routine inspections combined with using proper parts and tools. Regularly replacing worn supply lines with durable braided hoses, checking electrical components with a multimeter, and maintaining interior cleanliness are proven strategies. For example, checking the water inlet valve with a multimeter can reveal impending failures before leaks develop, saving you time and money. Incorporate this practice today to catch issues early, and consider exploring tools like ultrasonic cleaning devices to enhance your maintenance routine. Want to take your maintenance to the next level? Start with a comprehensive inspection using a multimeter and schedule a quarterly filter check—small steps that yield major long-term benefits.
Lessons Craftsmen Keep to Themselves About Parts and Warranties
- Patience Was My Best Tool: Rushing through inspecting supply lines or ignoring proper tightening led me to surprise leaks and mold growth. The quiet tip? Take your time and double-check each connection, especially after a repair—it’s worth it.
- Not All Parts Are Created Equal: Using cheap or incompatible hoses might seem save money upfront, but it risks voiding warranties and inviting mold. Investing in quality, like braided stainless steel lines, provides peace of mind and longevity.
- Warranties Are More Than Paper: Many overlook specific warranty stipulations, which can later invalidate claims. Reading the fine print and choosing approved parts ensures your safeguard stays intact when problems arise.
- Installation Technique Matters: Proper torque and correct routing can prevent micro-leaks and electrical issues. When in doubt, consult expert guides or professionals rather than guesswork—your future self will thank you.
- Regular Upkeep is the Shortcut to Reliability: Routine checks, like inspecting hoses and testing electrical components with a multimeter, prevent major failures. Building a maintenance routine turns complex troubleshooting into straightforward care.
Tools and Guides That Keep My Dishwasher Running Smoothly
- Multimeter — Essential for diagnosing electrical issues early and avoiding unnecessary replacements.
- Quality supply hoses — Braided stainless steel hoses stand out for durability and resistance to mold.
- Critical parts guide — Understanding the core components helps in quick troubleshooting and ensures you pick the right replacements.
- Installation tips — Avoid common pitfalls with expert tips that save time and prevent costly errors.
Take Action and Keep Your Dishwasher in Peak Shape
Every bit of knowledge and every tool you add to your kit builds confidence, reduces surprises, and extends your appliance’s life. Don’t wait until leaks or mold appear—start implementing these insights today. Remember, a well-maintained dishwasher isn’t just about clean dishes; it’s a testament to your care and expertise. Keep exploring and refining your maintenance routine, and enjoy the satisfaction of a reliable appliance that serves you for years to come.
What’s the most surprising thing you’ve learned about dishwasher parts or warranties during your repairs? Share your story below!
Related Posts
The Danger of Using Old Supply Hoses on a New Machine
Ever had that sinking feeling when you flip the switch…
Why You Must Never Toss the Factory Junction Box
Ever accidentally thrown away the factory junction box after installing…
Why This $12 Hammer Arrestor Is the Only Way to Stop Banging Pipes
It was midnight when I first realized my kitchen had…