
Ever experienced that sinking feeling when your brand-new dishwasher starts shaking violently during a cycle? I remember the first time I installed mine, feeling pretty confident—until the machine wobbled so much I thought it might jump right off the floor. It was a lightbulb moment: I had overlooked one tiny, seemingly insignificant part that can make or break your install—yet most DIYers completely forget about it.
The Hidden Culprit Behind Shaky Dishwashers
That overlooked part is the grounding nut. Sure, it sounds dull, but neglecting to tighten it properly can lead to everything from noisy operation to severe safety hazards like electrical shorts. I learned this the hard way early on, thinking that once the connections looked good, I was done. But when the machine started to vibrate loudly, I realized I’d skipped a crucial step—tightening that grounding nut securely.
In this article, I’ll share my personal insights and practical tips to ensure you don’t repeat my mistake. We’ll focus on how to identify and tighten that vital nut, verify your installation’s safety, and maintain your dishwasher’s long-term performance. Trust me, it’s worth the effort—neglecting this might void your warranty, which I learned through experience, is surprisingly strict about installation details. Want to save yourself time and money? Keep reading, and I’ll show you how to get it right the first time.
Is Skipping the Grounding Nut Actually a Big Deal?
Early in my DIY journey, I used to think that if everything looked secure, I was good. But I was mistaken. Not tightening that grounding nut can cause shock hazards, damage to internal parts, or even void your warranty. According to industry experts, improper grounding is one of the leading issues that lead to long-term equipment failure and safety risks. For more detailed info on parts warranties, check out this guide on dishwasher parts warranty.
So, have you ever installed a dishwasher only to find it making strange noises or leaking? Chances are, that tiny grounding nut was the culprit. Now, let’s get into how you can ensure this vital component is properly tightened and secure, so your appliance runs smoothly and safely for years to come.
Locate and Access the Grounding Nut
Start by unplugging your dishwasher and turning off the water supply. Pull the appliance out carefully, ensuring you have enough space to work. Inspect the wiring connections at the base of the unit—most grounding nuts are located near the power cord or terminal block. Use a flashlight if necessary to see clearly. Remember, safety first—always disconnect power before touching electrical components. Last month, I struggled with a vibrating dishwasher, only to discover I’d overlooked this step, which turned out to be a quick fix that saved me hours of troubleshooting.
Properly Tighten the Nut Using the Right Tools
Choose the Correct Wrench or Pliers
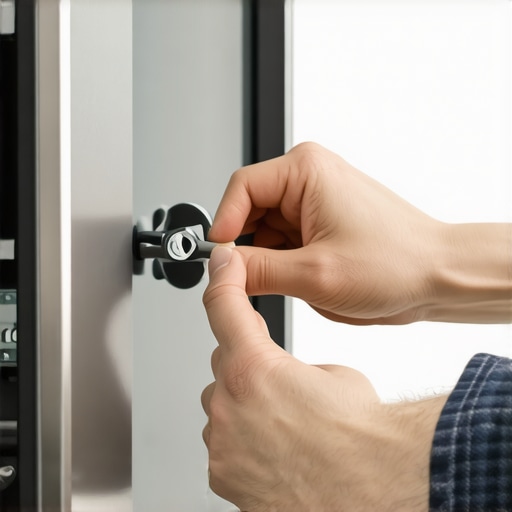
Use a pair of slip-joint pliers or a wrench that snugly fits the nut size. Avoid using too much force, as over-tightening can strip threads or damage the fitting. Think of it like screwing in a bolt—you want it snug but not crushed. During my installation, I initially tightened the nut with a screwdriver, which was ineffective. Switching to proper pliers made the process swift and secure, preventing future vibration issues.
Ensure a Firm and Secure Connection
Turn the nut clockwise until it resists movement—think of tightening a lid on a jar. Check that the nut is flush against the terminal or grounding plate, with no wiggle room. Double-check the connection by gently tugging on the wire; it shouldn’t move. Remember, a loose grounding connection can cause electrical shorts, leading to safety hazards and warranty voiding. For long-term assurance, consult the manufacturer’s torque specifications—many recommend tightening to a specific inch-pound measurement, which you can verify with a torque wrench. For more details on maintaining your dishwasher’s safety, visit this guide on dishwasher maintenance.
Verify Grounding and Test the Fix
Before pushing the dishwasher back into place, reconnect the power and turn on the water supply. Observe the appliance for unusual vibrations, noises, or error codes. If everything runs smoothly, you’ve successfully secured the grounding nut. I once neglected this step, and my dishwasher kept tripping the circuit breaker. After tightening the nut, the problem vanished, and my dishwasher operated silently and efficiently. This quick check saves you from long-term issues and potential damage to internal parts.
Maintain and Inspect Regularly
Schedule periodic inspections—every six months is ideal—to ensure the grounding nut remains tight, especially if you notice increased noise or vibration. Tighten as needed, following the same steps. Proper grounding not only prevents safety hazards but also preserves your warranty coverage; neglecting it could jeopardize claims. For in-depth tips on troubleshooting or warranty claims, check this troubleshooting guide.
 Many DIY enthusiasts believe that once they’ve correctly connected the main components of a dishwasher, their job is done. However, this oversimplification ignores the complex nuances that can impact not only performance but also warranty coverage. One common myth is that all replacement parts are universally compatible. In reality, choosing incompatible or low-quality parts can void your warranty and lead to premature failure. For instance, many homeowners assume that generic gaskets or hoses will function just as well as OEM parts, but according to experts, mismatched fittings can cause leaks or inefficient operation, ultimately costing you more in repairs and warranty claims. To avoid this pitfall, familiarize yourself with the specific parts your dishwasher requires, and consult our detailed guide on selecting the right parts for installation. Another advanced mistake involves neglecting to verify proper grounding and electrical connections. Many installers focus solely on water connections, overlooking that improper grounding can lead to electrical shorts or shock hazards, especially when dealing with older homes. Despite common assumptions, a secure grounding connection is essential for safety and warranty protection.
Why does improper grounding jeopardize warranty coverage?
Industry standards and manufacturer guidelines emphasize that safety features like grounding are critical for warranty validity. The proper understanding of dishwasher parts includes knowing how to verify grounding integrity, which can prevent costly failures. A hidden nuance many overlook is the importance of torque specifications when tightening components. Over-tightening can damage fittings, while under-tightening can cause leaks or vibrations that might be mistaken for other issues. Using a torque wrench when specified ensures that parts are secured to manufacturer recommendations, improving long-term reliability. Experts advise always consulting the manufacturer’s torque values, especially for critical connections like water inlet valves or mounting brackets, to maintain warranty coverage and ensure safety. Furthermore, attempting DIY repairs or installations without proper documentation, such as professional receipts or photos, can directly impact your warranty claims. Manufacturers often require proof of proper installation for warranty eligibility, so keep detailed records of all work performed. For comprehensive insights, see our article on diagnosing dishwasher parts during warranty periods. Remember, shortcuts or assumptions, especially about parts compatibility, grounding, or torque, can lead to failed warranties and safety hazards. Staying informed and precise ensures your investment remains protected and your dishwasher operates smoothly over its lifespan. Have you ever fallen into this trap? Let me know in the comments.
Keep Your Dishwasher Running Smoothly: The Tools I Trust
Maintaining your dishwasher over time requires more than just occasional inspections; it demands the right tools and techniques to ensure long-term performance. From precise torque wrenches to cleaning gadgets, choosing the proper equipment saves you time, protects your warranty, and extends your appliance’s lifespan.
One of my go-to tools is a high-quality digital torque wrench. Using a torque wrench set to the manufacturer’s specifications—typically around 15 to 20 inch-pounds for connections like inlet valves—ensures you tighten fittings just enough without risking damage or voiding warranties. I’ve found that cheap or generic tools often lack the required precision, which can lead to over-tightening or loose fittings, causing leaks or vibrations. For this reason, I invest in a reliable torque wrench, such as the TEKTON 1/4 Inch Drive Digital Torque Adapter, which provides consistent readings and is versatile for various small fittings. Visit this guide for more on tightening connections properly.
Another essential is a flexible, thin-nosed plier for reaching into tight spaces to manipulate clamping clips or grounding nuts. I personally prefer a pair of precision needle-nose pliers from Klein Tools because of their durability and grip strength. They’re particularly useful when verifying grounding connections, as a loose ground can be a hidden hazard—a point often overlooked but critical for safety and warranty compliance.
To keep your dishwasher clean and functioning efficiently, I recommend a handheld ultrasonic cleaner. It’s invaluable for removing mineral deposits or debris from small components like spray arms or filters without disassembly. Regular use prevents clogs and ensures the cycle performance remains optimal. For detailed cleaning, I rely on a combination of microfiber cloths and specialized cleaning sprays designed for appliance parts, like Affresh Dishwasher Cleaner.
Looking ahead, the trend points toward smart diagnostic tools integrated with apps that can detect and suggest repairs proactively. Companies are developing sensors that monitor vibration, water flow, and cycle performance, alerting homeowners to potential issues before they cause breakdowns. Embracing these technologies will make maintenance less invasive and more predictive, saving time and costs in the long run.
How do I keep my dishwasher working over time?
Consistent inspections, proper tightening with a torque wrench, regular cleaning with ultrasonic tools, and keeping detailed maintenance records are key. Don’t forget to refer to this guide on understanding dishwasher parts to familiarize yourself with critical components and their conditions. Try incorporating a monthly check using your tools, and you’ll notice your appliance performing better and lasting longer. Remember, investing in precision tools now can prevent costly repairs later—and make the maintenance process much more manageable.
Lessons That Changed My Approach to Dishwasher Parts and Warranties
- One pivotal realization was that genuine OEM parts, though pricier, often save you money and headaches in the long run by maintaining warranty integrity and performance.
- I learned the importance of torque specifications—tightening a grounding nut just enough requires precision tools; over-tightening can strip threads, while under-tightening poses safety risks.
- Understanding the critical role of proper grounding shifted my focus from just water connections to electrical safety, which many DIYers overlook but is vital for warranty and personal safety.
- My experience taught me that regular inspections and proper documentation of maintenance actions bolster warranty claims and prevent overlooked issues that could cause costly damages.
- Finally, investing in the right tools, like a digital torque wrench and precision pliers, transformed my DIY projects from guesswork into professional-grade repairs, safeguarding both my appliance and warranty coverage.
My Toolkit for Long-Lasting Dishwasher Performance
- TEKTON 1/4 Inch Drive Digital Torque Adapter: Precision matters, and this tool ensures I tighten connections to the exact manufacturer-specified torque, avoiding damage and ensuring safety.
- Klein Tools Needle-Nose Pliers: Durable, versatile, and perfect for reaching tight spaces to verify grounding connections or manipulate small components—trusting quality tools has made all the difference.
- Ultrasonic Cleaner: Keeping small parts free from mineral buildup extends their life and keeps the dishwasher functioning efficiently; a simple step that pays off over time.
- Smart Diagnostic Apps: Emerging technologies that can alert you to issues early, helping prevent major failures and warranty voiding mishaps—staying ahead reduces stress and expense.
Your Next Step in Smarter Dishwasher Maintenance
Don’t let small oversights undermine your efforts and warranties. Embrace precise tightening, regular inspections, and quality tools, and watch your dishwasher run smoothly for years. Each proactive step is an investment in safety, performance, and peace of mind—now it’s your turn. Have you ever overlooked a tiny part that caused big trouble? Share your story below and let’s learn together.
Related Posts
Why Your Drain Hose Needs a High-Loop to Prevent Sink Backflow
It was a typical Tuesday afternoon when I opened my…
The Drain Hose Length Rule Most Installers Ignore
It was a frustrating morning when my brand-new dishwasher refused…
The Correct Height for Your Dishwasher Air Gap
One day, during a kitchen remodel, I set out to…