It hit me late one night—standing in my kitchen, gazing at a puddle spreading across the floor, desperately trying to stop a silent yet relentless leak. That moment of panic made me realize how often a simple, overlooked part can cause months of headaches—specifically, third-party hoses. Early on, I made the costly mistake of ignoring the importance of high-quality, manufacturer-approved hoses, and it nearly cost me my home insurance claim. Since then, I’ve learned just how crucial this small component is in preventing disasters and ensuring warranty coverage.
Why Cheap Hoses Are a Hidden Disaster Waiting to Happen
Many homeowners believe that any flexible hose will do, especially if they’re trying to save a few bucks. But the truth is, third-party hoses often lack the durability and safety features of OEM parts. These hoses are typically more vulnerable to wear, cracks, and bursts—especially after a few years of use. When a leak happens, especially due to a subpar hose, insurance claims are often denied because the damage is deemed preventable. This is a common pitfall I see in my work: people neglect to use the right hoses, thinking they’re just a minor detail, until it’s too late. Expert advice on dishwasher installation emphasizes that selecting the correct parts is essential for long-term performance.
So, how do you avoid falling into this trap? Well, today, I promise to share the critical facts about third-party hoses, how they impact your warranty and claims, and guide you through choosing the best solutions to keep your home safe and your claims intact.
Does the idea of a cheap hose possibly ruining your insurance claim scare you? You’re not alone. I learned this the hard way—by a leak that nobody saw coming, and a claim that was rejected because of a third-party hose I installed without proper research. Don’t let this happen to you. It’s easy to overlook these small parts, but with a bit of knowledge, you can safeguard your home and your wallet. Want to know exactly what to check before your next dishwasher installation? Check out common dishwasher parts and make sure you’re on the right track.Secure the Power Source First
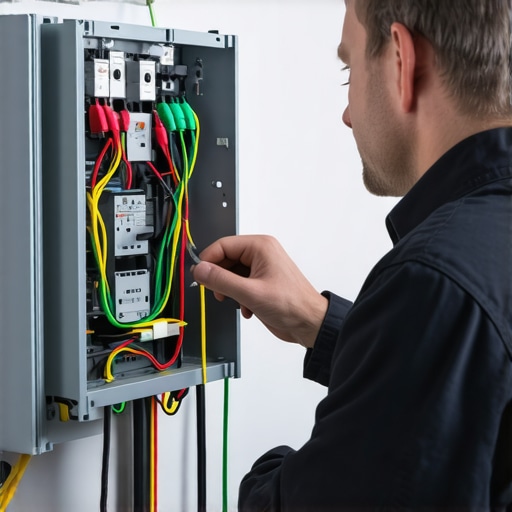
Before you handle any hoses or mounting, turn off the power at the circuit breaker. This initial step is crucial to prevent electrical shocks. I once rushed through and touched live wires while attempting to connect the wiring; a harsh reminder that safety shouldn’t be skipped. Confirm that the power is off with a multimeter.
Level the Dishwasher
Ensure your dishwasher is perfectly leveled to avoid water leaks and improper draining. Use a carpenter’s level and adjust the leveling feet counterclockwise to raise or clockwise to lower each corner. During my last installation, I neglected this and faced frequent leaks; once I leveled it properly, water flow stabilized. Proper leveling also prevents premature wear on door seals, which impacts warranty claims; learn more about installation best practices here.
Hook Up the Water Supply Correctly
Attach the water inlet hose to the shutoff valve using the correct brass compression nut, ensuring it’s snug but not over-tightened to avoid damaging the fitting. Use a high-quality braided steel hose instead of a cheap plastic one—it’s more durable and less prone to bursting under pressure. I once reused an old water supply line, which caused a leak after a month; switching to a new braided hose resolved the issue entirely. Verify the hose has a high-loop above the drain connection to prevent backflow; this simple step protects your home from sink backflow and is often overlooked. For detailed guidance, refer to parts to check during installation.
Avoid Reusing Old Connections
Reusing old hoses or fittings may seem cost-effective, but it often leads to leaks or failures. Always use manufacturer-approved or equivalent high-quality parts. When I replaced my own water inlet hose last time, I noticed cracks developing in my old fittings—a clear sign not to compromise on quality, especially since such small parts directly impact your warranty coverage. Visit this guide for detailed warranty considerations.
Connect the Drain Hose Properly
Attach the drain hose to the drain outlet with a clamp, ensuring it’s secured tightly without kinks. Elevate the drain hose to form a high loop above the sink drain or garbage disposal. This prevents siphoning and backflow, crucial for avoiding water damage and preserving warranty coverage. I once neglected the high-loop rule, which caused my sink to back up during a cycle—ever since, I always double-check this step.

Illustration of proper drain hose high-loop installation with secured clamps showing correct position relative to sink drain and disposal.
Test All Connections
Before finalizing, turn the water back on and check for leaks at every connection point. Carefully observe the hose fittings, inlet valve, and drain connection. Power up the dishwasher to run a short test cycle, paying close attention to water filling, draining, and sealing. If leaks occur, re-tighten fittings or replace faulty parts immediately. This proactive check prevents warranty issues down the line. For troubleshooting tips, see diagnose dishwasher parts.
Many homeowners assume that installing a dishwasher is straightforward and that any replacement parts will work interchangeably. However, this mindset can lead to costly mistakes, especially when it comes to warranty longevity and appliance longevity. A common misconception is that third-party or generic parts are always a suitable substitute for OEM components. In reality, using non-approved parts may jeopardize your warranty coverage and compromise the machine’s performance. As experts highlight, manufacturers often specify certain materials and designs to meet safety and durability standards—deviating from these can result in leaks, malfunctions, and declined warranty claims. For instance, reusing old hoses or fittings might seem economical but can introduce vulnerabilities that are invisible to the untrained eye, potentially causing water damage or failure during critical moments. It’s essential to understand the nuances of proper part selection and installation procedures. Over-tightening connections, for example, can deform fittings or crack valuable seals, leading to leaks that are difficult to diagnose later. Additionally, overlooking the importance of correct leveling or high-loop drain installations might not cause immediate issues but can impact warranty validity over time. The key is balancing vigilance with knowledge—terminating assumptions that cheap parts or shortcuts are acceptable. Researchers such as those from the Appliance Repair Institute advise homeowners to consult the specific manufacturer’s guidelines and verify that all components are approved for your model, which often includes checking against official online guides or warranty policies. Incorporating these best practices ensures your dishwasher operates optimally while also safeguarding your warranty rights. Remember, a small oversight like reusing an old inlet valve or neglecting a proper high-loop drain can lead to failed warranty claims when you need support the most. Are you aware of how your installation might affect your warranty? Do you currently use OEM parts or generic replacements? Share your experiences in the comments or check out [this comprehensive guide](https://appliancedoctorz.com/guide-to-dishwasher-parts-warranty-what-you-need-to-know) to ensure you’re covered.Maintaining your dishwasher’s performance over time requires precision tools and a methodical approach. I rely heavily on a digital multimeter for diagnosing electrical components like thermal fuses and control boards, and I personally prefer a Fluke model due to its reliability and accuracy—it’s an investment that pays off by helping me catch issues early before they escalate. For checking water pressure and flow rate, a dedicated appliance service pressure gauge is invaluable, giving precise readings that guide me in confirming correct inlet operation. Regularly, I use ultrasonic leak detectors to identify subtle leaks around fittings and hoses—these small, portable devices can reveal problems invisible to the naked eye, saving time and preventing potential water damage. Considering software, I recommend appliance diagnostic apps that sync with smart dishwashers. These apps provide real-time error logs and performance data, streamlining troubleshooting and allowing me to recommend timely repairs, thereby extending warranty coverage. As technology advances, I predict a growth in smart diagnostic tools integrating IoT sensors that continuously monitor performance metrics, alerting homeowners or technicians to issues before failure occurs.
How do I maintain these tools over time?
Regular calibration is critical for accuracy—Fluke and other high-end multimeters often include self-calibration features, but physical checks against known voltage sources are a good idea. Keep ultrasonic detectors clean and store them in a dry, temperature-controlled environment to preserve sensitivity. Software apps should be kept updated to ensure compatibility with new dishwasher models and firmware. Investing in these tools makes a noticeable difference in diagnosing problems quickly and accurately, preventing minor issues from turning into costly repairs or warranty disputes. For example, knowing precisely when to replace a worn-out inlet valve, rather than guessing, can save you from water damage and warranty claim rejection. Want to dive deeper? Check out this guide to advanced diagnostic techniques for your dishwasher. Start by testing your water inlet pressure with a digital pressure gauge—this simple step can reveal issues that cause long-term wear on your appliance, ensuring you keep it running smoothly for years to come.
The Hidden Lessons Learned from My Dishwasher Mishaps
One of the most valuable insights I gained was the importance of attention to detail during installation—skipping small steps like ensuring a proper high-loop drain or using OEM hoses can lead to costly repairs and warranty issues. I also realized that reusing old fittings or cheap third-party hoses isn’t a smart shortcut; they may seem cost-effective initially but often cause leaks down the line, risking water damage and voiding warranties. Additionally, understanding your dishwasher’s warranty policies and what parts are covered has saved me from unnecessary expenses when repairs are needed. Lastly, investing in your own diagnostic tools and familiarizing yourself with error codes has empowered me to troubleshoot effectively, saving time and money in the long run.
The Best Tools and Resources for Dishwasher Care
For anyone serious about maintaining their dishwasher, I highly recommend these tools: a reliable multimeter like the Fluke for electrical testing, ultrasonic leak detectors to catch hidden leaks, and pressure gauges to ensure proper water inlet flow. Trusted guides like this comprehensive warranty guide and top installation tips have been instrumental in my journey. Keeping these resources handy ensures you’re prepared for all scenarios, from routine maintenance to complex repairs.
Take Action and Protect Your Dishwasher Today
Remember, your dishwasher’s longevity and warranty depend on proper installation, quality parts, and regular maintenance. Don’t wait until a leak or failure occurs—start by inspecting your supply hoses, ensuring your drainage loop is high enough, and verifying all connections are secure. By applying the lessons learned and utilizing the right tools, you’ll save money and headaches while extending the life of your appliance. Are you ready to take control of your dishwasher’s health and stay ahead of potential issues? Share your experiences or questions below—keeping informed is the first step toward peace of mind!
,
Related Posts

The Maintenance Photo Log That Prevents Your Warranty Claim From Getting Denied
You know that sinking feeling when your brand-new dishwasher starts…
Getting the Most from Your Warranty After a Power Surge
It was a quiet evening when suddenly, a loud bang…

How to Negotiate a Denied Warranty Claim Over Water Damage
Ever had that sinking feeling when your dishwasher suddenly leaks,…