I remember the moment vividly. I was in a rush to get dinner on the table, loaded my dishwasher, pressed start, and watched in dismay as — halfway through that promising cycle — it came to an abrupt halt. Just like that, my spotless dinnerware was still soaking in soapy water. That frustrating, helpless feeling? Yeah, I’ve been there more times than I can count.
When Your Dishwasher Treats You to Mere Fragments of Cleanliness
Temporarily, it seems like a glitch, something minor. But soon enough, it becomes a recurring nightmare. Your cycle randomly stops, leaving you scratching your head, wondering if ‘it just happens sometimes.’ Well, I’m here to tell you — it’s not just bad luck. There’s often a reason behind those sudden halts, and understanding why can save you a lot of stress, money, and those dreaded*mid-cycle reset buttons*.
Is It Really Worth the Hassle? The Common Worries You Might Have
At first, I made the mistake of assuming these interruptions were just minor glitches, maybe a one-time thing. Turns out, ignoring early signs can lead to bigger problems — like expensive repairs or ruined dishware. Plus, if you’re like me, you rely heavily on your dishwasher. When it suddenly stops, it throws off your entire schedule, and I know I’m not alone in feeling that pinch. That’s why I decided to investigate — and I want to share what I found.
Research shows that many issues stem from simple faults with parts that can often be fixed or replaced. A common culprit? Bad sensors or faulty wiring, which can be diagnosed and sometimes fixed with basic knowledge. And surprisingly, many of these problems are preventable — especially if you know what warnings to look out for and how to approach maintenance correctly. For example, did you know that hard water can damage key components over time? That’s just one hidden trap I learned about the hard way, early in my DIY journey. You can read more about how to troubleshoot dishwasher parts during warranty periods here.
But before diving into the nuts and bolts, it’s essential to grasp the *why* — because once you understand the root causes, fixing those random stops becomes much simpler. Stay with me as I walk you through my personal experience, combined with practical tips to keep your dishwasher running smoothly and avoid being left with soggy plates again.
Step 1: Inspect the Power Supply and Control Panel
Start by ensuring your dishwasher is properly plugged in and the circuit breaker hasn’t tripped. Sometimes, simple power interruptions cause cycles to stop mid-way. Confirm the door latch is securely closed; a faulty latch can prevent operation. I once found my dishwasher’s cycle halted because the door wasn’t fully latched, which was evident only after I peeked behind the door panel. If these look fine, proceed to test the control panel for unresponsive buttons or error codes. Resetting the control board by unplugging the unit for five minutes can sometimes clear glitches.
Step 2: Check for Sensor Malfunctions and Wiring Issues
Sensory components like turbidity sensors monitor water cleanliness and ensure cycle completion. If these sensors are dirty or faulty, they might halt the cycle prematurely. I once cleaned mine with a soft cloth, gently wiping the lens (being careful not to scratch it), and that restored normal operation. Additionally, inspect wiring connections for corrosion or loose contacts, especially if your cycle randomly stops. Bad wiring can interrupt signals between components, leading to unexpected halts. For detailed troubleshooting, review how to diagnose dishwasher parts during warranty periods here.
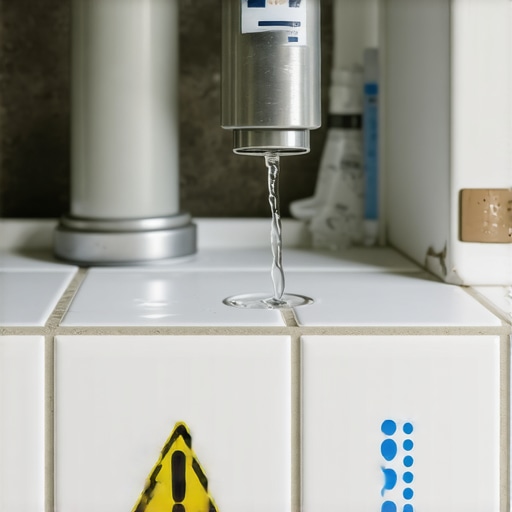
Step 3: Evaluate the Water Intake System
A malfunctioning inlet valve or clogged filter can cause water flow issues, prompting the cycle to stop. Check the inlet valve for debris or mineral buildup, especially if you have hard water, which can damage sensors over time. Remove the filter and clean it thoroughly with vinegar to dissolve mineral deposits. Over time, sediment buildup might mimic sensor issues and force the cycle to halt unexpectedly. Replacing worn inlet valves can be straightforward if you follow a DIY installation guide like this step-by-step. Cleaning or replacing this part can restart your dishwasher’s performance.
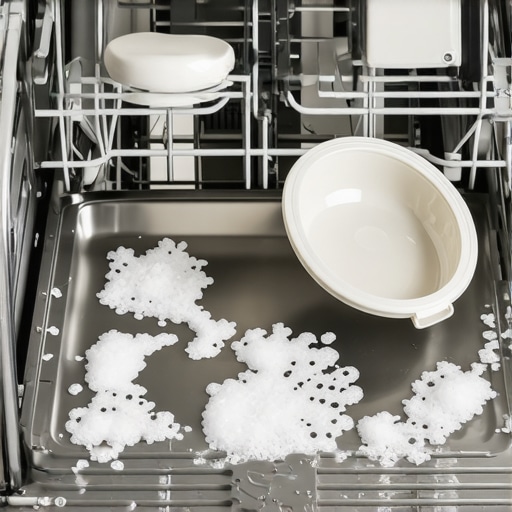
Step 4: Examine the Drainage System
Clogged or faulty drain pumps can cause water accumulation, triggering safety features that stop operation. Disconnect the power, open the panel, and inspect the drain hose for kinks or obstructions. I once used a flexible brush to clear out debris from the drain pump, which had been causing error codes and halts. Confirm the drain hose is installed with a high loop to prevent backflow, a crucial step in effective drainage here. If cleaning doesn’t work, replacing the drain pump might be necessary, and knowing which parts are most reliable can save time and money here.
Step 5: Review for Mechanical Obstructions and Wear
Mechanical parts like springs, door seals, and the spray arm can cause cycles to stop if damaged. For example, a broken door spring may prevent the door from sealing tightly, triggering an error. Check the door springs for fatigue and replace if necessary. Similarly, inspect the spray arm for clogs or cracks. I replaced a faulty spray arm after noticing uneven water flow, which caused incomplete washes and cycle halts. Regularly testing your door springs for metal fatigue and ensuring proper sealing can prevent sudden stops here. Mechanical issues are often identified with straightforward visual inspections and targeted replacements, keeping your dishwasher running smoothly.Many homeowners believe that installing a dishwasher is a straightforward task, or that warranty coverage will handle any repairs without fuss. However, these assumptions can lead to costly mistakes and missed opportunities for long-term performance. One prevalent myth is that a simple DIY installation guarantees warranty validity; in reality, improper setup can void your warranty, making future repairs more expensive. According to experts, **proper installation involves precise leveling, secure connections, and adherence to local plumbing codes**, which you can verify by reviewing this kitchen prep guide.
How do I maintain my dishwasher over time? Discover the right tools and methods to keep your appliance running smoothly for years to come.
Maintaining your dishwasher isn’t just about occasional cleaning; it requires the right equipment and a systematic approach. Personally, I rely on a combination of high-quality multimeters, specialized cleaning brushes, and diagnostic software to ensure my dishwasher stays in top shape. Using a digital multimeter helps me check electrical continuity and detect faulty sensors or control boards early. I prefer models like the Fluke 117 because of their durability and accuracy, which is crucial when diagnosing wiring issues or verifying circuit integrity.
Aside from electrical diagnostics, I use soft-bristled brushes designed specifically for appliance maintenance to clean sensors, filters, and spray arms without risking scratches. Regular cleaning of components like the turbidity sensor can prevent false halts during cycles. For more complex diagnostics, I turn to manufacturer-specific service diagnostic tools when available, which can be connected via USB or Bluetooth, depending on your model. These tools provide insights into error codes and real-time data, helping me identify problems before they escalate.
In the future, I predict that smart diagnostic apps connected to dishwasher systems will become standard, enabling owners to troubleshoot issues via their smartphones. Already, some models offer remote diagnostics, but broader integration is on the horizon. This shift will make regular maintenance more accessible to non-professionals, reducing breakdowns and extending the lifespan of appliances.
Getting the most out of your maintenance routine requires the right mindset and equipment. Here’s a quick tip: invest in a high-quality multimeter and learn how to interpret its readings. It’s an inexpensive yet powerful tool that can save you hundreds by catching issues early. For detailed guidance on diagnosing electrical components, check out this resource and start troubleshooting like a pro. Remember, consistent maintenance with the right tools not only prolongs your dishwasher’s life but also ensures optimal performance during warranty periods, which is vital for long-term peace of mind.
If you’re ready to take your DIY maintenance to the next level, try testing your control board with a multimeter tonight—this simple step can reveal hidden issues before they cause costly repairs. Proper tool use paired with regular upkeep guarantees your appliance remains a reliable workhorse in your kitchen for years.
The Hardest Lesson I Learned About Installation, Warranty, and Dishwasher Parts
One of my biggest surprises was realizing that a single overlooked detail—like improper leveling or using incompatible parts—could void an entire warranty and lead to costly repairs. It taught me that paying attention to every step during installation isn’t just about fitting things together; it’s about protecting your investments and ensuring longevity.
3 Myths About Installation, Warranty, and Dishwasher Parts That Held Me Back
Believing that DIY is always cheaper or that warranty covers all repairs is a common mistake. These misconceptions can cause frustration when issues arise, but understanding the actual scope of coverage and proper installation techniques empowers you to make smarter decisions and avoid unnecessary costs.
What Experts Won’t Tell You About Installation, Warranty, and Dishwasher Parts
Many professionals keep quiet about the importance of documentation—like photos and detailed records—when claiming warranty service. Having clear evidence of proper installation and maintenance can be the difference between a smooth warranty claim and a denied one. This behind-the-scenes insight can save you from potential headaches.
My Essential Toolkit for Maintenance and Troubleshooting
Equipping myself with a good multimeter, precision screwdrivers, and cleaning brushes has transformed my ability to diagnose and fix issues early. I trust tools like the Fluke 117 because their durability and accuracy give me peace of mind, allowing me to identify problems before they become costly repairs.
Where to Go from Here
If you’re serious about extending your dishwasher’s lifespan and maximizing your warranty benefits, investing in the right tools and knowledge is crucial. Regular inspections, proper part selection, and keeping detailed records can make all the difference. For expert advice on troubleshooting and part selection, check out this resource.
Seize the Moment and Take Control of Your Dishwasher’s Future
Empower yourself with knowledge, the right tools, and a proactive attitude. Your dishwasher is a vital part of your kitchen, and caring for it diligently ensures smooth operation for years to come. Don’t wait for a breakdown—start your maintenance routine today and enjoy the peace of mind that comes with being prepared.
Have you ever encountered a surprise warranty denial or struggled with improper installation? Share your experience below or ask questions—your journey to hassle-free dishwasher management begins now!
Related Posts
How to Identify a Leaking Inlet Valve Before It Ruins Your Floor
It was a quiet Sunday morning when I first noticed…
Why Your Dishwasher Still Smells After a Deep Clean
It was late on a weekend evening when I finally…
Why a Damp Subfloor Is the First Sign of a Slow Leak
It was a morning just like any other when I…