
If you’ve ever run your dishwasher expecting sparkling clean dishes only to open it and find your detergent pod still sitting intact, you know the frustration. I remember the first time I experienced this mystery—my shiny new dishwasher completed its cycle perfectly, but my detergent pod looked untouched, almost as if it had been ignored. I wondered if I had wasted my money on those fancy pods or if my machine was malfunctioning.
The Surprising Reality Behind Whole Detergent Pods After a Wash
This seemingly perplexing phenomenon isn’t a sign of a broken dishwasher; in fact, it’s more common than you’d think. It often comes down to how your dishwasher’s components and cycle settings interact with the detergent. Over the years, I’ve learned that several factors influence whether the pod dissolves completely or not, and understanding these can save you money and fuss.
Have You Faced This Problem Too?
Many dishwashers leave detergent pods whole after a cycle—so much so that I decided to dig deeper into the causes. If this has happened to you, you’re not alone. Sometimes, it’s just a matter of a simple adjustment, but other times, it hints at a maintenance or installation issue. According to appliance experts, improper installation or worn-out parts can prevent your dishwasher from heating water to the optimal temperature, which is critical for dissolving pods effectively. In fact, the U.S. Department of Energy states that proper water temperature is essential for efficient dishwashing and detergent activation (source).
Early in my experience, I made the mistake of assuming the detergent was expired or defective. But after some tinkering and learning about the parts involved—like the heater element and spray arms—I realized that proper maintenance and correct installation play a pivotal role in detergent dissolution. If your dishwasher isn’t heating correctly or if the spray arms aren’t distributing water properly, your pod may not dissolve, leaving you with a stubborn block instead of clean dishes. Understanding these parts can make a real difference.
In the next sections, I’ll guide you through practical steps to troubleshoot and resolve this issue—so you can enjoy spotless dishes without the hassle of stubborn detergent pods. Ready to discover what’s really going on inside your dishwasher?
Check the Water Temperature Immediately
Start by verifying your dishwasher heats water to at least 120°F (49°C). A simple way is to run a cycle without dishes and use a thermometer to check the incoming water if accessible. I once confidently set my dishwasher during a busy morning, only to discover the water was barely warm, causing the pod to stay intact. Adjust your water heater if necessary, or ensure your dishwasher’s heating element functions properly. For troubleshooting parts like the heater or thermostat, consult this guide.
Replace Faulty Heating Elements for Better Results
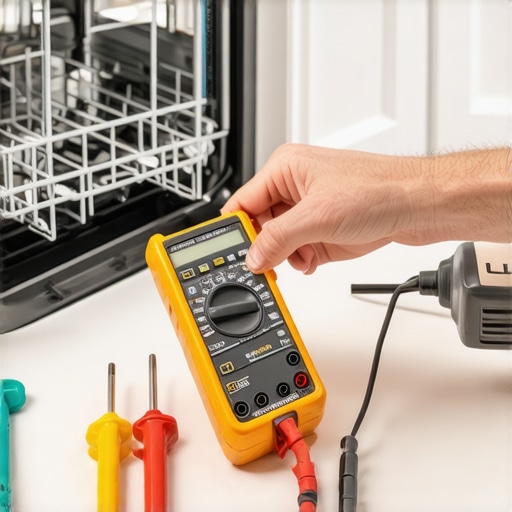
If you find your water isn’t reaching the required temperature, inspect the heating element with a multimeter. A broken element is like a toaster with a burnt fuse—the heat won’t reach the water, leading to undissolved detergent. For detailed replacement steps, see this resource. Remember, a malfunctioning heater not only stunts detergent dissolution but also hampers sanitization and drying.
Inspect and Clean Spray Arms Thoroughly
Clogged spray arms are a common culprit. Remove them and use a small brush and running water to clear debris, ensuring water jets hit every corner. I once noticed a spray arm clogged with mineral deposits; after cleaning, my dishes came out spotless, and detergent dissolved faster. For specific techniques, visit this guide. Proper spray arm function guarantees water reaches all surfaces, dissolving the pod effectively.
Flush Out Hard Water Deposits
Hard water can leave mineral buildup inside your dishwasher, especially in spray arms and nozzles. Run a cycle with a descaling agent or white vinegar, focusing on areas where water flow seems sluggish. Use a toothbrush to scrub off deposits after soaking. I did this one weekend and was surprised how much residue came out, improving water flow and pod dissolution. For more ideas, see this article. Keeping mineral build-up in check prevents blockage and ensures hot water gets where it needs to go.
Review and Optimize Dishwasher Installation
An improper installation can leave your dishwasher struggling to heat and spray effectively. Check that your unit is level with a spirit level; an uneven machine can hinder water circulation and heating. Also, inspect the inlet hose and drain setup; ensure there are no kinks or clogs, which can impair water flow and temperature. I once noticed my dishwasher was slightly tilted, leading to inconsistent wash results. After re-leveling, my detergent dissolved completely, and cleaning improved significantly. For detailed installation steps, explore this DIY guide. Proper setup isn’t just about fitting it in; it’s about ensuring optimal performance.
Test Your Detergent for Compatibility
If all hardware looks good, examine your detergent pods. Some formulations might not dissolve well in certain water conditions or with specific dishwasher models. Switch to a different brand or type—powder or gel—to test improvements. I switched brands after my pods repeatedly remained intact, and my dishes became cleaner. Note that eco-friendly or phosphate-free detergents can sometimes take longer to dissolve; adjusting cycle time and water temperature can help. For insights on selecting the right parts and detergents, see this article. Compatibility and quality of detergent are key for seamless dissolution.
Review Cycle Settings and Run Additional Washes if Needed
Ensure your wash cycle includes a hot water or extended rinse option. Some quick or eco cycles might not heat water sufficiently. During my troubleshooting, I selected a heavy-duty cycle with extra heat and rinse phases, which dissolved the pod thoroughly. Don’t hesitate to run an extra rinse if dishes appear unclean or the detergent remains whole. Selecting the correct cycle settings is a simple, effective way to improve dissolution and cleaning outcomes. Refer to your machine’s manual or this resource for cycle optimization tips.Many homeowners assume that once a dishwasher is installed correctly and under warranty, they’ve covered all bases for long-term performance. However, even seasoned DIY enthusiasts often overlook subtle nuances that can affect their appliance’s lifespan and efficiency. One common misconception is that all parts and installations are interchangeable or universally compatible—nothing could be further from the truth. For example, using generic replacement parts instead of specified factory-approved components can void your warranty and lead to premature failure, as highlighted in expert analyses (source).
A trap many fall into is believing that it’s sufficient to focus only on visible aspects like leveling the unit. Yet, hidden factors, such as the water inlet valve’s compatibility, can cause cycles to underperform or the warranty to be invalidated if not correctly diagnosed (see here). The misconception that warranties cover all sorts of damages without proper maintenance can also lead to costly expenses. It’s critical to understand which parts and damages are actually covered, and when an expert diagnosis becomes necessary (more info).
Beware of the ‘set-it-and-forget-it’ mentality—routine inspections of crucial components like spray arms, filters, and door gaskets are essential. Neglecting these can lead to mineral buildup, causing parts to wear faster, which isn’t always obvious until failure occurs. An appliance expert once explained that many issues flagged during warranty reviews stem from overlooked maintenance (read more).
Now, a question that even advanced users grapple with: How do I determine the right parts for my specific dishwasher model without risking compatibility issues? Making the mistake of purchasing mismatched or third-party parts can compromise the warranty and reduce performance. The best approach is to consult manufacturer-specific guides or certified professionals to ensure parts meet the exact standards. For detailed tips on selecting appropriate parts, visit this resource.

Maintaining your dishwasher with the right tools and practices not only extends its lifespan but also ensures optimal cleaning results over the long term. A few specialized instruments and systematic routines can make all the difference in preventing costly repairs and warranty issues.
Invest in a Reliable Multimeter
One of my go-to tools is a high-quality digital multimeter. I use it constantly to test heating elements, thermostats, and wiring connections. When diagnosing temperature-related issues—like undissolved detergent pods—checking the heater’s resistance with a multimeter helps identify faulty components quickly. For consistency and precision, I recommend the Fluke 115 or similar models. They’re accurate, durable, and essential for any homeowner serious about appliance maintenance.
Use an Ultrasonic Cleaner for Parts
Mineral deposits and grime can clog spray arms and filters, impairing water flow and heat transfer. An ultrasonic cleaner is a game-changer: I submerge spray arms and small parts in a solution of white vinegar and water, then run the cleaner for a few minutes. It effectively loosens stubborn deposits without manual scrubbing, saving time and preventing damage. This method can restore parts to near-original condition, ensuring better water coverage and temperature consistency.
Opt for Diagnostic Software and Apps
Many modern dishwashers come with built-in diagnostics or Wi-Fi connectivity. I use manufacturer apps and third-party diagnostic tools compatible with smart appliances to monitor cycle performance and identify issues remotely. These apps often alert you to maintenance needs or component failures before they escalate. As smart home integration evolves, staying updated with the latest software versions and features will be crucial for comprehensive maintenance.
Prioritize Routine Checks of Critical Components
Regularly inspecting water inlet filters, door gaskets, and spray arms with simple hand tools prevents buildup and wear. I schedule bi-annual checks using basic screwdrivers and brushes. Keeping parts clean and tight reduces strain on the heating system and minimizes warranty claim risks. For detailed guidance, exploring expert advice on this resource can help identify what specific parts to focus on based on your model.
Future Trends in Dishwasher Maintenance
The future of appliance upkeep is heading towards smarter diagnostics and predictive maintenance. Manufacturers are increasingly integrating AI-driven sensors that monitor performance in real-time, alerting homeowners to issues well before failure occurs. Embracing these innovations now can save time and money down the line, and staying involved with software updates will ensure you benefit from the latest advancements.
How do I maintain my dishwasher over time?
Adopting a regular maintenance routine using precision tools like multimeters and ultrasonic cleaners, combined with smart diagnostics, will keep your dishwasher operating efficiently for years. Periodic inspections, timely part replacements, and software updates form the backbone of long-term performance and warranty compliance. For instance, verifying the wiring integrity and temperature sensor functionality can prevent unexpected breakdowns, safeguarding your warranty coverage.
Try implementing a bi-annual diagnostic check using your multimeter and ultrasonic cleaner. This proactive approach minimizes the risk of encountering undissolved detergent issues or component failures, ensuring your investment continues to serve you reliably.
Over the years, I’ve realized that truly mastering your dishwasher isn’t just about following the manual—it’s about understanding the nuanced interplay of installation, maintenance, and smart troubleshooting. These insights have turned routine chores into more efficient, reliable experiences, saving me money and headaches along the way.
Lessons That Changed My Approach to Dishwasher Care
- Never underestimate installation accuracy: A level, properly connected dishwasher prevents uneven wear and ensures optimal performance. I once skipped this step and paid the price with lingering detergent residue despite regular cleaning.
- Prioritize water temperature and cycle settings: Many issues stem from inadequate heating. Upgrading my thermostat and selecting cycles with extended rinse phases made a noticeable difference in detergent dissolution and cleaning quality.
- Stay vigilant about component health: Regularly inspecting spray arms and filters prevents buildup. I learned that a quick ultrasonic cleaning can restore efficiency much faster than manual scrubbing.
- Use diagnostic tools proactively: A multimeter is invaluable for early detection of heater or wiring issues, reducing unexpected breakdowns and protecting warranty claims.
- Choose compatible, high-quality parts: Using OEM parts or verified equivalents maintains warranty coverage and performance. My DIY upgrades only succeeded after consulting trusted resources to avoid mismatched components.
Tools and Resources That Keep My Dishwasher Running Smoothly
- Understanding dishwasher parts — This guide helped me identify critical components and perform effective maintenance.
- Installation checklists — Ensuring my setup was perfect minimized future issues.
- DIY troubleshooting tips — Quick diagnostics save time and protect my warranty.
- Part replacement tutorials — Clear instructions empower confident repairs.
Empower Your Dishwasher Journey Today
Taking control of your dishwasher’s health isn’t just about fixing problems—it’s about becoming an informed owner who can prevent issues before they start. With the right knowledge and tools, you can extend your appliance’s lifespan, preserve your warranty, and enjoy spotless results every time.
Have you ever faced a tricky repair or installation challenge? Share your experiences below and let’s learn together!
Related Posts
Why Your Dishwasher Door Won’t Latch After a Floor Renovation
If you've recently finished a floor renovation and suddenly find…
The Silent Leak: Why Your Base Pan Is Full of Water
I remember the first time I opened my dishwasher after…
The $10 Drain Solenoid That Often Mimics a Dead Pump
Ever opened my dishwasher and found that frustratingly silent machine…