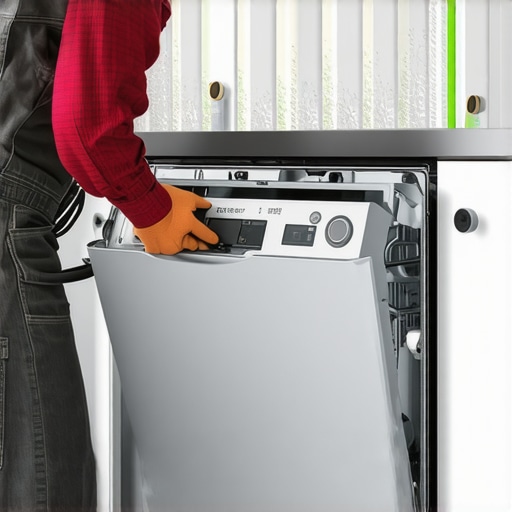
Last month, I was all set for my usual Sunday cleanup, eager to tackle a load of dirty dishes. But then, boom—the circuit breaker tripped just as my dishwasher started its cycle. Frustration? You bet. And that was the moment I realized I’d missed a pretty important detail when installing our kitchen outlet. It wasn’t just a minor oversight; it was the beginning of ongoing problems that could have been avoided.
The Hidden Power of a Dedicated 20-Amp Circuit for Your Dishwasher
Ever wonder why some dishwashers seem to run smoothly while others struggle or cause electrical issues? The answer often lies in the electrical setup behind your unit. My lightbulb moment was understanding that a standard household outlet—usually rated for 15 amps—is simply not enough to handle the power load of modern dishwashers, especially if they have advanced features or larger capacities. Investing in a dedicated 20-amp circuit isn’t just a technical upgrade; it’s a practical step toward long-term appliance health and safety. When I finally installed a dedicated circuit, I noticed less flickering, fewer trips, and a more reliable performance overall. For detailed guidance on the benefits of proper wiring, check out this helpful resource.
Facing Skepticism: Is a 20-Amp Circuit Really Necessary?
Here’s where I made my first mistake—assuming that a standard outlet could suffice if I used a surge protector. Big nope. That’s akin to trying to power a jet with a lawn mower engine. The electrical draw of dishwashers can spike, especially during heating cycles, making it crucial to follow manufacturer recommendations. Early on, I overlooked this and paid the price with intermittent cycles and eventual component wear. Trust me; ensuring your dishwasher has its own proper circuit is a small investment that pays off in appliance longevity and peace of mind. If you’re curious about the common mistakes people make during installation, see these expert tips.
End of this section. Next, we’ll dive into how to properly set up this dedicated circuit—step-by-step—to prevent future headaches and keep your dishwasher running at its best.
Prepare Your Workspace and Gather Your Tools
Before you start the installation, clear the area around your kitchen outlet. Turn off the main power supply at the circuit breaker to ensure safety. Gather essential tools: a voltage tester, wire stripper, screwdrivers, a circuit tester, and a new 20-amp breaker with appropriate wiring. Think of this as preparing your toolkit before embarking on any repair—missing a tool can turn a smooth job into a frustrating mess.
Switch Off Power and Verify
Using the voltage tester, double-check that the outlet has no power. This step is crucial; working live can cause electric shock or damage your components. Imagine testing a water pipe with a leak: you want to confirm it’s safe to work on. Once confirmed, proceed to remove the outlet cover carefully.
Remove the Existing Outlet and Assess Wiring
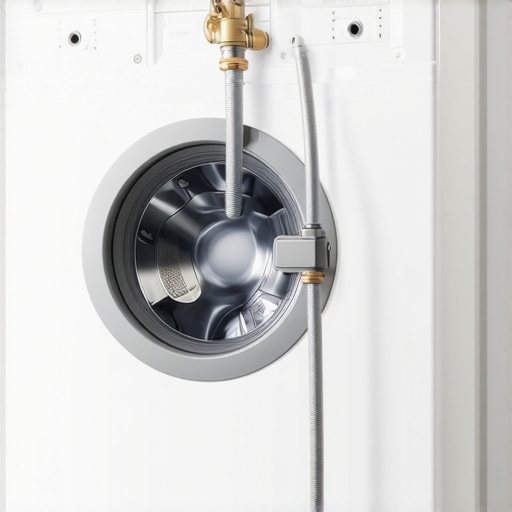
Unscrew and disconnect the existing outlet. Examine the wiring; if you see a single black (hot) wire, white (neutral), and green or bare copper (ground), note their connections. This is akin to reading a map—understanding the current setup avoids misplacing connections later. If wires are loose or damaged, replace them with new, UL-listed wiring from a supplier like top-quality parts.
Estimate the Circuit Length and Prepare the Wiring
Measure the distance from the main panel to the outlet location. Use heavy-gauge wire—typically 12-gauge for 20 amps—to handle the load. Cutting and stripping the wire properly is vital; leave about 6 inches of slack at the panel for connections. Visualize this as planning a road trip—routes, distances, and supplies matter.
Install the New Breaker and Circuit Wiring
At the main panel, remove the panel cover, and locate the vacant slot for your new 20-amp breaker. Attach the black (hot) wire to the breaker terminal, the white (neutral) wire to the neutral bus bar, and the ground wire to the grounding bus or screw. Tighten all connections securely—think of it as tightening nuts on plumbing, where a loose connection causes leaks.

Double-Check Connections
Use the circuit tester to verify the wiring is correct. Turn the breaker on briefly—then turn it off again—and make sure no sparks or unusual contacts occur. This is similar to test-driving a car after repairs; ensure everything runs smoothly before fully committing.
Connect the Outlet to the Circuit
Mount the outlet box securely to the wall, ensuring it aligns with your kitchen surface. Connect the wires: hot to brass screw, neutral to silver screw, and ground to green screw. Use wire connectors if necessary for tighter, safer joints. When done, replace the outlet cover plate.
Power the breaker back on and test the outlet with a multimeter—ideally achieving around 120V. Think of this final check as your eye test before driving: it confirms that all signals are clear and safe to proceed.
Test the Installation with Your Dishwasher
Plug your dishwasher into the new outlet and run a short cycle. Observe performance: no flickering, trips, or error messages. This practical test ensures the circuit is capable of handling the load safely. If issues arise, revisit your wiring, consult the contact support, or reschedule your professional installation.
Remember, a properly installed dedicated circuit helps protect your appliance warranty and prevents long-term electrical problems. For the best maintenance practices, explore tips on preparing your kitchen for installation and keep your dishwasher running at peak performance.
Many homeowners assume that installing a dishwasher is a straightforward task and overlook the intricate nuances that can impact long-term performance and warranty coverage. Let’s dig deeper into what most people get wrong, even among seasoned DIYers, and how to avoid costly pitfalls. A prevalent myth is that using generic parts or shortcuts during installation won’t affect the appliance’s longevity or warranty. In reality, selecting the right parts and following manufacturer guidelines is crucial. For example, choosing a subpar water inlet valve not only risks leaks but can also invalidate your warranty if it leads to damage. Check out this guide on top dishwasher parts to make informed choices.
Why Skimping on Proper Wiring Can Cost You
Many assume that extension cords or shared circuits are acceptable for dishwasher installation, but this is false. Appliances like dishwashers require dedicated 20-amp circuits to prevent electrical issues and safeguard your warranty. An improper setup increases risks such as electrical shorts, and in the event of damage, it complicates warranty claims. Remember, the warranty coverage often hinges on proper installation. Always verify wiring meets the specifications; otherwise, you risk voiding your warranty and facing costly repairs.
Myth: All Parts Are Equal for Replacement
Many assume that any dishwasher part will do, but this is false. Using generic replacements, especially for critical components like pumps or control boards, can lead to premature failure and warranty denial. The key lies in selecting OEM or manufacturer-approved parts, which are designed for compatibility and durability. For detailed guidance, see this resource on warranty exclusions. Furthermore, neglecting periodic maintenance on parts like door gaskets or filters can cause water leaks or cycle failures—issues often mistaken for manufacturing defects but actually resulting from neglect or improper part selection.
How Does Misunderstanding Whirlpool vs. Bosch Parts Affect Your Warranty?
Different brands and models have unique parts and specifications. Using incompatible parts—say, fitting a Whirlpool pump into a Bosch dishwasher—can cause damage and void your warranty. Understanding the specific requirements and compatibility is critical. Consulting with a professional or referencing brand-specific guides, such as these detailed tutorials, ensures you’re making the right choices.
Finally, always document your installation process with photos and receipts. This evidence becomes invaluable if you need to file a warranty claim or dispute a denial. Have you ever fallen into this trap? Let me know in the comments. Proper awareness and adherence to these nuances can save you time, money, and frustration in the long run.
Invest in Quality Diagnostic Tools
To ensure your dishwasher remains in top shape, I rely on a high-quality multimeter from Fluke. This device allows me to quickly test electrical connections, thermal fuses, and control boards with precision. Its durability and accuracy make it a staple in my toolkit, giving me confidence that the electrical systems are functioning correctly after repairs. For more comprehensive diagnostics, a digital refrigerant leak detector can help identify issues that might affect related appliances but ensuring sharp electrical readings is my top priority. Regular testing with these tools helps catch problems early, preventing costly repairs down the line. As technology advances, I predict the integration of smart sensors into diagnostic tools will become standard, offering real-time data and predictive maintenance alerts—making appliance care even more proactive.
Keep Spare Parts on Hand for Quick Repairs
Having a few essential parts readily available can drastically reduce downtime. I always keep OEM water inlet valves, door latches, and filters in my toolbox because they tend to fail without warning. When a control board starts showing warning signs, replacing it promptly can preserve your warranty coverage—it’s vital to consult this guide to understand which parts are most critical and how they influence performance. By maintaining a well-stocked supply of these components, I can perform quick replacements during routine maintenance or unexpected failures, keeping my dishwasher reliably operational for years.
Implement Routine Maintenance Routines
Scheduling regular inspections and cleanings is key. I recommend cleaning the filter and spray arms monthly to prevent blockages that can impair washing quality. Using a vinegar soak every six months helps remove mineral deposits, especially if you have hard water—just ensure you’re following proper procedures to avoid damaging seals, as explained in this article. Additionally, inspecting door seals and gaskets periodically prevents leaks that can damage cabinetry and void warranties. Setting reminders on your digital calendar for these tasks ensures you don’t skip out on vital upkeep. Over time, these small efforts add up, extending the life of your appliance and maintaining excellent cleaning results.
Choose Tools That Grow With Your Skills
As you become more comfortable with DIY maintenance, investing in specialized tools can make your work easier. An ultrasonic cleaner can rapidly remove mineral buildup from small parts like spray nozzles, saving you time and effort. Similarly, a torque wrench ensures that fittings are neither too loose nor over-tightened—a common mistake during installations and repairs. I personally prefer a digital torque wrench for its precision, especially when working on sensitive components like control boards. In the future, I foresee automated diagnostic systems equipped with AI that can guide amateurs through troubleshooting steps, dramatically reducing error rates. Embracing these advanced tools today prepares you for that future, turning maintenance from a chore into a skill you master.
How do I maintain my dishwasher over time?
Consistent maintenance involves regular cleaning, timely replacement of worn parts, and utilizing the right diagnostic tools. Monitoring the condition of components like filters, seals, and spray arms prevents small issues from becoming major breakdowns. Using reliable equipment, such as calibrated multimeters and OEM parts, ensures repairs are effective and warranty-compliant. Remember to document your maintenance activities, including part replacements and inspections, as proof of proper care should warranty claims be necessary. Learning to troubleshoot with precise tools and following professional guidance can save you hundreds in repairs and extend your dishwasher’s lifespan. To keep these steps manageable, set up a maintenance schedule—monthly, quarterly, and annually—to stay on top of your appliance’s health. This proactive approach guarantees reliable performance and preserves your warranty coverage, minimizing unexpected expenses.
What I Didn’t Know About Circuit Needs Could Have Cost Me Big
One of my biggest lightbulb moments was realizing that skimping on dedicated wiring isn’t just a small oversight—it’s a recipe for ongoing trouble and potential warranty issues. Understanding that a dishwasher demands a dedicated 20-amp circuit, instead of relying on a shared or lower-rated outlet, was the step that truly transformed my approach. This lesson emphasizes that in complex appliance installations, attention to the smallest details makes all the difference.
The Tools That Gave Me Confidence During Installation
Investing in quality diagnostic and wiring tools, like a reliable multimeter and high-quality wire strippers, significantly boosted my confidence. Not only did they help me verify my connections, but they also prevented costly mistakes. For anyone thinking about DIY installation, I recommend checking out this detailed guide on essential tools that every homeowner should have.
My Secret for Long-Term Success in Dishwasher Maintenance
Regularly inspecting and maintaining your wiring setup, including the circuit breaker and outlet connections, is crucial. Keeping a spare set of OEM parts handy allows for quick fixes, minimizing downtime and safeguarding your warranty. The most valuable insight? Maintaining a well-documented installation—photos, receipts, and logs—can be the difference-maker when warranty claims and technical support come into play.
Sharing My Journey: From Mistakes to Mastery
Looking back, I realize that the biggest mistake I made was assuming more power meant more convenience. But the truth is, understanding the specific power requirements of my dishwasher and respecting the importance of dedicated wiring kept my unit running smoothly and maintained my peace of mind. If you’re about to start your own installation or upgrade, embrace these lessons, and remember that the effort you put in now will pay off in silent operation and longer appliance life.
Are you ready to re-evaluate your dishwasher wiring setup? Share your experiences or ask questions below—I love hearing how homeowners are taking control of their appliance care!
Related Posts

The Real Cost of Reusing an Old Water Supply Line
Have you ever reached behind your dishwasher, only to be…
Why Your Drain Hose High Loop Is Non-Negotiable for Safety
It was a frustrating Saturday when I discovered water pooling…
The Trick to Installing a Dishwasher in a Tight Cabinet Space
Have you ever stood in your kitchen, staring at that…