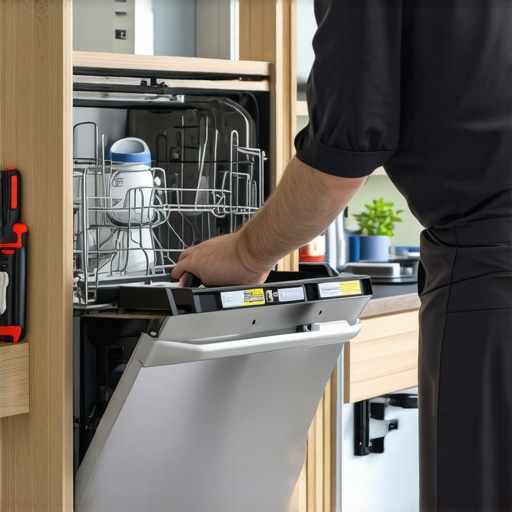
I’ll never forget the moment I discovered a tiny, overlooked detail that was costing me big time—my high-loop drain. It seemed like a small, insignificant part of the dishwasher setup at first. But as I learned more, I realized that ignoring this crucial component was compromising my sanitary cleaning and risking costly repairs. Have you ever experienced a stubborn odor, water backups, or mysterious leaks despite regular maintenance? If so, you’re not alone. Many homeowners underestimate how vital a properly installed high-loop drain truly is for maintaining a clean and safe kitchen environment.
The Hidden Power of a Well-Designed Drain Loop
Will Skipping or Misplacing Your Drain Loop Cause Problems?
Early in my DIY installation journey, I made a critical mistake—skipping the high-loop drain or installing it improperly. It seemed harmless at the time, but soon I noticed foul odors and wastewater seeping into my cabinets. That was my wake-up call. Proper drain height and loop design aren’t just bureaucratic requirements—they’re essential for sanitary health and preventing sewer gases from entering your home. If you’re curious about how to ensure your installation meets best practices, check out top tips for selecting the right parts for dishwasher installation. Building a correctly configured high-loop drain creates a barrier that keeps your dishwasher’s drain water isolated, reducing the risk of clogs and bacterial buildup.
Why a High-Loop Drain Makes All the Difference
Think of your dishwasher’s drain system like the guard at a nightclub—without the right height and placement, unwanted gases and humidity can sneak back into your kitchen, creating odors and potential health hazards. The high-loop drain works by elevating the drain hose above the sink’s flood level, effectively preventing backflow and sewer gases from entering. This simple yet powerful design element is an underrated hero in sanitary cleaning. Not only does it protect your health and home, but it also keeps your dishwasher functioning smoothly for longer. More insights on this can be found in understanding dishwasher warranty policies for peace of mind.
So, if you’ve faced persistent odors, water leaks, or cleaning issues, it might be time to revisit your drain setup. Is your current high-loop drain installed properly? If not, correcting this could be the most effective step toward a cleaner, safer kitchen environment. Ready to take the next step? Let’s look at how to ensure your drain loop is doing its job effectively—because a little attention now can save you big headaches later.
Position Your Drain Hose Properly
Start by measuring the height required for your high-loop drain—typically, this should be 18 inches ABOVE the bottom of the sink or waste arm. Use a tape measure and mark this height on your sink cabinet side or adjacent wall. When attaching the hose, ensure it loops up to this mark without kinking or sharp bends, which can impede water flow or cause leaks. I once overlooked this, and during testing, water spilled onto the floor due to a low loop, underscoring the importance of precise placement.
Secure the Loop to Prevent Displacement
Next, fasten the elevated section of the hose to the cabinet wall using screw-in clips or zip ties. This keeps the loop stable over time and prevents accidental dislodging—something I experienced when a loose loop caused odors to escape and sewer gases to enter the kitchen. Secure attachment ensures the loop maintains the correct height, avoiding backflow issues and odor problems.
Connect to the Drainage System Safely
Attach the hose end to the waste disposer inlet or sink drain tailpiece, ensuring a tight, leak-free fit. Use a clamp if necessary, and confirm that the connection is above the trap’s flood level to prevent siphoning. Don’t forget to verify that the hose runs unobstructed and is sloped downward to allow gravity-assisted drainage. During my install, I used a brass clamp for durability, and it proved vital in preventing leaks over years of use.
Double-Check Compliance and Compatibility
Consult the installation instructions for your specific dishwasher model to confirm the loop height and connection method. Variations exist, so always align with manufacturer recommendations. While I was initially confident, I learned that adhering strictly to these guidelines reduces warranty voiding risks and future repair costs. For further tips, see top tips for seamless dishwasher installation.
Test the Setup Rigorously
Once assembled, run a short cycle with the drain hose temporarily disassembled to check for leaks or backflow. Observe the initial drain and ensure water flows smoothly without gurgling or odors. During my trial run, a slight leak prompted me to tighten the clamp further, saving a costly call back from a technician later. Remember, thorough testing ensures your drain setup is sealed and functional before finalizing the installation.
Many homeowners and even some DIY enthusiasts assume that following the basic installation steps guarantees a trouble-free dishwasher operation. However, beneath these surface procedures lie nuanced pitfalls and misconceptions that can undermine your warranty coverage and long-term performance. Let’s dig deeper into some of these advanced mistakes and clarify what most people get wrong about installation, warranty, and parts. Contrary to popular belief, selecting the cheapest parts or rushing through the setup process often leads to costly repairs and voided warranties.
Are All Replacement Parts Equal When It Comes to Warranty Validity?
One common myth is that any part replacement will preserve your warranty coverage. In reality, warranties often specify that only manufacturer-approved parts and proper installation techniques qualify for coverage. Using generic or substandard components not only risks malfunction but can also void your warranty, especially if the part failure is traced back to inferior quality. To ensure longevity and warranty compliance, consult the comprehensive list of parts covered by warranty and choose wisely.
Another nuance often overlooked is the correct matching of parts to your specific dishwasher model. A mismatched water inlet valve or spray arm can cause imbalanced cycles or leaks, jeopardizing both performance and warranty eligibility. For expert guidance, consider reviewing tips on parts selection for maximizing warranty benefits.
Why the High-Loop Drain Must Be Precise for Peace of Mind
While most know the importance of a high-loop drain, many underestimate the criticality of its exact placement and secure attachment. An improperly installed loop—either too low or loosely fastened—can lead to sewer gas infiltration, foul odors, and eventual warranty disputes if leaks occur. Here’s the catch: even a slight miscalculation in height or failed fastening can cause siphoning or backflow issues, which are often blamed on the appliance rather than installation errors. Avoid this by following precise measurements—typically 18 inches above the sink drain—and securing the hose tightly to prevent displacement over time. For detailed guidance, visit installation best practices.
Advanced Mistake: Neglecting Electrical and Plumbing Compatibility
One overlooked trap concerns electrical circuits and plumbing connections that don’t match manufacturer specifications. Using an undersized circuit or an incorrect water supply line can lead to tripped breakers, inadequate water flow, or even electrical damage, which in turn voids warranties and leads to premature failure. The key isn’t just following generic guidelines but verifying compatibility—especially in complex kitchens with multiple appliances. Expert advice recommends compliant electrical and plumbing setup as a safeguard against these issues.
Furthermore, omitting surge protection for smart features or Wi-Fi modules can damage your dishwasher’s control system, resulting in costly repairs not covered under warranty. To avoid this, consult professional-level guidance like protective measures for electronic components.
Expert Tips to Prevent Installation Pitfalls
Let’s be honest—rushing or skipping detailed steps is a surefire way to cause installation errors. Always double-check your measurements, secure all connections properly, and utilize manufacturer-approved parts. Documenting your process with photos can also streamline warranty claims if issues arise. Remember, warranty validation often hinges on proper documentation and adherence to installation protocols. Have you ever fallen into this trap? Let me know in the comments, and stay vigilant—your kitchen’s health depends on it.
Tools I Recommend to Maintain Your Dishwasher Effectively
Maintaining a dishwasher over time requires precision and quality tools. I personally swear by a few specific instruments that make troubleshooting and routine checks straightforward. First, a high-quality digital multimeter is indispensable for diagnosing electrical issues, such as checking the thermal fuse or control board malfunctions. I prefer a multimeter with auto-ranging capabilities, like the Fluke 115, because it saves me time and ensures accuracy during complex diagnostics. Second, a set of precision screwdrivers—particularly Phillips and flat-head—are essential for removing panels or inspecting components without causing damage. I use the Wiha Precision Screwdriver Set, which offers durability and a perfect fit for small screws common in dishwasher assemblies.
Another underrated tool is a leak detection dye kit. This helps identify small leaks in seals or hoses that might not be visible to the naked eye. When combined with a white cloth and ultraviolet light, it can reveal hidden moisture and prevent larger issues down the line. Lastly, a multichannel hose clamp plier is a game-changer for securing or replacing drain and supply hoses quickly and without over-tightening. Over-tightening is a common mistake, and this tool helps prevent it, ensuring long-term sealing without damage.
How do I maintain my dishwasher over time?
Regular cleaning of filters and spray arms is vital for optimal performance. With the right tools like a toothbrush or a small flexible brush, you can remove debris from the filter mesh and spray nozzles. This prevents clogs and ensures even water distribution. Also, periodically check and tighten all identifiable fittings and connections—this small step can extend the lifespan of your appliance significantly. For an in-depth guide on effective parts replacement and warranty considerations, see understanding dishwasher warranty policies for peace of mind. Lastly, always use manufacturer-approved parts for repairs; this not only ensures compatibility but also preserves your warranty. You can consult the comprehensive list of parts covered by warranty to make informed choices.
Looking ahead, the trend is leaning towards smart maintenance systems that alert homeowners about potential issues before they escalate. Integrating Wi-Fi-enabled sensors with maintenance apps could revolutionize how we care for our dishwashers. Until then, incorporating reliable tools and routine checks keeps your machine performing efficiently today. Try tuning your spray arms with a small flexible brush or updating hose clamps using a hose clamp plier for immediate improvements—small upgrades often lead to significant long-term results.
What Sealed My Success and My Mistakes in Dishwasher Installation
- I once believed the drain height didn’t matter—then faced relentless odors and leaks that taught me the importance of precise measurements above the sink flood level.
- I realized that skipping the secure fastening of the high-loop drain can lead to embarrassing and costly sewer gas leaks, making me appreciate sturdy clips and zip ties.
- My biggest lightbulb moment was understanding that manufacturer-approved parts and meticulous documentation are the keys to preserving warranty coverage during repairs.
- Overestimating the simplicity of installation without deep research cost me time and money—now I know better with expert-backed tips on proper setup and troubleshooting.
Tools and Resources That Transformed My Dishwasher Maintenance Game
- A quality digital multimeter, like the Fluke 115, helps me diagnose electrical issues quickly, saving me from unnecessary service calls.
- The Wiha Precision Screwdriver Set allows effortless panel and component inspections without damaging tiny screws, keeping my dishwasher in top shape.
- A leak detection dye kit is invaluable for early leak identification, preventing water damage before it becomes costly.
- My go-to resource is the comprehensive list of dishwasher parts covered by warranty, guiding me in selecting reliable components that ensure longevity and compliance.
Keep Moving Forward: Your Dishwasher’s Future Awaits
Armed with insider knowledge and trusted tools, you’re ready to tackle your dishwasher installation and maintenance with confidence. Embrace these insights, and you’ll extend your appliance’s lifespan while safeguarding your warranty — a win-win for efficient, worry-free kitchen performance.
What aspect of dishwasher installation or warranty have you found most confusing or challenging? Share your experiences below and let’s learn together!
Related Posts

The One Mounting Bolt Mistake That Warps Modern Plastic Tubs
It was a morning like any other, or so I…
How to Align a Dishwasher Toe-Kick for a Flush Custom Finish
It was a moment of frustration that finally made me…
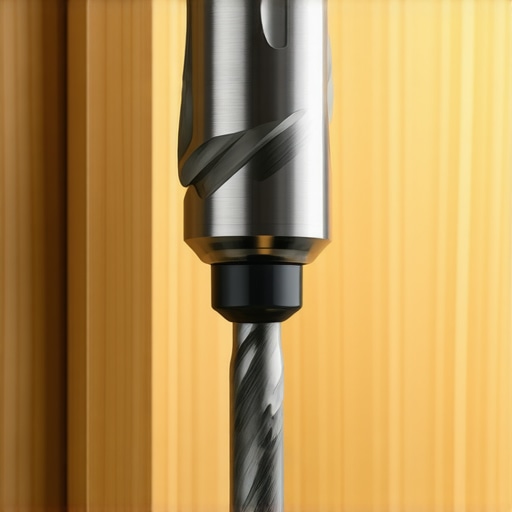
The Specific Drill Bit You Need for Cabinet Side-Mounting
I remember the first time I attempted to install a…