
I was staring at a half-inch puddle of water slowly creeping toward my expensive hardwood when it finally hit me. A few years back, I thought I was being clever by insisting my plumber reuse the old brass fittings from my 1990s Maytag for a shiny new upgrade. I mean, it’s brass, right? It lasts forever. Wrong. That ‘money-saving’ move ended up costing me a three-day industrial fan rental and a very awkward conversation with my insurance agent. Today, I want to help you avoid that same damp disaster by explaining exactly why your pro is shaking their head at your old hardware. We are going to look at the hidden physics of metal fatigue and the real reason your professional installer refused your old cord or those crusty fittings in the first place. My goal is to make sure your next kitchen upgrade doesn’t turn into an accidental indoor pool.
The Hidden Science of Why Old Brass Fails
It’s easy to look at a solid-feeling piece of metal and think it’s immortal. But brass is an alloy, and over years of being subjected to extreme heat cycles and the harsh chemicals found in modern detergents, it actually changes on a molecular level. I once tried to save twenty bucks by skipping out on the essential parts every dishwasher owner should know about, convinced my old ones were ‘good enough.’ They were not. According to the Copper Development Association, brass can be susceptible to ‘dezincification,’ a process where the zinc leaches out of the metal, leaving behind a brittle, porous sponge of copper that can snap under the slightest pressure. When a pro sees white, crusty buildup or green oxidation on your old fittings, they aren’t seeing ‘character’—they are seeing a ticking time bomb. They know that the critical parts to check when installing a dishwasher involve looking for these microscopic fractures that the naked eye usually misses.
Is the installer just trying to pad the bill?
It is the question everyone thinks but is often too polite to ask. You are already paying hundreds for the machine and the labor; adding another $30 for a ‘fitting kit’ feels like a classic retail squeeze. But here is the reality from someone who has been in the trenches: an installer’s reputation and their liability insurance depend entirely on that machine staying dry. If they reuse an old part and it fails six months later, you aren’t going to blame the 15-year-old brass; you are going to blame the person who touched it last. This is why the risks of skipping the professional installation receipt and using fresh parts are so closely linked to your peace of mind. Have you ever felt that sting of being told your ‘perfectly fine’ parts are junk? I’d love to hear if you thought it was a scam or if you were glad you made the switch. We are about to dive into how new compression seals differ from the old-school gaskets you might be used to.
Why Your Supply Line is the Kitchen’s Weakest Link
Think of your dishwasher’s water supply line as the main artery of your kitchen. It is under constant pressure, waiting for a single microscopic tear to let loose. When I first started DIY-ing my home repairs, I thought a hose was just a hose. I learned the hard way when a cheap, generic plastic line split while I was at work, leaving me to salvage a flooded kitchen after a supply line failure that cost thousands. A professional insists on new parts because they know that rubber gaskets inside old hoses take a ‘set’—they compress and harden into the shape of the old machine. When you move them to a new unit, they rarely reseal perfectly. To guarantee a dry floor, you need to look for the most durable braided steel hoses for long-term safety. These hoses have a stainless steel mesh that prevents the inner tubing from expanding and bursting under pressure spikes.
Pick the Braided Steel Over the Plastic Junk
If you are standing in the hardware aisle debating between the $10 plastic kit and the $25 braided steel version, put the plastic back. Stainless steel braiding acts like a suit of armor against the kinks and abrasions that happen when you slide the dishwasher into its tight cabinet opening. I once watched an apprentice try to save time by shoving a unit back with a standard poly line; the sharp edge of the cabinet frame sliced it like a razor. Always ensure you have the correct hose length for a proper dishwasher installation so there is enough slack to pull the unit out for future maintenance without snapping the connection. 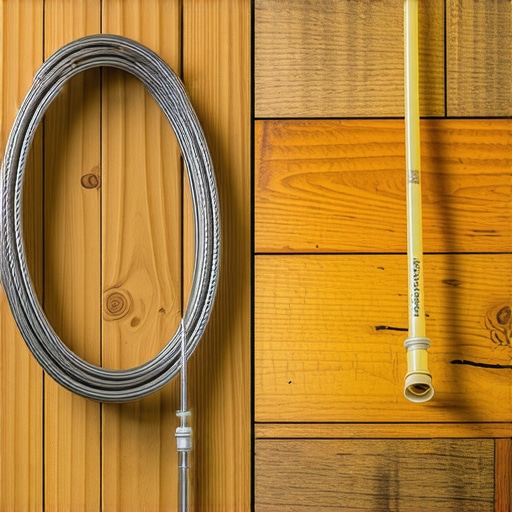
Get the High Loop Right or Prepare for the Stink
The drain hose is the second half of the equation, and it is where most DIYers fail. If you have ever noticed a funky, sewage-like smell in your clean dishes, it is likely because you skipped the high loop. Without it, dirty water from your sink or garbage disposal can siphoning back into your dishwasher. This is exactly why your installer insists on a high loop drain. I spent a whole weekend once troubleshooting a ‘broken’ pump, only to realize the drain line was sagging and letting gray water pool at the bottom of the tub. It is a $0 fix that saves you a $200 service call.
Protecting Your Warranty Before the First Cycle Starts
Manufacturers are incredibly picky about how their machines are installed. If you use an old power cord or a salvaged water inlet valve, you might be handed a ‘denied’ stamp the moment you try to file a claim. I’ve seen homeowners lose their entire five-year coverage because they didn’t follow the top tips for selecting the right parts for dishwasher installation. The warranty often stipulates that ‘consumable’ parts like hoses and cords must be new and up to current safety codes. By using fresh hardware, you are effectively maximizing your dishwashers warranty through proper parts selection.
Keep Your Paperwork Like Its Gold
When the installer finishes, they should give you a receipt that specifically lists the new parts used. This is your insurance policy. If a motor fails in two years, the manufacturer will check if the failure was caused by a surge from an old, frayed cord or a leak from a reused valve. You need to know how to get your warranty claim approved on the first try, and having a paper trail that proves professional-grade parts were used is the fastest way to the ‘approved’ pile. I keep my installation receipts in a gallon-sized freezer bag taped to the back of the kickplate; that way, they never get lost in a junk drawer.While we are on the subject of receipts and protection, let’s talk about a mistake that even seasoned renovators make: assuming that ‘softer is always better.’ Most people believe that a whole-home water softener is a gift to their appliances. However, there is a technical nuance here that often catches people off guard. Extremely soft water—water with near-zero mineral content—can actually become ‘aggressive.’ According to research by the Water Quality Association, water that is totally stripped of minerals will actively try to leach them back from its environment. In your kitchen, that environment is the stainless steel tub and the delicate glass surfaces of your plates. This leads to irreversible clouding and can even accelerate the degradation of internal seals. It is a classic case of too much of a good thing, and it’s a primary reason why soft water is ruining your dishwasher interior faster than hard water if you aren’t careful with your detergent dosing. Have you ever fallen into this trap? Let me know in the comments.
Why Soft Water is the Enemy of Your Stainless Steel Tub
Then there is the ‘vapor barrier’ trap. I see it all the time during high-end kitchen remodels. People spend thousands on custom cabinetry and then forget the $5 piece of foil tape that protects the underside of the counter. Without it, the steam from every cycle slowly rots the particle board or swells the wood of your expensive island. Learning the best way to tape your vapor barrier during installation is the difference between a kitchen that stays beautiful for twenty years and one that starts sagging in three. 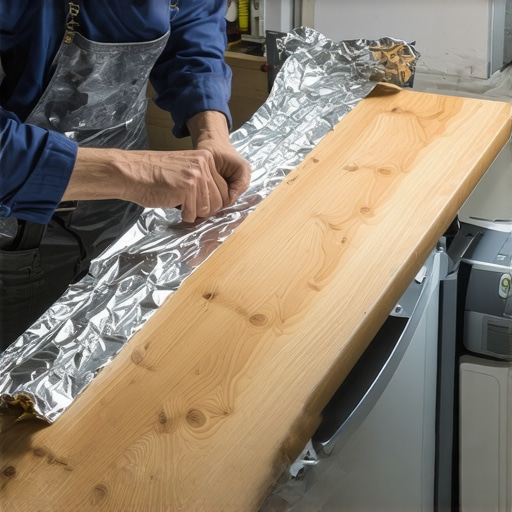
Stop the Thumping Before It Cracks Your Valves
One advanced mistake that often goes unnoticed until it’s too late is ignoring the ‘water hammer’ effect. If you hear a loud thud when the dishwasher stops filling, your pipes are taking a physical beating. Over time, this shockwave can crack the plastic housing of even a brand-new water inlet valve. A pro knows why your machine makes a thumping sound when the water starts and will recommend a small arrestor to solve it. It’s these small additions that separate a ‘functional’ install from a professional one. Understanding common dishwasher parts and their role in proper installation goes far beyond just connecting a hose; it’s about managing the physics of your home’s entire plumbing system.
Why Does the GFCI Trip Only During the Heat Cycle?
This is the ultimate ‘pro-level’ headache. You install everything perfectly, the machine fills, it starts washing, and then—click—the power dies. Most people immediately blame a faulty motor or a bad breaker. In reality, it’s often a microscopic pinhole leak in the heating element sheath that only expands when the metal gets hot. This is exactly why your machine trips the GFCI outlet only when heating. If you tried to save money by using a generic heating element instead of an OEM part, you’re likely seeing the result of inferior insulation. I’ve found that why OEM pumps outlast cheap alternatives every time also applies to these heating components; the tolerances are just tighter. Finally, if you are currently troubleshooting, you need to be careful with how you handle the unit while it is under coverage. Many owners accidentally void their protection by attempting advanced repairs without realizing how to diagnose dishwasher parts during warranty periods without breaking factory seals. Even something as simple as using the wrong cleaning agent can be problematic; for example, you should stop using vinegar in your high-end smart machine as the high acidity can damage the sensors that the warranty is supposed to protect. Knowing what you need to know about dishwasher parts warranties before you open the cabinet is essential for long-term savings.I carry a specific “go-bag” for every install, and it isn’t just full of wrenches. The MVP of my kit is a digital multimeter; I personally use a Fluke model because its low-impedance mode prevents ghost voltages from giving me a false reading during a repair. If you are serious about avoiding unnecessary service calls, you absolutely need to know how to test your thermal fuse with a basic multimeter before you start ordering expensive control boards. It is a five-minute check that often solves the ‘no power’ mystery for less than twenty dollars. I also swear by ratcheting hose cutters. Most people use a utility knife on a drain line, which creates a jagged edge that eventually fails under the pressure of a hose clamp, but a clean cut ensures a factory-perfect seal every time.
The Diagnostic Gear That Saves Me Thousands
Beyond the physical tools, I rely heavily on the diagnostic mode built into most modern machines. The Association of Home Appliance Manufacturers (AHAM) notes in their technical standards that nearly 30% of service calls could be avoided if homeowners understood the error codes their machines were already flashing. I make it a habit to look up the service manual the moment a unit is installed. This allows for understanding dishwasher parts a key to effective maintenance rather than just guessing which part is broken. When you know what the ‘E15’ or ‘F2’ code means for your specific brand, you are already halfway to a fix.
How do I maintain my dishwasher’s health over the long haul?
Long-term performance is really a game of consistency. I set a calendar reminder every six months to pull the bottom rack and inspect the spray arm nozzles for calcium or seed buildup. If you ignore this, the circulation motor has to work significantly harder to push water through restricted openings, which leads to premature bearing failure. This is the sweet spot for when to replace dishwasher parts for optimal performance—you want to catch the wear before it triggers a cascade of other mechanical issues. #IMAGE_PLACE_PLACEHOLDER_D#
Predictive Parts and the Future of Smart Kitchens
The industry is moving toward a world where your dishwasher will tell you it’s going to break before it actually does. We are seeing a massive surge in ‘predictive parts,’ where sensors monitor the harmonic vibration of the pump or the resistance in the heating element. Looking at current trends, I predict that within the next five years, most high-end units will automatically ship you a replacement gasket or filter before the current one reaches its failure point. For now, you can stay ahead of the curve by maximizing your dishwashers warranty coverage today through digital registration and app-based monitoring. I always tell my clients that the best way to how to diagnose dishwasher parts during warranty periods is to use the manufacturer’s own Wi-Fi module to pull the error logs before the tech arrives. This ensures you are speaking their language and your claim gets processed faster. Don’t forget to review the complete list of dishwasher parts covered by warranty so you know exactly what you are entitled to. My best advice? Go buy a basic multimeter today and test your door latch; it is the single most empowering DIY skill you can learn for your kitchen.
I used to believe that saving an old brass fitting was a sign of a seasoned DIYer, but my flooded kitchen floor taught me otherwise. When you realize that common dishwasher parts and how to replace them effectively are your first line of defense against property damage, the extra cost of a new installation kit feels like a bargain. My lightbulb moment came when I saw a “perfect” looking supply line snap simply because it had been moved two inches during a swap; that’s when I learned that metal fatigue doesn’t care about your budget.
The Hardest Lesson I Learned About Reusing Old Brass
The most dangerous part is the one that looks fine but has already failed internally. Professional installers refuse old cords and hoses because they understand the liability of microscopic stress fractures. It isn’t just about the leak today; it is about the surge or the burst six months from now when you aren’t home. By insisting on new hardware, you are actively maximizing your dishwashers warranty through proper parts selection and ensuring that if something does go wrong, you are fully covered.
What Pro Installers Keep in Their Trucks
If you want a result that lasts a decade, you need to use what the experts use. Start by how to prepare your kitchen for dishwasher installation by ensuring your plumbing is up to modern code before the machine arrives. I always recommend following the top tips for seamless dishwasher installation in 2025, which include using smart leak detectors and high-grade braided steel lines. Don’t forget to review what your dishwasher warranty doesnt cover and how to avoid fees so you can keep your paperwork in order for the long haul.
#IMAGE_PLACEHOLDER_FINAL#
Get Ready for Your New Dishwasher
You have done the hard work of researching the risks and understanding why those crusty old fittings belong in the scrap bin. By prioritizing fresh components during your parts, warranty, dishwasher, installation process, you are buying more than just a clean set of plates—you are buying peace of mind. Your home is your biggest investment; don’t let a twenty-year-old brass valve be the reason it gets damaged. Have you ever had a brand-new appliance leak because of an old part you tried to save? Tell me your story in the comments!
Related Posts
Why Your Professional Installer Insists on a New Braided Hose
It was a frustrating morning when I found my brand-new…
The Most Common Mistakes Professional Installers See
It was 11:30 PM on a Tuesday when I heard…
Why Professional Leveling Prevents Your Door From Leaking
I will never forget the squish. That sickening, wet sound…