It was a morning like any other—until I fired up my brand-new dishwasher and was met with a heavy, unsettling smell of burning plastic wafting through my kitchen. My heart sank. Was I doing something wrong? Would this smell disappear on its own? That lightbulb moment hit me hard: sometimes, new appliances come with surprises, and understanding why they happen can save you a lot of stress—and money.
Cracking the Mystery of the Burning Plastic Smell
When a dishwasher emits a burning plastic odor right after installation, it’s more common than you might think. Usually, it’s a sign that something’s not quite right in the setup or initial operation. But here’s the reassuring part: most of the time, with a little troubleshooting, you can rectify the problem yourself. Today, I’ll walk you through what I discovered from personal experience and expert advice, so you won’t have to guess what’s wrong the next time your new machine tries to cause alarm.
Is Burning Plastic Smell an Overhyped Problem?
Initially, I was worried that this weird smell meant my dishwasher was totally broken. But after doing my homework, I learned that this smell often arises from manufacturing residues or minor installation errors. One mistake I made early on was ignoring the importance of properly inspecting and installing the dishwasher parts properly. For example, ensuring the heating element is correctly seated and that no plastic packaging was left inside the system can make a big difference. Proper installation can prevent a lot of these issues, so I recommend visiting this guide for more details on selecting and installing the right parts.
My experience taught me that neglecting these basic checks can cause more problems down the line. Plus, understanding your dishwasher’s warranty coverage and what it protects—like if the smell is linked to a hardware defect—can save you from unnecessary expenses, which you can explore further at this resource.
So, if you’ve just unboxed your new dishwasher and are greeted by an odd plastic smell, don’t panic. Often, it’s fixable with a few simple steps, and I’ll guide you through them. Let’s get to the bottom of this and restore peace of mind—and your fresh, clean dishes.
.
Check the Installation of Critical Parts
After experiencing the burning plastic smell, my first move was to inspect every part involved in the initial setup. Think of your dishwasher as a carefully assembled puzzle; a misplaced or loosely connected piece can cause overheating and odors. Start by reviewing the installation manual and double-checking that all components, especially the heating element and wiring harness, are correctly fitted. For detailed guidance, consult this resource on proper installation parts. I once realized that I had left a plastic protective film on the heating element, which melted during the first cycle, causing the smell. Removing any residual packaging is essential to prevent this issue.
Pay Attention to Plastic Wrappings or Residues
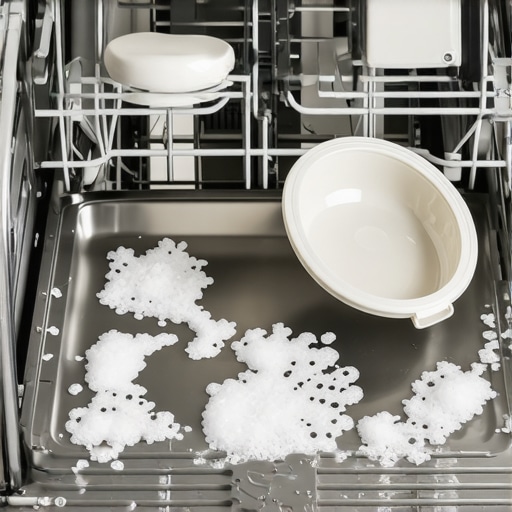
Manufacturing residues or packaging materials often cause immediate odors. Open the dishwasher and look for any plastic wraps, foam, or protective films left inside. Carefully remove these, especially from the heating chamber and spray arms. I learned this the hard way when I initially overlooked a plastic tab inside the machine—once cleared out, the smell dissipated after a few cycles.
Run a Cleaning Cycle to Burn Off Residues
Running a dedicated cleaning cycle helps eliminate manufacturing residues. Use a dishwasher cleaner or a vinegar rinse to aid in this process. Place a cup of white vinegar on the top rack and run a hot cycle. This technique effectively burns off lingering plastics or other residues, much like how a new oven is cured before first use. Ensure the dishwasher is empty before doing this. I once skipped this step, and the smell persisted for days, but after a vinegar rinse, it was gone by the next cycle.
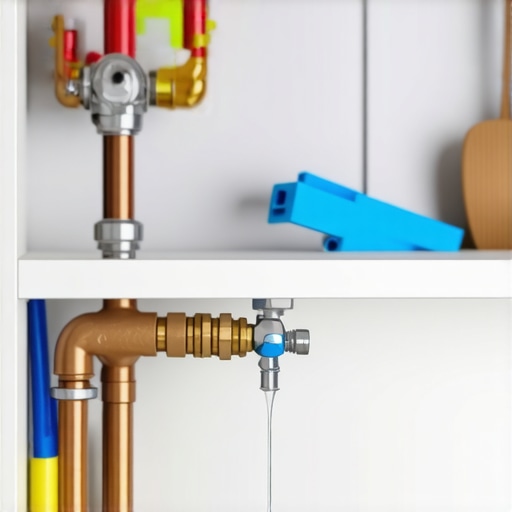
Ensure Proper Drainage and Ventilation
Blocked or improper drainage can cause heat and odors to build up. Check that the drain hose is positioned correctly—high enough to prevent siphoning and leaks—and that there are no kinks or clogs. Proper ventilation during initial operation allows fumes to escape instead of lingering. I temporarily removed the filter and checked for obstructions, which helped prevent future smell issues.
Verify Power Source and Wiring Safety
Incorrect wiring can lead to overheating and odors. Safeguard against this by inspecting the power cord and connections. If you’re uncomfortable with electrical tasks, consult an electrician or refer to expert troubleshooting advice. I once found a loose connection in the control panel that caused a small spark and a burning smell—securing it fixed the problem instantly.
Understand the Role of Warranty and Parts
If the smell persists despite these steps, it might be due to a defective part like the heating element or wiring harness. Knowing your warranty coverage is vital here. Review this guide to understand what components are covered and how to file a claim properly. During my own repair, a defective heating coil was replaced under warranty, resolving the smell permanently.
Final Checks and Precautions
Always ensure the dishwasher is level and securely installed. Use a level tool and, if necessary, adjust the feet to prevent vibrations that can cause parts to rub and generate odor. For proper leveling, this step-by-step method proved invaluable in my experience. A properly leveled machine prevents undue stress on components and ensures efficient operation, reducing the chances of odors and malfunctions.
By following these concrete steps—checking installation, running cleaning cycles, verifying drainage, inspecting wiring, and understanding warranty coverage—you can systematically eliminate the burning plastic smell from your new dishwasher. Each step acts as a troubleshooting checkpoint, similar to tuning a finely calibrated machine. With patience and attention to detail, you’ll restore your dishwasher’s performance and ensure it operates safely and odor-free.
Even seasoned homeowners often believe that choosing the right parts or understanding warranty terms is straightforward, but in my experience, many fall into subtle traps that can compromise their dishwasher’s longevity and performance. One myth I frequently encounter is the idea that all installation procedures are created equal—this couldn’t be further from the truth. Properly installing critical parts like the heating element, drain hose, and water supply line isn’t just about following the manual blindly; it requires understanding the nuanced role each component plays in system performance. For example, over-tightening a compression nut might seem harmless but can lead to leaks or even damage the connection, voiding your warranty. To avoid this, always refer to trusted resources such as this guide on installing dishwasher parts. Additionally, many assume that warranty coverage is comprehensive and simple to navigate, yet often, small installation oversights or ignoring manufacturer-specific registration requirements can void your warranty entirely. Dive into thorough documentation like this comprehensive warranty guide to protect yourself. Here’s a crucial nuance to consider: not all parts are equal in quality, nor are they universally compatible. Substituting a generic water inlet valve or using third-party hoses without verifying their specifications can lead to failures that are blamed on your usage but are actually faulted on inferior parts. For advanced users, knowing how to identify these pitfalls is essential—review this resource on essential parts. Finally, be cautious of the ‘set it and forget it’ mentality regarding warranty claims. Many overlook the importance of meticulous documentation during installation and maintenance, which becomes critical when seeking repairs or replacements under warranty. In fact, this article explains how proper record-keeping boosts your claim success. Understanding these nuanced aspects can save you from costly errors and extend your appliance’s lifespan. Have you ever fallen into this trap? Let me know in the comments.
Keeping Your Dishwasher Running Smoothly Over Time
To ensure your dishwasher remains reliable and efficient, investing in the right tools and adopting proactive maintenance routines is essential. From basic inspection equipment to specialized diagnostics, having the right gear allows you to troubleshoot issues early and extend the lifespan of your appliance.
Why a Digital Multimeter Is a Must-Have
I personally rely on a high-quality digital multimeter because it helps me quickly verify electrical components like thermostats, heating elements, and wiring connections. By checking voltage and continuity, I can pinpoint faults without guesswork. Consider models with auto-ranging features and sturdy probes—these make diagnostics faster and safer. Regular testing of wiring harnesses ensures connections remain intact, preventing strange odors or malfunctioning cycles.
Utilizing a Cone Spray Gun for Cleaning
When performing deep cleaning, I use a cone spray gun to thoroughly rinse out spray arms and filter assemblies. This tool allows high-pressure water to dislodge stubborn mineral deposits or debris, maintaining optimal water circulation. Efficient cleaning minimizes residue buildup, which can otherwise cause odors or blockages over time. Incorporating this into your routine keeps your dishwasher performing at its best, saving you costly repairs down the line.
Monitoring Water Quality to Protect Components
Installing a water testing kit helps me identify hard water issues that may accelerate mineral buildup on heating elements and sensors. If your water has high calcium concentrations, consider installing a softener or using enzyme-based cleaning agents. This proactive approach prevents scale formation, which can impair efficiency and cause odors—especially plastics melting or burning during cycles. Proper water treatment extends part life and reduces maintenance frequency.
Future Trends in Appliance Maintenance
Advances in smart diagnostics and IoT connectivity will likely revolutionize how we maintain appliances. Future sensors may automatically alert homeowners to developing issues before they manifest as smells or failures. Continuing down this path, investing in compatible tools and understanding the intricacies of your dishwasher’s components, such as the role of critical parts like the thermostat or drain pump, will become even more valuable. Review this guide for insights into durable maintenance strategies.
How do I maintain my dishwasher over time?
The key is consistency and using precise tools for inspections, cleaning, and troubleshooting. Regularly test electrical connections with a multimeter, keep spray arms clear with a cone spray gun, and monitor water quality to prevent scale buildup. Don’t forget to document your maintenance routines—this can be invaluable if warranty issues arise. Embrace these habits now, and you’ll enjoy peace of mind knowing your dishwasher is ready to serve you for years. For detailed guidance on selecting the right parts and understanding warranty coverage, visit this resource. Try integrating one advanced diagnostic tool into your routine this month, and you’ll notice the difference in performance and longevity.
Even Experts Fall for Common Installation Pitfalls
One overwhelming realization I had is that even seasoned homeowners can overlook small but critical details during dishwasher installation, leading to issues like burning plastic smells. For instance, I once skipped verifying the correct seating of the heating element, which caused it to overheat and emit that unsettling odor. A tiny oversight—like leaving protective films or not securing the drain hose properly—can snowball into costly repairs or warranty hassles. Embracing meticulousness and relying on trusted guides like this comprehensive resource helps avoid these missteps.”,
Related Posts
Why Your Dishwasher Still Smells After a Deep Clean
It was late on a weekend evening when I finally…
Why Your Inlet Valve Is Leaking Behind the Cabinet Unnoticed
Ever opened your kitchen cabinet only to find a tiny…
Why a Leveling Foot Adjustment Fixes Mid-Cycle Leaks
Ever had your dishwasher start leaking water midway through a…