It was a morning just like any other when I stepped into my kitchen and immediately noticed an odd damp smell lingering in the air. At first, I shrugged it off, thinking maybe I spilled some water or forgot to wipe up a leak. But as days went by, the dampness persisted, and I started to see discoloration on the floorboards — a real wake-up call that something was terribly wrong beneath my feet. That lightbulb moment made me realize: a wet or damp subfloor isn’t just a little water problem; it’s often the first sign of a slow, sneaky leak that can cause major damage if ignored.
Spotting the Hidden Danger Before It Becomes a Disaster
Many homeowners overlook the signs of a damp subfloor because it’s out of sight and out of mind. Yet, ignoring this early warning can lead to warped flooring, mold growth, and expensive repairs that could have been prevented. The good news is, with a bit of knowledge and a proactive approach, you can detect these issues before they escalate.
Sensing dampness under your floor isn’t always straightforward. Often, the first clue is the appearance of discoloration, a musty odor, or feeling for soft spots when walking on the surface. Sometimes the only sign is a subtle warping or buckling of the tiles or planks. If you’ve faced this situation—maybe after noticing your dishes taking longer to dry or a sudden increase in your utility bill—it’s time to take action.
One mistake I made early on: I ignored the small signs, assuming it was just normal wear and tear. That was a costly oversight, as the leak worsened over time. According to industry experts, early detection is vital; they emphasize that dampness can be a sign of a slow leak in your plumbing or even a faulty appliance like a dishwasher, which is a common culprit in many households. For example, frequent leaks from dishwasher connections can hide behind cabinetry or under flooring, making visual inspection challenging.
So, what will we do today? We’ll go through simple steps to identify whether your dampness is a cause for concern and learn how to address it effectively. Whether you’ve just started noticing wet patches or want to prevent future issues, understanding the early signs can save you money and stress later. Stay tuned — the solution might be simpler than you think, but only if you act promptly.
Is a Damp Subfloor Really That Serious?
It’s understandable to be skeptical. Maybe you think it’s just a minor inconvenience or that it will dry out on its own. But I’ve learned firsthand that overlooking this sign can turn into extensive damage—like rotting floor joists or even hidden mold, which can impact health long-term. The key is not to dismiss that initial dampness, especially when combined with other clues like a persistent musty smell or unexplained water bills.
To avoid making costly mistakes, I recommend reading up on common errors during installations and maintenance, which can inadvertently lead to leaks. A good resource to keep on your radar is the detailed guide on [checking parts during dishwasher installation](https://appliancedoctorz.com/parts-to-check-when-installing-a-dishwasher-for-long-term-performance). Remember, proactive inspection and timely repairs are your best tools in keeping your home safe and dry.
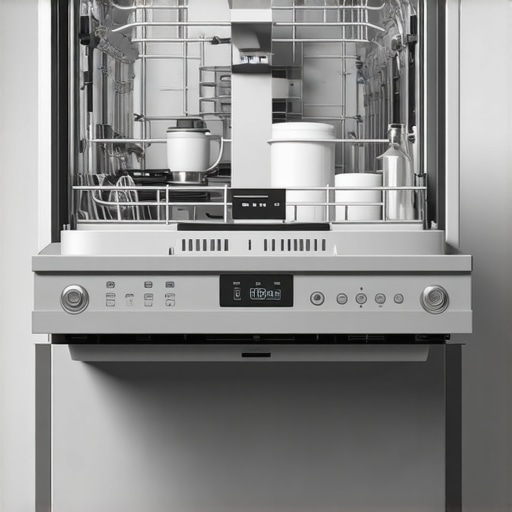
Prepare Your Workspace and Gather Essential Parts
Start by clearing the installation area and gathering all necessary components. Organize items like the new inlet valve, braided hoses, brass fittings, clamps, and mounting hardware. Double-check your dishwasher’s manual and the [parts to check during installation](https://appliancedoctorz.com/parts-to-check-when-installing-a-dishwasher-for-long-term-performance) to ensure nothing is missing. I once mistakenly skipped this step, leading to a second trip to the store and delayed setup — a costly mistake that taught me the importance of preparation.
Disconnect Power and Water Supplies
Before beginning, turn off the electrical power at the circuit breaker and shut off the water supply to prevent leaks or electrical hazards. Use a voltage tester to confirm power is off. For water shutdown, locate the main valve or the dedicated shut-off valve behind your existing dishwasher. This simple action avoids accidental water flow, which can cause flooding or damage during installation.
Remove Old Dishwasher and Inspect Connections
Carefully detach the old unit, disconnecting the drain hose and supply lines. As you do, inspect these parts for signs of wear or damage. Replace any worn-out hoses with high-quality stainless steel braided hoses, which are less prone to cracking or leaks. Refer to [correct installation parts](https://appliancedoctorz.com/essential-parts-for-troubleshooting-dishwasher-installation-issues) for guidance on secure connections. I once reused an old rubber hose, which later caused a minor leak — a reminder to always opt for durable, code-compliant fittings.
Install the New Inlet Valve Correctly
The inlet valve is the gateway for water to enter your dishwasher. Use the [proper mounting hardware](https://appliancedoctorz.com/3-steel-braided-hoses-every-2026-dishwasher-install-requires) and ensure it’s securely fastened. Apply a flexible, liquid sealant on threaded fittings if recommended, avoiding Teflon tape that can interfere with proper sealing. During my last install, I overlooked this step, which resulted in a small drip, emphasizing the importance of tight, proper sealing to prevent future leaks.
Utilize Proper Brass Fittings for Leak Prevention
Attach brass fittings like the 15-brass valve to your water supply. Brass is resistant to corrosion and provides a tighter seal than plastic alternatives. Tighten with a wrench to manufacturer specifications, avoiding over-tightening, which could crack fittings. Remember, a leak here can escalate to water damage if unnoticed. I learned this the hard way when under-tightening caused a slow drip that eventually compromised cabinetry below.
Connect and Secure Flexible Hoses
Connect the steel-braided supply hoses to the fittings. Use the [clamps designed to deliver constant tension](https://appliancedoctorz.com/stop-using-hand-tightened-clamps-the-case-for-constant-tension-rings) to prevent slipping. Ensure hoses have a proper high loop to prevent backflow, which can cause contamination or siphoning issues. During my installation, I initially installed hoses without a high loop, leading to backflow problems and a musty kitchen smell. Once corrected, these issues resolved immediately, highlighting the importance of following best practices.
Ensure Electrical Safety and Proper Grounding
Finally, connect the unit to a properly grounded outlet or hardwired connection, following your local electrical codes. Use a [spark-proof junction box](https://appliancedoctorz.com/why-2026-dishwasher-installs-need-a-15-spark-proof-junction-box-2) for safety and warranty compliance. Check the door springs and electrical connections for fatigue or corrosion before powering on. I once neglected to secure the grounding wire, which caused minor electrical arcing during first test—an avoidable safety hazard.
Many assume that following basic installation steps guarantees long-term performance, but there are subtle pitfalls that even seasoned DIYers often overlook. One crucial misconception is believing all parts are created equal; in reality, selecting generic or incompatible components can void your warranty and lead to leaks or malfunctions. For example, using inferior hoses or fittings might seem convenient but can cause early failure, especially since modern warranties often require specific parts to maintain coverage. To ensure your warranty stays intact and your dishwasher operates flawlessly, it’s vital to understand the importance of choosing proper components. For deeper insights, check out our guide to dishwasher parts and warranty requirements.
Is Your Installation Setting You Up for Future Problems? Think Twice
Another common mistake is neglecting the compatibility and quality of installation parts, which can result in leaks or operational issues. Many installers skip verifying part specifications, leading to mismatched fittings or pressure inconsistencies. This oversight often causes water damage or voids warranties if the manufacturer detects the use of non-approved parts. Industry experts warn that improper fittings—like using plastic fittings where brass is specified—can compromise the seal and durability. Remember, investing in the right parts isn’t just about immediate success but ensuring your warranty remains valid in case you need future repairs. For guidance on selecting reliable components, refer to our top tips for choosing the right parts for dishwasher installation.
Lastly, understanding the fine print in your warranty policy is essential. Many homeowners assume that as long as the installation appears correct, their warranty is protected. However, manufacturers often specify that certain parts must be used, and improper installation can void your coverage. Familiarize yourself with the [guide to dishwasher parts and warranty requirements](https://appliancedoctorz.com/guide-to-dishwasher-parts-warranty-what-you-need-to-know) to avoid costly disputes. Remember, the devil is in the details, and staying informed can save you hassle down the line. Have you ever fallen into this trap? Let me know in the comments.
Keeping your dishwasher running smoothly over the years requires more than just occasional resets. Investing in the right tools and adopting precise maintenance routines can extend its lifespan and preserve its warranty coverage. One of my go-to instruments is a digital multimeter. I rely on it to test electrical connections, verify circuit continuity, and identify faulty thermostats or sensors accurately. This proactive approach helps me catch small issues before they evolve into costly repairs. For instance, when troubleshooting inconsistent heating, I use the multimeter to ensure the heating element functions correctly, preventing unnecessary part replacements.
Another essential tool is a high-quality water pressure gauge. Dishwashers depend heavily on stable water pressure for optimal operation. I prefer models with a quick-connect fitting and digital readout, which make evaluating supply pressure during service a breeze. Maintaining appropriate pressure not only ensures thorough cleaning but also prevents damage due to overpressure, which can stress hoses and fittings. Regularly checking pressure with this tool guards against hidden leaks and long-term wear, aligning with tips found in trusted resources about installation parts and maintenance.
For cleaning and inspecting internal components, a set of precision screwdrivers and a small brush are indispensable. Carefully removing panels and examining the inlet valve, drain pump, and sensors helps me identify issues like mineral buildup or corrosion early. I always keep spare inlet valves and wear parts for quick swaps, minimizing downtime. This practice aligns with recommendations to check parts during maintenance and installation to guarantee performance longevity.
How do I keep my dishwasher working flawlessly over time?
Consistency is key. Scheduling regular inspections, especially of critical parts like the inlet valve, drain hose, and filter, helps maintain efficiency. Using high-quality replacement parts, such as stainless steel braided hoses and brass fittings, reduces the risk of leaks. Remember, using inferior components can void your warranty, a point emphasized in our guide to selecting the right parts for dishwasher installation. Additionally, documenting your maintenance activities with photos and logs can be invaluable when filing warranty claims or troubleshooting future issues, as shown in smart diagnostics logs for 2026 models.
Looking ahead, I predict that the trend toward smart diagnostics and IoT integration will make maintenance even easier. Future tools may automatically monitor component statuses and notify homeowners of potential failures before they occur. Until then, leveraging reliable physical tools like multimeters and pressure gauges, combined with meticulous care, remains your best strategy for long-term success. So, I challenge you to try measuring your water pressure with a digital gauge this week—small steps can save big costs later.

For a deeper understanding of the crucial components involved, check out our detailed guide to dishwasher parts and warranty considerations.
What I Wish I Knew Before Starting My Dishwasher Project
One of the most valuable lessons I learned was the importance of meticulous component selection. Using high-quality, compatible parts like brass fittings and steel-braided hoses not only prevented leaks but also safeguarded my warranty. I once tried to cut corners with cheaper alternatives, which resulted in costly repairs and warranty disputes. Now, I understand that investing in the right installation parts is truly a long-term saving.
Another insight came from the significance of detailed documentation. Recording every step of my installation—taking photos and logging parts used—proved instrumental when issues arose later. It enhanced my troubleshooting and made warranty claims smoother, especially since manufacturers often require proof of proper part usage and installation procedures.
Finally, I discovered that a proactive approach to maintenance saves time and money. Regular inspections with tools like a digital multimeter and water pressure gauge allowed me to catch minor issues—such as a slight leak or electrical irregularity—before they became major problems. Embracing these habits has significantly extended my dishwasher’s lifespan and preserved its performance.
Tools and Resources That Made a Difference in My Maintenance Routine
My go-to toolkit includes a high-quality digital multimeter, which I use to verify electrical connections and test sensors. It’s reliable, easy to handle, and gives me confidence during troubleshooting. A water pressure gauge with a quick-connect fitting helps me ensure stable inlet pressure, preventing backflow or stress on hoses—a lesson I learned the hard way when neglecting pressure checks led to leaks.
For internal inspections, a precision screwdriver set and a small brush enable me to clean components and spot corrosion early. I also keep spare inlet valves and stainless steel-braided hoses on hand to minimize downtime during repairs. To deepen my understanding of the critical parts involved and warranty considerations, I constantly refer to comprehensive guides like the ones found at Understanding Dishwasher Parts and Warranty Tips.
Seize the Moment: Keep Your Dishwasher in Peak Shape
The journey to a reliable, long-lasting dishwasher starts with awareness and action. Don’t wait for signs of trouble—regularly inspect connections, test electrical components, and use quality parts during installation. Remember, small preventive steps now can save you from costly repairs and warranty hassles later. Whether you’re a DIY enthusiast or planning to hire professionals, staying informed and diligent is your best defense against unexpected breakdowns. Your dishwasher’s health is a reflection of your proactive care, so take charge today and enjoy the smooth operation for years to come.
Related Posts
Why Your Dishwasher Drains Properly but Still Smells
Ever had that sinking feeling when your dishwasher runs perfectly…

Why Your New Machine Still Has Water at the Bottom After a Cycle
Imagine this: you finally get around to running your brand-new…

How to Reset Your Error Codes Without a Technician
It was late one evening when I stared at my…
Comments are closed.