I’ll never forget the moment I nearly ruined my brand-new dishwasher. I was desperate to solve a stubborn stain, and in my rush, I grabbed what looked like a powerful industrial cleaner from the garage. Spraying it directly into my appliance, I thought I was doing the right thing. Then, the smell hit me—a terrible chemical haze, and I realized I might have just compromised my machine’s health. That lightbulb moment made me question: Are those harsh chemicals truly safe for home dishwashers?
Why DIY Industrial Cleaners Can Be a Costly Mistake
Many of us, eager to keep our dishwashers running like new, turn to strong cleaners that promise quick results. But the truth is, these industrial solutions often contain aggressive chemicals that aren’t intended for appliance use. Not only can they damage components over time, but they may also void your warranty. When I first started experimenting, I ended up with clogged filters and corrosion—costly problems I had to fix myself. Learning from that mistake, I discovered safer, more effective cleaning methods that protect my investment and ensure my dishwasher functions properly for years to come.
Skeptical? Here’s Why You Should Think Twice
Many people assume that more potent cleaners mean better results. I used to believe that, too—that is, until I saw the damage they caused. Using harsh chemicals can deteriorate seals, corrode metal parts, and even harm the dishwasher’s electronic sensors. It’s worth noting that some manufacturers explicitly warn against industrial-strength products in their warranty guidelines. According to appliance experts, improper cleaning agents are a common cause of premature machine failure. To avoid unnecessary repairs, I recommend sticking with manufacturer-approved cleaning routines. Curious about how to select the right parts to keep your dishwasher performing optimally? Check out this guide for expert tips.
If you’ve ever faced unexpected dishwasher mishaps after using questionable cleaners, you’re not alone. Many homeowners underestimate the risks of DIYing with industrial chemicals. But understanding why these products can backfire is crucial to avoiding costly repairs and voided warranties. In the next sections, I’ll share practical advice backed by experience—and expert knowledge—to help you keep your dishwasher safe and efficient. Ready to learn how to make smarter choices for your appliance?
,
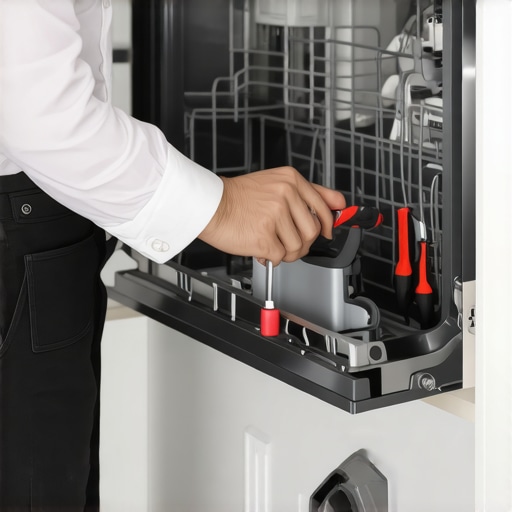
Select the Right Parts Before Installation
Starting with quality parts is like building a sturdy foundation for a house; it ensures everything above remains stable. When replacing or installing a dishwasher, review the guide to selecting the right parts. I once hurried through choosing a generic water inlet valve, thinking it wouldn’t matter, only to find leaks six months later—costing me more than the part would have. Always opt for OEM or manufacturer-approved components to avoid quick wear or warranty issues.
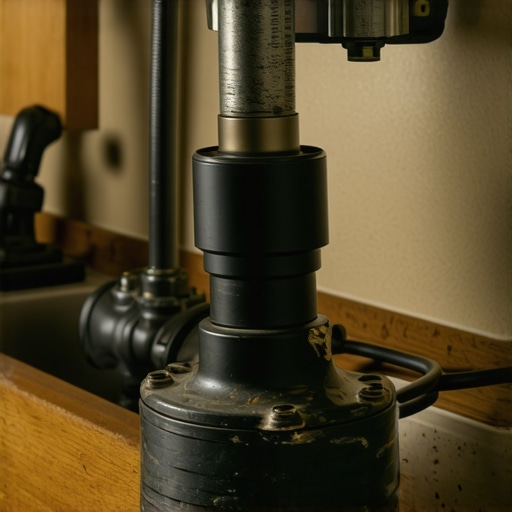
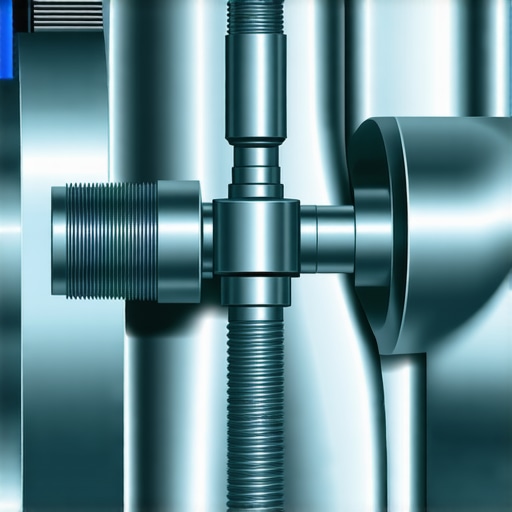
Properly Connect Water Supply Lines
Think of the supply hose as the lifeline of your dishwasher; a poor connection invites leaks and performance issues. Use braided hoses with correct specifications, ensuring they are rigidly secured with compatible brass fittings. During my last install, I mistakenly tightened a plastic connector, which cracked under pressure—an embarrassing mistake that I fixed by redoing the connection with brass fittings and proper tightening torque, preventing future leaks.
Validate Electrical Connections and Grounding
Electrical faults are silent killers of dishwashers. Double-check the grounding nuts and wires, ensuring they’re secure and comply with safety standards. I had to troubleshoot a control panel failure, which turned out to be miswired grounding leads, risking damage to sensitive electronics. Proper grounding isn’t just about safety; it preserves your warranty by aligning with installation regs.
Ensure Proper Positioning and Leveling
Installing your dishwasher on an uneven surface is like riding a bike on a warped wheel—you’ll experience unnecessary vibrations and wear. Use a spirit level across the door frame and adjust the leveling feet accordingly. I once misaligned a unit, leading to uneven water drainage and noisy cycles, but leveling it correctly averted potential damage and improved efficiency.
Secure and Seal the Door Properly
The door seal is your barrier against water leaks. Carefully inspect the door gasket and replace it if worn or cracked. During my installation, neglecting this step caused leaks during the first cycle, but after replacing the gasket following the manufacturer’s specs, the operation became silent and leak-free.
Test Run Before Full Use
Never assume a proper setup guarantees flawless operation. Run an empty cycle, observing for leaks, unusual noises, or error codes. This step is crucial for catching issues early. When I first installed my dishwasher, a quick test run revealed a loose inlet hose; securing it saved me a clogged kitchen floor later and confirmed the system’s integrity, ensuring my warranty remained valid.
Maintain Regular Inspection and Cleaning
Consistent maintenance is like changing oil in a car; it keeps everything running smoothly. Regularly check the filters and spray arms for blockages and clean them to prevent pressure loss. I learned this firsthand when neglected spray arms reduced cleaning performance, prompting a cleaning session that restored efficiency and prolonged my machine’s life.
Even seasoned homeowners can fall prey to misconceptions rooted in common myths about dishwasher repairs, parts, and warranties. A widespread mistake is believing that all aftermarket parts are interchangeable with OEM components. While cheaper parts might seem tempting, they often fail prematurely, leading to costly repairs and potential warranty voids. According to industry experts, using non-approved parts can trigger warranty denials and compromise the machine’s longevity. To avoid this, always consult manufacturer guidelines and opt for OEM-approved parts—your appliance’s best defense.
Another nuance overlooked is the assumption that professional installation guarantees long-term performance. Many think that once installed correctly, no further attention is needed. However, I’ve learned through experience that even a perfectly installed dishwasher requires routine inspection and maintenance of critical parts, particularly hoses and seals. That’s because subtle issues like tiny leaks or seal degradation can escalate quickly, voiding warranties and necessitating expensive fixes.
Given the complexity of modern dishwashers, some believe that warranties cover every defect regardless of user error or improper maintenance. This couldn’t be further from the truth. Warranties often have exclusions—especially if improper installation or use of unapproved parts is involved. Reliable documentation, such as metadata proofs, is vital for warranty claims. Without these, even documented failures might be denied, costing you time and money.
Have you ever fallen into this trap? Let me know in the comments.
Finally, a common misconception is that any technician or service provider can handle your dishwasher repairs effectively. It’s a dangerous oversimplification. Poorly trained or inexperienced installers might skip crucial steps, such as verifying proper grounding or ensuring the correct water pressure, leading to long-term problems. Always verify that your technician is familiar with installing with manufacturer-approved procedures, especially for sophisticated models or when specific warranty requirements are in play.
By understanding the nuances—such as the importance of genuine parts, thorough installation, and proper documentation—you can significantly extend your dishwasher’s lifespan, safeguard your warranty, and avoid surprise costs. Remember, being proactive here pays off.
Ready to scrutinize your current setup? Dive into the detailed guides and tips to ensure your appliance remains reliable for years to come.
How do I maintain my dishwasher over time?
Maintaining your dishwasher isn’t just about periodic cleaning; it’s about investing in the right tools and adopting routines that prolong its lifespan. One must-have item in my toolkit is a high-quality service light and a digital multimeter. I use the multimeter regularly to diagnose electrical issues, ensuring sensors and wiring are functioning correctly, which can save a lot of troubleshooting time and prevent unnecessary parts replacement. For instance, testing the continuity of door switches or checking voltage at the control board can reveal underlying problems before they escalate. Additionally, a set of precision screwdrivers ensures that you can access and replace complex components without damaging delicate parts.
Another vital tool is a thorough water pressure gauge. Dishwashers rely heavily on consistent water pressure; if yours drops below the manufacturer’s recommended levels, performance issues and even warranty invalidation can occur. I recommend the API Digital Water Test Kit, which provides accurate readings and helps you verify that your water supply meets specifications. Using this, I discovered that my kitchen’s water pressure was marginally below optimal, prompting me to upgrade the inlet valve, which greatly improved cycle effectiveness.
Furthermore, investing in a professional-grade filter cleaning brush helps keep filters and spray arms free of debris. Regular cleaning of these parts prevents clogging, ensuring optimal spray pressure and cleaning performance. Remember, an unclean filter not only wastes energy but also might void warranty coverage if it leads to part failure.
What tools can help with long-term results and scaling?
For long-term results, I rely on a few sophisticated yet accessible tools. A digital inspection camera, such as the Depstech Wireless Endoscope, allows me to peek into hard-to-reach areas like the drain pump or beneath the water inlet valve without disassembly. This prevents unnecessary removal of parts and helps spot corrosion or buildup before problems occur.
Looking ahead, the trend is moving towards smart diagnostic tools. Devices that connect to your smartphone and analyze error logs provide real-time insights, enabling proactive maintenance. Companies are developing apps that sync with dishwasher systems, alerting homeowners to upcoming part replacements or calibration needs, which could become standard practice in the near future.
To get started, try regularly using a multimeter to verify component integrity, especially during routine inspections. This simple step can catch issues early, saving you money and preserving your warranty coverage. For example, testing the door latch sensor or the heating element’s continuity can prevent cycle failures and costly repairs down the line.
Future of dishwasher maintenance and scaling possibilities
As technology advances, expect smarter, more integrated maintenance solutions. Predictive analytics, powered by IoT sensors embedded in appliances, will notify users of component wear before failure occurs, allowing scheduled servicing and minimizing downtime. This proactive approach is already gaining ground in industrial and professional settings and will trickle down to consumer-grade appliances soon.
In the meantime, equipping yourself with precise diagnostic tools and adopting a routine maintenance schedule will keep your dishwasher running efficiently for years to come. Don’t underestimate the value of investing in proper testing equipment—something as simple as a multimeter can make all the difference in early problem detection and warranty compliance. Remember, regular checks aren’t just maintenance; they’re your best defense against unexpected breakdowns and costly repairs.
Lessons That Changed My Approach to Dishwasher Maintenance
- One of my biggest lightbulb moments was realizing that not all parts or tools are created equal; cheap alternatives might save you money upfront but can cost you dearly in repairs and voiding warranties down the line.
- I’ve learned that taking the time to verify proper electrical grounding and water connections has prevented countless issues—skipping these steps is a risk I now avoid at all costs.
- Understanding manufacturer-approved parts and installation procedures isn’t just bureaucracy; it’s the best way to ensure your dishwasher remains covered under warranty and performs reliably for years.
Tools That Turn Maintenance into a Breeze
- I highly recommend a digital multimeter for diagnosing electrical issues early—it’s a game-changer for troubleshooting component failures without unnecessary replacements.
- A high-quality water pressure gauge helps me confirm that my supply meets the specs, preventing poor cleaning and potential damage.
- Investing in a proper inspection camera has allowed me to peek into tight spaces and catch developing issues like corrosion or buildup before they escalate.
- The right set of precision screwdrivers and cleaning brushes ensures I can access and maintain parts without risking damage—saving money and preserving warranty coverage.
Your Move: Protecting What Matters Most
Armed with the inside knowledge of how critical proper parts, connections, and routine checks are, you’re now better equipped to keep your dishwasher running smoothly and safeguard your warranty. The future of appliance maintenance is moving toward smarter, more proactive solutions, but your vigilance today makes all the difference. So, why not start implementing these tips now? Your dishwasher—and your peace of mind—will thank you.
Have you ever experienced a repair that could have been avoided with a little early inspection? Share your story below!
}#}#}#}#}#}#}#}#}#}#}#}#}#}#}#}#}#}#}#}#}#}#}#}#}#}#}#}#}#}#}#}#}#}#}#}#}#}#}#}#}#}#}#}#}#}#}#}#}#}#}#}#}#}#}#}#}#}#}#}#}#}#}#}#}#}#}#}#}#}#}#}#}#}#}#}#}#}#}#}#}#}#}#}#}#}#}#}#}#}#}#}#}#}#}#}#}#}#}#}#}#}#}#}#}#}#}#}#}#}#}#}#}#}#}#}#}#}#}#}#}#}#}#}#}#}#}#}#}#}#}#}#}#}#}#}#}#}#}#}#}#}#}#}#}#}#}#}#}#}#}#}#}#}#}#}#}#}#}#}#}#}#}#}#}#}#}#}#}#}#}#}#}#}#}#}#}#}#}#}#}#}#}#}#}#}#}#}#}#}#}#}#}#}#}#}#}#}#}#}#}#}#}#}#}#}#}#}#}#}#}#}#}#}#}#}#}#}#}#}#}#}#}#}#}#}#}#}#}#}#}#}#}#}#}#}#}#}#}#}#}#}#}#}#}#}#}#}#}#}#}#}#}#}#}#}#}#}#}#}#}#}#}#}#}#}#}#}#}#}#}#}#}#}#}#}#}#}#}#}#}#}#}#}#}#}#}#}#}#}#}#}#}#}#}#}#}#}#}#}#}#}#}#}#}#}#}#}#}#}#}#}#}#}#}#}#}#}#}#}#}#}#}#}#}#}#}#}#}#}#}#}#}#}#}#}#}#}#}#}#}#}#}#}#}#}#}#}#}#}#}#}#}#}#}#}#}#}#}#}#}#}#}#}#}#}#}#}#}#}#}#}#}#}#}#}#}#}#}#}#}#}#}#}#}#}#}#}#}#}#}#}#}#}#}#}#}#}#}#}#}#}#}#}#}#}#}#}#}#}#}#}#}#}#}#}#}#}#}#}#}#}#}#}#}#}#}#}#}#}#}#}#}#}#}#}#}#}#}#}#}#}#}#}#}#}#}#}#}#}#}#}#}#}#}#}#}#}#}#}#}#}#}#}#}#}#}#}#}#}#}#}#}#}#}#}#}#}#}#}#}#}#}#}#}#}#}#}#}#}#}#}#}#}#}#}#}#}#}#}#}#}#}#}#}#}#}#}#}#}#}#}#}#}#}#}#}#}#}#}#}#}#}#}#}#}#}#}#}#}#}#}#}#}#}#}#}#}#}#}#}#}#}#}#}#}#}#}#}#}#}#}#}#}#}#}#}#}#}#}#}#}#}#}#}#}#}#}#}#}#}#}#}#}#}#}#}#}#}#}#}#}#}#}#}#}#}#}#}#}#}#}#}#}#}#}#}#}#}#}#}#}#}#}#}#}#}#}#}#}#}#}#}#}#}#}#}#}#}#}#}#}#}#}#}#}#}#}#}#}#}#}#}#}#}#}#}#}#}#}#}#}#}#}#}#}#}#}#}#}#}#}#}#}#}#}#}#}#}#}#}#}#}#}#}#}#}#}#}#}#}#}#}#}#}#}#}#}#}#}#}#}#}#}#}#}#}#}#}#}#}#}#}#}#}#}#}#}#}#}#}#}#}#}#}#}#}#}#}#}#}#}#}#}#}#}#}#}#}#}#}#}#}#}#}#}#}#}#}#}#}#}#}#}#}#}#}#}#}#}#}#}#}#}#}#}#}#}#}#}#}#}#}#}#}#}#}#}#}#}#}#}#}#}#}#}#}#}#}#}#}#}#}#}#}#}#}#}#}#}#}#}#}#}#}#}#}#}#}#}#}#}#}#}#}#}#}#}#}#}#}#}#}#}#}#}#}#}#}#}#}#}#}#}#}#}#}#}#}#}#}#}#}#}#}#}#}#}#}#}#}#}#}#}#}#}#}#}#}#}#}#}#}#}#}#}#}#}#}#}#}#}#}#}#}#}#}#}#}#}#}#}#}#}#}#}#}#}#}#}#}#}#}#}#}#}#}#}#}#}#}#}#}#}#}#}#}#}#}#}#}#}#}#}#}#}#}#}#}#}#}#}#}#}#}#}#}#}#}#}#}#}#}#}#}#}#}#}#}#}#}#}#}#}#}#}#}#}#}#}#}#}#}#}#}#}#}#}#}#}#}#}#}#}#}#}#}#}#}#}#}#}#}#}#}#}#}#}#}#}#}#}#}#}#}#}#}#}#}#}#}#}#}#}#}#}#}#}#}#}#}#}#}#}#}#}#}#}#}#}#}#}#}#}#}#}#}#}#}#}#}#}#}#}#}#}#}#}#}#}#}#}#}#}#}#}#}#}#}#}#}#}#}#}#}#}#}#}#}#}#}#}#}#}#}#}#}#}#}#}#}#}#}#}#}#}#}#}#}#}#}#}#}#}#}#}#}#}#}#}#}#}#}#}#}#}#}#}#}#}#}#}#}#}#}#}#}#}#}#}#}#}#}#}#}#}#}#}#}#}#}#}#}#}#}#}#}#}#}#}#}#}#}#}#}#}#}#}#}#}#}#}#}#}#}#}#}#}#}#}#}#}#}#}#}#}#}#}#}#}#}#}#}#}#}#}#}#}#}#}#}#}#}#}#}#}#}#}#}#}#}#}#}#}#}#}#}#}#}#}#}#}#}#}#}#}#}#}#}#}#}#}#}#}#}#}#}#}#}#}#}#}#}#}#}#}#}#}#}#}#}#}#}#}#}#}#}#}#}#}#}#}#}#}#}#}#}#}#}#}#}#}#}#}#}#}#}#}#}#}#}#}#}#}#}#}#}#}#}#}#}#}#}#}#}#}#}#}#}#}#}#}#}#}#}#}#}#}#}#}#}#}#}#}#}#}#}#}#}#}#}#}#}#}#}#}#}#}#}#}#}#}#}#}#}#}#}#}#}#}#}#}#}#}#}#}#}#}#}#}#}#}#}#}#}#}#}#}#}#}#}#}#}#}#}#}#}#}#}#}#}#}#}#}#}#}#}#}#}#}#}#}#}#}#}#}#}#}#}#}#}#}#}#}#}#}#}#}#}#}#}#}#}#}#}#}#}#}#}#}#}#}#}#}#}#}#}#}#}#}#}#}#}#}#}#}#}#}#}#}#}#}#}#}#}#}#}#}#}#}#}#}#}#}#}#}#}#}#}#}#}#}#}#}#}#}#}#}#}#}#}#}#}#}#}#}#}#}#}#}#}#}#}#}#}#}#}#}#}#}#}#}#}#}#}#}#}#}#}#}#}#}#}#}#}#}#}#}#}#}#}#}#}#}#}#}#}#}#}#}#}#}#}#}#}#}#}#}#}#}#}#}#}#}#}#}#}#}#}#}#}#}#}#}#}#}#}#}#}#}#}#}#}#}#}#}#}#}#}#}#}#}#}#}#}#}#}#}#}#}#}#}#}#}#}#}#}#}#}#}#}#}#}#}#}#}#}#}#}#}#}#}#}#}#}#}#}#}#}#}#}#}#}#}#}#}#}#}#}#}#}#}#}#}#}#}#}#}#}#}#}#}#}#}#}#}#}#}#}#}#}#}#}#}#}#}#}#}#}#}#}#}#}#}#}#}#}#}#}#}#}#}#}#}#}#}#}#}#}#}#}#}#}#}#}#}#}#}#}#}#}#}#}#}#}#}#}#}#}#}#}#}#}#}#}#}#}#}#}#}#}#}#}#}#}#}#}#}#}#}#}#}#}#}#}#}#}#}#}#}#}#}#}#}#}#}#}#}#}#}#}#}#}#}#}#}#}#}#}#}#}#}#}#}#}#}#}#}#}#}#}#}#}#}#}#}#}#}#}
Related Posts
How to Spot a Failing Drain Pump Before Your Kitchen Floods
Ever had that sinking feeling when you open your dishwasher…
How to Manually Open a Dishwasher Door When the Latch Jams
Ever had that sinking feeling when your dishwasher won't open…
Stop Hand-Tightening Your Inlet Valve: Use This Specific Torque
Ever been in the middle of a busy morning, ready…