Ever had a sink flood unexpectedly, with water bubbling up perfectly timed with your dishwasher cycle? I remember the first time it happened to me — a sudden surge of water spilling over, turning my kitchen into a mini river. It was one of those lightbulb moments that made me realize how something as simple as an air gap can cause chaos if it’s clogged. That experience convinced me to dig deeper into the mystery behind water backing up into the sink, especially after dishwashing, and I want to share what I learned.
Spotting the Hidden Culprit — A Blocked Air Gap
Many folks, myself included initially, overlook the importance of the air gap installed on the sink or countertop. It’s designed to prevent wastewater from siphoning back into the dishwasher or contaminating your water supply. But here’s the kicker: when the air gap gets clogged, it becomes a bottleneck, forcing water back into the sink instead of draining properly. This simple component, often overlooked, is vital for a clean and flood-free kitchen. If you’ve ever noticed water pooling or backup after running your dishwasher, chances are the air gap might be clogged and needs a quick cleaning or replacement. For a comprehensive understanding of your dishwasher parts, check out this guide.
Is the Air Gap Overhyped? Or Necessary for Safety?
At first, I thought it was just an unnecessary extra, like many DIYers assume. But I made a costly mistake early on — I ignored the air gap entirely, believing it was just a fancy trinket. That oversight led to clogs and water backup, which could have been prevented with routine maintenance. Understanding the role of this small device and keeping it clear is crucial. Studies show that proper installation and maintenance of dishwasher components can extend the lifespan of your appliance and prevent water damage. For tips on choosing and maintaining the right parts, explore these top tips.
Next, I’ll walk you through specific signs your air gap might be blocked and simple steps to clear or replace it, ensuring your kitchen stays dry and functional. Have you ever faced a water backup after your dishwasher ran? Let’s find out how to fix it for good.
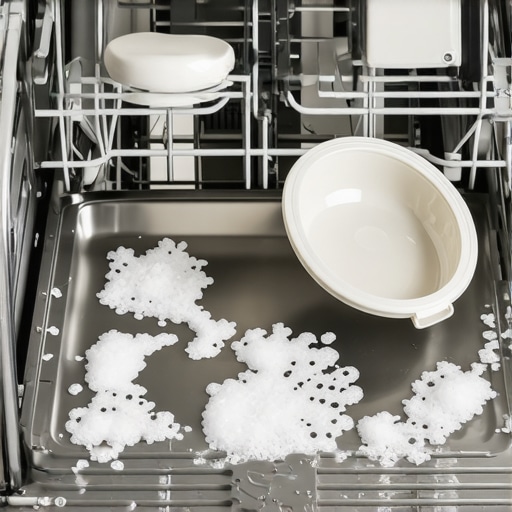
Remove and Inspect the Air Gap
First, locate your air gap device, usually a small cylindrical fixture mounted on the sink or countertop. Carefully unscrew the cap using a screwdriver or as recommended by your manufacturer’s instructions. Once removed, examine the interior for debris, mineral buildup, or obstructions. Use a flashlight to look for blockages that may impede water flow. During my last repair, I found a thick layer of grease and detergent residue blocking the passage, causing water to back up into my sink. Cleaning this out immediately restored proper drainage and prevented future floods.
Clean the Air Gap Thoroughly
Dip a small brush or pipe cleaner into a mixture of hot water and vinegar to scrub the inside of the air gap and remove stubborn deposits. Rinse with clean water to ensure all debris is flushed out. For persistent clogs, use a straightened paper clip or similar tool to gently dislodge any stubborn buildup in the inlet or outlet ports. Remember, a clogged air gap mimics a plumbing bottleneck, forcing water into your sink rather than down the drain. Regular cleaning can keep this part functioning optimally, avoiding costly water damage or appliance failures.
Reinstall and Test the System
Once the air gap is clean, carefully reattach the cap securely, ensuring it’s tight enough to prevent leaks but not overtightened to avoid damage. Run your dishwasher through a full cycle and observe the drainage process. Water should flow freely through the air gap and into your plumbing system without backing up or pooling in the sink. If issues persist, check the connecting hoses for kinks or damage. In my experience, a simple cleaning resolved the backup problem, saving me the expense of replacing the entire assembly or calling a plumber.
Replace the Air Gap if Necessary
If cleaning does not improve water flow, consider replacing the air gap entirely. Look for compatible models that fit your existing setup, and verify warranty coverage by reviewing warranty details. Remember, using a quality, corrosion-resistant component can extend the life of your dishwasher and protect your home from water damage. When purchasing replacement parts, consult resources like these expert tips to ensure optimal performance.
Many homeowners operate under misconceptions when it comes to dishwasher components, installation practices, and warranty coverage. Let’s dig deeper into some of these nuances, revealing common pitfalls that even seasoned DIY enthusiasts often overlook. Recognizing these details can save you money, extend your appliance’s lifespan, and ensure your warranty remains valid.
Why Believing More Expensive Parts Guarantee Long-Term Performance Is a Trap
It’s a widespread myth that premium-priced dishwasher parts are inherently better—yet, in my experience, quality matters less than correct installation and proper maintenance. A high-end part poorly installed or neglected won’t perform better than a modest, correctly fitted component. For example, using a reputable, compatible part and installing it according to guidelines—something detailed in this resource—is often more beneficial than just spending more on branded components. It’s a nuanced understanding that can prevent unnecessary expenses and warranty issues.
Do All Parts Need Replacement at the First Sign of Trouble?
Many believe that if a dishwasher part shows the slightest defect, replacing the entire component is the safest choice. However, rushing to replace without diagnosing the core issue is a common mistake. Sometimes, a simple cleaning or minor repair restores functionality, preserving the warranty and saving costs. Refer to this guide to distinguish when replacement is necessary versus when troubleshooting suffices. Proper diagnosis can prevent premature part failures and warranty denials.
Overlooking the Critical Role of Proper Installation in Warranty Coverage
By far, one of the most overlooked factors is how installation quality affects warranty validity. Even the best parts can be rendered ineffective or invalidated if installed improperly. For example, connecting hoses with insufficient tension, neglecting high-loop drain requirements, or using incompatible fittings can cause damage and lead to warranty claims being denied. A comprehensive approach to installation, including checking critical parts, is essential for warranty security. Remember, warranties often specify that installation must follow manufacturer guidelines to be valid—don’t skip this step.
How Advanced Mistakes Could Voids Your Warranty Without You Knowing
Even subtle errors, like failing to log maintenance properly or using non-approved replacement parts, can jeopardize your coverage. For instance, neglecting to record maintenance activities or using aftermarket parts not recommended by the manufacturer may lead to warranty denial. A recent study highlights that documentation and adherence to recommended procedures significantly improve warranty success rates (source). Always keep records and verify parts compatibility to protect yourself against such pitfalls.
Understanding these nuanced aspects isn’t just about avoiding costly mistakes; it empowers you to maintain your dishwasher effectively and uphold warranty rights. Have you ever fallen into this trap? Let me know in the comments.
Tools I Trust for Long-Term Dishwasher Care
Over the years, I’ve honed my toolkit with specific, high-quality tools that make maintenance straightforward and effective. One indispensable item is a flexible, mini drain auger, which I use to clear stubborn blockages in air gaps and hoses without dismantling the entire unit. I personally prefer a set of precision screwdrivers, especially Phillips and flat-heads, because they reach the tight spaces behind panels and access screws easily, preventing damage during disassembly. For inspecting internal parts, a high-powered LED flashlight is essential—bright illumination helps spot mineral buildup or corrosion, as demonstrated in this guide.
The Power of a Digital Inspection Camera
If you’re serious about maintenance, a flexible borescope camera is a game-changer. It allows you to peer into hard-to-reach areas like the interior of hoses, seals, or the sump area, revealing hidden debris or damage. I recommend models with at least 4 mm diameter lenses and adjustable LED brightness—these give you detailed views without dismantling the entire dishwasher. Regular visual inspections with this tool can catch early signs of wear, helping you schedule repairs before a breakdown occurs.
Software and Methodologies for Consistent Results
Beyond physical tools, maintaining a digital log of your dishwasher’s performance can track issues over time. I use a dedicated app to record cycle times, error codes, and maintenance dates, which makes diagnosing recurring problems much easier. This habit ensures you’re proactive rather than reactive, extending your appliance’s lifespan and safeguarding warranties. Additionally, employing specific cleaning cycles with manufacturer-approved detergents optimizes long-term performance—keeping internal parts clean prevents buildup and corrosion.
Predicting Future Trends in Maintenance
As technology advances, I foresee smart diagnostics becoming standard—think Wi-Fi-connected sensors that alert you to emerging problems before they escalate. Already, some models monitor water hardness, usage patterns, and component wear, sending notifications to your device. Investing in these tools early can save significant repair costs and keep your warranty intact, especially as the industry emphasizes predictive maintenance rather than reactive fixes.
How do I maintain my dishwasher over time?
The key is routine inspections combined with the right tools—regularly check and clean critical parts like the air gap, spray arms, and filters. Using a borescope camera periodically helps spot issues early. Remember, using proper installation techniques and high-quality parts, as detailed in these tips, can prevent many maintenance headaches. Try scheduling bi-annual inspections with your tools to keep everything running smoothly—preventative care is always cheaper than emergency repairs or warranty hassles.
The Hardest Lesson I Learned About Parts, Installation, and Warranties
One of my most eye-opening experiences was realizing that even the smallest overlooked detail in dishwasher installation could void my warranty. I once hurried through connecting the drain hose without a high-loop or proper clamps, and it resulted in leaks that cost me hours of cleanup and a denied warranty claim. That taught me the importance of following manufacturer guidelines meticulously, including verifying all critical parts are correctly installed and compatible. Now, I double-check each step, ensuring I understand the nuances of warranty coverage, especially when replacing parts or performing maintenance.
3 Myths About Dishwasher Parts That Led Me Astray
Initially, I believed that spending more on branded parts meant better performance and longer lifespan. I also thought that all components could be cleaned and reused indefinitely. Lastly, I assumed that professional installation was unnecessary if I followed online tutorials. These misconceptions led to premature failures and warranty issues. Through experience, I learned that proper diagnosis, quality parts suited to my model, and sometimes professional guidance are crucial. Resources like this guide helped reshape my understanding and improve my maintenance routine.
What Experts Won’t Tell You About Making Your Dishwasher Last
One piece of insider wisdom is that maintaining a detailed digital log of every inspection, cleaning, and part replacement can significantly boost your chances of successful warranty claims. Also, understanding that proper installation—including correct hose routing, secure fittings, and high-quality components—protects you from costly repairs and unwarranted warranty denials. Many overlook how critical these details are, but I’ve seen firsthand how they make all the difference. Investing time in the right tools, like a flexible borescope camera, and following comprehensive tutorials can save you money and extend your dishwasher’s lifespan considerably.
Curated Tools to Keep Your Dishwasher in Top Shape
If you’re serious about maintaining your dishwasher, I recommend some essential tools that have transformed my approach. A high-powered LED flashlight helps spot corrosion or buildup inside components, while a sturdy, flexible drain auger clears stubborn blockages without dismantling the entire unit. Also, a high-quality Phillips screwdriver and a set of precision nut drivers make disassembly safer and more efficient. For inspecting hard-to-reach areas, I rely on a small, budget-friendly digital borescope camera—finding hidden debris or damage before failures occur. Consistent use of these tools, combined with manufacturer guidelines, offers peace of mind and a well-functioning appliance.
Protect Your Investment and Embrace Better Maintenance
Taking control of your dishwasher maintenance isn’t just about fixing issues—it’s about preventing them and safeguarding your warranty. Prioritize routine inspections of critical parts like the air gap, spray arms, and filters, and keep detailed records of all activities. Remember, high-quality, compatible parts installed correctly are central to longevity and warranty success. Start small: schedule bi-annual checkups and use the right tools to spot early signs of trouble. Your kitchen, and your wallet, will thank you for it. So, are you ready to give your dishwasher the care it deserves and enjoy a leak-free, efficient kitchen? Let me know your thoughts or share your tips below.
Related Posts
Why Your Dishwasher Still Smells After a Deep Clean
It was late on a weekend evening when I finally…
Why a Damp Subfloor Is the First Sign of a Slow Leak
It was a morning just like any other when I…

Why Your New Machine Still Has Water at the Bottom After a Cycle
Imagine this: you finally get around to running your brand-new…
Comments are closed.