It was a moment of frustration that finally made me realize how much detail matters in appliance installation. I had just finished installing a new dishwasher, eager for that sleek, built-in look, only to notice the toe-kick didn’t sit flush. Instead, it jutted out at odd angles, throwing off the entire aesthetic of my kitchen. At first, I thought it was a minor misalignment—something I could fix with a quick nudge. But as I adjusted, I realized there’s a precise art to aligning that toe-kick to achieve a truly custom, integrated finish.
Why Proper Toe-Kick Alignment Makes a Difference
The little things, like the alignment of your dishwasher’s toe-kick, can transform a standard installation into a showcase of craftsmanship. A flush, seamless finish not only looks more professional but also prevents dirt and debris from collecting in gaps, which can become a breeding ground for mold and bacteria. Plus, when the toe-kick is properly aligned, you reduce stress on the cabinet and appliance, extending their lifespan.
But here’s the kicker—many DIYers and even some pros overlook this step, rushing through the process and ending up with an uneven or crooked installation. And trust me, I made that mistake early on, thinking I could just eyeball it and get away with a quick fix. That misguided approach often leads to headaches down the road, like need for rework or warranty issues.
If you’ve ever faced that awkward gap between your dishwasher and cabinet or struggled with parts that just don’t sit right, you’re not alone. Achieving a perfect flush finish requires more than just patience; it’s about understanding the crucial steps and the right tools.
To get started on the right foot, I recommend familiarizing yourself with your dishwasher’s specific parts and how they fit together. For a comprehensive understanding of the components involved and their role in installation, check out [Understanding Dishwasher Parts](https://appliancedoctorz.com/understanding-dishwasher-parts-a-key-to-effective-maintenance). Knowing what each part does helps prevent mistakes and ensures your toe-kick sits perfectly.
Ready to delve into the details and turn your kitchen into a professional-looking setup? Let’s walk through the key steps to align your dishwasher toe-kick flawlessly and achieve that seamless, custom appearance everyone loves.
Prepare Your Workspace and Tools
Start by clearing the area around your dishwasher to ensure easy access. Gather necessary tools such as a adjustable wrench, a spirit level, a measuring tape, a screwdriver, and masking tape. Familiarize yourself with your dishwasher’s model-specific parts by reviewing this guide to avoid confusion during installation. Remember, a well-prepared setup minimizes mistakes and streamlines the alignment process.
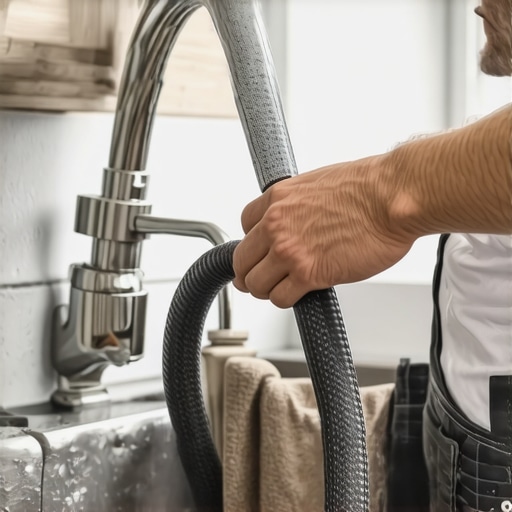
Secure the Dishwasher in the Correct Position
Carefully slide the dishwasher into its designated space, ensuring it sits flush against the cabinetry. Use a spirit level to check the top and front surfaces for levelness. If the dishwasher leans, identify which leveling feet require adjustment. Do not rely solely on guesswork; precise leveling is critical to prevent future misalignments and vibrations. For uneven floors, refer to this article for step-by-step guidance.
Adjust Leveling Feet for Perfect Height
Locate the leveling feet at the base of your dishwasher. Use an adjustable wrench to turn them clockwise to raise the unit or counterclockwise to lower it. Make small adjustments, about a quarter turn at a time, checking with the spirit level after each turn. Aim for a completely level position; a tilted dishwasher can cause water drainage issues and misaligned toe-kicks. For specific tips on how to verify proper leveling, consult this resource.
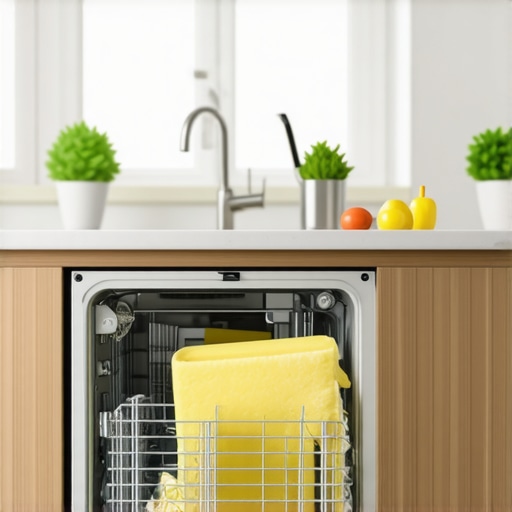
Fit and Align the Toe-Kick Panel
Now, position the toe-kick panel against the base of the dishwasher. Before securing it, check the gap between the panel and surrounding cabinetry. Use a measuring tape to ensure uniform spacing on all sides—aim for a gap of about 1/8 inch for a seamless look. Temporarily fix the panel with masking tape to evaluate the alignment visually and physically. In a real-world example, I once spent an afternoon adjusting the panel for hours because I overlooked this step, resulting in an uneven profile that took extra time to fix later. Take your time to get this right the first time.
Fine-Tune Positions for a Seamless Finish
With the panel aligned, tighten the screws gradually, alternating sides to maintain even pressure. Recheck with the spirit level after each tightening session. If the toe-kick still doesn’t sit flush, slightly loosen the screws to make minor adjustments. Remember, patience is key—small, incremental movements prevent misalignment. For detailed visuals of this process, consider reviewing this guide.
Inspect and Confirm Stability
Finally, gently push and tap the toe-kick to ensure it doesn’t rattle or shift. Verify the flushness with the spirit level once more. A correctly aligned toe-kick improves the dishwasher’s aesthetic and function, preventing debris accumulation and undue stress on the cabinet. Remember, a little extra time here guarantees a professionally finished look, as I discovered during my own project when rushing led to later rework and frustration. Properly aligned components prolong the lifespan of your appliance and restore the sleek look your kitchen deserves.
Many homeowners assume that once they’ve installed their dishwasher correctly and registered the warranty, they’re set for any future issues. However, even seasoned DIYers often overlook nuanced details that can impact long-term performance and warranty validity. One prevalent misconception is that warranty coverage automatically includes all parts and labor, but in reality, warranties often exclude user-serviceable components or improper installation. For example, using incompatible parts or neglecting to verify proper drainage and water inlet setups can void the warranty, even if the product itself remains functional. Additionally, a common mistake is assuming that a quick fix during initial installation won’t affect future service eligibility, but misaligned components or overlooked connections can lead to costly repairs and warranty denials.
An advanced consideration is the importance of understanding the specific parts covered under warranty. Knowing exactly which parts qualify can help you diagnose issues promptly and avoid unnecessary disputes with manufacturers. Furthermore, many overlook the significance of proper documentation — keep detailed records of installation steps, parts used, and maintenance routines. This evidence can be crucial when pursuing a warranty claim, especially if your claim is challenged.
A critical trap to avoid is neglecting the importance of high-quality, compatible parts during repair or replacement. Using generic or incompatible components can lead to subpar performance and might void your warranty. For example, substituting a part without consulting expert recommendations can result in leaks, noise, or early failure.
A nuanced insight is that even seemingly minor installation errors, such as improper leveling or incorrect hose positioning, can cause water leaks or overflows that damage your flooring. These issues, if not addressed immediately, might be mistaken for appliance defects, leading to incorrect warranty claims. Therefore, meticulous installation and regular inspection promote warranty longevity and appliance health.
Why are incorrect parts and poor installation practices often overlooked, and what’s the real cost?
According to the experts, neglecting these critical steps can result in significant long-term expenses, including premature component failure, increased energy consumption, and even mold growth due to poor sealing or inadequate drainage. Remember, truly effective maintenance and warranty assurance depend on understanding these nuanced details. Have you ever fallen into this trap? Let me know in the comments.
Keeping Your Dishwasher Running Smoothly: Tools and Techniques
Maintaining a dishwasher’s optimal performance requires more than just routine cleaning; it involves using the right tools and adopting careful methods that help you catch issues early and prolong the appliance’s lifespan. As someone who has spent years troubleshooting and maintaining dishwashers, I can attest that investing in quality equipment and understanding their specific roles makes all the difference.
One of my most trusted tools is a digital multimeter. I rely on it to quickly diagnose electrical issues with inlet valves, thermostats, and other electronic components. For example, when a dishwasher isn’t filling properly, testing the inlet valve’s coil resistance with a multimeter helps determine if it’s functioning correctly—saving you from replacing parts unnecessarily. I prefer a multimeter with auto-ranging and hold functions to simplify testing and ensure accuracy.
Another indispensable item is a high-quality wrench set, particularly adjustable wrenches and basin wrenches, which allow me to access tricky plumbing connections without causing damage. I always make sure to have a set of nut drivers for removing and tightening screws, especially for securing the tub or panel parts during repairs or reinstallation. When working on tight spaces, I use stubby screwdrivers that provide sufficient leverage while fitting into confined areas.
What truly enhances long-term performance is a reliable inspection mirror, which helps me check under the dishwasher and behind inaccessible panels for leaks, debris buildup, or loose hoses. Paired with a good LED flashlight, it illuminates hidden corners, revealing issues before they escalate into costly repairs. Remember, early detection is key—regular inspections using these tools can prevent unwarranted breakdowns and preserve warranty coverage. For detailed parts recommendations, consult this resource.
How do I maintain my dishwasher’s parts over time?
Implementing a scheduled maintenance routine is vital. This involves cleaning filters and spray arms, inspecting water inlet valves and door seals, and testing operational components periodically. Using diagnostic tools like multimeters helps verify electrical integrity, especially after an appliance faces power surges or planned repairs. Additionally, keeping an eye on the condition of hoses and connectors can prevent leaks and water damage. As the trend moves toward smart diagnostics, investing in model-specific diagnostic software or apps can help you monitor appliance health remotely, catching issues before they impact performance. Expect this field to evolve with more integrated sensors and AI-powered diagnostics, making DIY maintenance even more precise.
Incorporating these tools into your maintenance process elevates your ability to keep the dishwasher functioning long-term. I recommend setting a quarterly check-up schedule using your multimeter to test critical components, especially if your warranty relies on documented maintenance routines. A proactive approach reduces unnecessary repairs, preserves warranty validity, and ensures your appliance remains at peak efficiency. Why not start today by testing your inlet valve resistance and see the difference proper diagnostics can make? Keep your dishwasher happy and avoid costly surprises—your future self will thank you.
The Costly Mistakes Only Experienced Installers Know
One of the biggest lessons I learned is that rushing through the alignment process can quietly sabotage your dishwasher’s longevity and your warranty validity. Small oversights, like uneven leveling or inconsistent toe-kick gaps, may seem trivial but often lead to leaks, premature failures, and warranty claims denied due to improper installation. These insights came after I experienced costly rework, realizing that attention to detail in every step—especially verifying proper hardware fit and alignment—can save significant time and money in the long run.
Tools and Tips That Changed How I Approach Maintenance
Investing in a quality multimeter and inspection mirror transformed my troubleshooting routine. Knowing exactly whether an inlet valve’s coil is functioning—versus guessing—has saved me from unnecessary replacements. Regular inspections using these tools keep issues from escalating, preserving warranty support and prolonging the dishwasher’s lifespan. I also rely heavily on reputable guides, such as this comprehensive resource, to deepen my understanding of critical parts.
Embrace the Finicky Details: They Make All the Difference
The real game-changer was recognizing that tiny details—like the exact positioning of the toe-kick or securing hoses with proper high loops—can prevent issues before they start. These nuances are often overlooked, but they act as the difference between a professional-looking setup and one prone to leaks or performance hiccups. When I slowed down and meticulously checked each connection and alignment, I found my appliance operated more quietly, used less energy, and maintained its warranty status more confidently. An investment in precision now pays dividends in performance and peace of mind.
Where to Find Tools, Knowledge, and Inspiration
My go-to resources include this guide for part selection, ensuring I use compatible components that won’t void the warranty. I also keep handy this list to quickly identify critical parts during emergencies. For troubleshooting, I often consult this resource to verify electrical and mechanical integrity, saving me unnecessary service calls and potential warranty denials.
Now It’s Your Turn to Master Dishwasher Success
Remember, meticulous attention to detail, using the right tools, and continuous learning transform an ordinary installation into a long-lasting investment. I encourage you to cross-check your alignment, verify each connection, and document your steps—these habits not only enhance performance but also fortify your warranty claims. Do you have any personal tips or stories from your own appliance projects? Share them below and let’s grow together in this journey of DIY mastery.
Related Posts

The Quietest Way to Route Your Drain Hose Through a Cabinet
Ever had that moment when you're standing in your kitchen,…
How to Install a Dishwasher Sound Insulation Blanket Correcty
Ever pushed your dishwasher into place only to be greeted…
The Proper Way to Loop a Drain Hose Behind a Sink
Ever had that sinking feeling when you open your dishwasher,…