Ever opened your kitchen cabinet only to find a tiny puddle forming out of nowhere? Maybe it was a slow drip, almost like a mini lake creeping behind the panel, but you never saw the actual leak. I’ve been there—frustrated and puzzled, thinking I’d missed something during installation or that I had a hidden water nightmare on my hands. That lightbulb moment hit when I finally realized the inlet valve was quietly leaking behind the scene, and I hadn’t noticed it because it was tucked away behind the cabinet panel. It’s a sneaky problem that many homeowners overlook until it causes serious damage or costly repairs.
The Hidden Water Threat Behind Your Kitchen Cabinets
The truth is, a leaking inlet valve can remain unnoticed for months. It’s tucked in a dark corner—behind the dishwasher or beneath the sink—making detection tricky. This slow leak doesn’t just waste water; it can rot cabinets, encourage mold growth, and escalate your repair costs. Early on, I made the mistake of ignoring a tiny wet spot and hoping it would dry up. But as the leak persisted, it worsened—damage became visible, repairs became expensive, and my peace of mind was shattered. That’s why understanding how to identify and address this hidden leak is crucial. If you’re tired of guessing and want a straightforward way to diagnose your leak before it causes more trouble, you’re in the right place. For professional advice, I recommend checking out expert tips on troubleshooting dishwasher installation issues, which cover common problems like this. Learn more about troubleshooting tips here.
Is Leaking Behind the Cabinet Really a Big Deal?
You might wonder if this tiny leak warrants concern. Let me tell you, even a slow drip can turn into a major headache. It can lead to structural damage, or worse, compromise your home’s foundation if water seeps into unseen cracks. Early detection is key, and I learned that the hard way—assuming that a dry cabinet was safe until mold or warping became undeniable. One mistake I made early on was ignoring small water stains, thinking they were just a splash or condensation. That was a mistake. If you’ve faced similar doubts, don’t worry—step by step, I’ll show you how to identify the tell-tale signs of a leaking inlet valve and prevent it from wrecking your home.
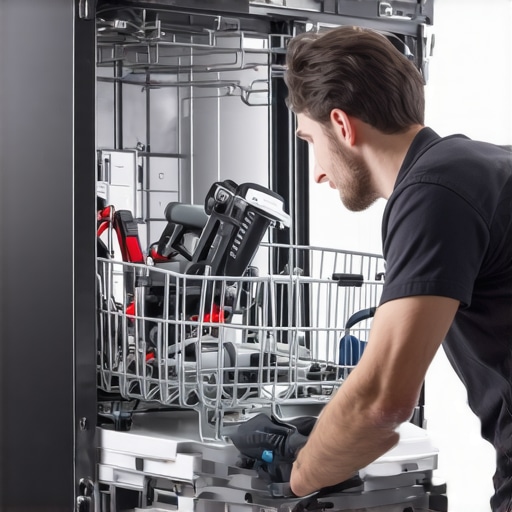
Shut Off Water and Remove the Panel
My first step was turning off the water supply to prevent further damage. I then removed the cabinet panels to access the inlet valve area. Think of it like opening a secret door—being cautious here is key to avoid breaking the panel or damaging surrounding cabinetry. Use a screwdriver or your hands, whichever you prefer, and keep the screws in a safe place for reassembly.
Inspect the Inlet Valve for Debris and Loose Connections
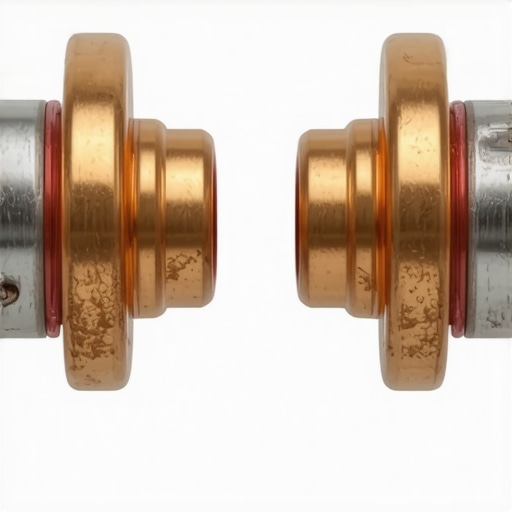
Next, I visually checked the inlet valve for any signs of debris or corrosion. Loose fittings are common culprits; I gently tightened the connectors using a wrench, ensuring not to over-tighten and strip the threads. Remember, a connection that’s too tight can cause damage, just like overtightening a lamp’s bulb socket. For detailed guidance on connections, visit common dishwasher parts and replacement tips.
Check for Small Debris in the Valve
I used a flashlight to look inside the valve for any tiny particles that could hinder sealing. If debris is present, flushing the valve with water or replacing the inlet valve might be necessary. Think of it like cleaning a coffee filter—you want a smooth flow without blockages. For advice on selecting the right parts, see top tips for parts selection.
Test the Repair with a Controlled Water Supply
After reassembly, I turned the water back on and ran the dishwasher briefly to observe for leaks. Use a towel or paper towels around the area as you test—like a detective looking for footprints. If no water escapes, you’re on the right track. If it persists, double-check the connections or consider replacing the inlet valve entirely, which you can learn more about at when to replace dishwasher parts.
Secure the Panel and Confirm No Leaks
Finally, I secured the cabinet panel back in place and did a final run to ensure there were no leaks or drips. Think of this as sealing the deal—making sure everything is tight, dry, and ready for normal use. Remember, regular inspection can catch leaks early, preventing costly repairs down the line. Properly diagnosing this hidden leak saved me from a potential water disaster, and I recommend checking your connections periodically as part of routine maintenance.Many homeowners assume that installing a dishwasher is as simple as plugging it in and turning on the water supply. However, this oversimplification leads to overlooked details that can compromise performance and warranty coverage. One prevalent misconception is that using generic or inexpensive parts won’t affect your warranty. In reality, manufacturers often specify the use of OEM (original equipment manufacturer) parts to ensure optimal function and maintain warranty validity. Relying on third-party parts might save a few dollars initially but can void your warranty—so always consult your manufacturer’s guidelines or check expert resources like how to maximize your dishwasher’s warranty with proper parts.
A common mistake during installation is neglecting to properly secure the drain hose or using the wrong type of clamp, which can cause leaks that are hidden behind cabinetry. These leaks often go unnoticed until significant damage occurs, leading to costly repairs and possible issues with warranty claims. Remember, manufacturers usually require proof of correct installation, including high-loop drain setups that prevent backflow and ensure smooth drainage. For detailed advice, see top tips for installing your dishwasher seamlessly.
The nuances don’t stop at installation; understanding how parts affect warranty coverage is crucial. Many people believe that replacing the inlet valve or spray arm with aftermarket parts won’t impact their warranty, but manufacturers often specify which parts are covered under warranty policies. Using non-approved parts might lead to warranty denial if the appliance develops issues. To understand the specifics, review comprehensive guides like parts to check during installation for longevity and guide to dishwasher parts warranty essentials.
Another little-known fact is that certain parts, like the electronic control board or door gasket, are frequently overlooked during routine maintenance. Failing to replace worn parts promptly can cause damage that isn’t covered under warranty. Manufacturers also often require that routine inspections or part replacements be documented, with photographic evidence when claiming warranty. Learning how to properly document these steps can save you from unnecessary disputes. For customizable advice, visit what your dishwasher warranty doesn’t cover.
In conclusion, installing a dishwasher isn’t merely a plug-and-play task. It involves nuanced considerations—from parts selection and installation practices to warranty stipulations—that can make a substantial difference in performance and peace of mind. Don’t let misconceptions cost you time and money. Vigilance, proper parts, and attention to manufacturer guidelines are your best strategies. Have you ever fallen into this trap? Let me know in the comments.
Keeping Your Dishwasher in Top Shape with the Right Tools
Maintaining your dishwasher isn’t just about replacing parts when they break—it’s about proactive care and using dedicated tools that make the job easier and more effective. One of my favorite tools is a digital multimeter. I use it to regularly check the electrical components, such as the control board and switches, ensuring they’re operating within safe parameters. I personally prefer a multimeter with auto-ranging capability, like the Fluke 115, because it simplifies readings and reduces mistakes, especially for those who aren’t electrical specialists. Additionally, a set of high-quality, magnetic screwdrivers is essential. They allow me to work efficiently without dropping screws into hard-to-reach areas, saving time and frustration.
While inspecting parts, I keep a small but powerful flashlight—like the LED Penlight from Streamlight—to illuminate intricate components or hidden areas beneath the dishwasher. For parts replacement, I rely on OEM parts, which often come with specialized tools or adapters. For example, replacing a spray arm or inlet valve benefits from a socket or nut driver set, ensuring fittings are properly secured without over-tightening, which could cause leaks or damage. Properly calibrated tools are critical, especially when checking for electrical continuity or adjusting components during maintenance.
What’s on the Horizon for Long-Term Dishwasher Care?
Looking ahead, I see smart diagnostic tools becoming more prevalent. Devices that can connect via Bluetooth or Wi-Fi to share real-time data about your dishwasher’s health are emerging, revolutionizing maintenance routines. These tools can alert you to potential issues, like a siphon valve wearing out, before they worsen—saving money and preventing inconvenient breakdowns. Additionally, software updates for many modern dishwashers will likely include better diagnostic support, allowing owners and technicians to troubleshoot issues remotely, much like how auto mechanics diagnose car errors through OBD-II scanners. Embracing these innovations will make long-term maintenance less of a chore and more of a preventive approach, extending your appliance’s lifespan considerably.
How do I maintain dishwasher parts over time?
Regular inspections are key. Periodically removing and cleaning components like the drain filter, spray arms, and inlet valves prevents buildup of debris and mineral deposits that can impair performance. A detailed walkthrough at common dishwasher parts and how to replace them effectively provides specific tips on cleaning and checking critical parts. When replacing parts, always choose OEM options to ensure proper fit and warranty coverage; see how to maximize your dishwasher’s warranty through proper parts selection. To keep everything functioning optimally, I also recommend setting reminders for scheduled maintenance—think of it as a health checkup for your appliance. This proactive approach minimizes unexpected failures and preserves your warranty rights, especially if issues arise from overlooked components.
Experiment with high-quality tools and smart diagnostics, and you’ll find maintaining your dishwasher becomes less intimidating and more efficient. For example, try using an ultrasonic cleaner on spray arms—a tip I learned from a kitchen appliance expert. It can significantly improve water spray efficiency, which translates into better cleaning results. Advanced maintenance might seem complex at first, but embracing these tools and techniques can lead to long-term savings and a hassle-free dishwashing experience.
Lessons Nobody Tells You About Installing a Dishwasher
One of the toughest realizations I faced was that even well-planned installations can harbor unseen pitfalls. I once overlooked the importance of properly securing the drain hose, which later led to silent leaks behind cabinets. That experience taught me to double-check every connection, knowing that even small details—like a high-loop drain line—make a huge difference. A key insight was understanding that warranty coverage often hinges on correct installation practices; neglecting these can void your warranty unexpectedly. I also discovered that not all parts are created equal—using OEM replacements ensures longevity and keeps warranties intact. Always remember, mastering proper installation techniques is less about mechanics and more about protecting your home investment.
Related Posts

The Muddy Residue on Your Plates: Is It Your Detergent or Your Filter?
Ever opened your dishwasher after a cycle and found your…
The Fix for a Dishwasher That Keeps Humming After the Cycle
It was late at night, and I was already dreaming…
5 Signs Your Heating Element Is Failing Before the Error Code Appears
I'll never forget the morning my dishwasher decided to give…